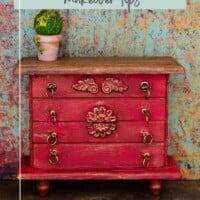
Add texture and a vintage vibe to your dollhouse furniture with furniture reliefs. I share several techniques on how to distress furniture, as well as how to make your own faux carvings and reliefs.

Since I moved into my new place over a year ago, I have been obsessed with furniture refinishing. It’s all about taking something old and forgotten and transforming it into a gorgeous piece of art.
I started learning how to strip furniture and learned how to bleach wood to get that raw bare wood look. The lighter wood brightened up my rooms, especially since I live in a smaller space.
One furniture refinisher I found, Re-design with Prima, has truly inspired me to try even more furniture refinishing techniques. Okay, not with big pieces of furniture, but with dollhouse furniture! I have already shown you how to decorate a dollhouse dresser with rub on transfers.
The result is one of my favorite pieces in my dollhouse. I have been trying to up my dollhouse furnishing game by learning new techniques and trying to mimic what I find online.
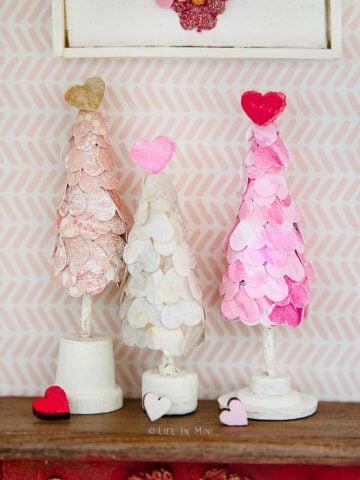
When setting up my previous post on making mini heart valentine trees, I wanted to show it off in a unique way. I saw an antique site had a cute Valentine set up on a red dresser and well, down the rabbit hole I went!
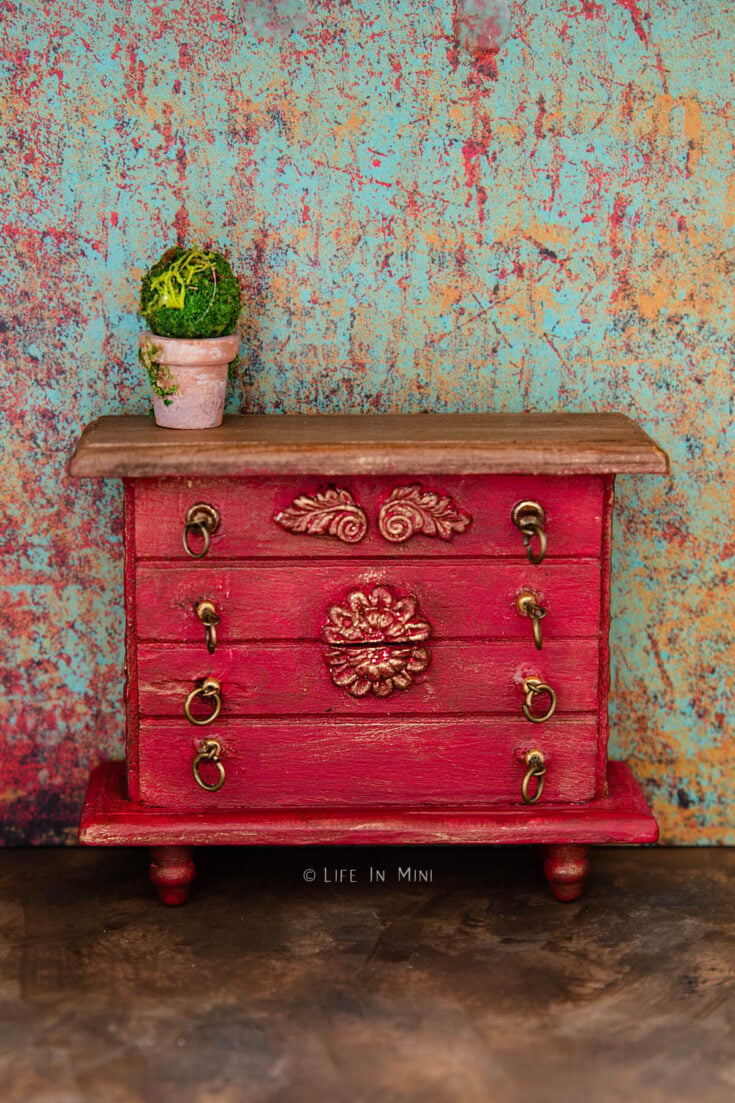
A simple red dresser ended up being well, a new tutorial! I wanted to create something unique and different from what I had done before. This post shows you several ways you can add texture and relief effects to your dollhouse furniture.
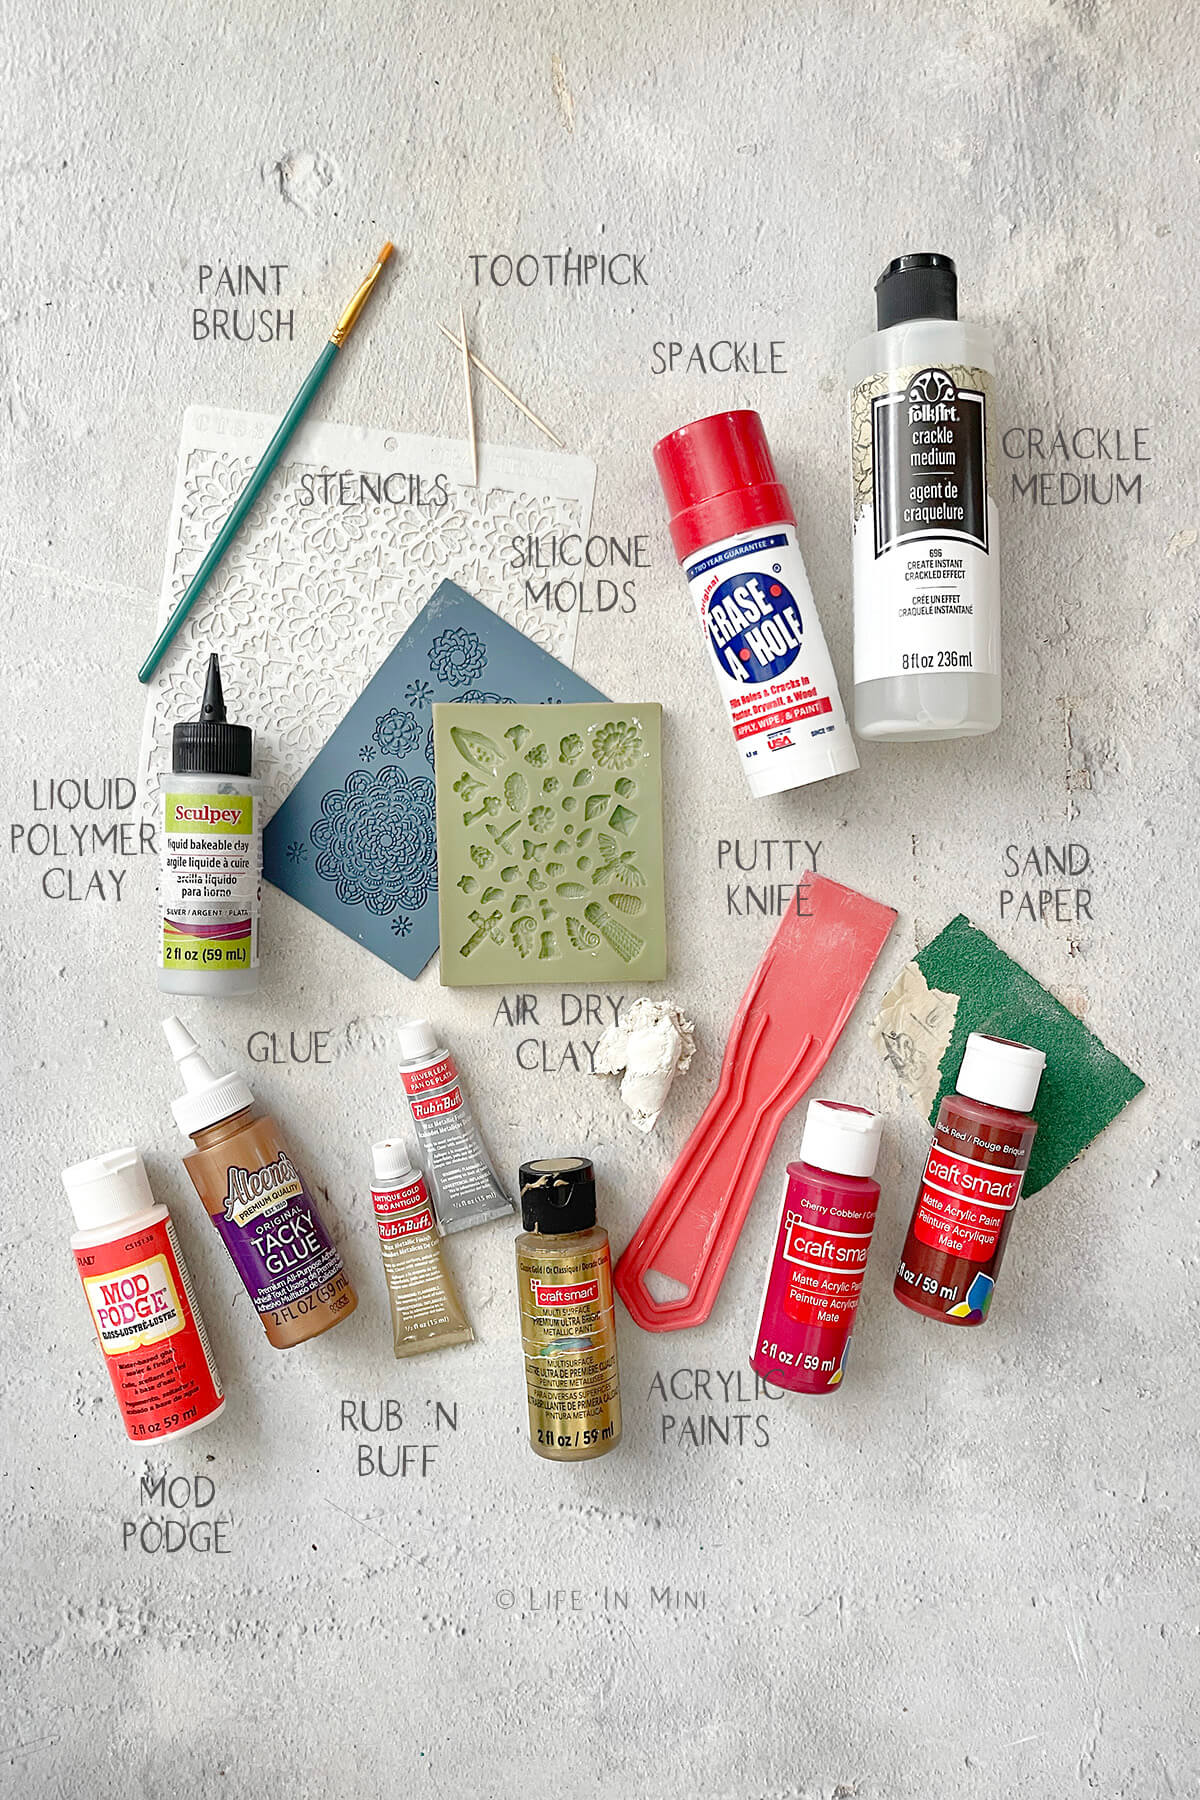
Supplies you need
This post contains some affiliate links for your convenience (which means if you make a purchase after clicking a link I will earn a small commission but it won’t cost you a penny more)! Read my full disclosure policy.
You will not need everything on this list, but I decided to include an all encompassing list for aging and painting unique dollhouse furniture pieces. You might use some of the items on this list or even most of them, but you certainly don’t need all of them.
- Dollhouse furniture: You can do this technique on any cabinet or dresser, something with sides, doors and/or drawers. I used a wooden doll dresser from The Dollar Tree. You can use this technique on a variety of furniture pieces made of wood, cardboard or plastic. Amazon also sells unfinished wooden 1:12 dressers with working drawers (for a bit more than $1.25).
- Paint: My dresser was unfinished wood so it needed to be painted. I used a combination of acrylic paints and even some chalk paint I had on hand.
- Crackle medium: If you want to add a crackle effect, you will need two contrasting colors of paint and some crackle medium. This is totally optional. You only need a little bit and don’t need to crackle the entire piece.
- Gold paint: This is totally optional, but I wanted to add a touch of glam by adding some touches of gold. You can use gold foil, gold leaf or gold paint. You can also do this with silver or bronze paints. Another option is Rub ‘n Buff.
- Stencil: This is the stencil I used for this particular dresser. You can use a large design for dramatic effect or a small one.
- Modeling paste: Usually for this type of effect, you use something like modeling paste. Since I didn’t have that, I first attempted this with spackle, but mine was old and dried. I did have some of this Erase-A-Hole and it was still soft and malleable and it worked great.
- Silicone molds: Another option to add furniture reliefs is using molds. Over the years I have collected molds on Amazon, craft stores and thrift stores. Some are for crafting and clay, others for resin and fondant.
- Air dry clay: For the silicone molds I used air dry clay. You can also use polymer clay or UV resin, if you prefer. Any color is fine as you will paint it once dry and hardened. Some people use hot glue, but I’m not convinced this will last long.
- Liquid polymer clay: Some molds are thin and can be used for chocolate or fondant. You can use these molds with some liquid polymer clay and bake it. The final piece comes out semi-flexible. You will also need a scraper or putty knife to remove the excess before baking.
- Mod Podge: You can add a final layer of mod podge for a little protection and shine as most of my acrylic paints are matte finish.
- Wood waxes: I had some clear and brown wood wax to seal my pieces. The brown wax added some dark tones and aging to the piece.
- Aleen’s tacky glue: I use this glue for everything, it is so versatile. You will need a clear drying white glue or wood glue to glue the drawer pulls back on
- Popsicle stick: I use this it to spread the spackle through the stencil and to press the clay in the molds. You can also use a putty knife.
- Scissors: I had to trim my stencil to fit on my dresser.
- X-acto knife: I didn’t like the boring knobs on the original dresser so I cut off. If you do this, you need beads or other baubles to make drawer pulls.
- Paint brushes: You will need small paint brushes for painting and applying your sealant.
- Sand paper: Whether you are repainting an old piece of furniture or painting unfinished wood, you will need to sand everything down for the paint to adhere better. Also, if you want to give your piece a distressed look, you can add layers of paint and sand parts of it off.
Make the reliefs
There are three ways to add reliefs to your dollhouse furniture or any other piece you are working on.
1. Spackle and stencils. My stencil was big and hard to maneuver over the dresser so I cut portions of it off to handle it better. Hold it down with your fingers or blue masking tape and evenly spread your spackle onto the dresser thru the stencil. Gently peel the stencil off and let the spackle dry completely.

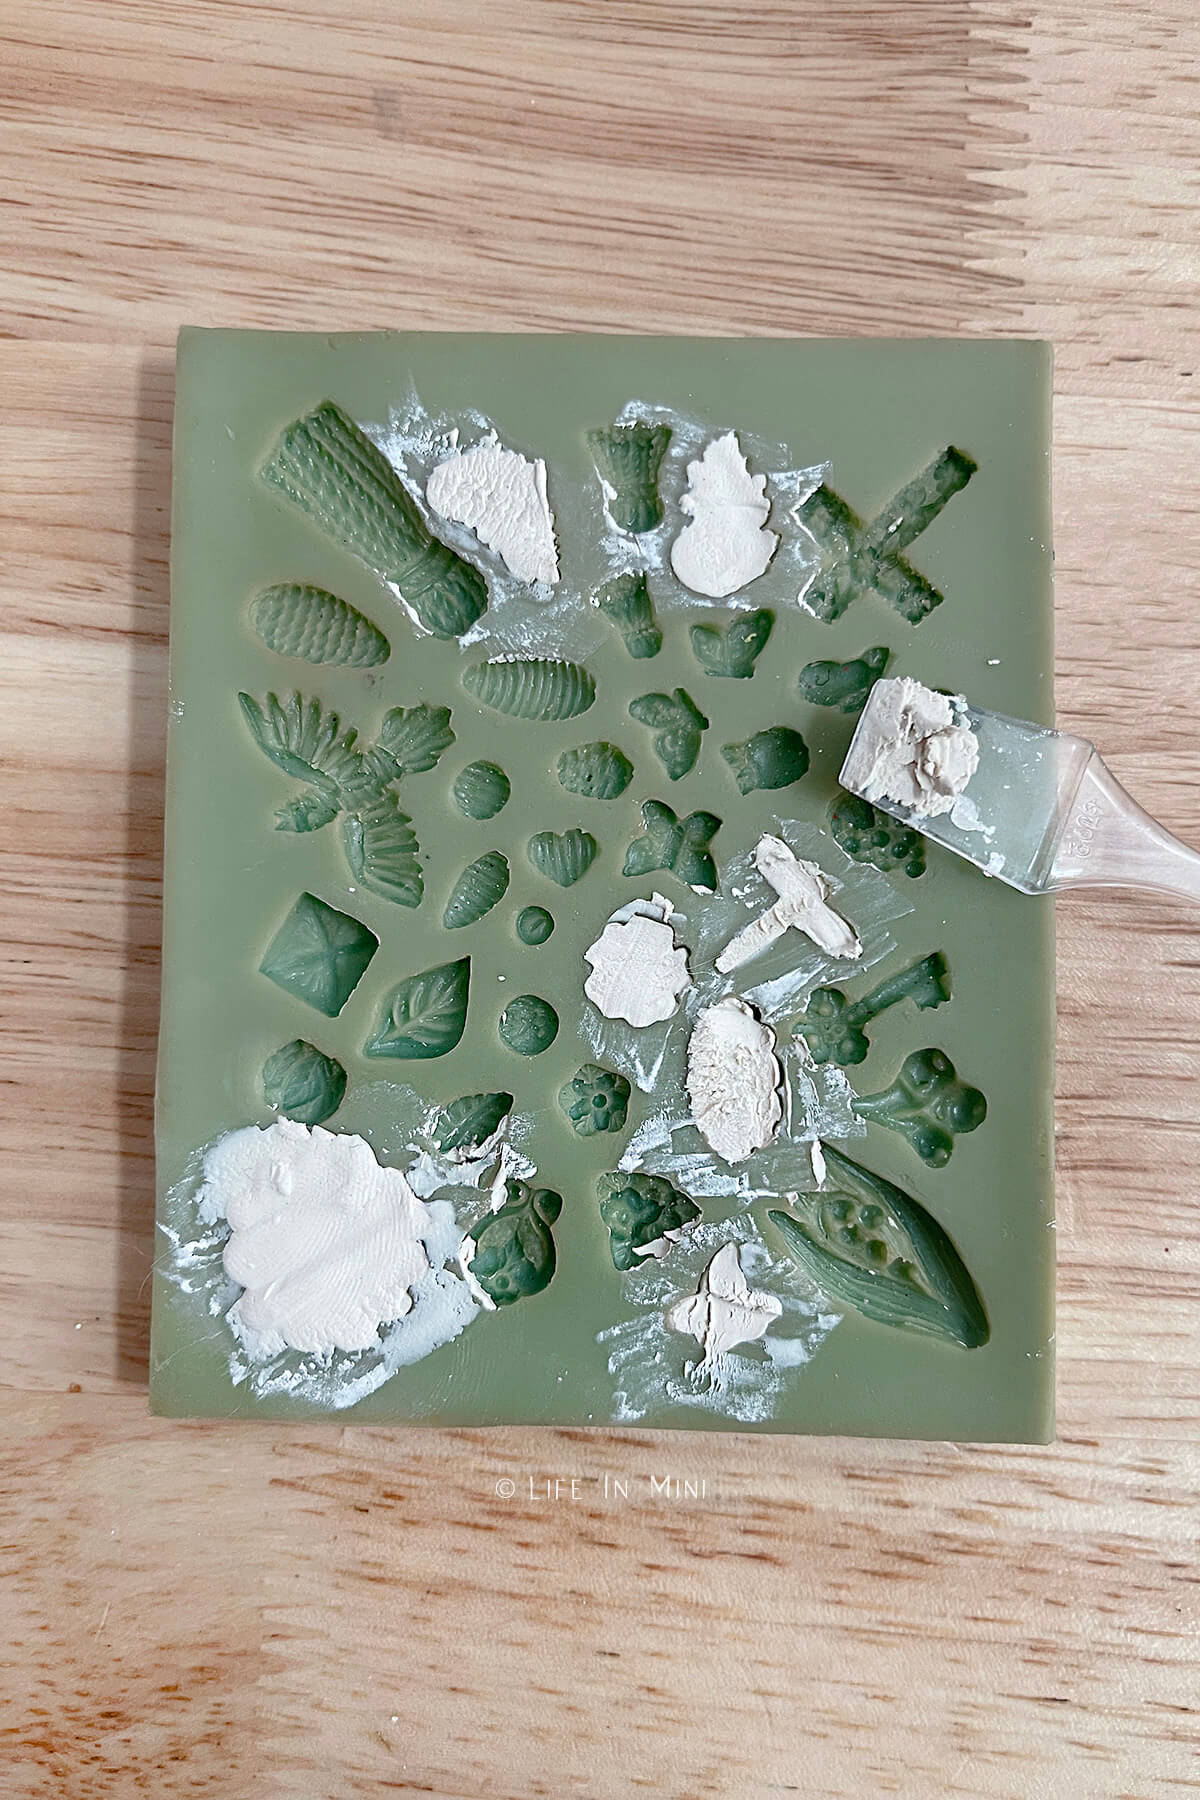
2. Clay and molds. I used air dry clay with my silicone molds and let it dry completely before removing. It worked great. You can also use polymer clay, but will need to be baked and cooled. For UV resin, pour and cure.
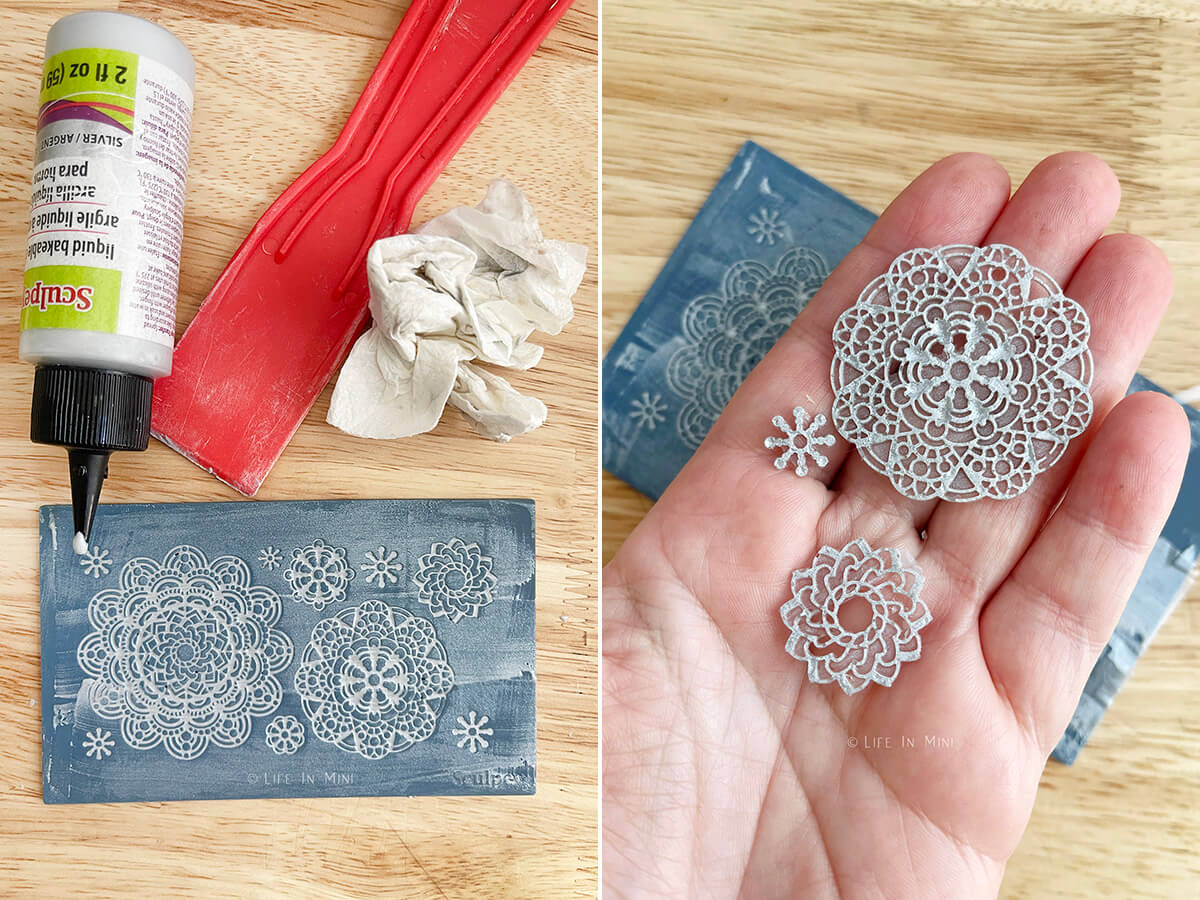
3. Liquid polymer clay. I’m not sure where I got this mold, but it is thin. You could use UV resin to form the relief, but I wanted it a little flexible so I used liquid Sculpey. Fill the holes, scrape the excess off and then bake it. I ended up not using it on my dresser, but will probably put it on something else instead.
This was my first time doing this. I didn’t clean the film off the mold before baking so the final pieces had a thin layer of polymer clay. It kinda gave a lace affect, which I really liked. I will play around with this some more until I get a cleaner final product.
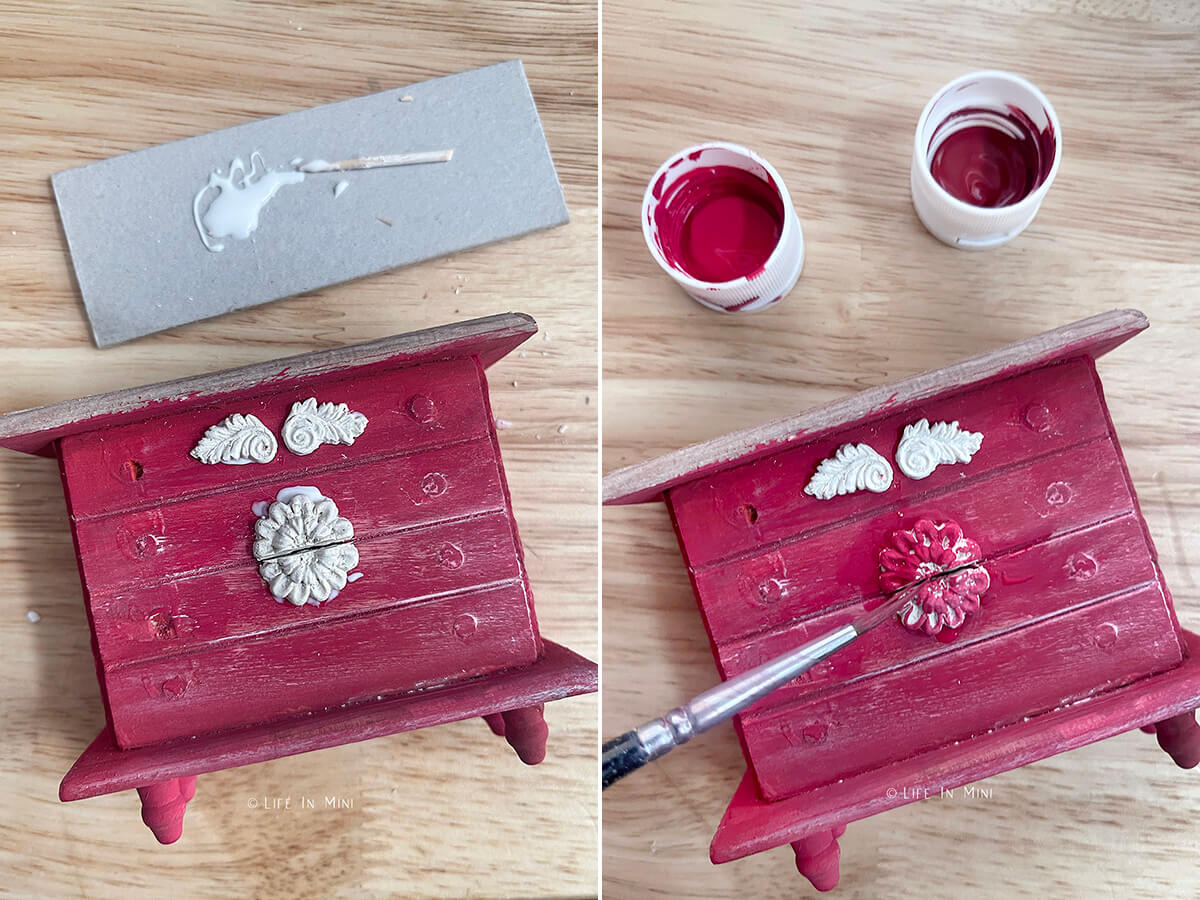
3. Attach and paint. Once your reliefs are hardened, cured and/or baked and cooled, you can attach it to your furniture piece. I used my favorite Aleen’s tacky glue as it is strong and dries clear. When the glue is dried, you can paint it.
Aging dollhouse furniture
There are several ways to give your dollhouse furniture a weathered antique look. You can use one or multiple effects.
1. Paint and sand paper. You can easily mimic a lot of aging techniques using multiple layers of paint. You will have the base color, then can go a little dark and a little lighter to give it more depth. Some browns can mimic dirt and age. Then go back and sand down areas of your furniture to reveal the color underneath.

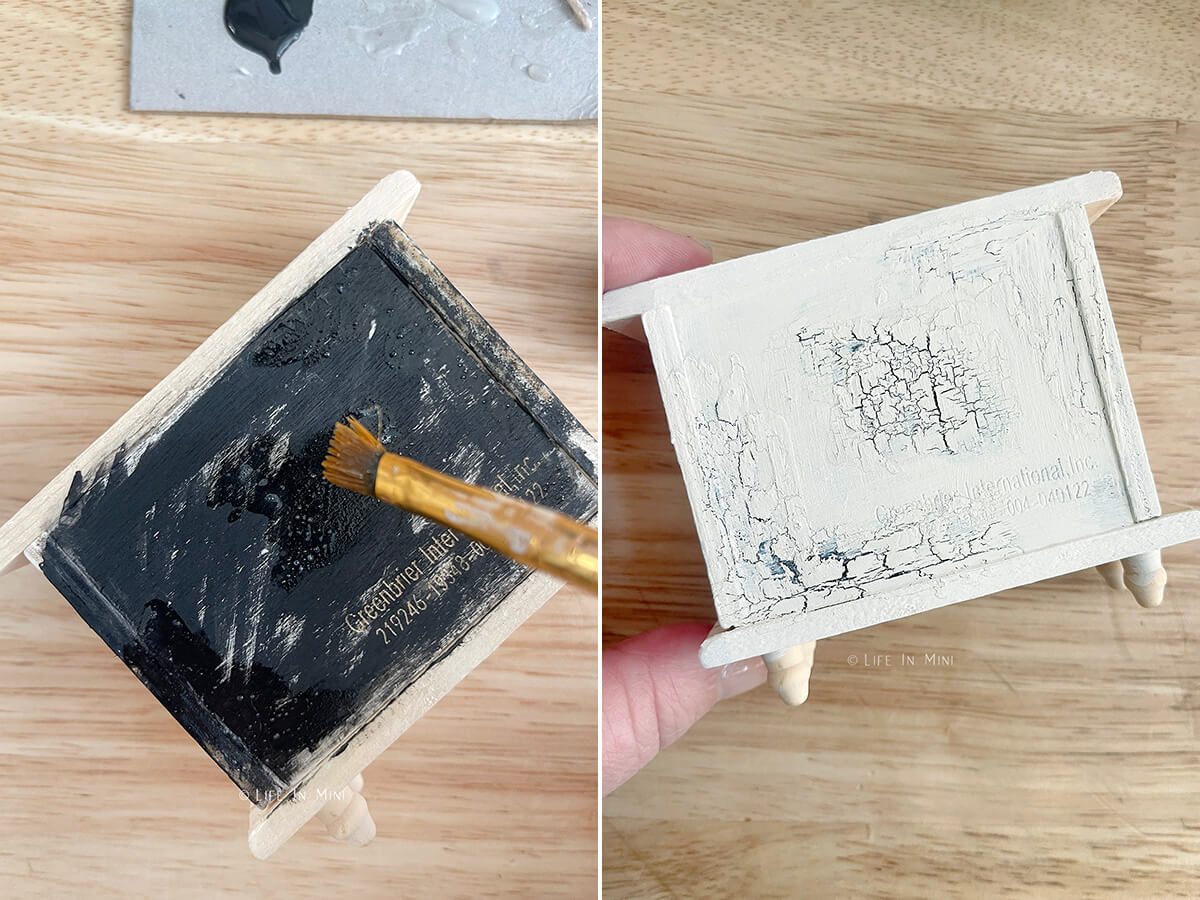
2. Crackle effect. Another way to add some age to a piece is with a crackle affect. I suggest doing this to your furniture piece BEFORE adding your reliefs. You will need two contrasting color choices. The first layer will be the revealed crackle. Add crackle medium to where you want them to show. Once dried, add your top color.
This can take a little experimenting until you get it right. I will write a more detailed post on using crackle medium in another tutorial.
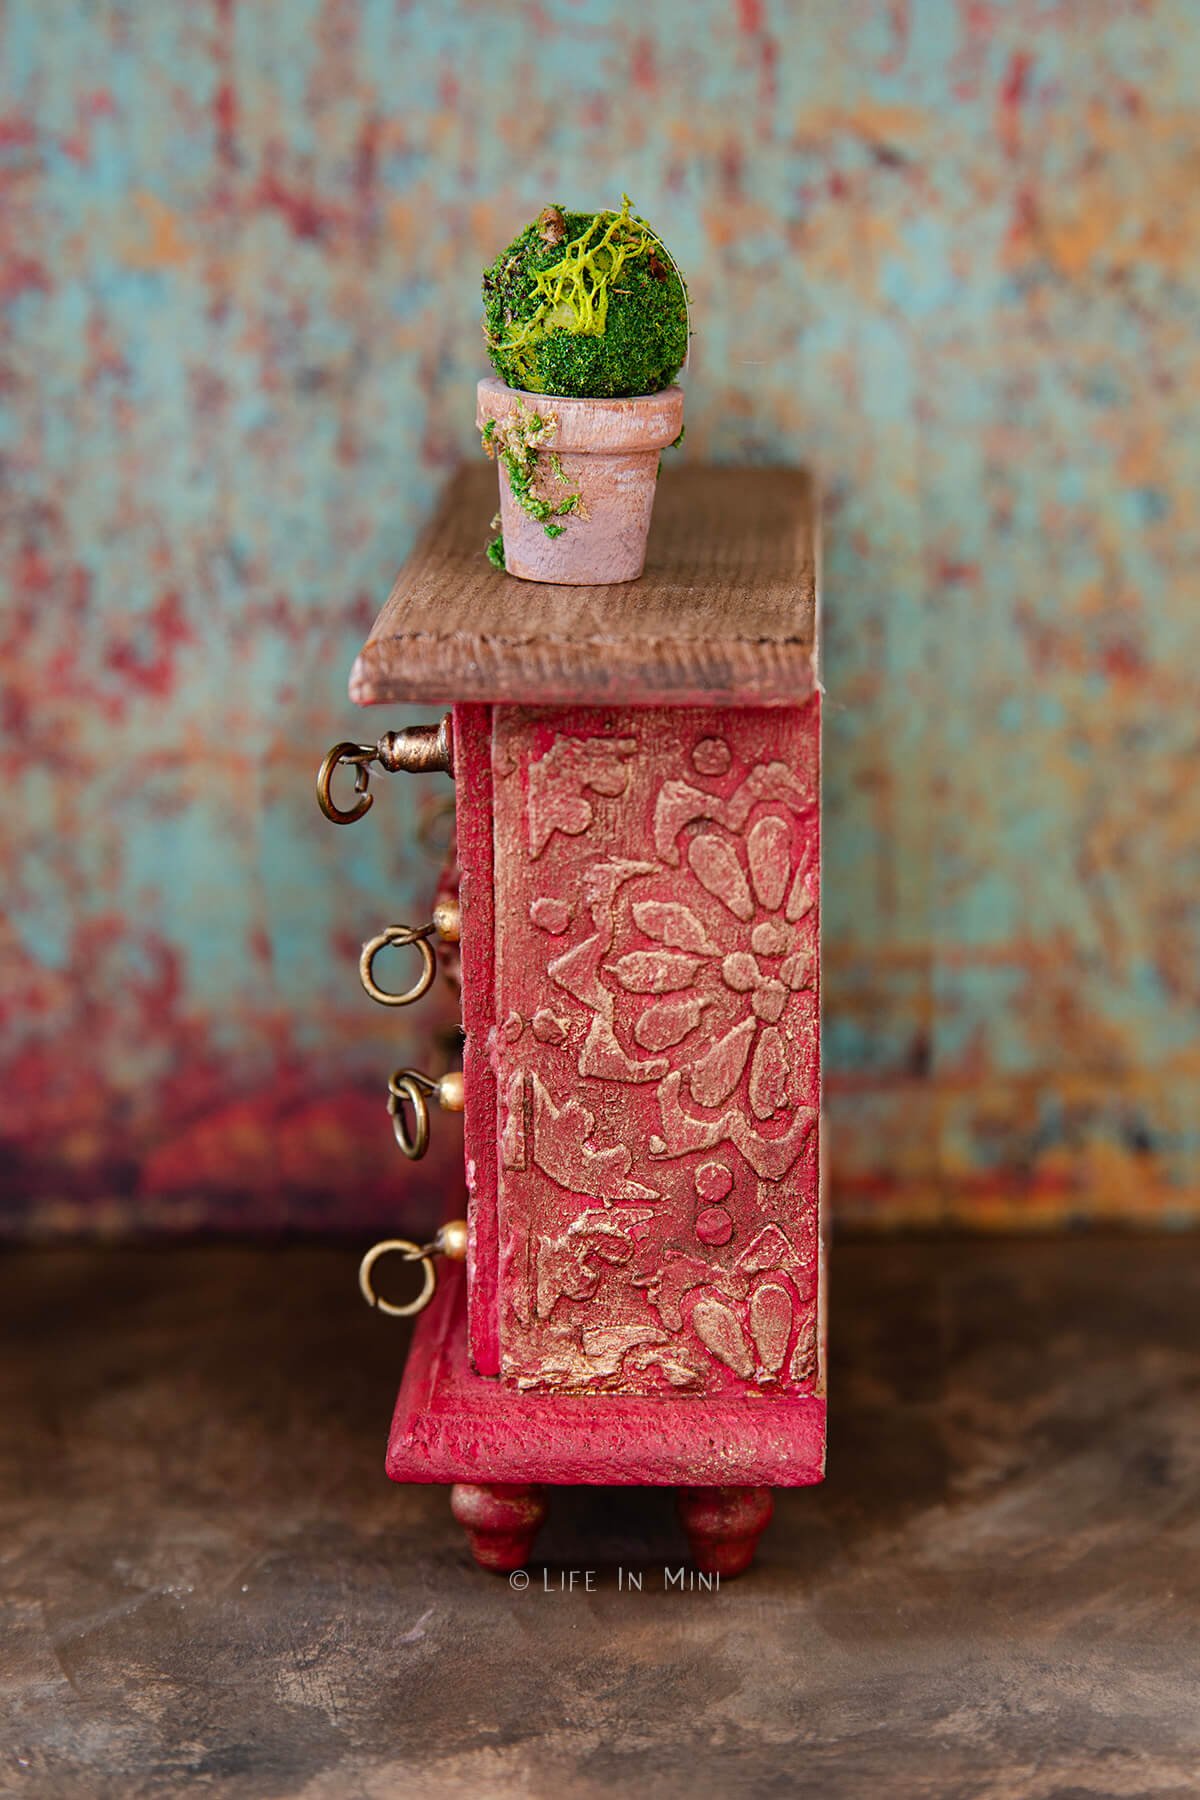
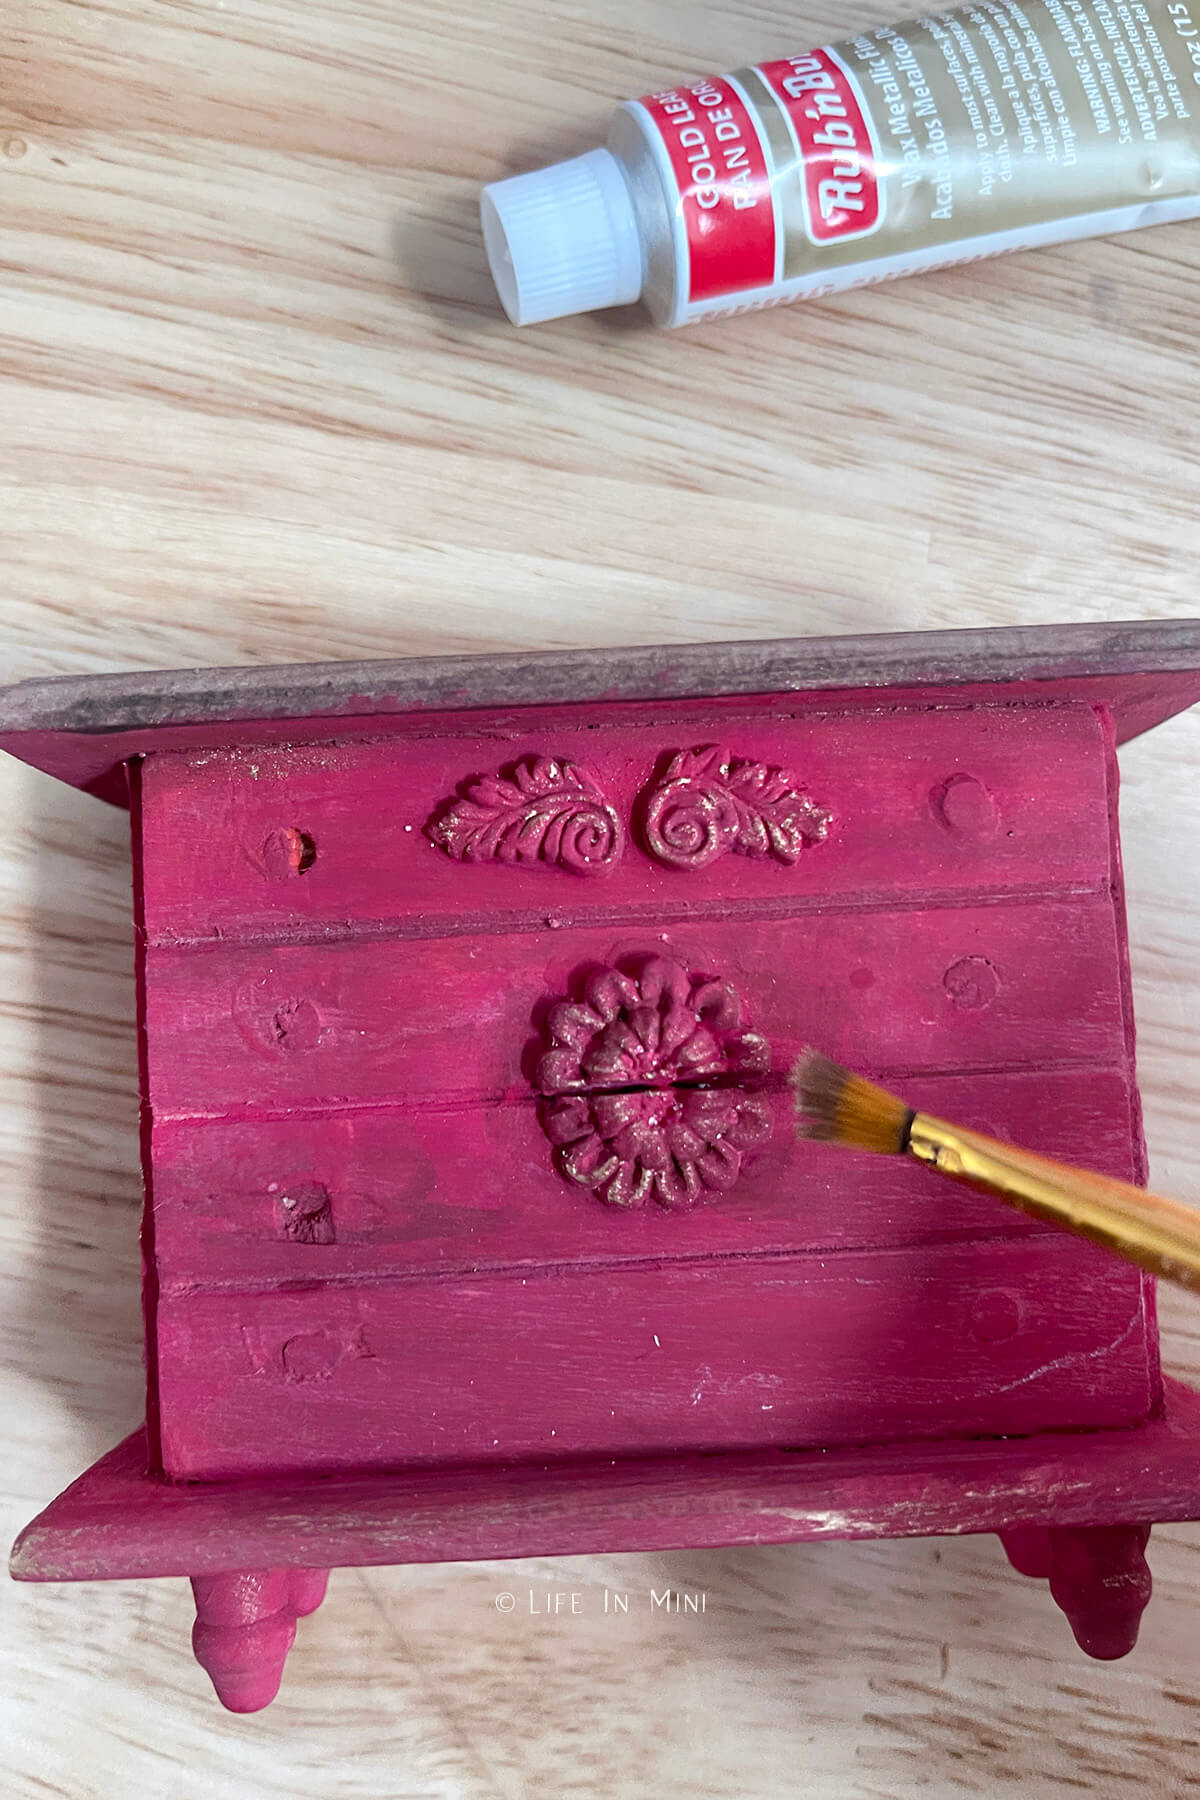
4. Add highlights. I painted the dresser and reliefs the same color. I did want to highlight them a bit so I used the Antique Gold Rub and Buff. You can also dry brush gold or a contrasting paint color on your reliefs. I also used some brown furniture wax to give it some darker tones for aging and shadowing the reliefs.
5. Seal it. Once you are happy with the look of your dresser, it is time to add a sealant. You can add a layer or two of Mod Podge or you can rub on some clear furniture wax. Since I added brown wax to parts of the dresser already, I finished this piece with clear wax.

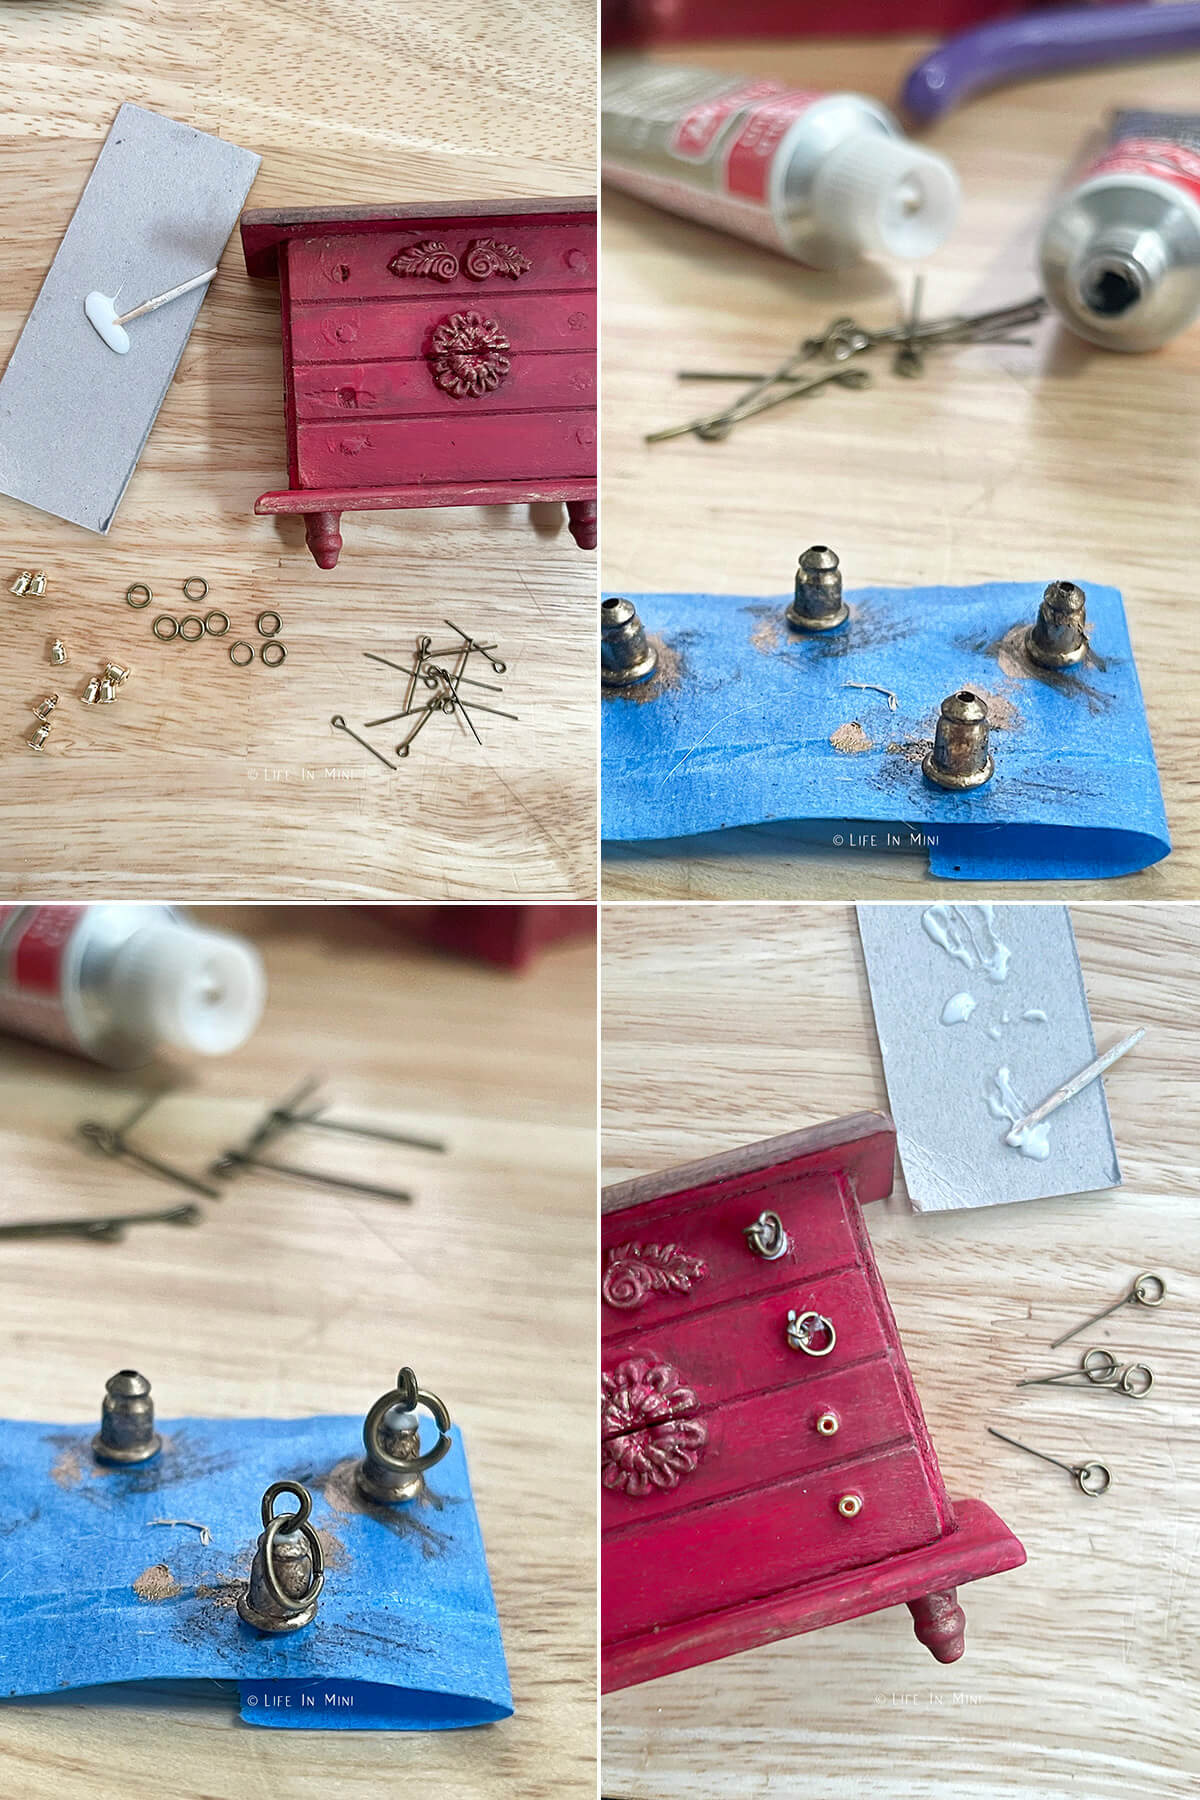
6. Hardware. Once all the painting is done you can embellish your piece with hinges, locks, knobs, drawer pulls or whatever you like. For this dresser, I was going to use these miniature antique drawer pulls, but I didn’t like them for this piece.
So I used a combination of earring backs, eye pins and jumper rings for the top drawer. I swapped out the earring back for a small bead for the remainder drawer pulls. Everything was attached with Aleen’s tacky glue.
Project tips and FAQs
I hope this shows you that there are a number of ways to finish your dollhouse furniture. You can create a lot of personality and back story to a piece depending on how you paint it.
You can easily keep it simple with just a single paint color. And trust me, I have many pieces like that! But you can also create a unique and antique look by adding a few extra steps.
Adding reliefs does not have to be expensive. As I showed above, you can easily do it with inexpensive air dry clay or spackle. Silicone molds and paint stencils can also be found easily enough in craft stores, online or even thrift stores. You can use candy and fondant molds, too.
And if you don’t like what you created, sand it down and try it again.

If you are enjoying my blog, why not sign up for my newsletter so you won’t miss out on the mini adventures!
How to Make Dollhouse Furniture Reliefs
Add texture and a vintage vibe to your dollhouse furniture with furniture reliefs. I share several techniques on how to distress furniture, as well as how to make your own faux carvings and reliefs.
Materials
- Dollhouse furniture
- Assorted acrylic paints
- Stencils
- Spackle
- Silicone molds
- Air dry clay
- Liquid polymer clay
- White glue
- Wood wax or Rub 'n Buff
Tools
- Paint brushes
- Sand paper
- Putty knife
Instructions
- Prep your furniture piece prior to adding reliefs. I usually paint the piece beforehand using assorted colors to create a vintage look. Paint the base color, then add a little dark and little lighter colors to give it more depth. Some browns can mimic dirt and age. Then go back and sand down areas of your furniture to reveal the color underneath
- Using spackle and stencils. My stencil was big and hard to maneuver over the dresser so I cut portions of it off to handle it better. Hold it down with your fingers or blue masking tape and evenly spread your spackle onto the dresser thru the stencil. Gently peel the stencil off and let the spackle dry completely.
- Clay and molds. I used air dry clay with my silicone molds to create some of the reliefs. Let it dry completely before removing. You can also use polymer clay, but it will need to be baked and cooled. For UV resin, pour and cure.
- Liquid polymer clay. With thin molds, you can use liquid clay or UV resin to form the relief. Liquid clay is still a little flexible after it bakes so that is what I I used. Fill the holes, scrape the excess off and then bake it.
- Attach and paint. Once your reliefs are hardened, cured and/or baked and cooled, you can attach it to your furniture piece. I used my favorite Aleen’s tacky glue as it is strong and dries clear. When the glue is dried, you can paint it.
- Add highlights. I painted the dresser and reliefs the same color. I did want to highlight them a bit so I used the Antique Gold Rub and Buff. You can also dry brush gold or a contrasting paint color on your reliefs. I also used some brown furniture wax to give it some darker tones for aging and shadowing the reliefs.
- Seal it. Once you are happy with the look of your dresser, it is time to add a sealant. You can add a layer or two of Mod Podge or you can rub on some clear furniture wax. Since I added brown wax to parts of the dresser already, I finished this piece with clear wax.
- Hardware. Once all the painting is done you can embellish your piece with hinges, locks, knobs, drawer pulls or whatever you like.
PS If you try this craft, why not leave a star rating in the direction card right below and/or a review in the comment section further down the page? I always appreciate your feedback.
You can also follow me on Pinterest, Facebook or Instagram. Sign up for my eMail list, too!
Leave a Reply