Take your simple dollhouse dresser from drab to fab by using rub on transfers This method can be used for any scale of miniatures you are working with, like 1:24, 1:12 and 1:6.
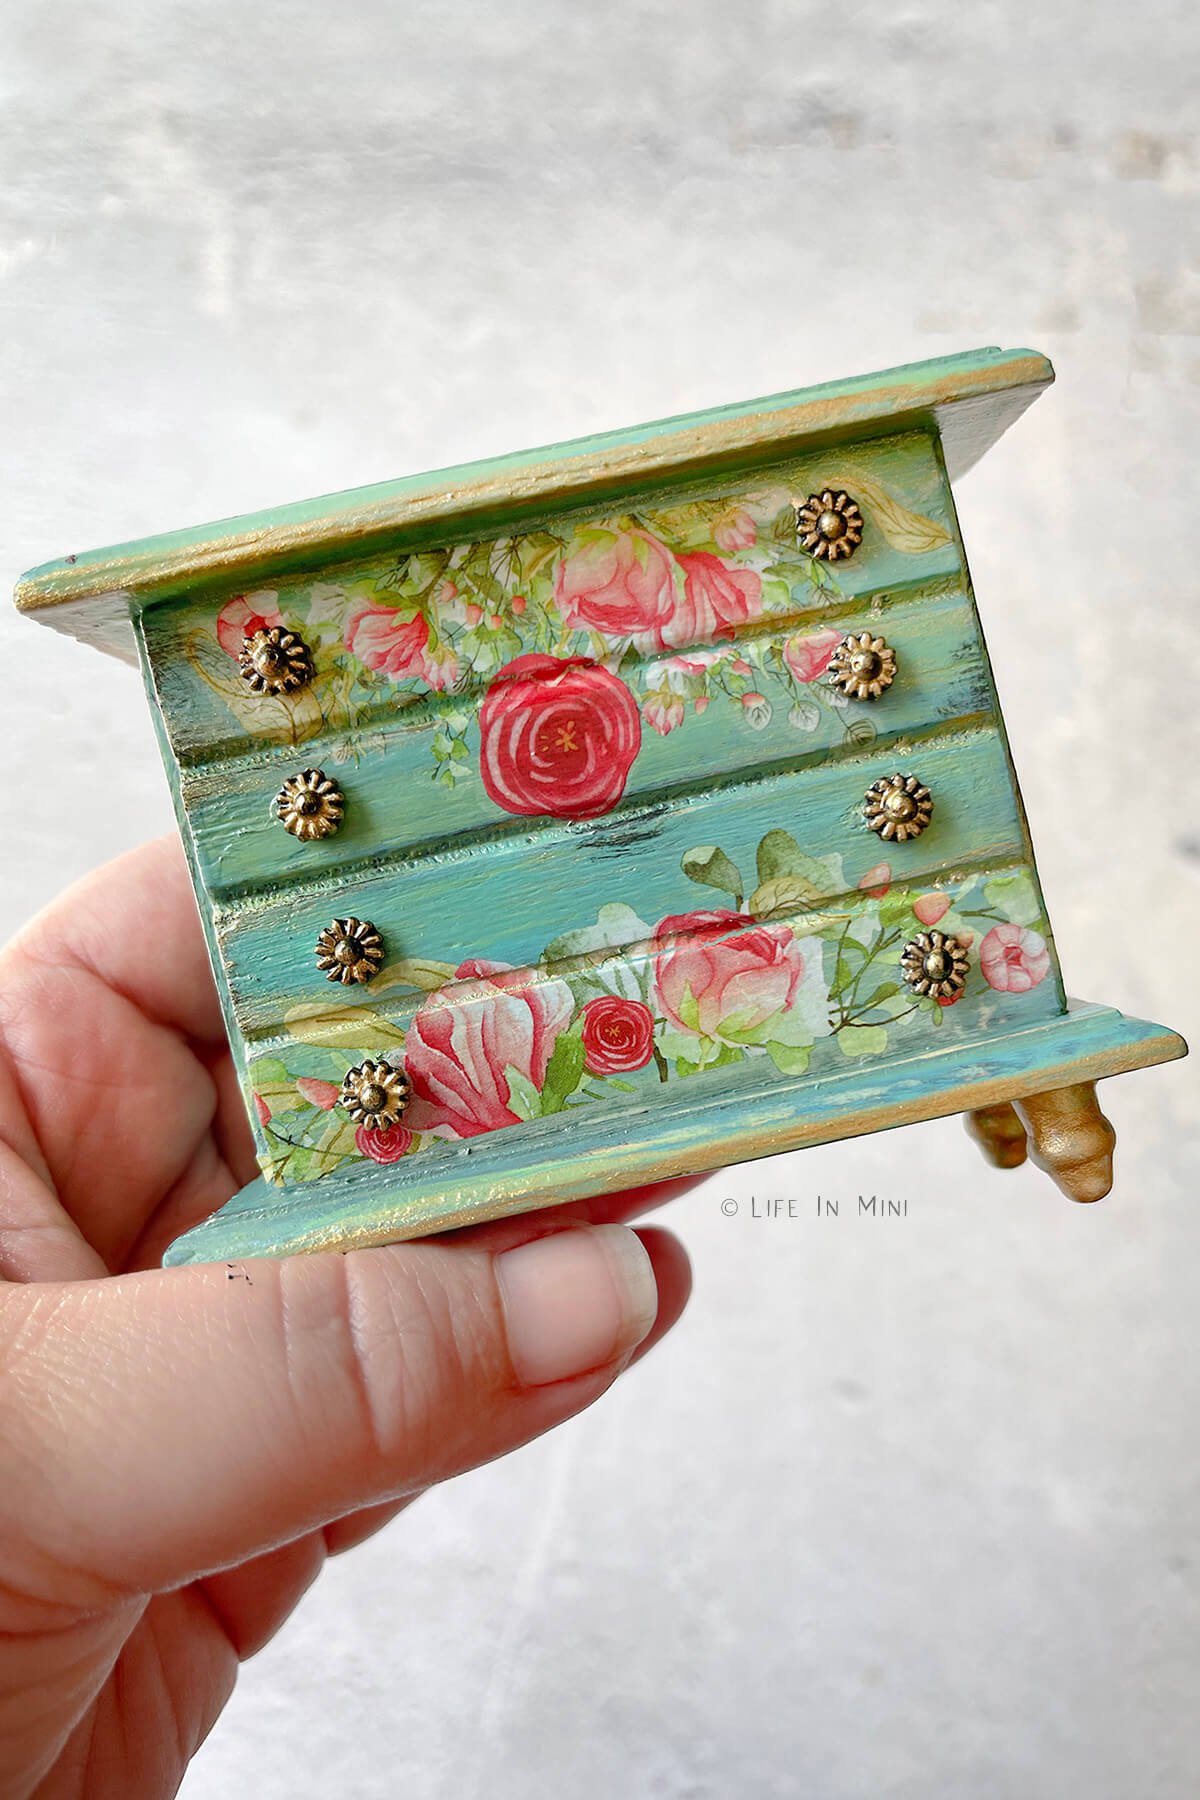
Furnishing your dollhouse is what I truly love doing. It’s the fun and creative part of this exciting and somewhat frustrating world of miniatures. I have a variety of miniature furniture, some store bought while others are homemade.
Making your own dollhouse furniture has its benefits. You can make (or attempt to make) exactly what you want in whatever scale you need. Dollhouse furniture kits are a great middle ground when you don’t have the know how or have the patience to create your own furniture from scratch, but want to save money.
Furniture kits can be less expensive than purchasing pre-made dollhouse furniture and you can add some customizations as you finish it. So save money, I have found some great miniature pieces at thrift stores and rummage sales.
If you are lucky, you can find wood dollhouse furniture at your local Dollar Tree. They are nothing fancy, but they are a great starting point to customize.
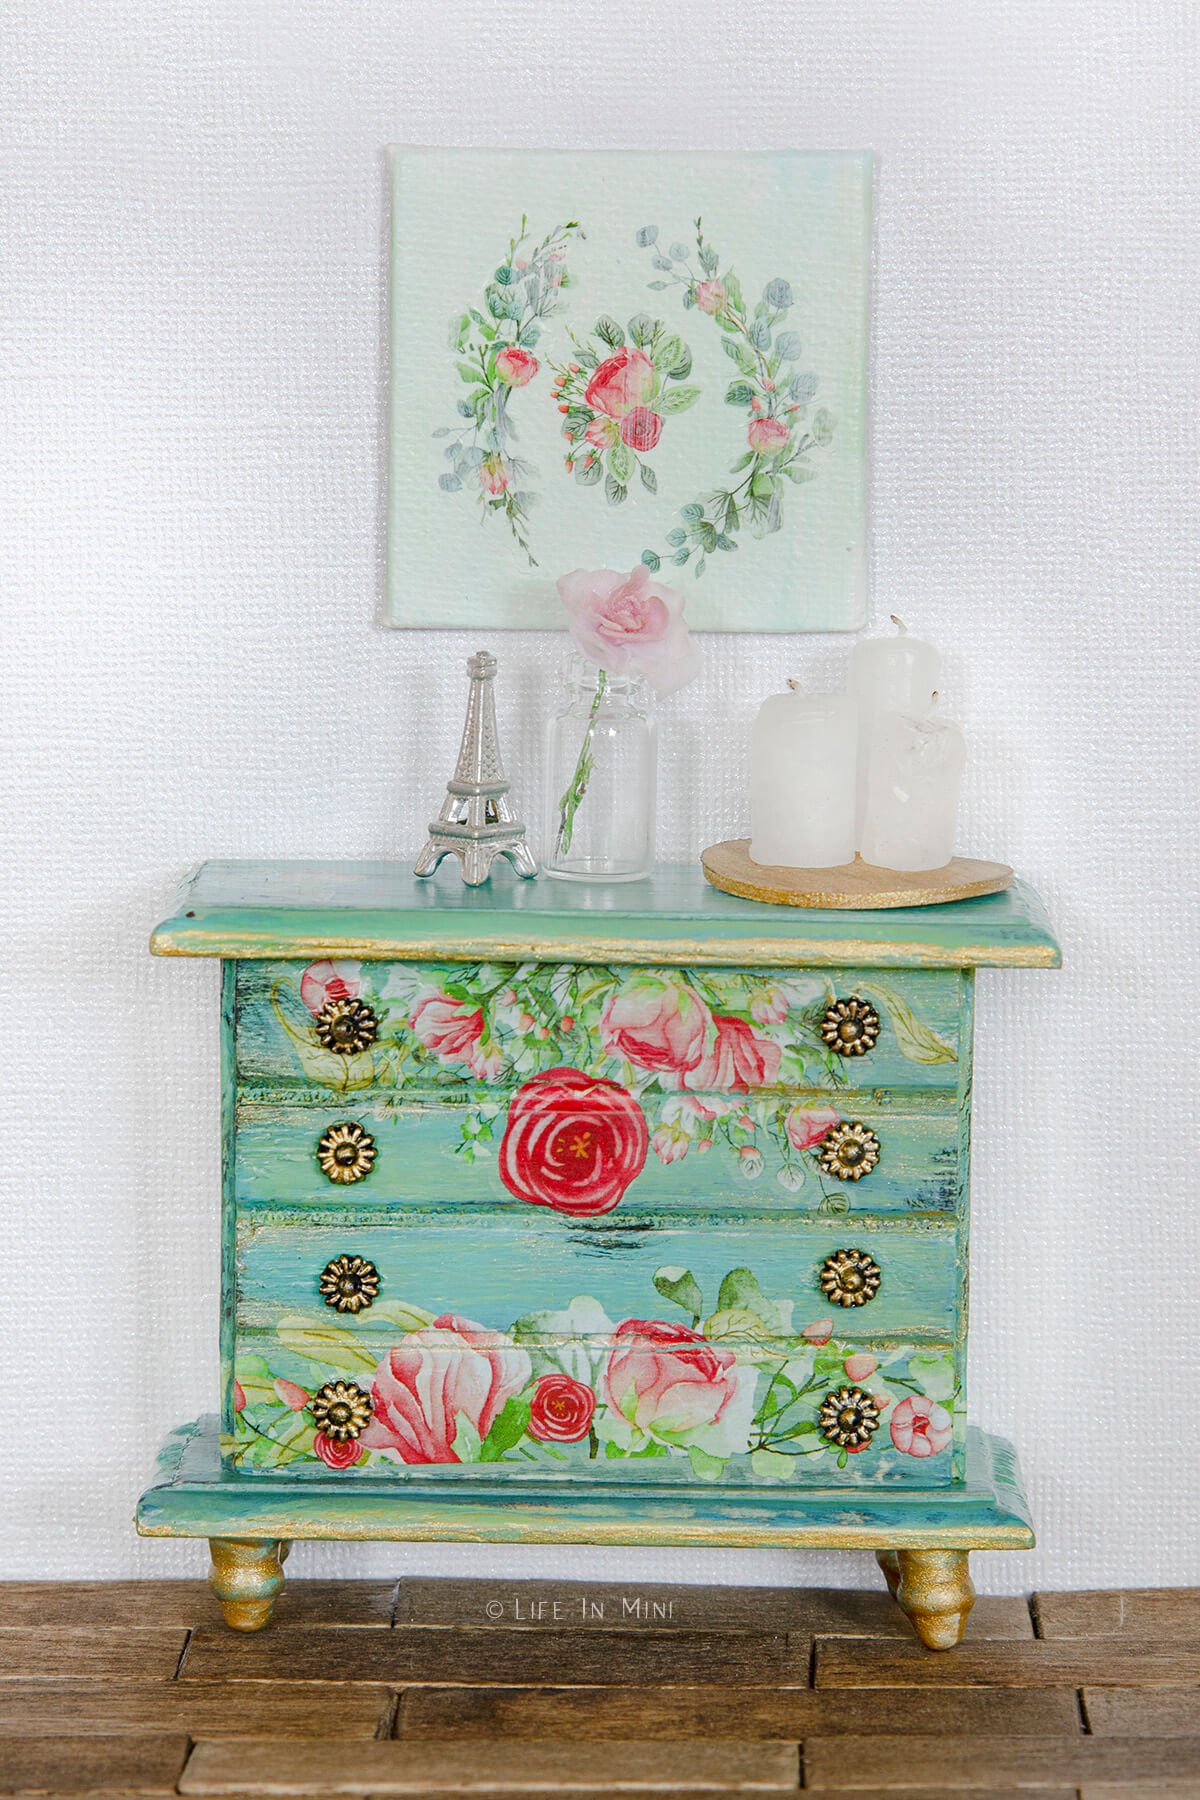
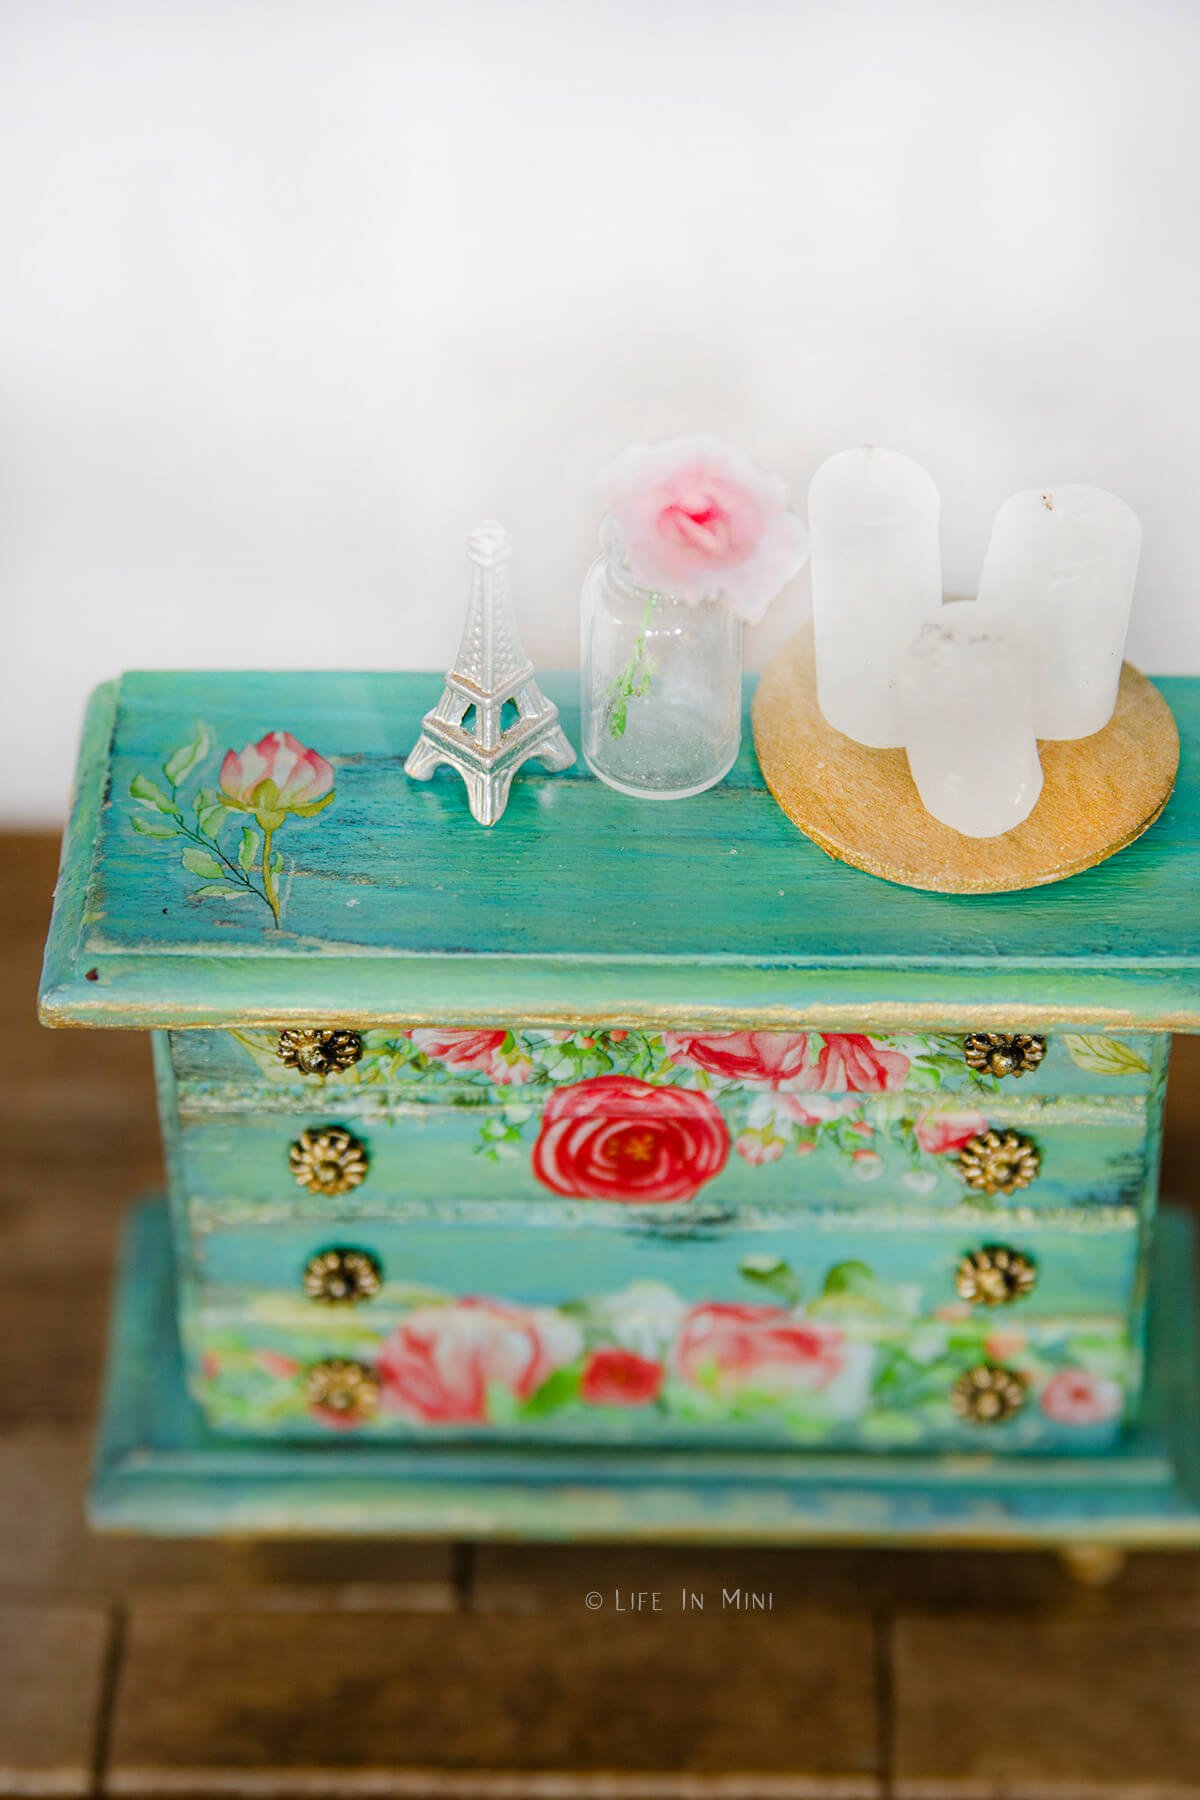
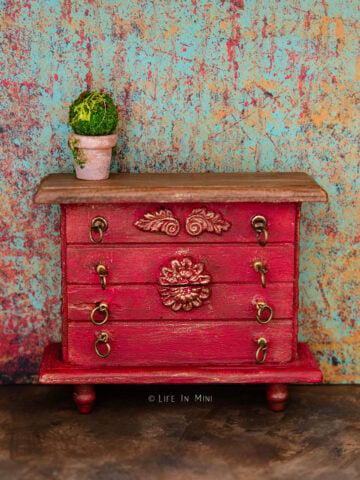
Today’s tutorial is a Dollar Tree hack on how to glam up a very basic Dollar Tree dollhouse dresser. My inspiration comes from those refurbished pieces of furniture that have big bold floral transfers incorporated into the design.
I already shared one way to use rub on transfers to make beautiful miniature pillows. But in my head I kept thinking about how gorgeous a floral image would look on a dollhouse dresser.
The furniture I am using is a Dollar Tree dollhouse dresser (scaled at 1:12) that I bought for $1.25. The drawers do not open and close, which usually annoys me, but it is not always necessary when furnishing your mini home.
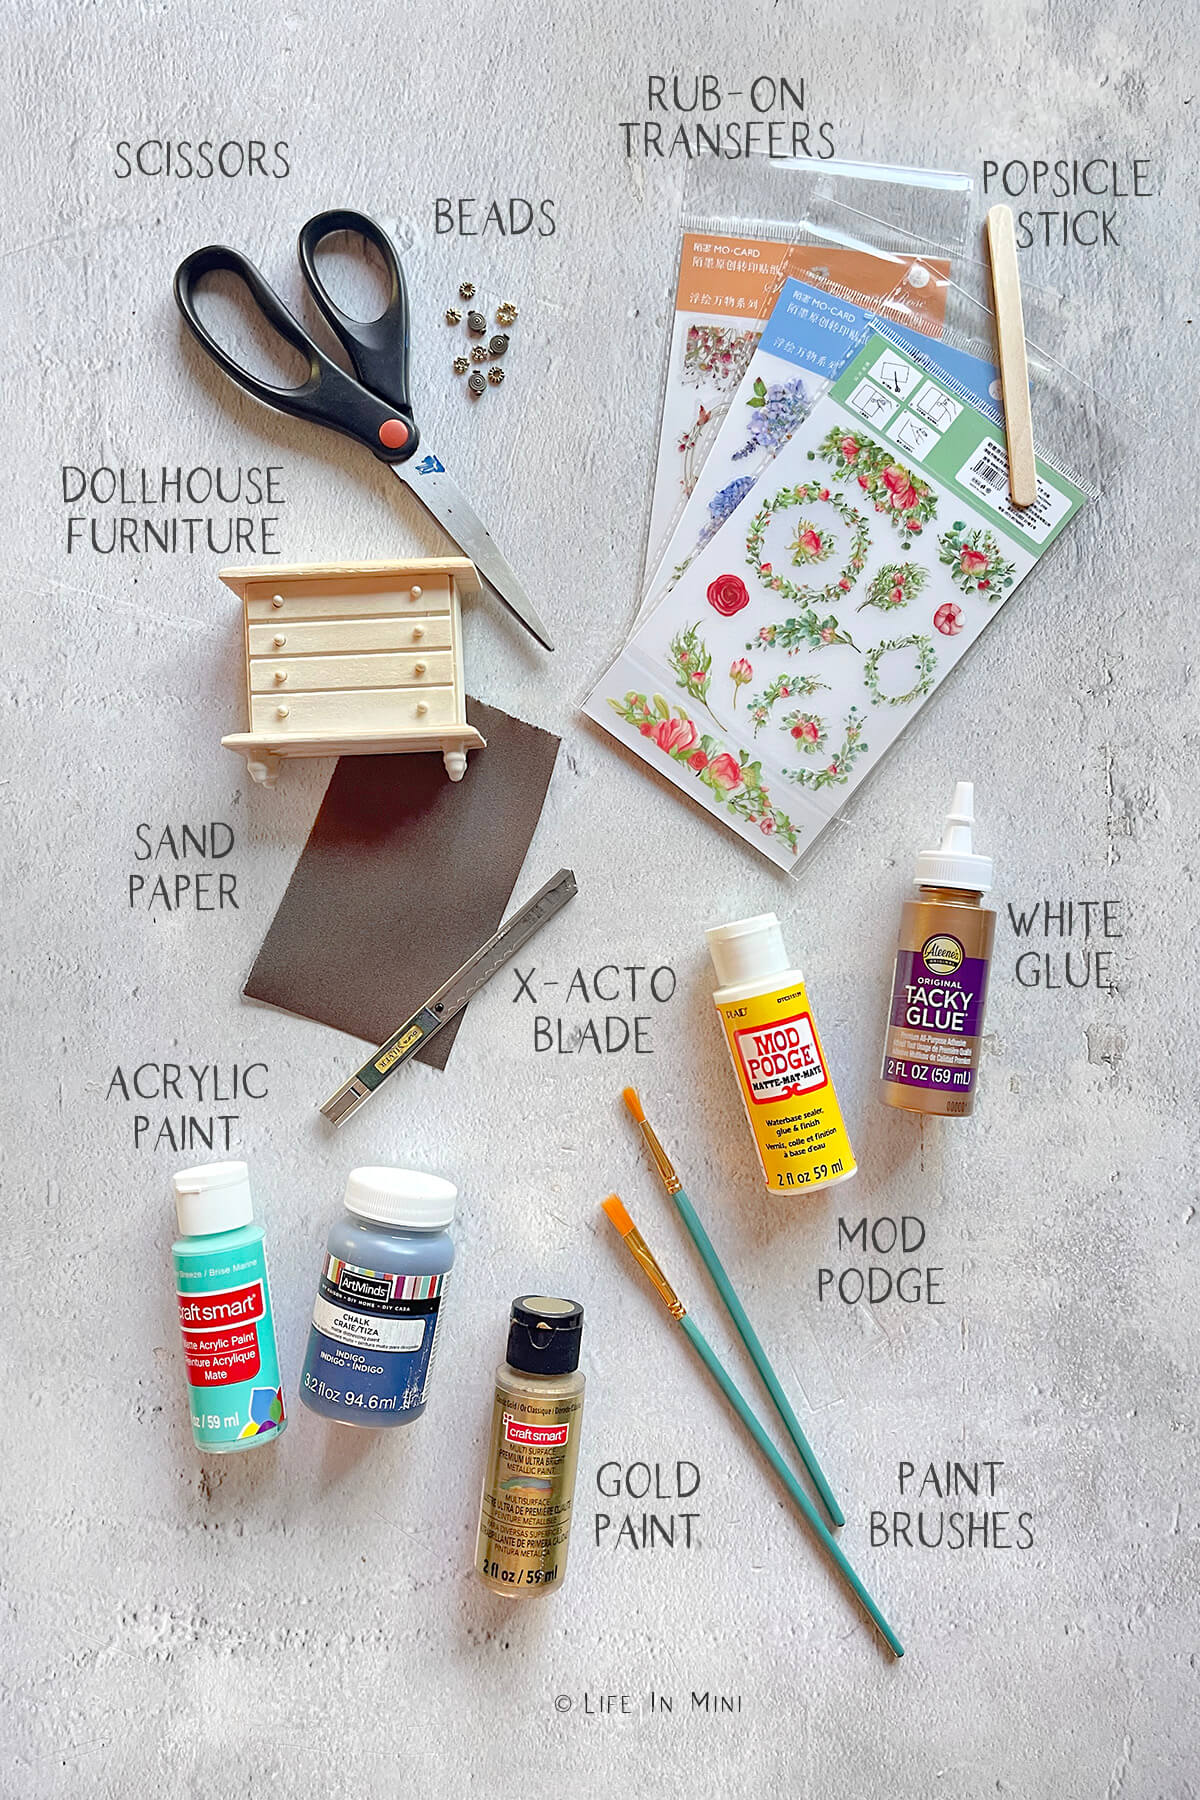
Supplies you need
This post contains some affiliate links for your convenience (which means if you make a purchase after clicking a link I will earn a small commission but it won’t cost you a penny more)! Read my full disclosure policy.
- Dollhouse dresser: Rub on transfers work on a variety of surfaces. I’m using a wooden doll dresser from The Dollar Tree. You can use this technique on a variety of furniture pieces made of wood, cardboard or plastic. Amazon also sells unfinished wooden 1:12 dressers with working drawers (for a bit more than $1.25).
- Paint: My dresser was unfinished wood so it needed to be painted. I used a combination of acrylic paints and some chalk paint I had on hand.
- Crackle medium: If you want to add a crackle effect, you will need two contrasting colors of paint and some crackle medium. This is totally optional. You only need a little bit and don’t need to crackle the entire piece.
- Rub on transfers: Look for designs that will fit your furniture in whatever theme and colors you like. I purchased these rub on transfers from Amazon. You can also find rub on transfers at craft stores and even at The Dollar Tree or 99¢ Stores.
- Gold paint: This is totally optional, but I wanted to add a touch of fancy schmancy by adding some touches of gold. You can use gold foil, gold leaf or gold paint. You can also do this with silver or bronze paints.
- Mod Podge: I applied a final layer of mod podge for a little protection and shine.
- Aleen’s tacky glue: I use this glue for everything, it is so versatile. You will need a clear drying white glue or wood glue to glue the drawer pulls back on
- Popsicle stick: This is used to rub the design onto your furniture.
- Scissors: You will need to cut the transfer images you want to use from the sheets they come in. You can use regular scissors or an x-acto knife.
- X-acto knife: It is easier to apply the transfers with the dresser knobs off so they need to be cut off. You can paint them and glue them back on if you didn’t destroy them in the removal process, or use beads to make new drawer knobs.
- Paint brushes: You will need small paint brushes for painting and applying your sealant.
- Sand paper: Whether you are repainting an old piece of furniture or painting unfinished wood, you will need to sand everything down for the paint to adhere better. Also, if you want to give your piece a distressed look, you can add layers of paint and sand parts of it off.
Step-by-step directions
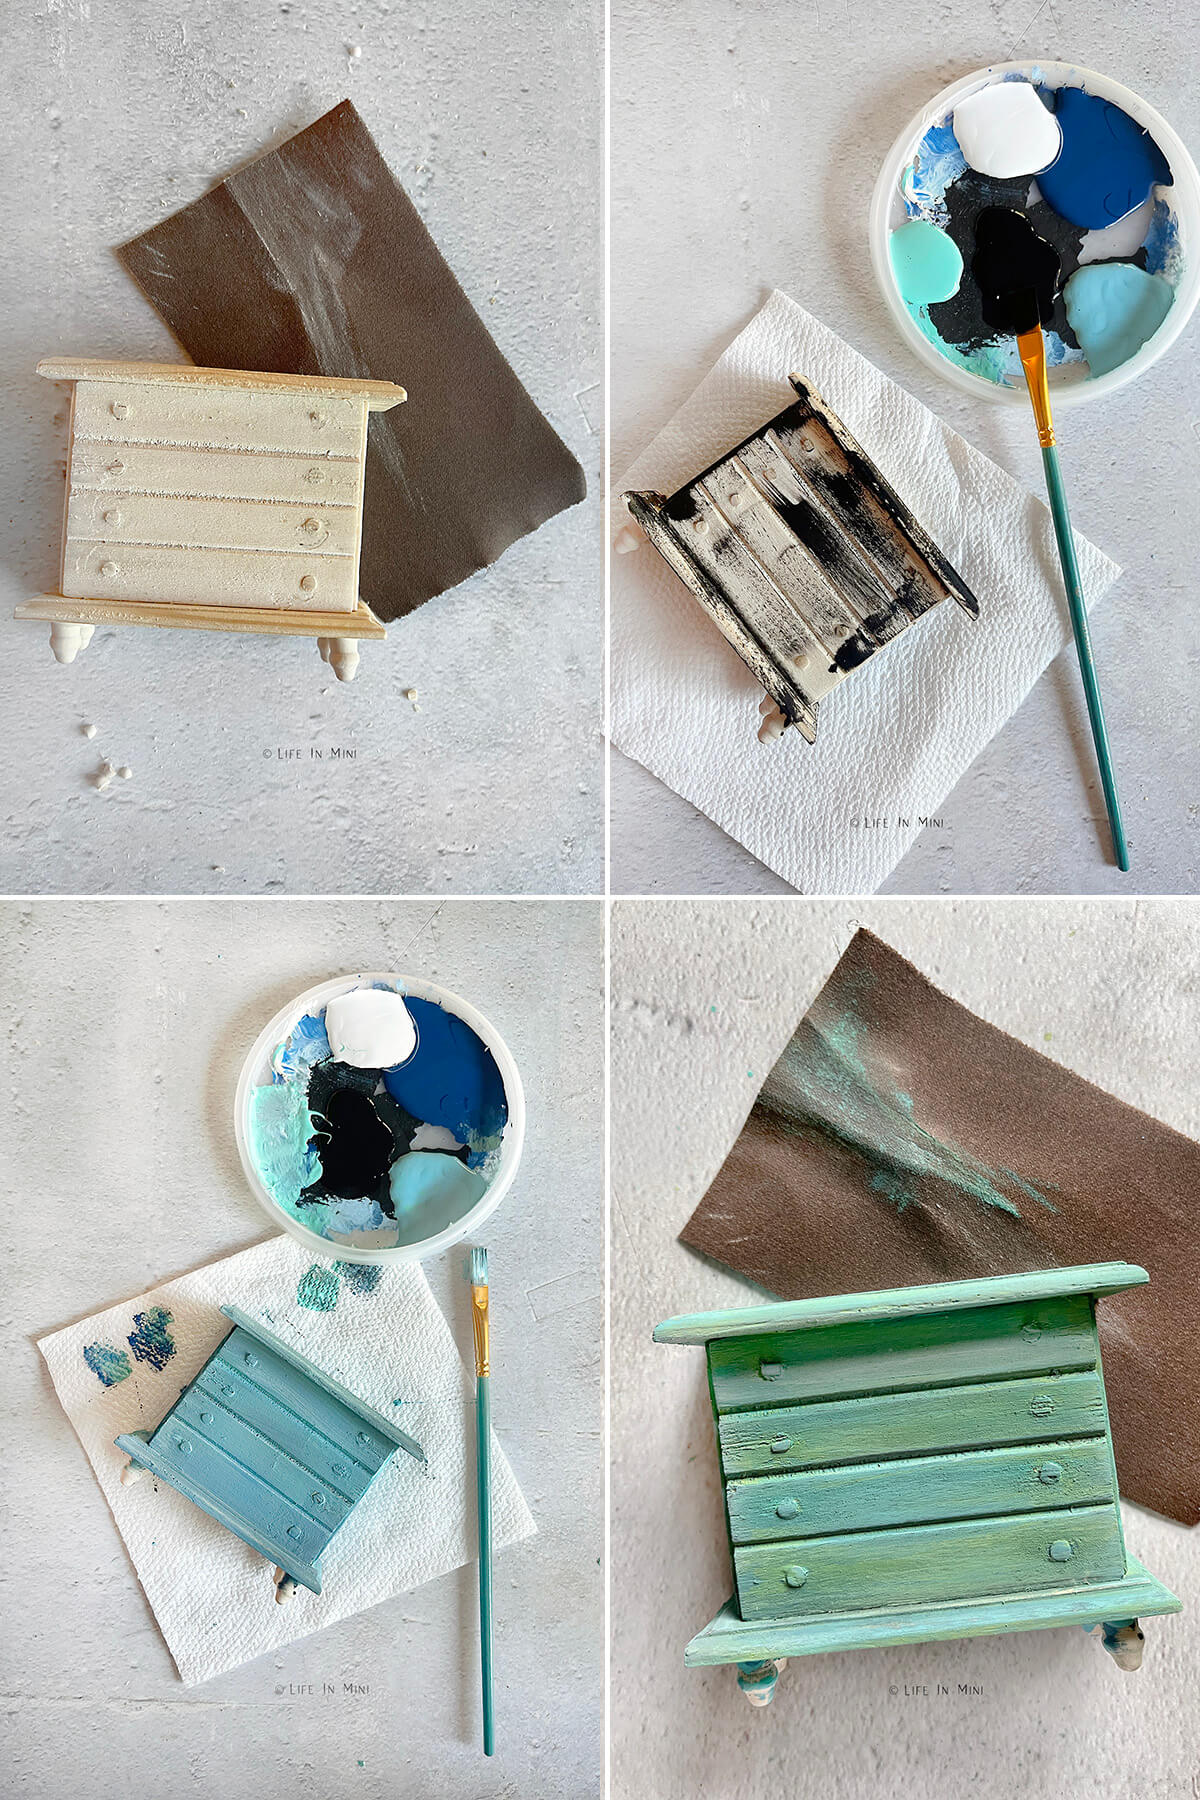
1. Cut off the drawer pulls from your dresser and sand the entire piece well. You don’t HAVE to cut these off. If you don’t, you just need to be super careful while rubbing the transfer on the dresser and around the drawer pulls.
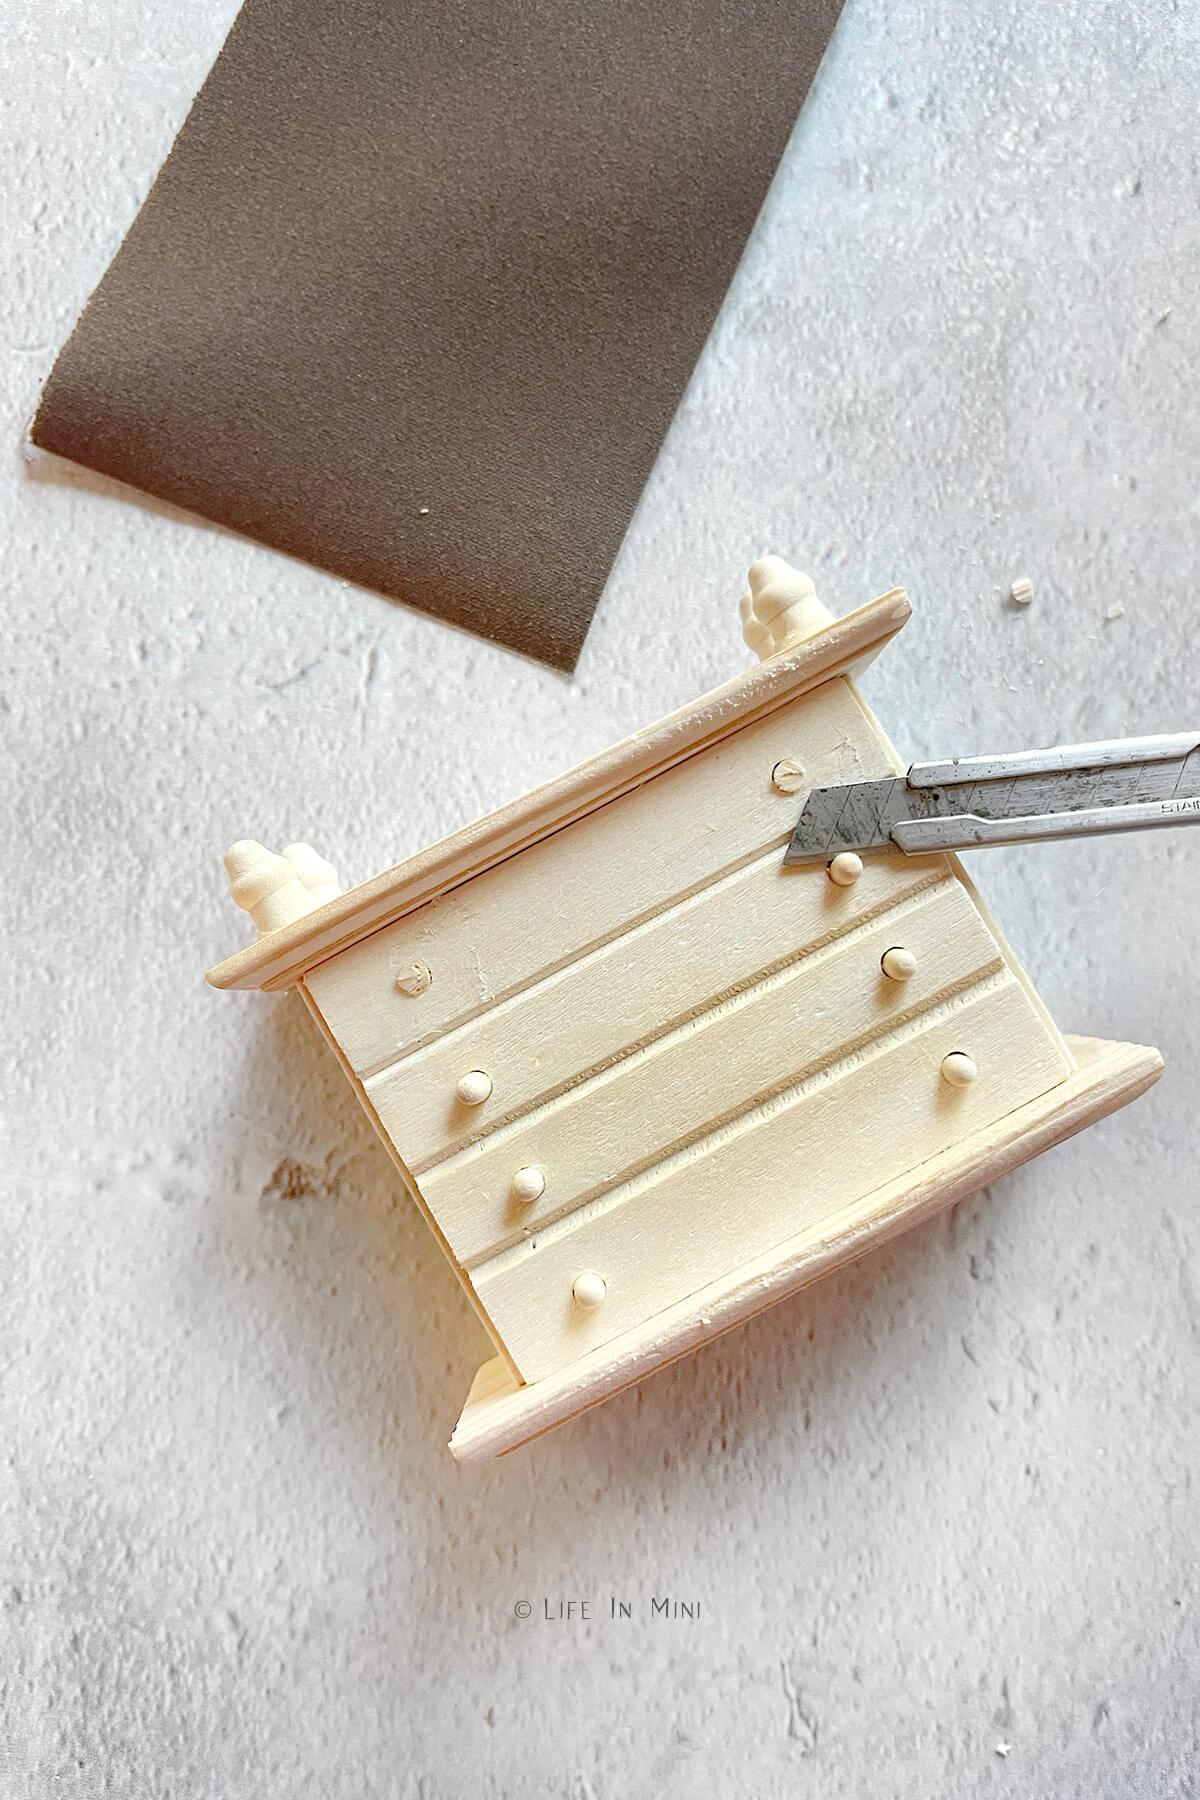
2. Paint the base coat of your dresser. If you are making an antique look, add multiple layers of paint including streaks of white or black, depending on the look you are going for.
If adding crackle affect, apply crackle medium over parts of your dresser. When dry, add a final layer of paint over it. You can also sand parts of the paint off to show bottom layers of paint to mimic weathering.
It took me a variety coats of paints to get the color I wanted. At first, it turned out more blue which didn’t match well with the floral transfers I was going to use. A little yellow-green solved that problem.
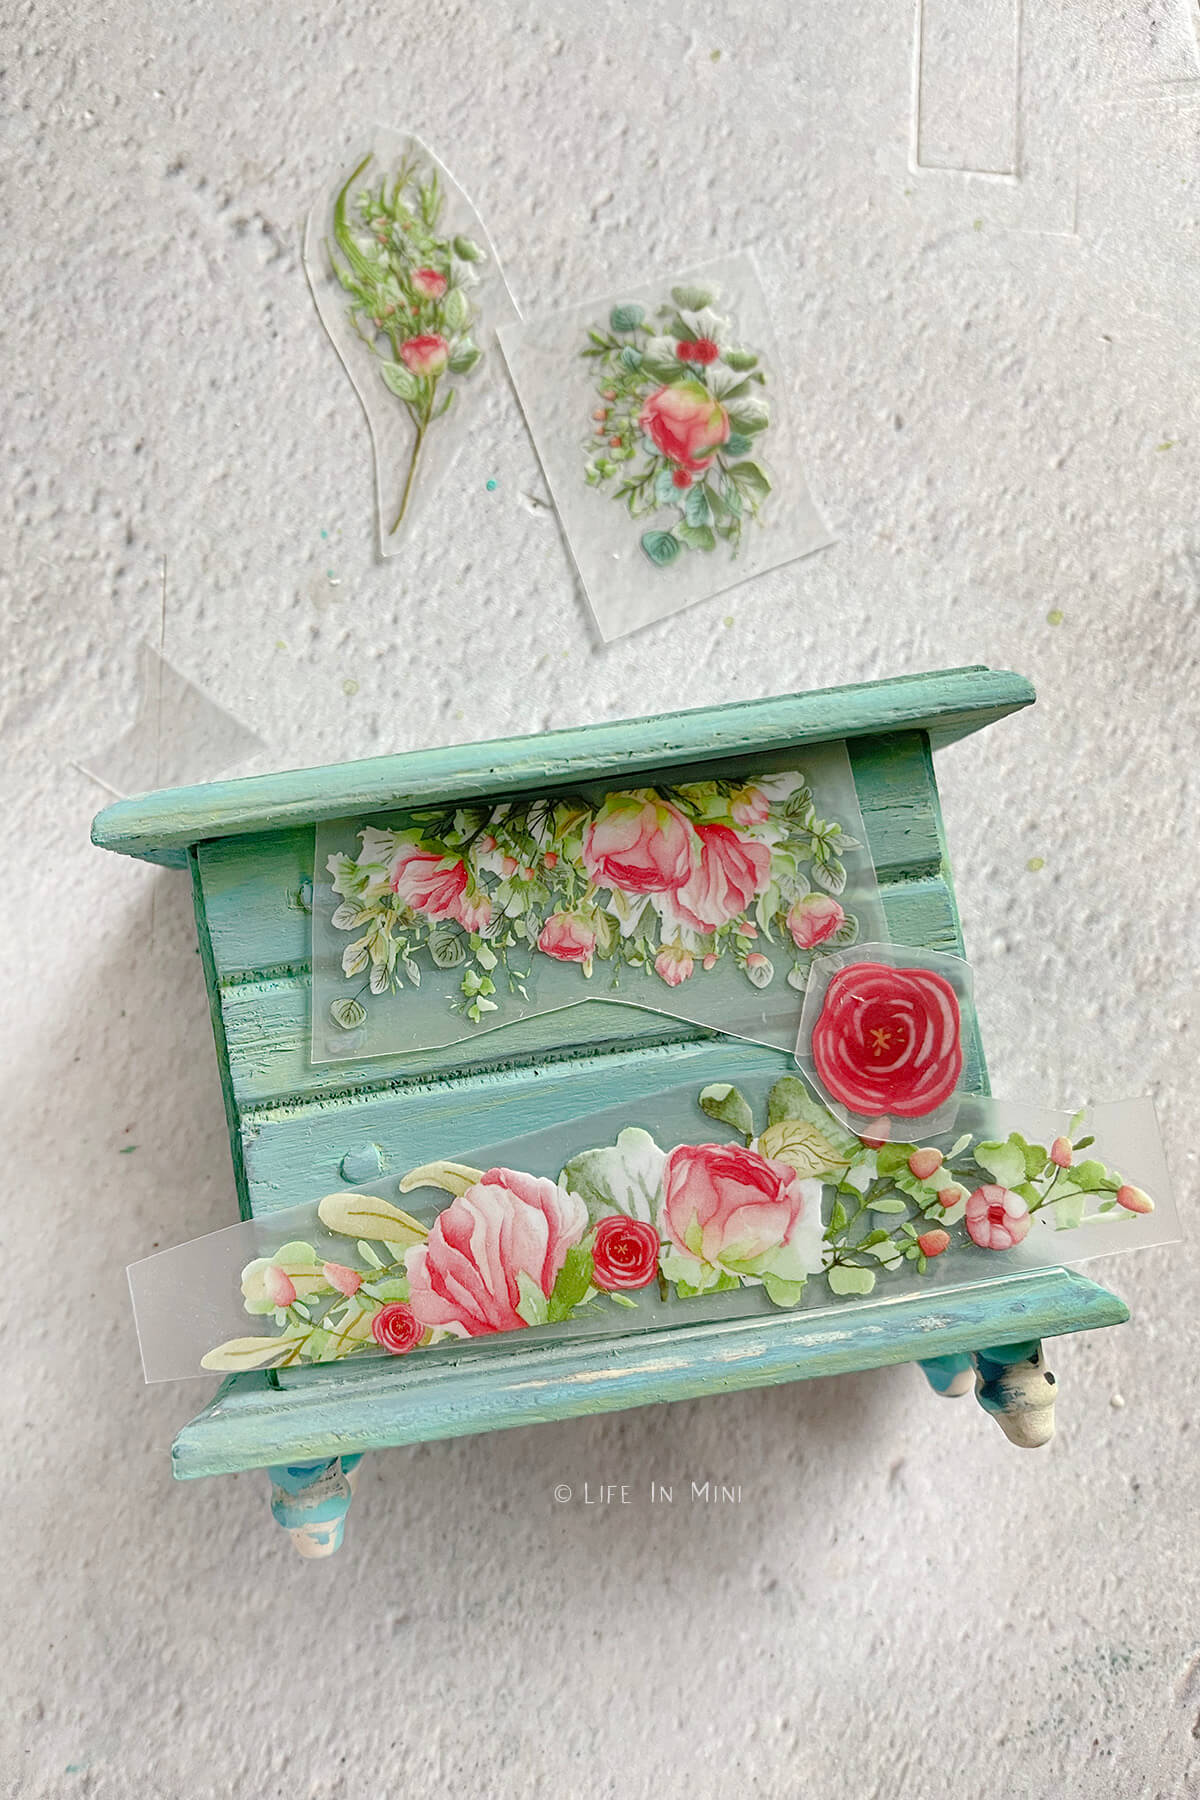
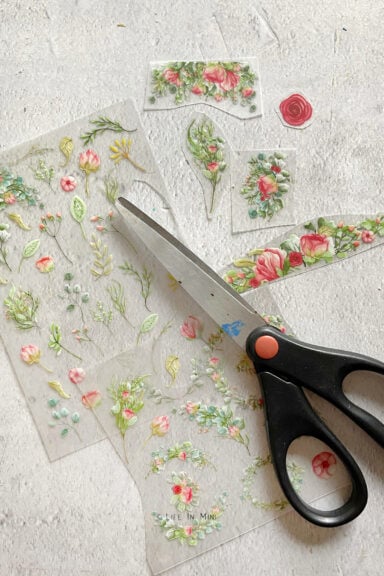
3. When the paint is completely dry, cut out the rub on transfers you are using. Position them on your furniture piece to make sure they fit properly.
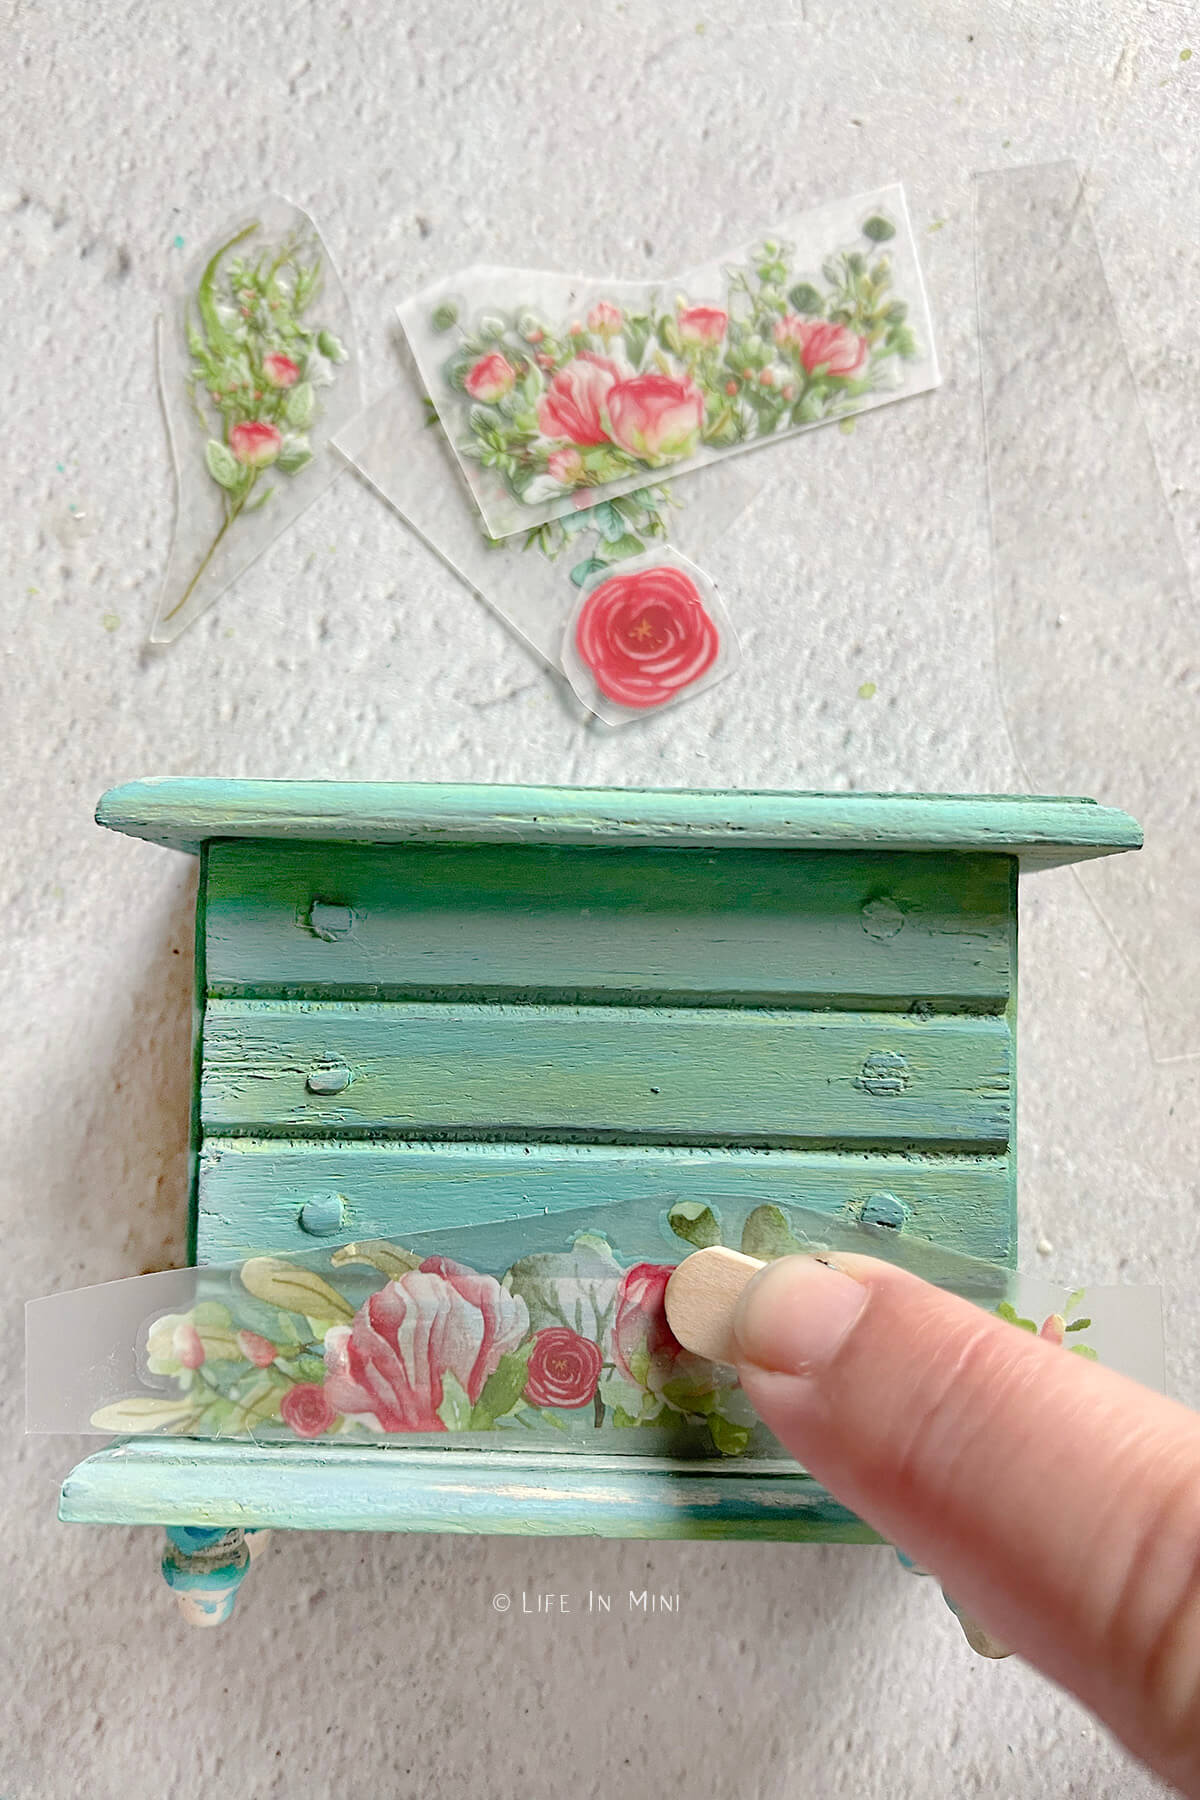
4. Peel the backing from your rub on transfer and use your popsicle stick to rub and press your images onto your furniture piece. Remember to press into the grooves, if you want, or only rub the image onto the drawers.
Gently peel the acetate from your rub on to make sure the image has completely transferred. If not, continue rubbing until done. These particular rub ons transferred really easily.
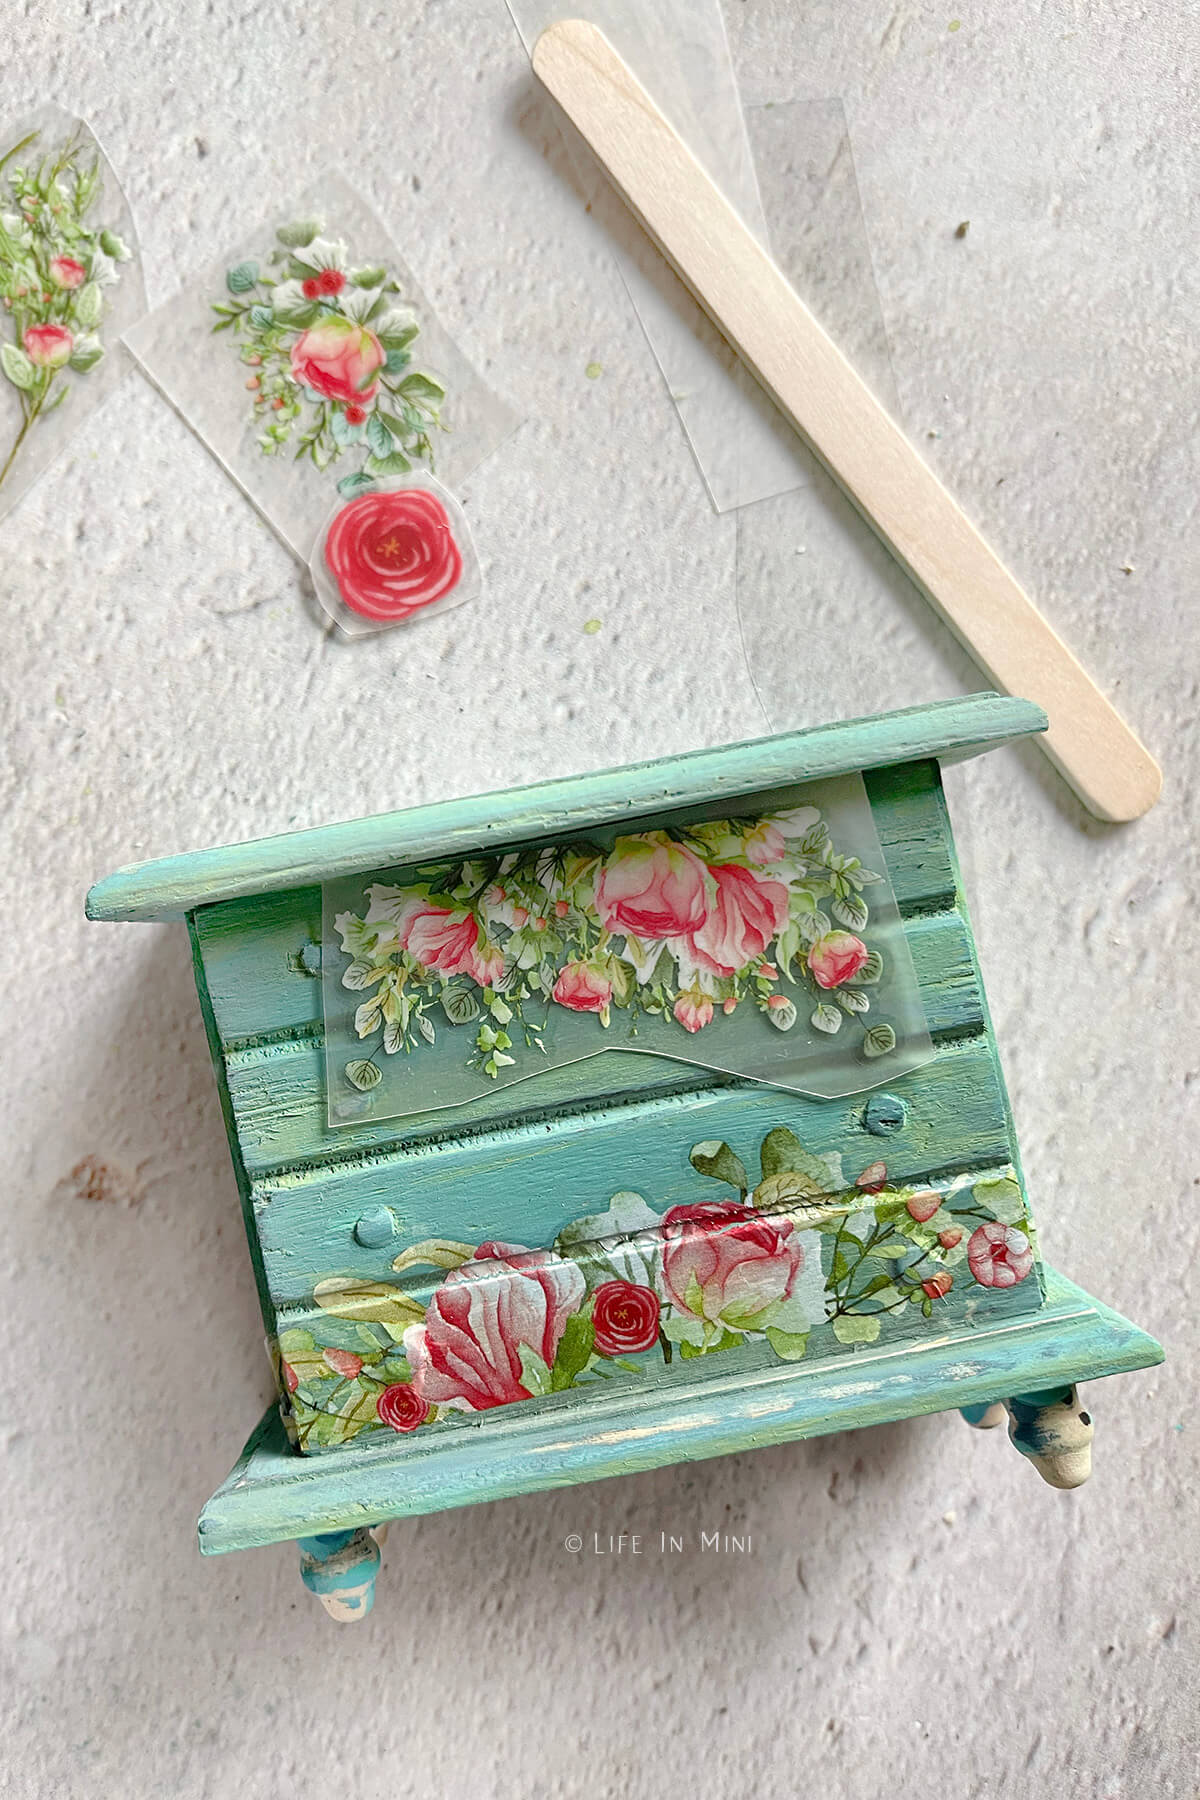
5. If using multiple images, continue adding and rubbing the images onto your furniture piece.
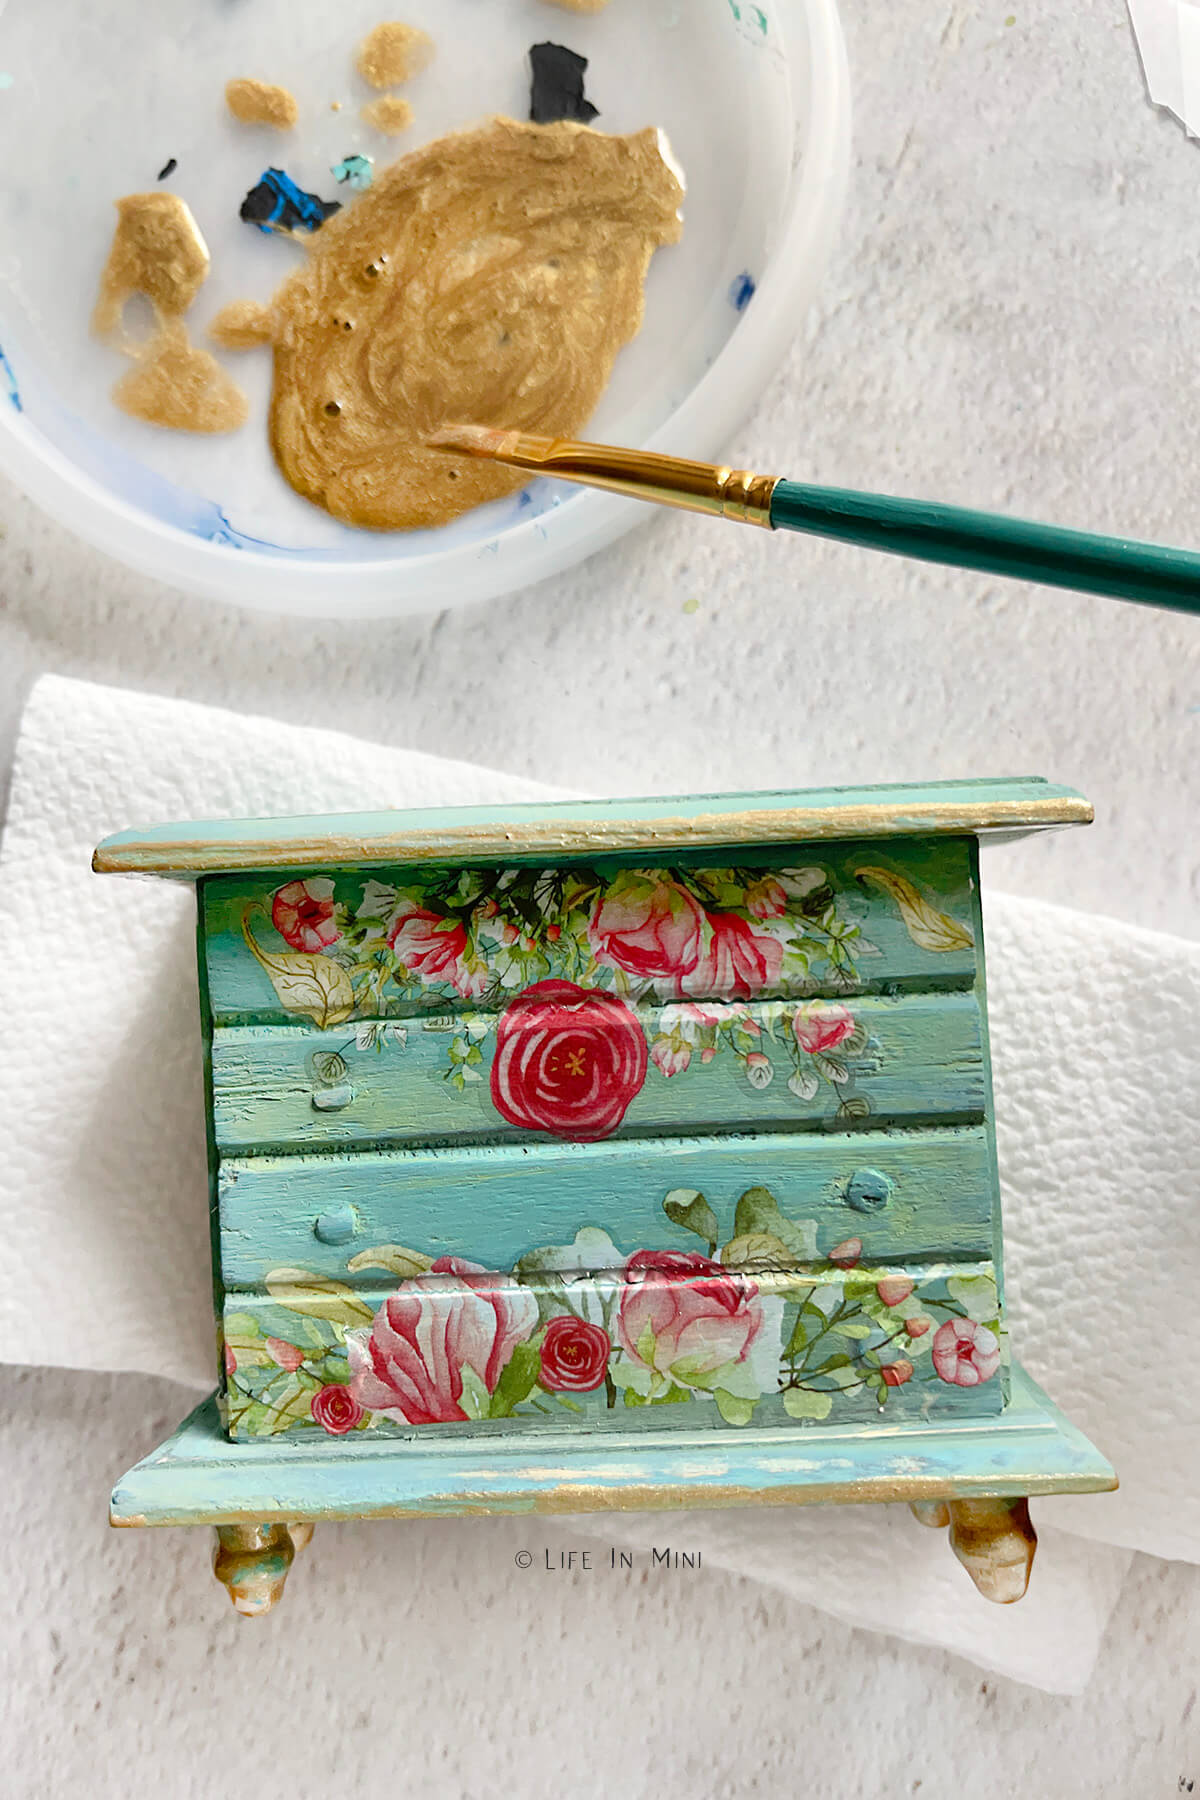
8. My dresser needed a little more glam so I added a little bit of gold paint on the edges and feet. I lightly brushed gold paint along the rest of the dresser.
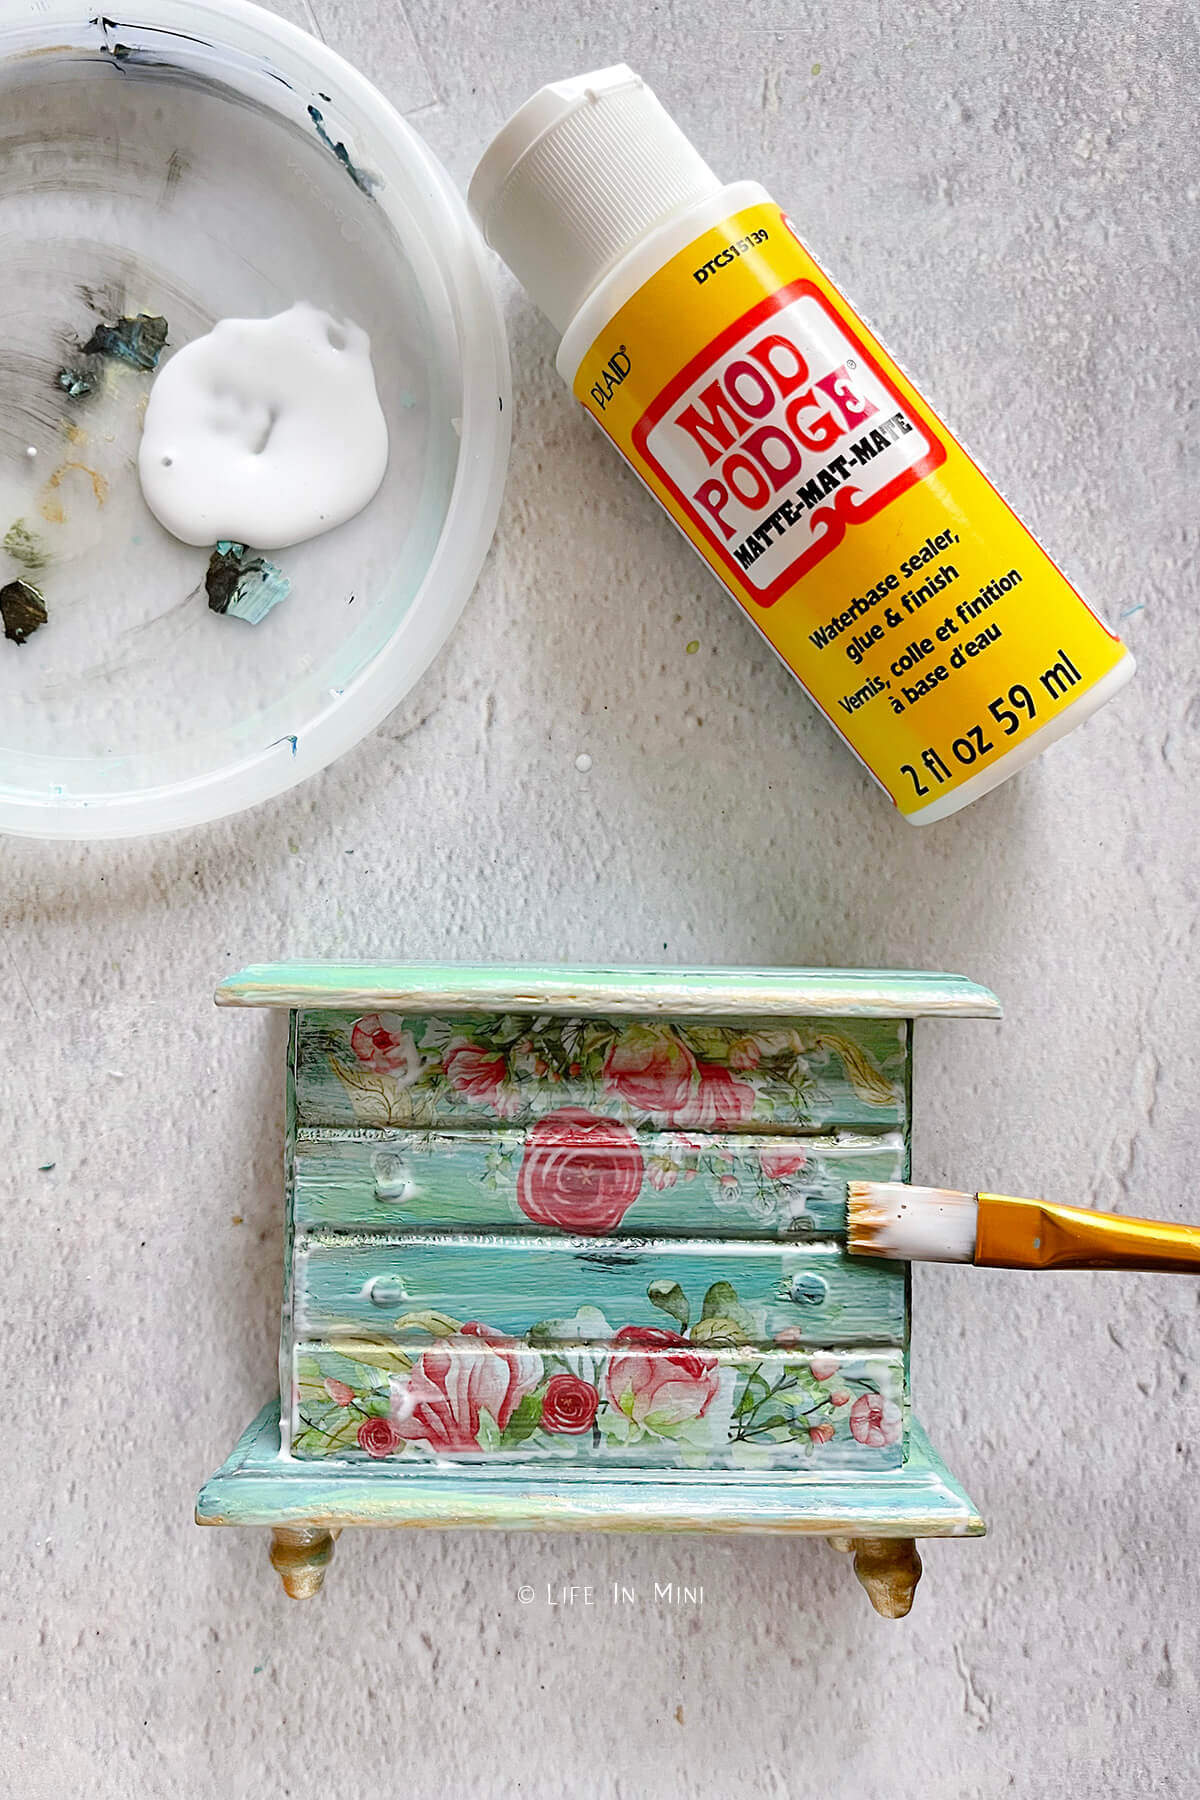
8. Once you are happy with the look of your dresser, it is time to add a sealant. I added a layer or two of Mod Podge, but you can also use other types of clear acrylic coating.
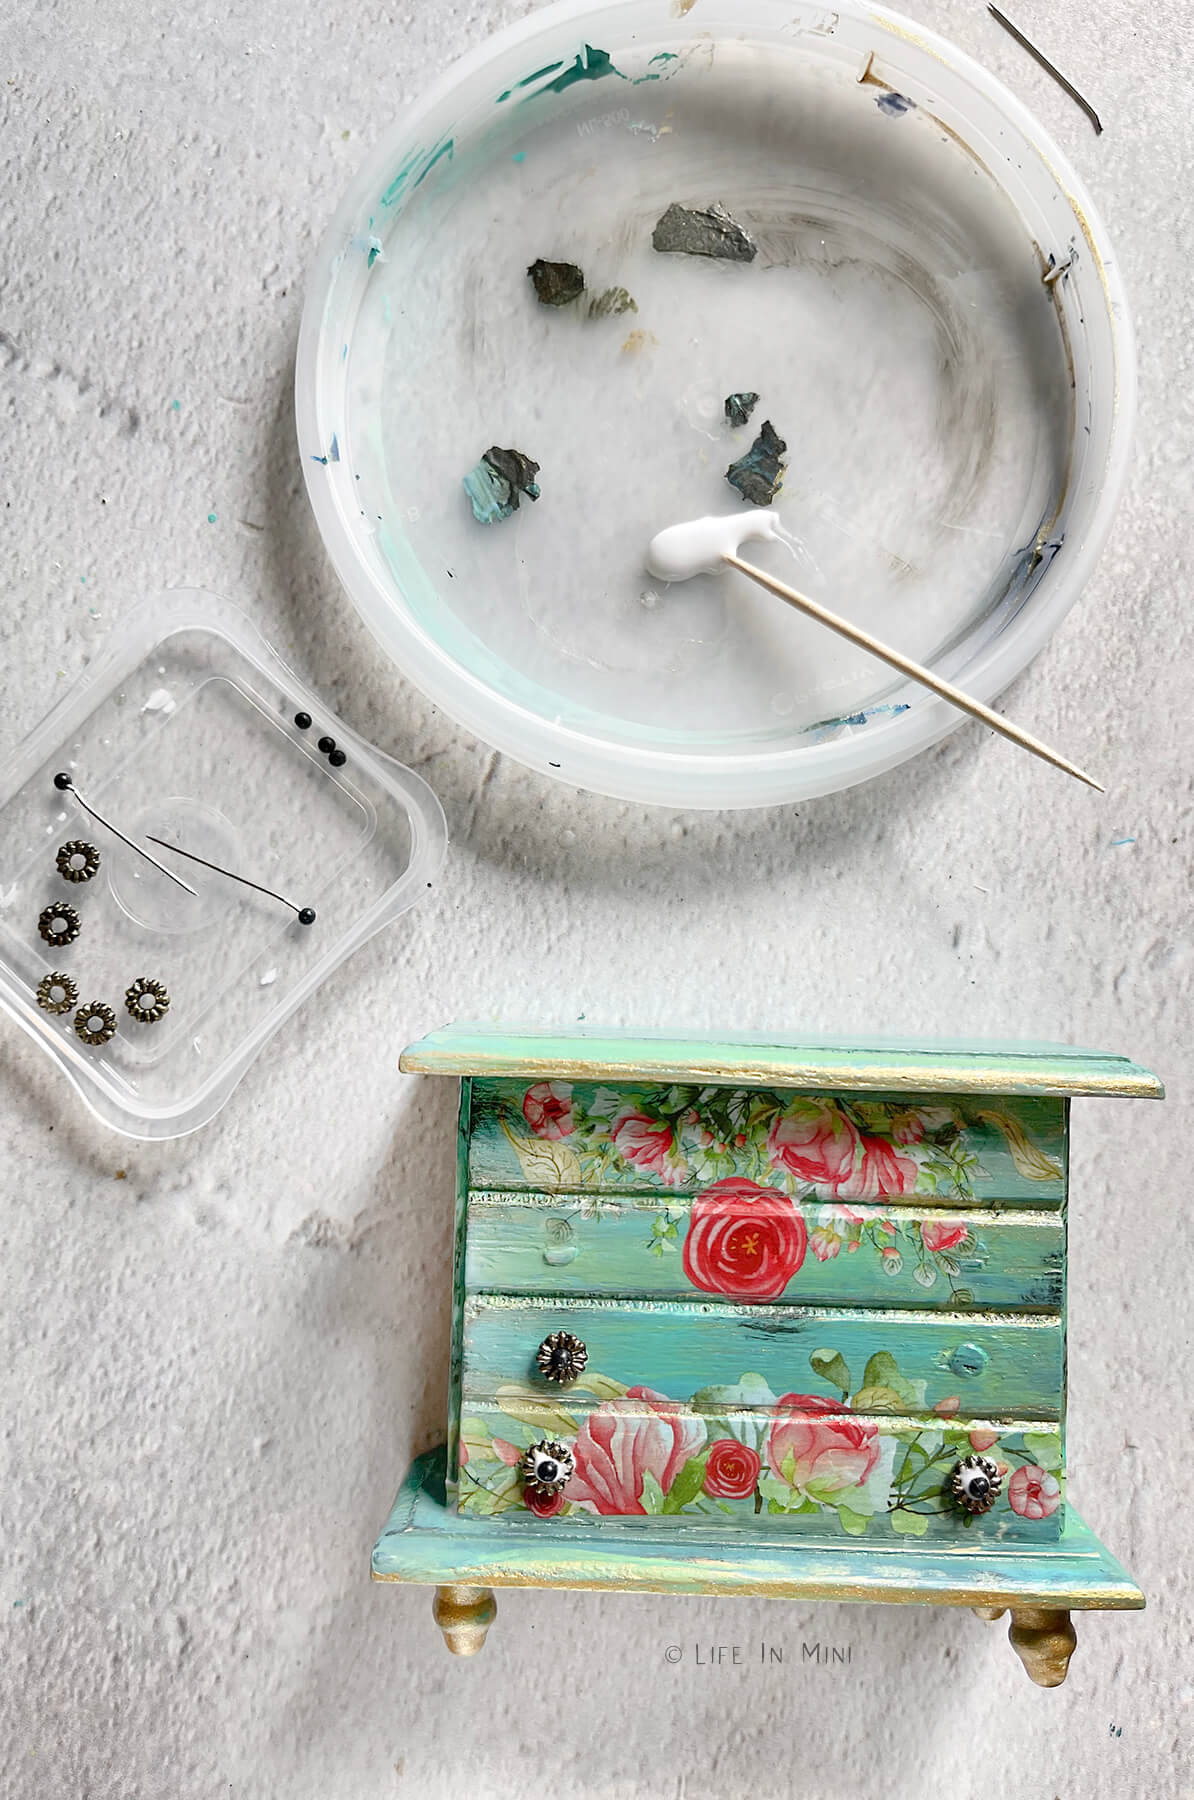
9. If you didn’t destroy the drawer knobs when you removed them, you can paint them and glue them back on. You can also use beads and jewelry pieces for drawer pulls.
I used some flat golden beads and the ball tip of a straight pin that I cut off. The balls were all black so after I glued them on, I added a dab of gold paint to them.
Laura’s Top Pick:
I fell in love with the transfer floral designs of these rub-on transfers. They come in a variety of designs and colors, plus they are small enough for miniatures.
Project tips and FAQs
Can I just say how in love I am with this dresser and how it turned out?! I seriously wish I had this for real in my own house. Perhaps I’ll try my hand at refurbishing a real dresser on day?
The beauty of this project (besides making some really beautiful!) is that if you mess up, you can paint and start all over again. And if you really mess up badly, you can simply buy another dresser at The Dollar Tree for a whopping $1.25.
I priced this project at less than $5 because despite receiving 6 sheets of rub on transfers for $12, you only use a few pieces for one piece of furniture. Plus, you can find rub on transfers at The Dollar Tree for yes, only $1.25.
Paint and Mod Podge most crafters already have on hand and it lasts for many projects. The only other ‘big’ cost are beads, and you can go fancy or simple if you want.
So you see, this might look like a custom fancy expensive dollhouse dresser, but it is quite cheap.
After I finished this piece, my daughter and I hit our local Dollar Tree and found more wood dollhouse furniture available there. It really is hit or miss with inventory, so I grabbed a whole bunch and plan on sharing more ways to upgrade these pieces of furniture.
Most wooden dollhouse furniture is made with basswood. It has fine grain and is strong. Balsa wood can be used for some furniture projects, but it is a very soft and light wood that crumbles easily. Most craft stores sell basswood by various sheets of thickness.
The most popular dollhouse size, or scale, commonly found in toy stores is 1:12. Some smaller dollhouses can also be found in 1:24 and even 1:48. If you want your dollhouse for your 1:12 dollhouse, this scale is 1:144. Dolls like barbies are scaled larger and are sized at 1:6.
If you are enjoying my blog, why not sign up for my newsletter so you won’t miss out on the mini adventures!
Decorating Dollhouse Dresser with Rub On Transfers
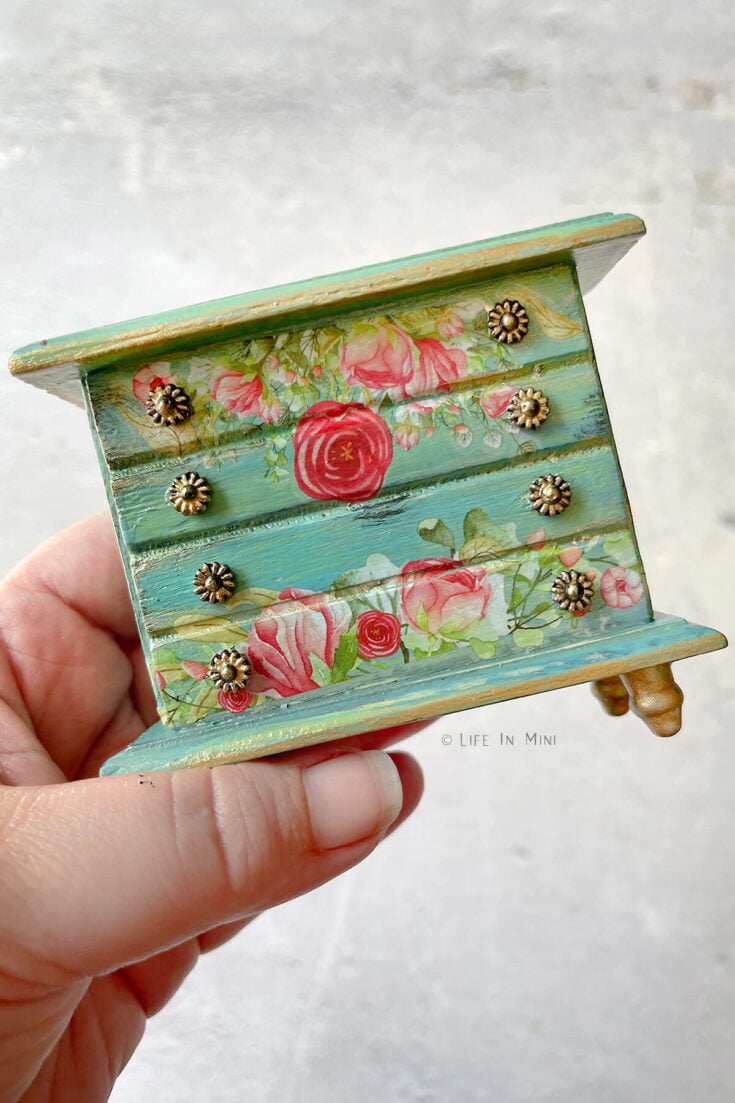
Take your simple dollhouse dresser from drab to fab by using rub on transfers This method can be used for any scale of miniatures you are working with, like 1:24, 1:12 and 1:6.
Materials
- Dollhouse dresser or cabinet
- Assorted paints
- Crackle medium (optional)
- Rub on transfers
Tools
- Popsicle stick
- X-acto blade
- Paint brushes
- Sand paper
Instructions
- Cut off the drawer pulls from your dresser and sand the entire piece well. You don’t HAVE to cut these off. If you don’t, you just need to be super careful while rubbing the transfer on the dresser and around the drawer pulls.
- Paint the base coat of your dresser. If you are making an antique look, add layers of paint including streaks of white or black, depending on the look you are going for.
- If adding crackle affect, apply crackle medium over parts of your dresser. When dry, add a final layer of paint over it. You can also sand parts of the paint off to show bottom layers of paint to mimic weathering.
- When paint is completely dry, cut out the rub on transfers you are using. Position them on your furniture piece to make sure they fit properly.
- Peel the backing from your rub on transfer and use your popsicle stick to rub and press your images onto your furniture piece. Remember to press into the grooves, if you want, or only rub the image onto the drawers.
- Gently peel the acetate from your rub on to make sure the image has completely transferred. If not, continue rubbing until done. This particular rub ons transferred really easily.
- If using multiple images, continue adding and rubbing the images onto your furniture piece.
- My dresser needed a little more glam so I added a little bit of gold paint on the edges and feet. I dry brushed gold paint along the rest of the dresser.
- Once you are happy with the look of your dresser, it is time to add a sealant. I added a layer or two of Mod Podge, but you can also use or another clear acrylic coating.
- If you didn’t destroy the drawer knobs when you removed them, you can paint them and glue them back on. You can also use beads and jewelry pieces for drawer pulls.
- I used some flat golden beads and the ball tip of a straight pin that I cut off. The balls were all black so after I glued them on, I added a dab of gold paint on them.
Notes
This technique can be used for a variety of dollhouse scales. You can also use furniture made from wood, plastic or metal.
You can find rub on transfers online, at craft stores and at your local dollar or 99¢ cent stores.
PS If you try this craft, why not leave a star rating in the direction card right below and/or a review in the comment section further down the page? I always appreciate your feedback.
You can also follow me on Pinterest, Facebook or Instagram. Sign up for my eMail list, too!

Lisa jones says
I love the dresser and your instructions are easy to follow! my sister gave me a cute little bungalow type unfinished dollhouse for Christmas and I’ve started with some pnt and wallpaper (actually scrapbook paper I already had). she’s given me some dishes,a broom, chickens of course!, and some other accessories. my problem is what size furniture do I get? the 1st floor rooms are 5 in. tall, 2 3/4 in. deep. I know the 1:12 is too large. help? I’ve tried looking it up, but I am confused. I thought maybe just go to craft store and buy some different sizes and see what works best but after looking at prices probably not. I’ve seen patterns that can be purchased also. but I really just am not sure. help please?
Laura says
Hi Lisa-
Sorry for not writing sooner. I didn’t get notified on your comment.
Determining scale can be a challenge. Usually you take the measurements in real life and divide it by 12 (for 1:12) to get what it should measure to for 1/12th scale. For walls, well, as you know houses vary in how tall their walls are.
My 1:12 dollhouse as walls that are 10″ tall. You might have a house that is 1:24 scale since they are 5″ tall (half of a standard 1:12).
Does that make sense?
Now 1:24 scale miniatures are harder to find and most people make it themselves or use a 3D printer. Michaels Craft Stores sells some miniatures of various sizes and although I haven’t measure some of what they have, they seem smaller than 1:12 and could possibly be 1:24.
Although 1:24 scaled miniatures are harder to find, I personally think the compact size of these dollhouses are super cute and easier to collect and store!
I hope that helps.
Laura
Katherine Agall says
Just finished doing my mini dresser and I love it. I order some transfers from, Amazon and they look great on my dresser. I loved your instructions and everything you have shared with me. Thank you so much.
Laura says
Hi Katherine-
This makes me so happy! I am so glad you love what you made.
Laura
Gerry says
Super cute!!! I love it! My granddaughter and I are redoing my old dollhouse and your ideas will help. I have a lot of old ugly furniture we can fix up! Thanks!
Laura says
Hi Gerry-
What a fun project to do together! I can’t wait to see what you both come up with.
Laura
Dawn says
I finally had a minute to try this and I’m so thrilled with the result. Your instructions were perfect. Thanks so much for sharing.
Laura says
Hi Dawn-
I’m so glad you are happy with what you made! I’d love to see what you created.
Laura