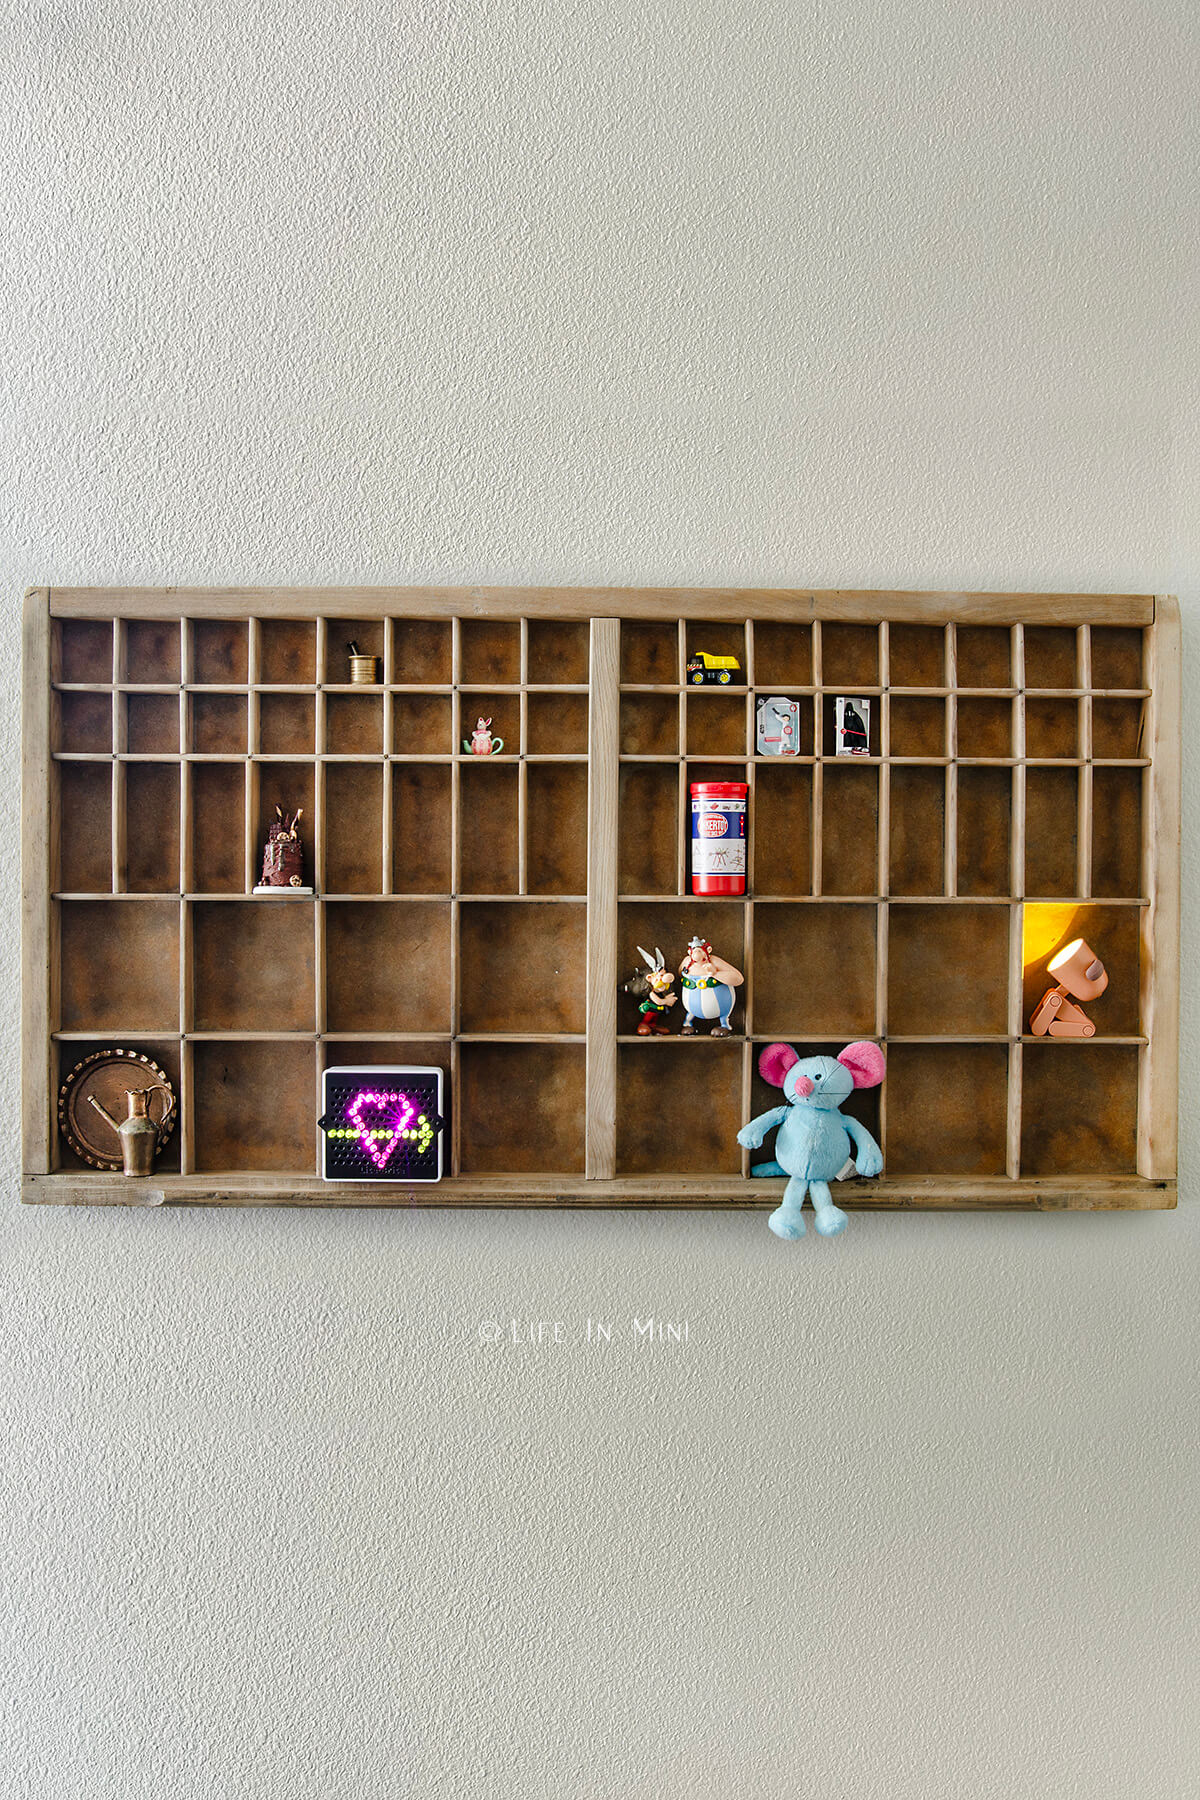
I share my tips on how to bleach wood so you can get any piece of wood furnishings a light, natural and faded look. I used this technique on my coffee table and this vintage printers drawer.
I don’t have a dollhouse DIY project to share in this post, but I do think you DIYers will like this next tutorial.
The process of finding a new place and moving in has been a crazy roller coaster ride. My daughter and I had about six months in limbo at my parents’ house until we found and moved into our new-for-us townhouse.
Once we moved in and unpacked the bulk of our stuff (another crazy stressful and exhausting time), we had the fun task of decorating our space any way we wanted.
Our old house was larger and filled with dark furniture. We were downsizing now. Although our new home had lots of big windows and natural light (a must for a photographer like me), the dark furniture made the smaller rooms look… well, even smaller.
While spending the past six months watching the real estate market go up and down, I distracted myself on Pinterest, look at different ways to decorate my magical new home. I fell in love with the trend of natural wood tones, having no stain, no gloss, no additional color.
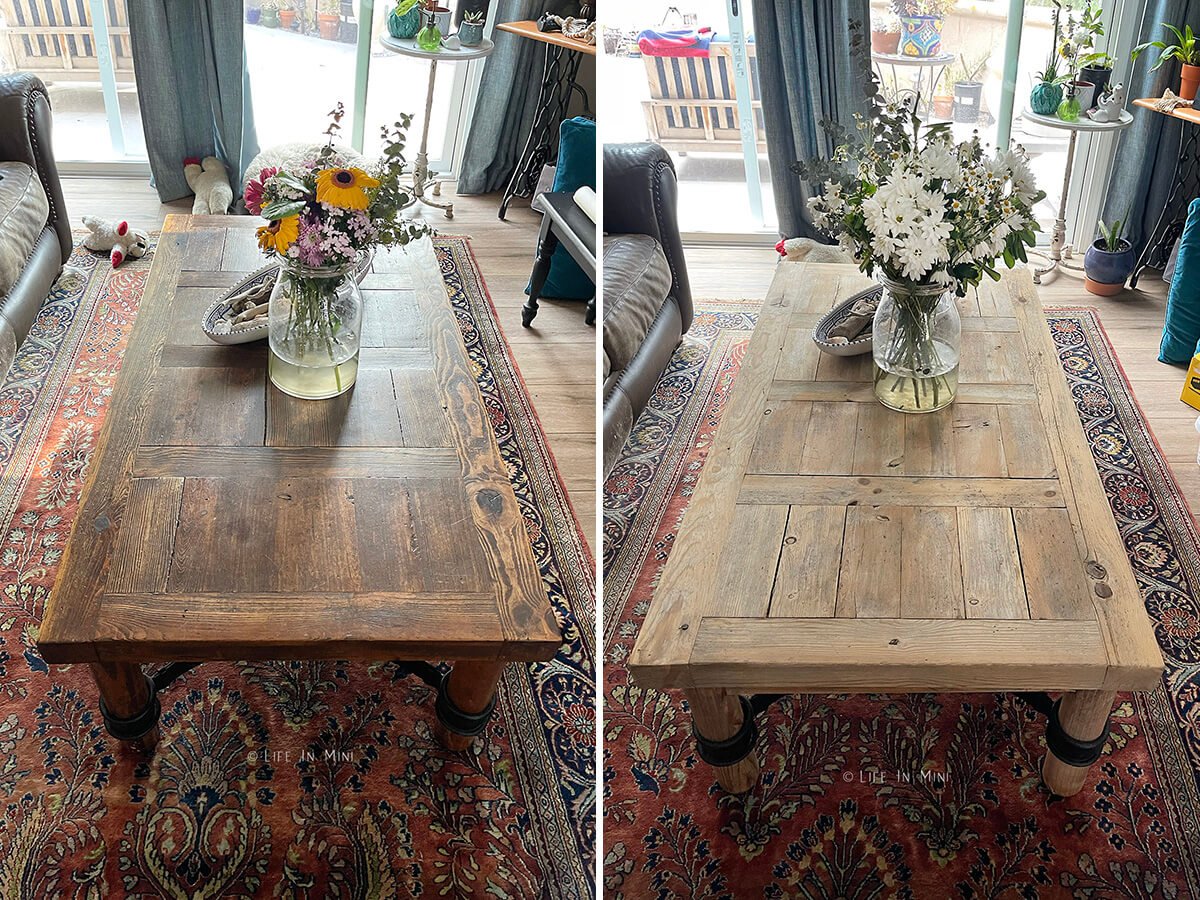
As I found more pieces that I liked, I realized that I wanted to bleach my furniture, to get that light muted wood look. It is not terribly difficult to bleach wood but I decided to start with an easy first piece: my coffee table.
This post contains some affiliate links for your convenience (which means if you make a purchase after clicking a link I will earn a small commission but it won’t cost you a penny more)! Read my full disclosure policy.
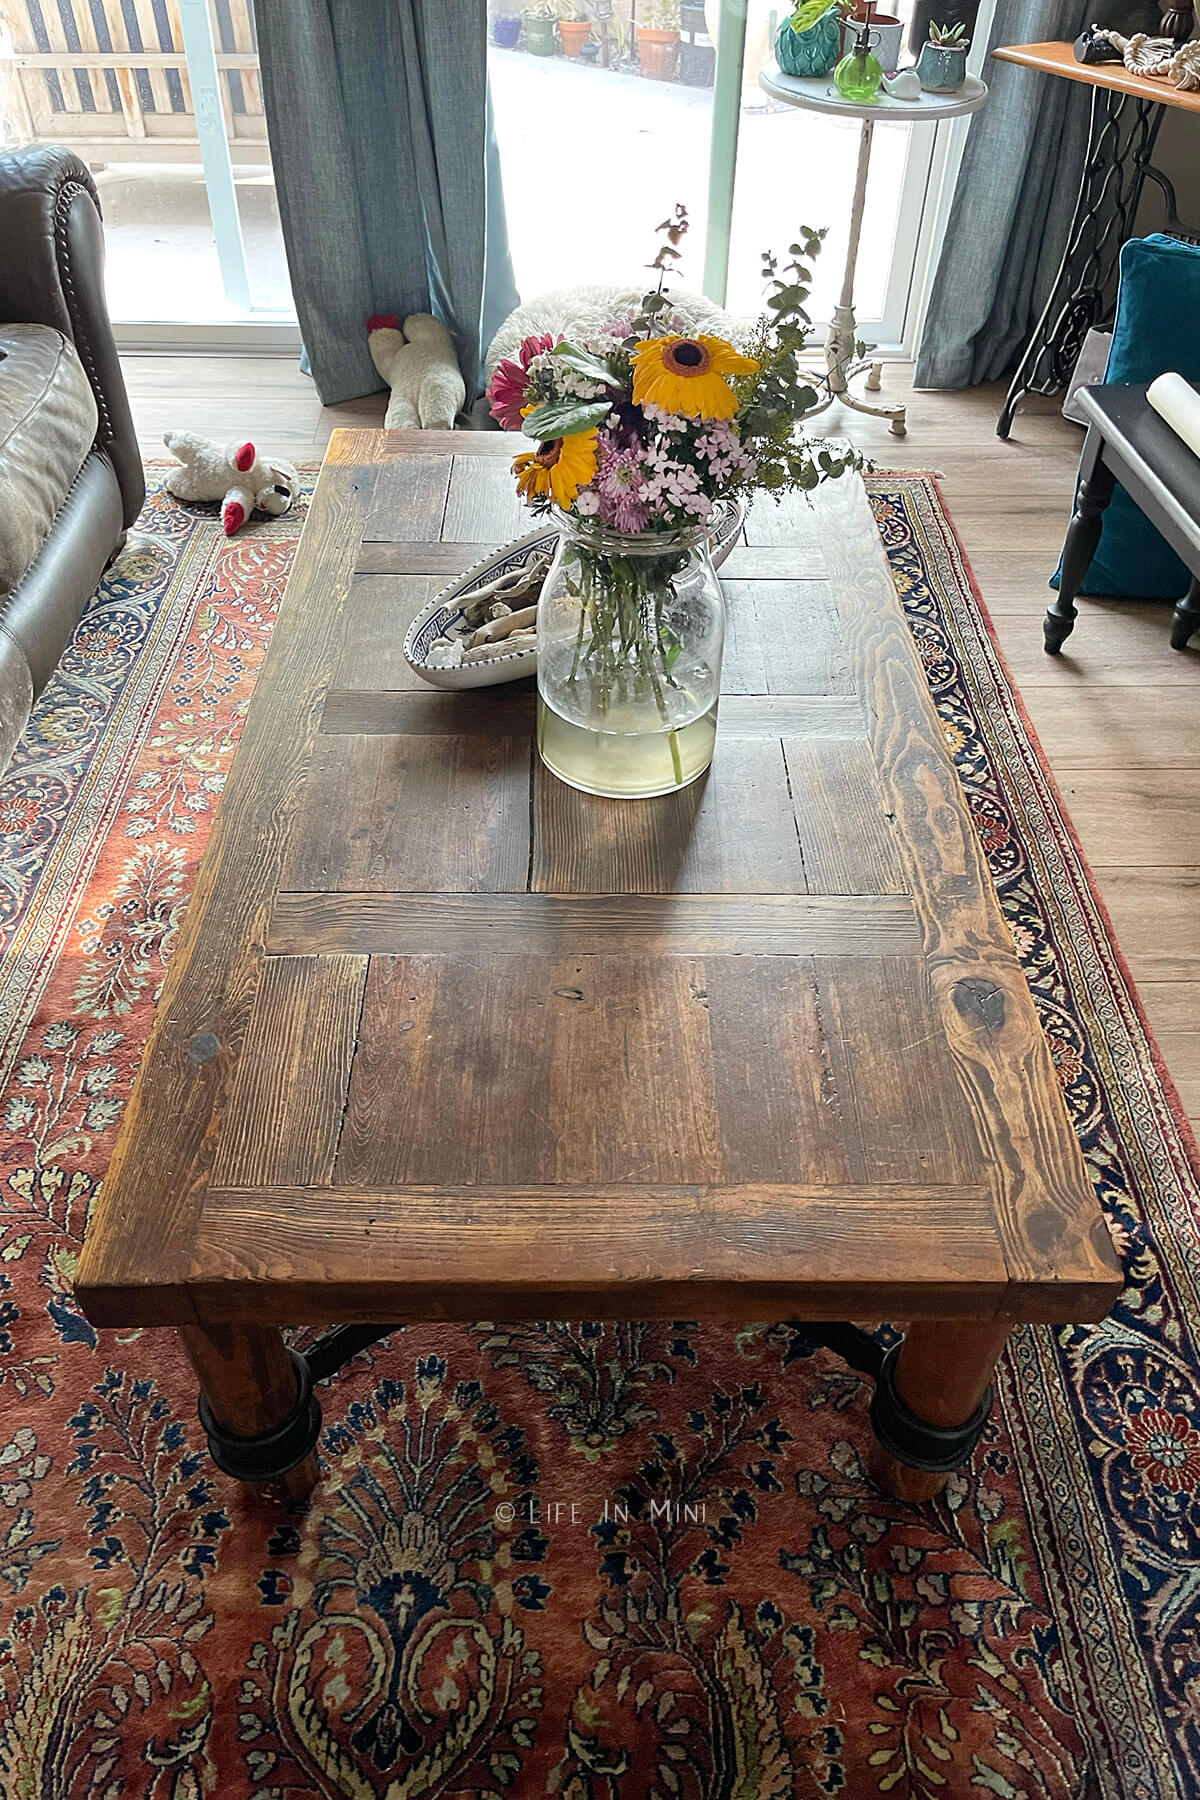
This table had a dark wood stain on it. I figured I would try to remove the stain first, as easily as possible. I learned that Easy Off, yes the oven cleaner, was a cheap and easy way to remove wood stain.
Spray it on, let it sit, scrub it off. It really was easy and the stain did come off!
Although I was able to remove the stain, the wood was not as light as I wanted it. So enter wood bleach, which is made with oxalic acid. This product is specifically for bleaching wood. It is more expensive and stronger than regular bleach. It comes in a granular form, and you mix it with water to use it.
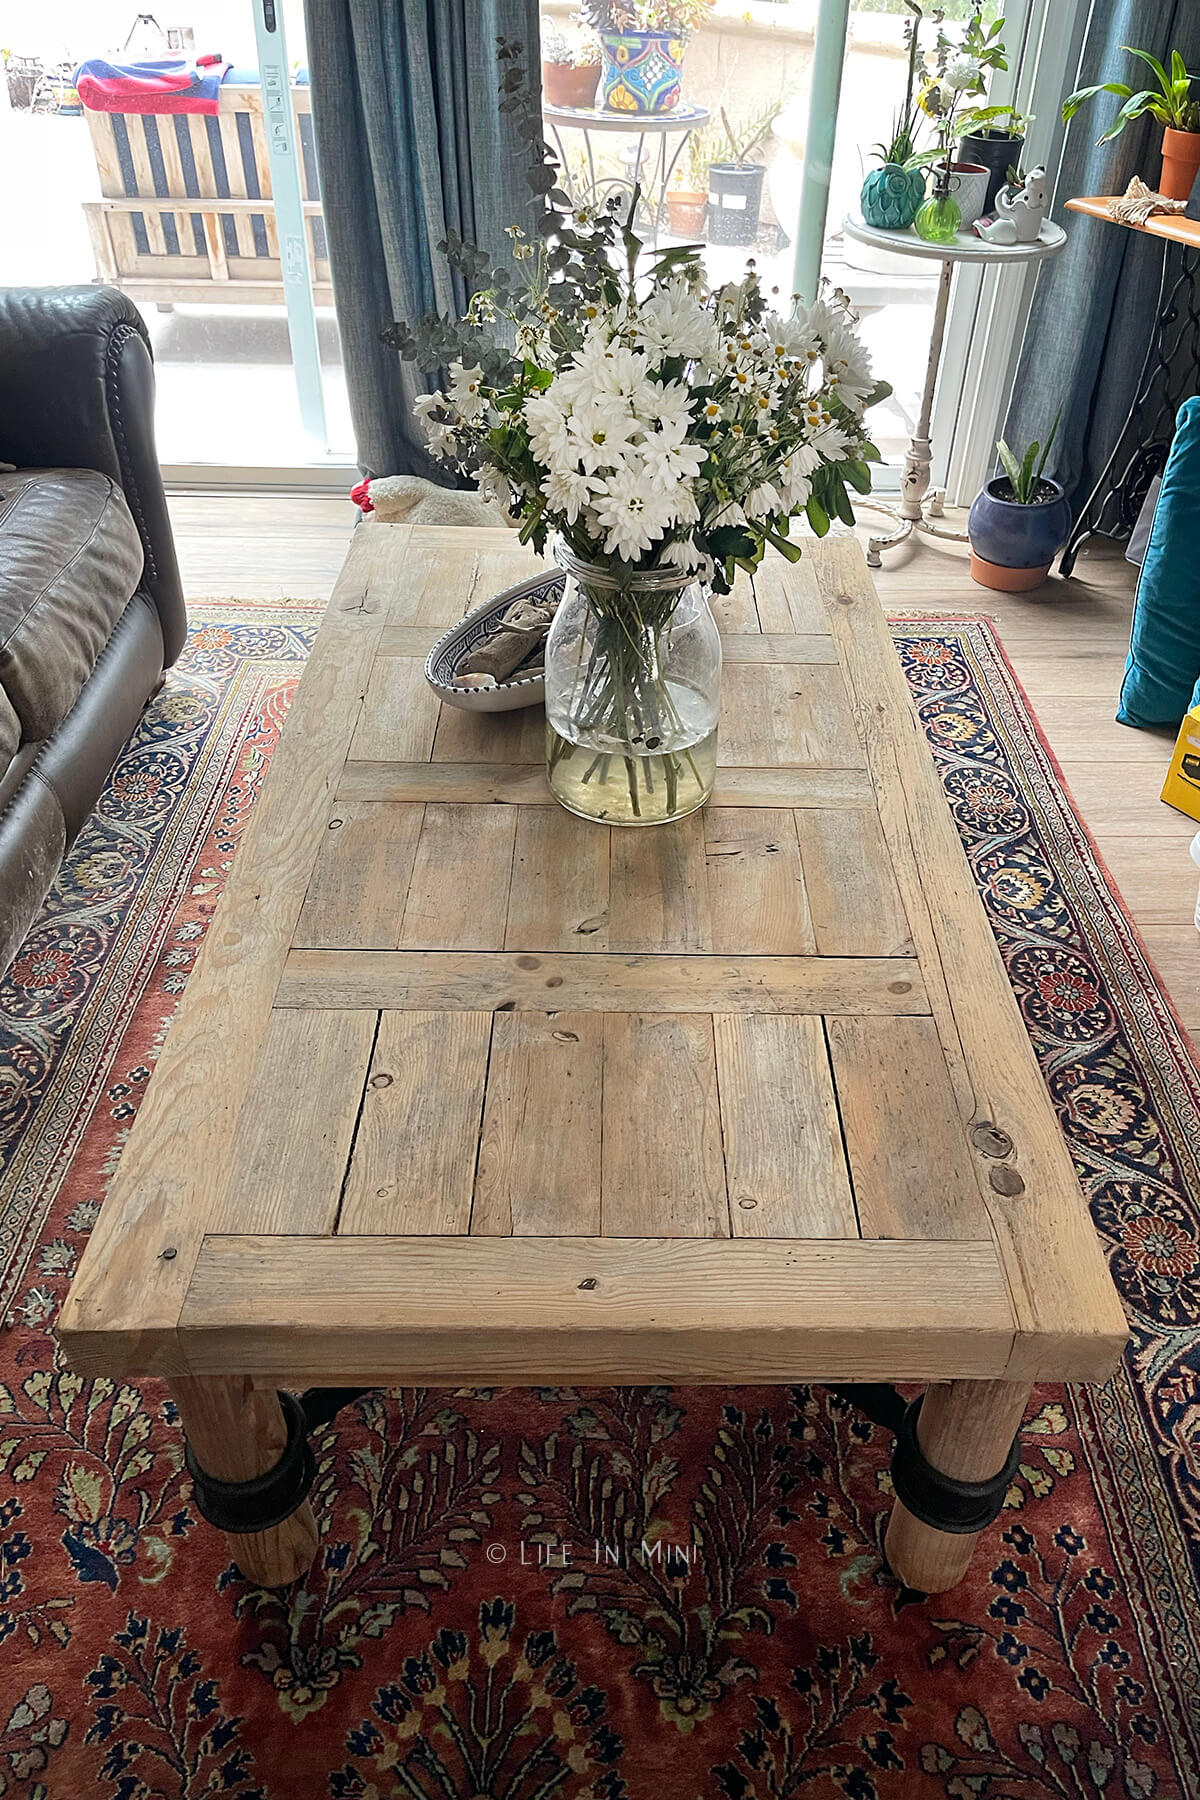
I mixed the solution, sprayed it on the table and after two coats, what a change! I was in love with my new table. And my living room seriously brightened up, too. You can see the whole process this piece went thru in my instagram highlight.
I was so in love with how this project turned out, I quickly looked for the next piece to bleach. Hello, letterpress drawer!
Printers Drawer Display
I bought a vintage printer’s tray YEARS ago on Etsy. My goal was to place my minis in it. One day. Well fast forward 8 years and I am finally ready to do just that.
If you love minis and don’t have the room for a giant dollhouse, this is a great way to display your miniature collection. I had a variety of minis in my collection that weren’t the right scale for my dollhouse.
My printer’s drawer was a great option for these little objects. Have you been collecting those Mini Brands, like I have? Well, they fit beautifully in a letterpress tray.
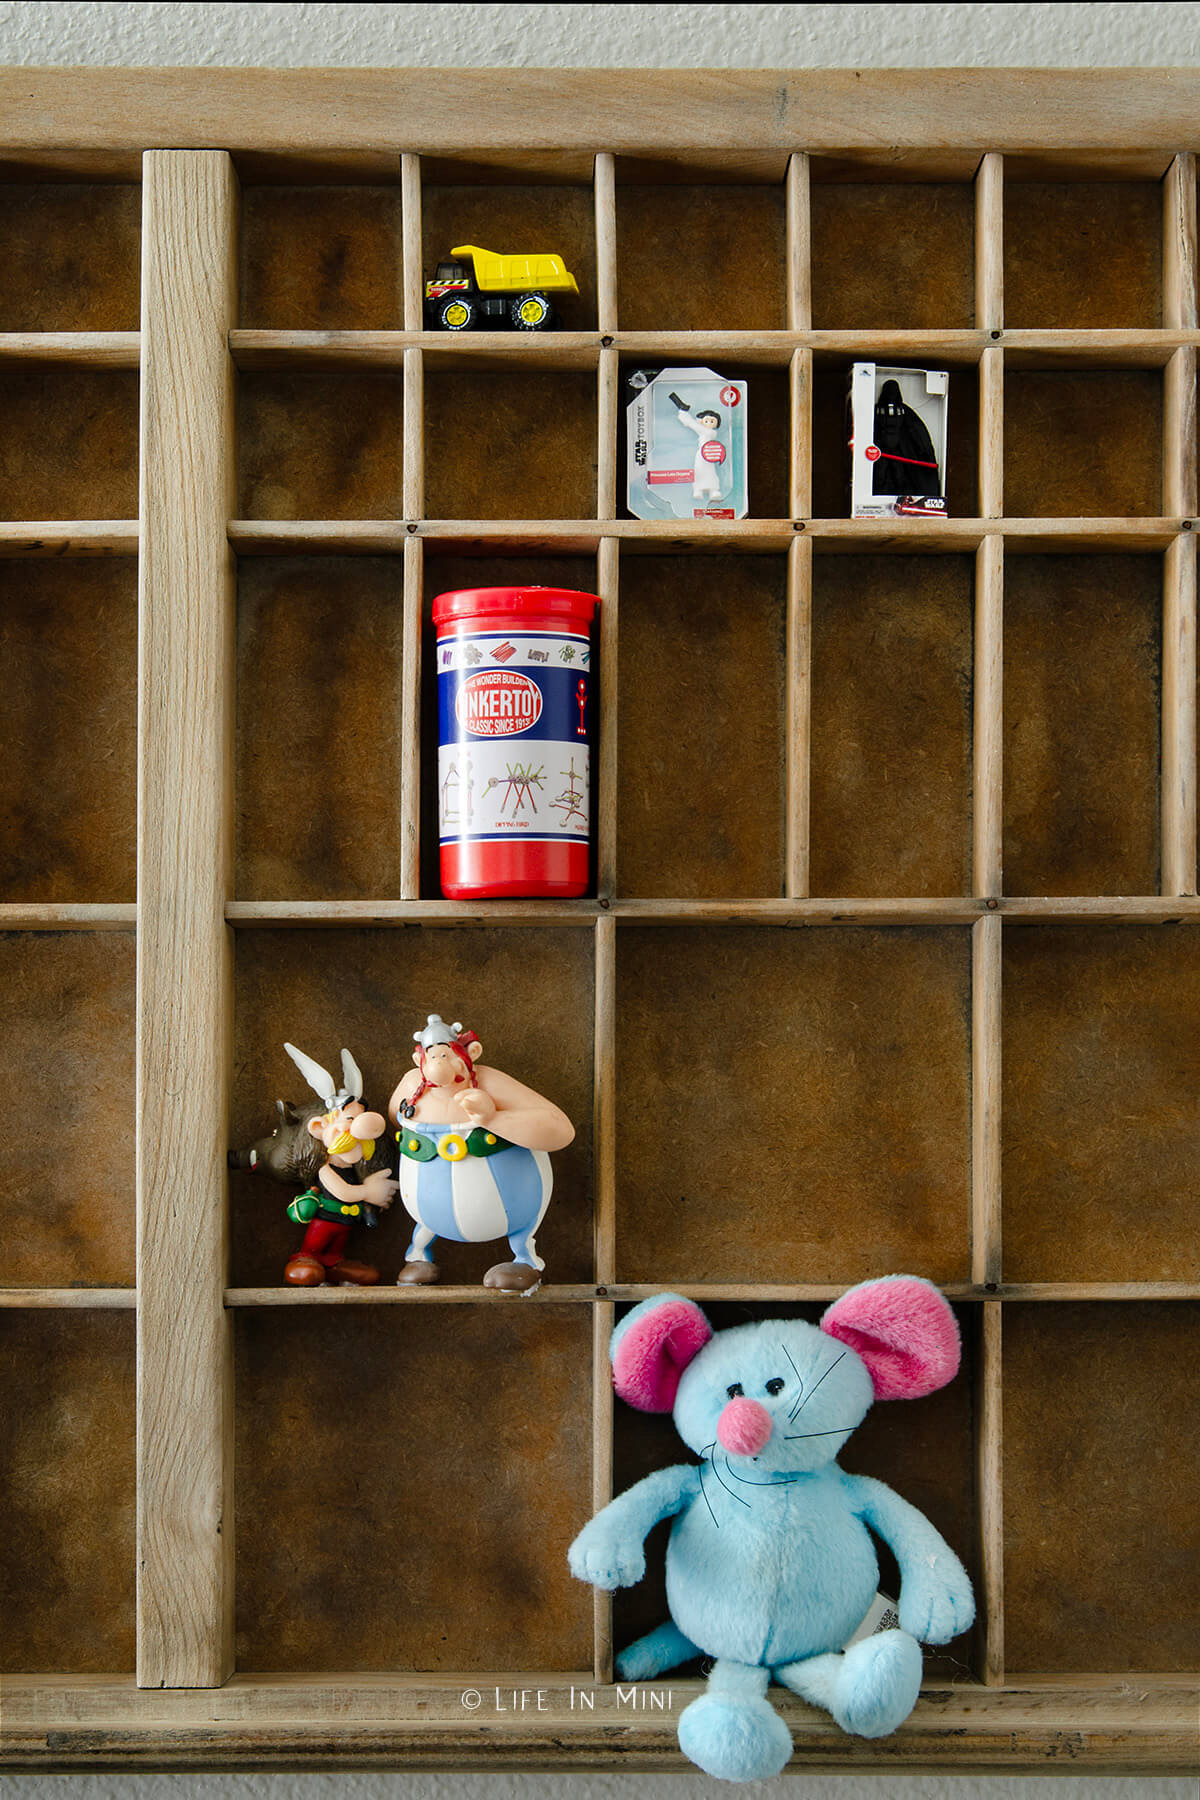
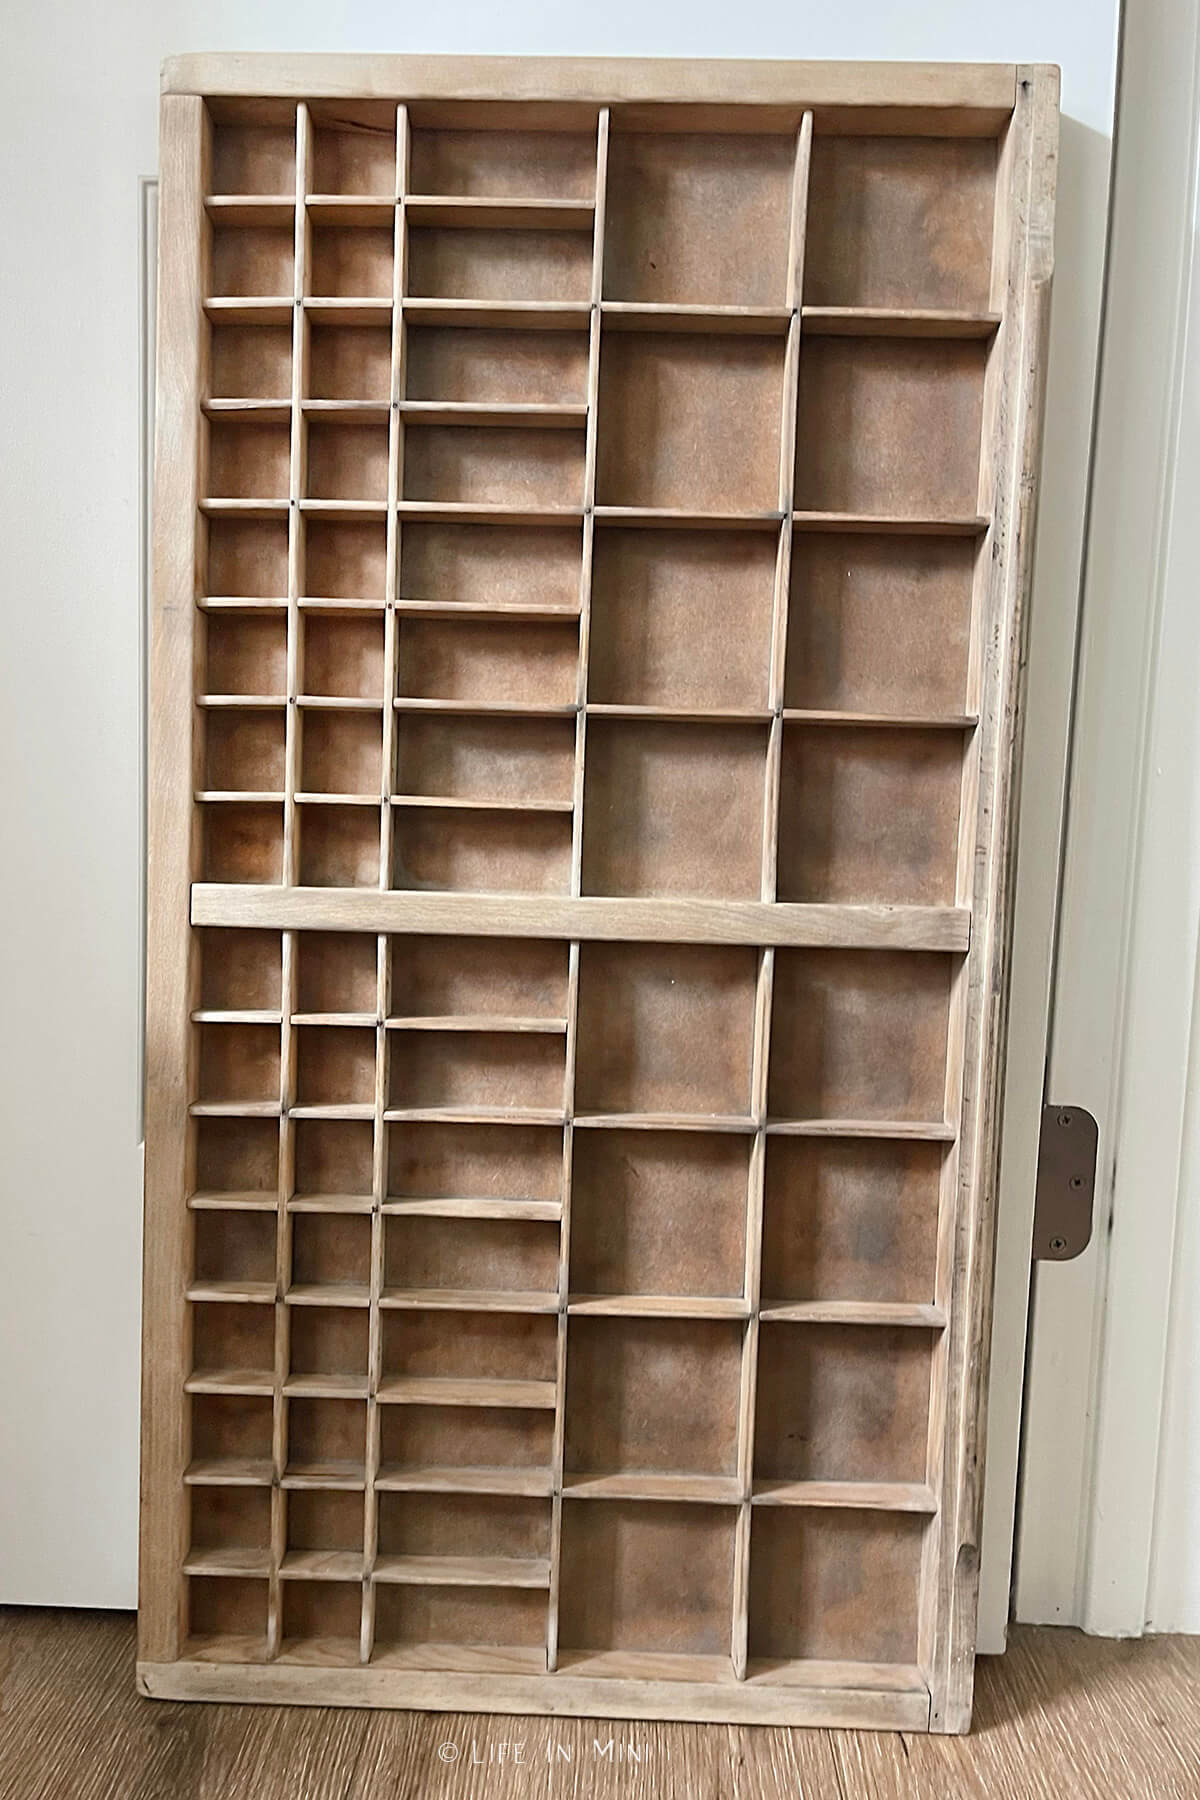
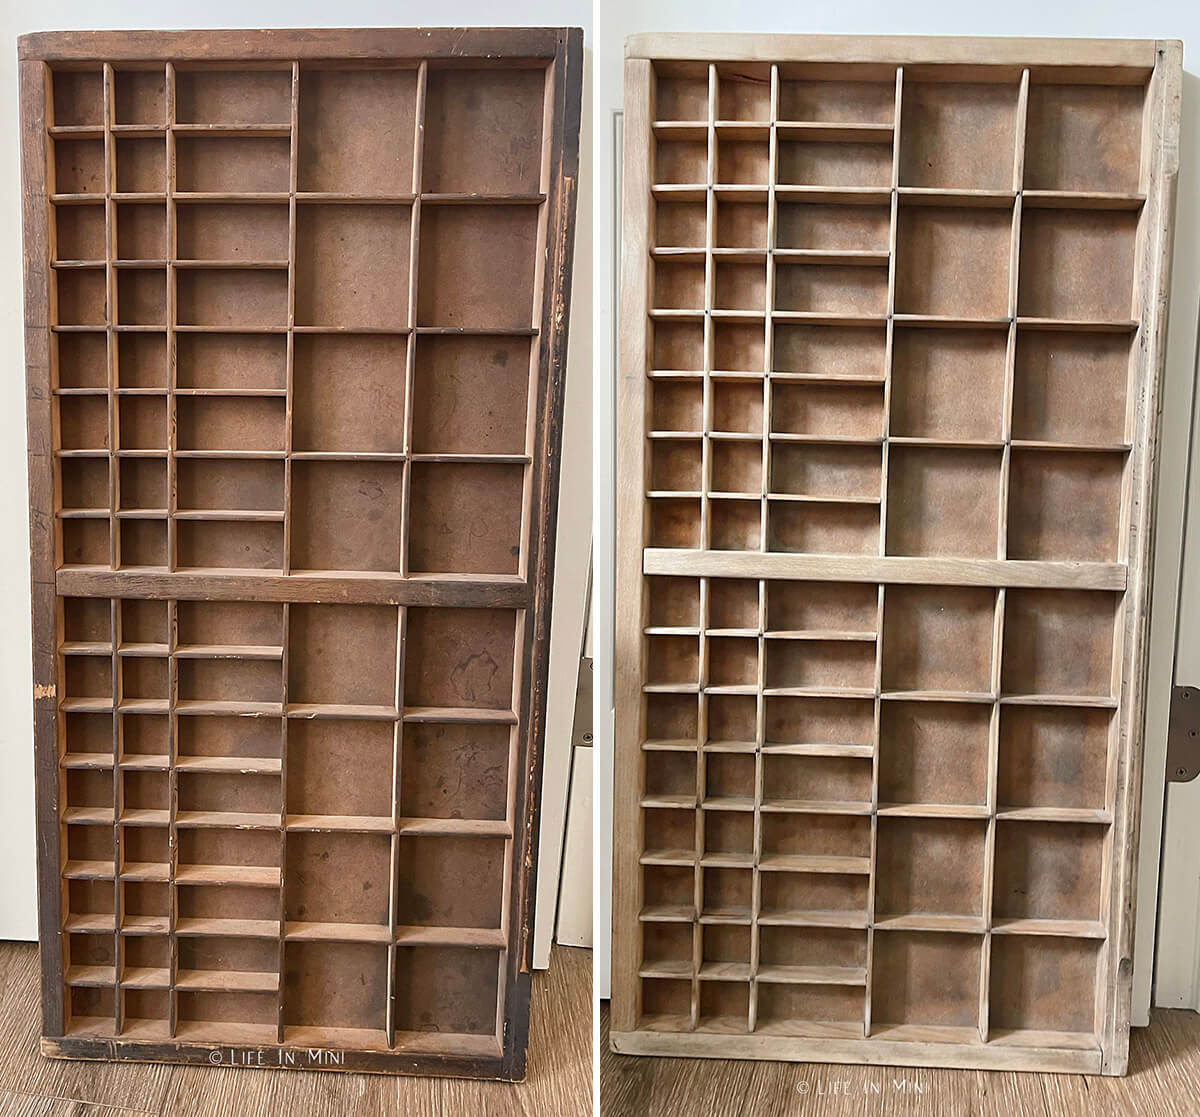
My main pet peeve was the color of the wood. It had an orange tinge to it. Now you can paint the tray white or black or any color you want. But I didn’t want to paint it or cover up the beautiful wood grain. I wanted the faded look that bleach would give.
I didn’t want to use Easy Off on this tray because I was lazy and didn’t want to scrub each square. So I used the wood bleach I used on the coffee table first. It did absolutely nothing.
Second coat. Nope. Third coat? Nada.
A little more research and I learned that I could use diluted household bleach. So I did.
And it worked!
Overall, I brushed the diluted bleach 3 times and left it out in the sun for a week. But the faded look I was looking for was there after the third coat was applied.
Maybe I diluted the wood bleach too much for the printer’s tray, I don’t know. I’m just so very happy with how it turned out.
Although I have not tried using the Easy Off or the bleach techniques on dollhouse furniture, wood is wood. If you have some old wood dollhouse furniture that needs stripping, I hope you try these techniques and let me know how they work for you.
It works on big furniture, so why not little furniture, too?!
Supplies needed
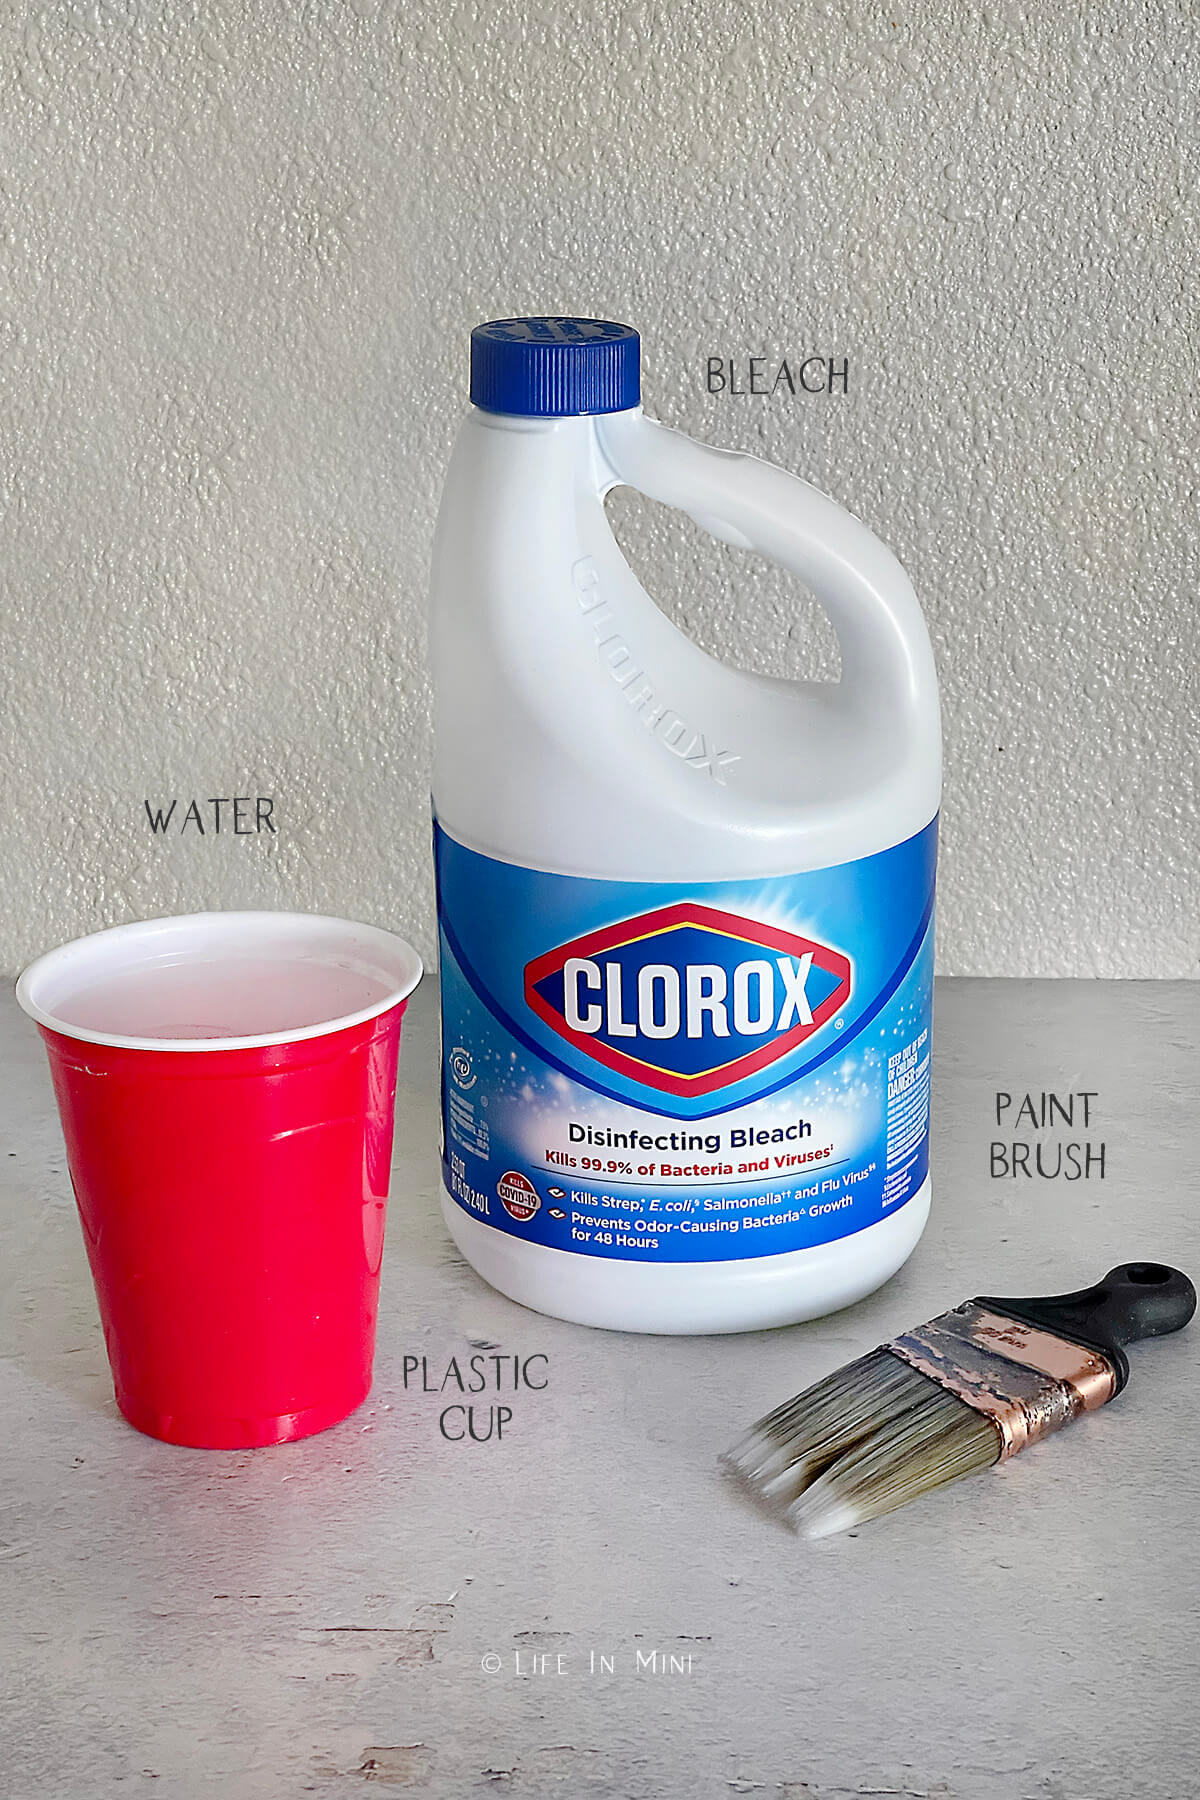
- Bleach: You just need regular household bleach for this project.
- Water: The bleach will be diluted with water so you will not be putting full bleach on your wood furniture. You will also need water to rinse out the wood you are bleaching.
- Paint Brush: Choose a paint brush size that works for the piece you are bleaching. I used a larger brush for the sides and big sections and a small brush for the smaller parts. You need to brush into the nooks and crannies your wood piece has.
- Plastic Cup: You will need two cups, one for just water and another for the bleach-water solution. You can also use glass or ceramic bowls instead of plastic. Bleach can damage metal, so do not use a metal bowl or can.
- Protective Gear: You will need rubber gloves to protect yourself from the bleach. A pair of safety glasses also helps protect your eyes from splashes.
Step-by-step directions
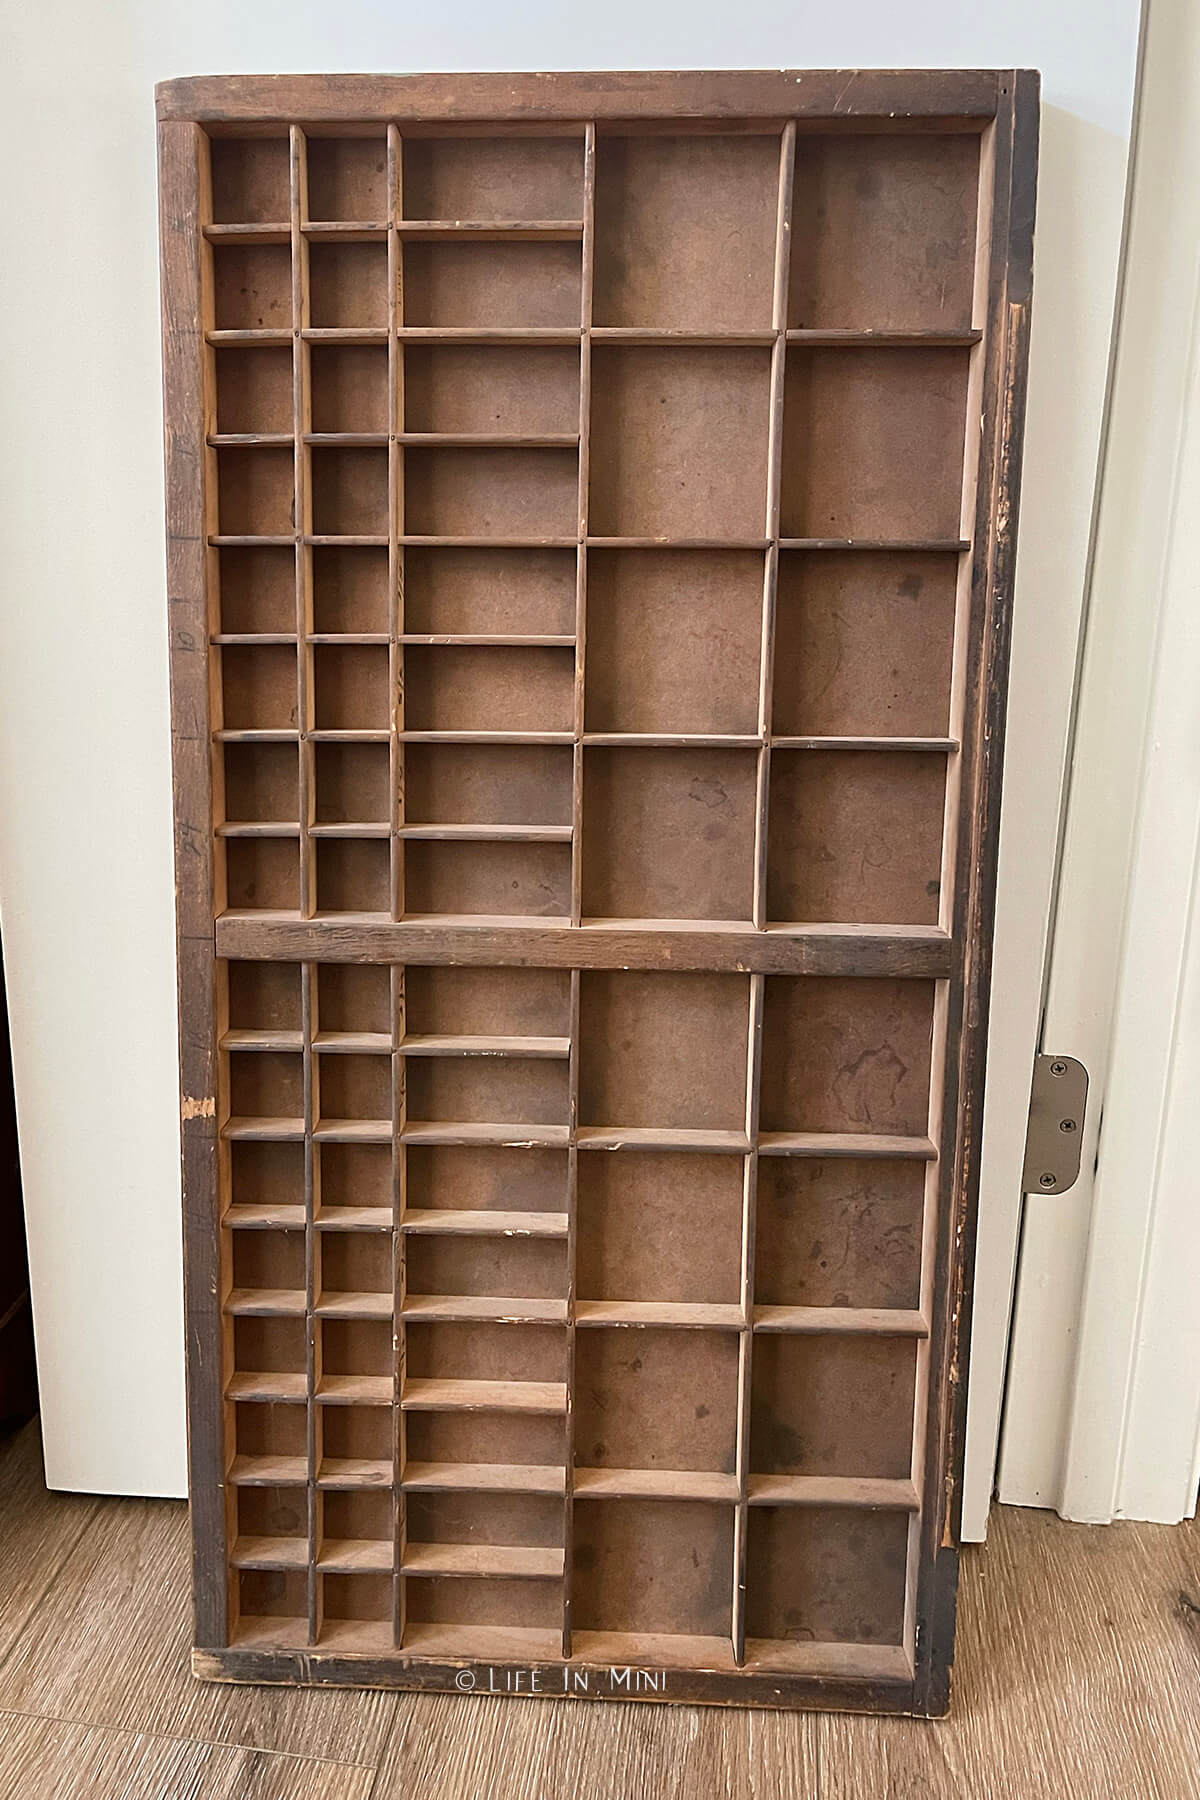
1. Remove any dust and dirt on your wood piece. I simply wiped my printers drawer with a rag since this beauty was sitting in storage for six months.
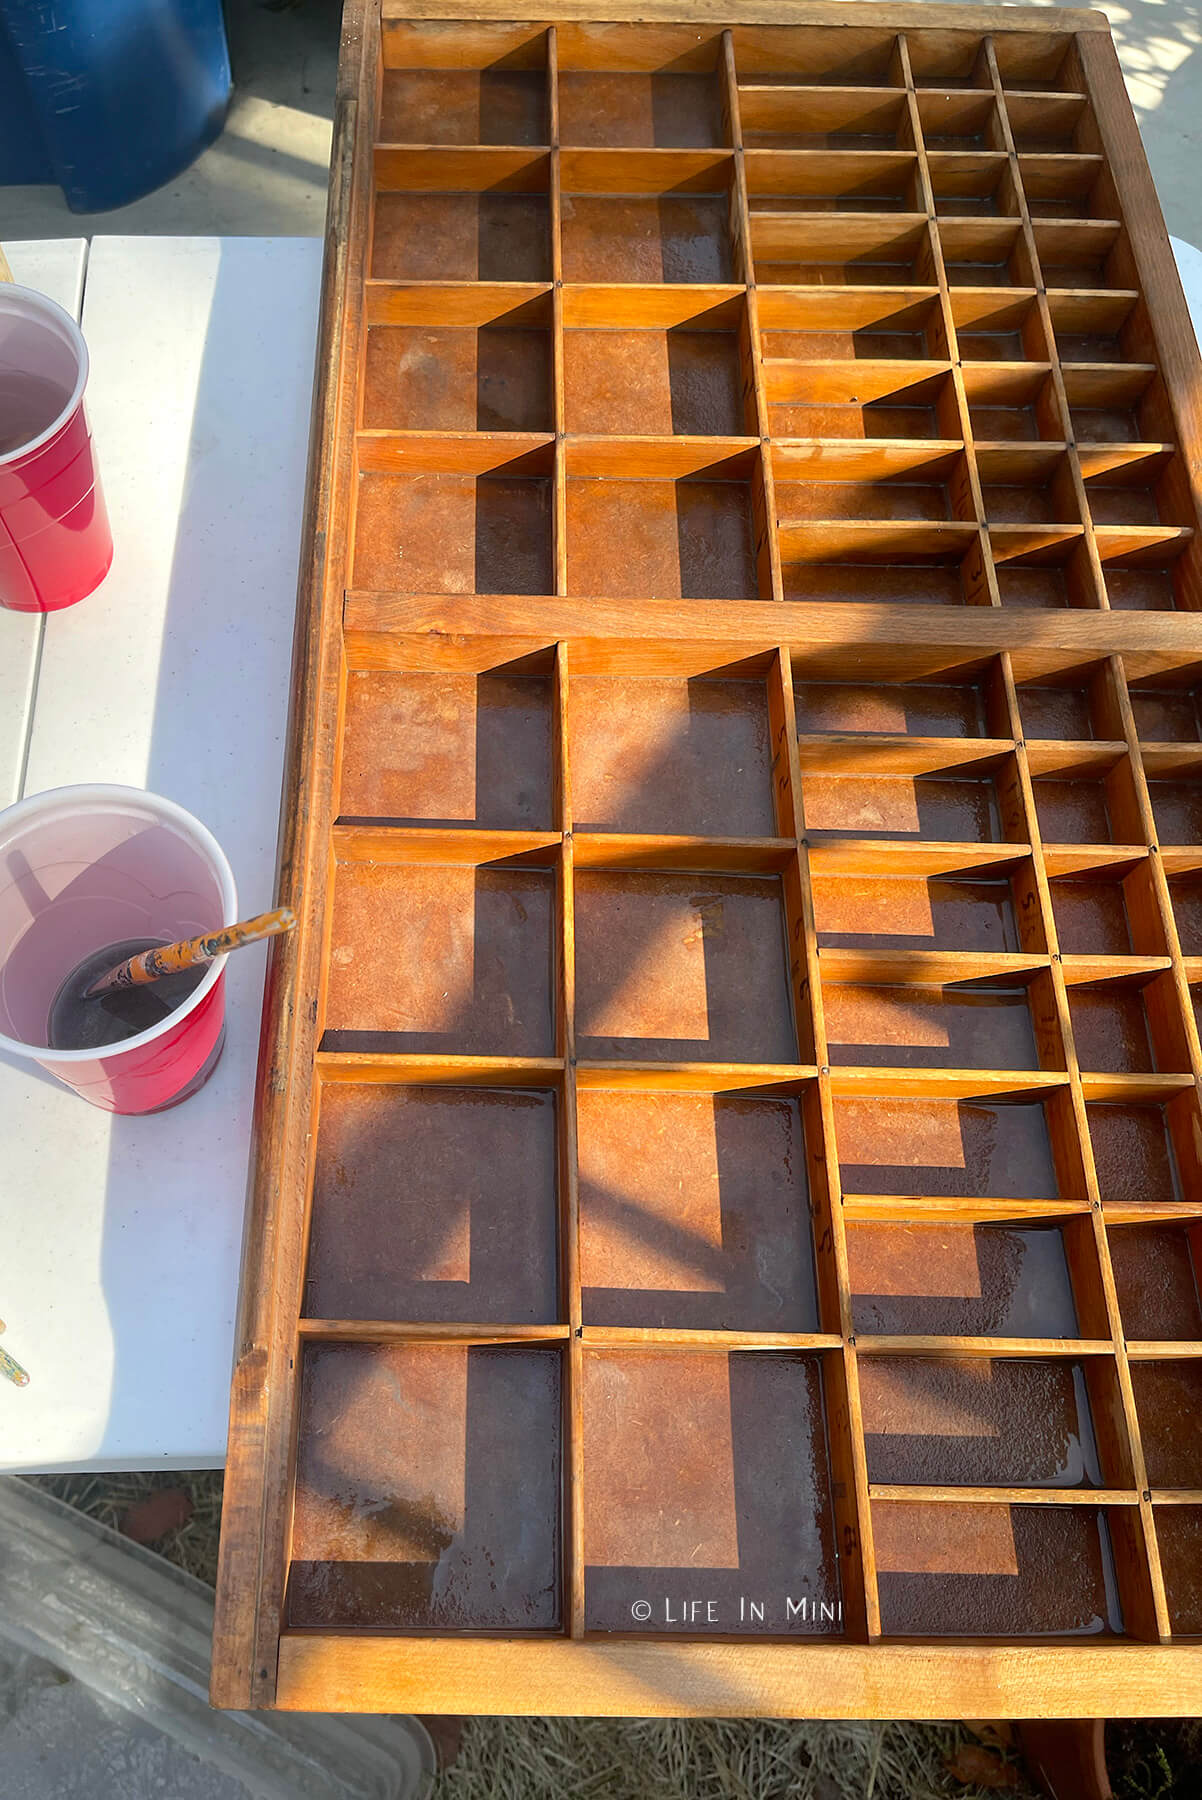
2. Fill one plastic cup with water and another with a 2:1 chlorine to water solution. Place your wood piece in an area outside safe for working with bleach and begin brushing the wood with your bleach solution. Be very generous, almost soaking the wood in the bleach solution.
3. Let the woods dry completely in the sun for a few hours and brush the wood piece again with with the bleach solution. After the second coating, I suggest you let it sit overnight to see what the wood looks like before adding more bleach. Keep your brushes in the water while you wait between coats.
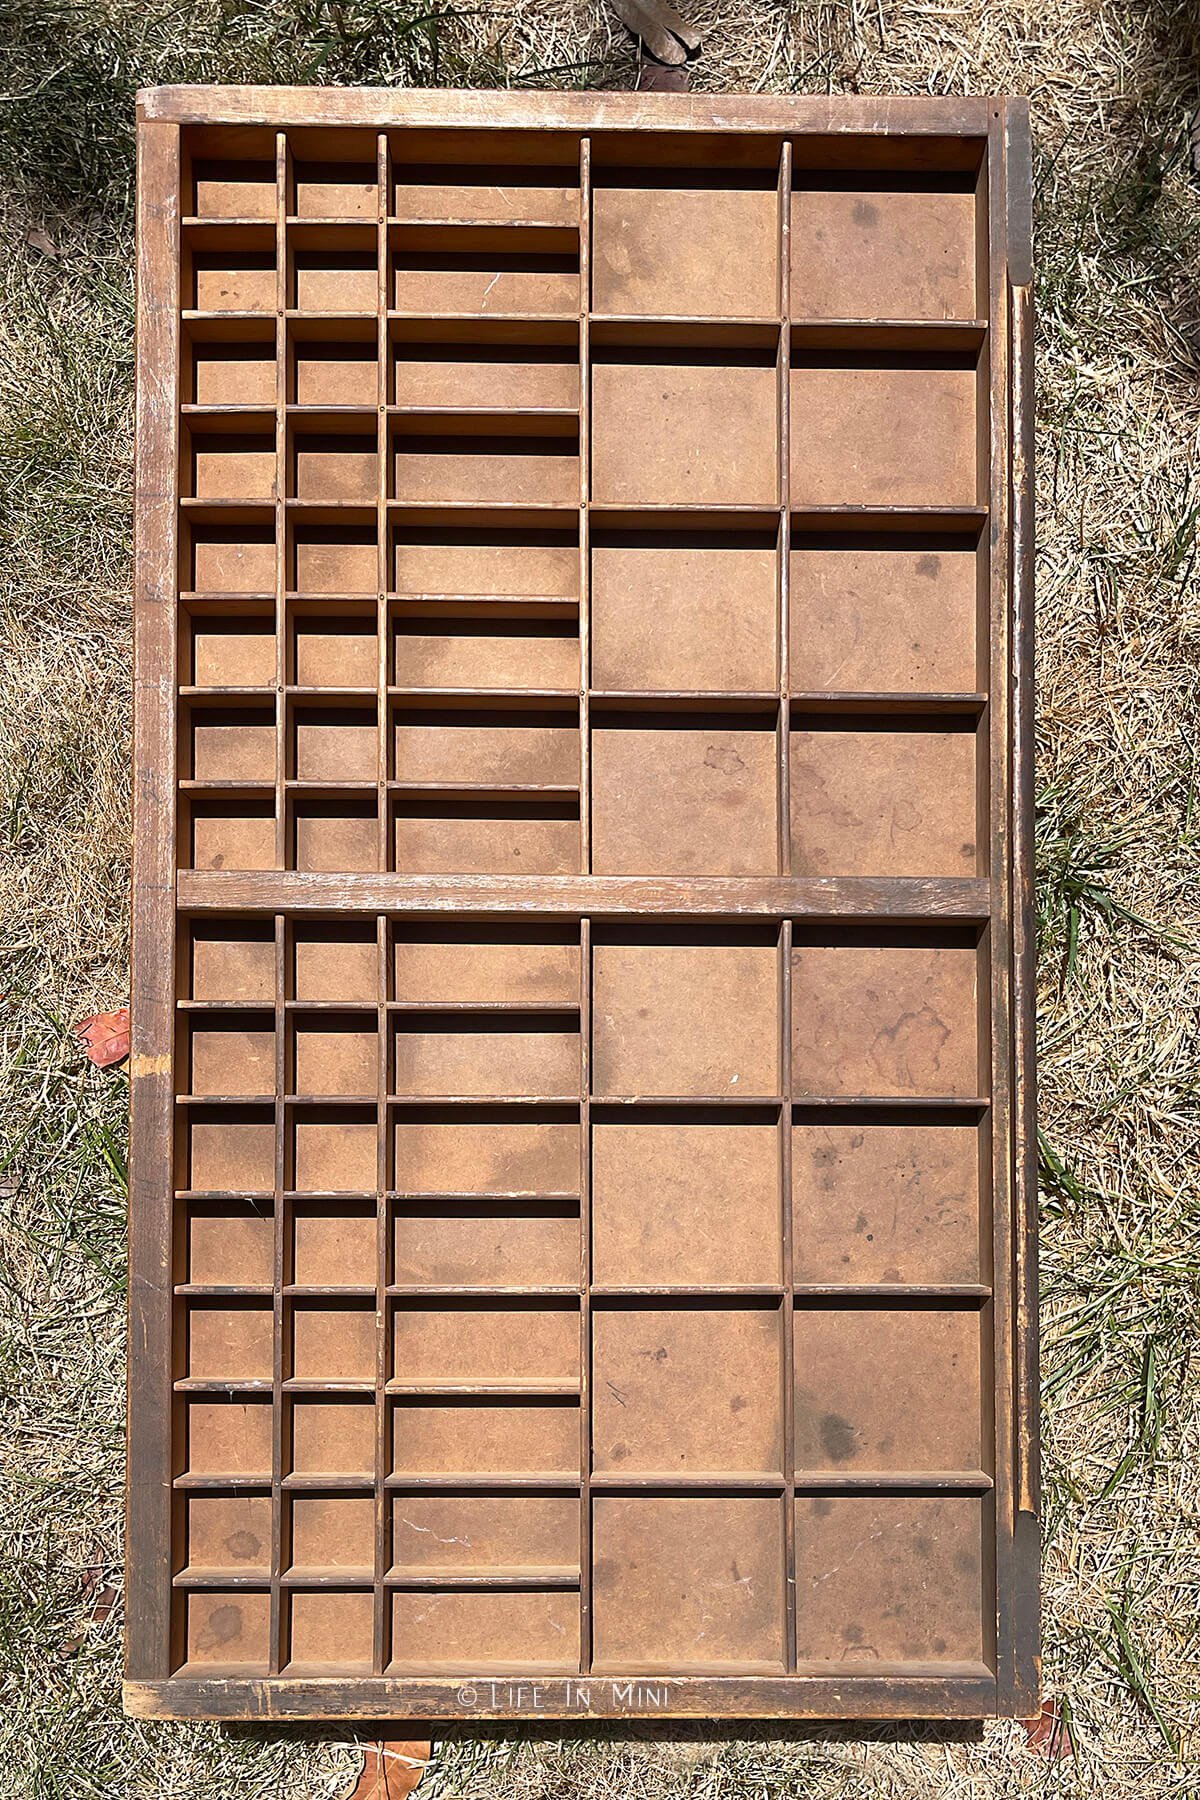
4. Once you are happy with the way your wood looks, rinse the wood completely with water twice, letting it dry in between washes. You can start using your piece once it is completely dry.
The bleach can make your wood coarse, so you can sand it afterwards to smooth and finish your piece.
Expert tips and FAQs
I learned a lot about stripping and bleaching furniture from My Vintage Porch. Talk about dream house! She has stripped and bleached a large variety of gorgeous antiques.
Once the pieces are bleached and done, you have to decide if it needs a protective wax or not. I have read that many waxes claim to add no color, but still do.
I still need to find a wax for my coffee table because I don’t want water rings or food stains on it. The letterpress tray, though, doesn’t need a wax, in my opinion.
This post by the Coastal Oak goes into the many different ways you can bleach wood. Not all woods react the same to these different methods, so there is some trial and error in these kinds of projects. Also, darker woods are harder to bleach.
Remember to do your own research and follow all safety precautions when using chemicals. Always follow the product instructions and don’t combine chemicals that should never be combined.
Work outdoors! Not only is better ventilated and safer, sunlight helps speed up the wood lightening process. A perfect project during these sunny summers! Bob Villa has even more great tips on bleaching wood furniture.
The furniture you want to bleach will get very wet during the bleaching process and washing afterwards. So you need to make sure that the piece can handle all that wetness and that it can dry quickly and completely to prevent water damage or mold formation.
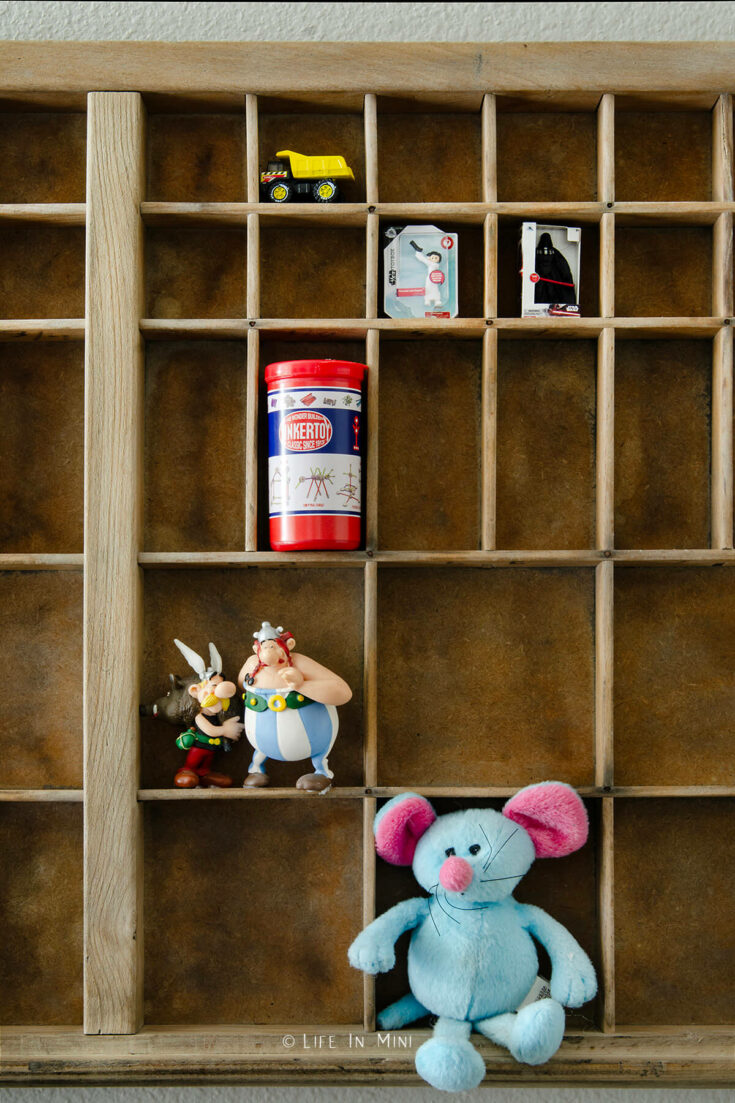
Some of my favorite pieces that I’m showing in the printers drawer include:
- Mini Brands Disney: I had to buy three of these babies before I found my Princess Leia! There are also Mini Foods and Mini Toys and Mini Tikes.
- World’s Smallest: These mini toys actually work. Most of these are larger than 1:12 scale, but hey they are super cute! I need a Mini Mr. Potato Head in my life! You can also get a mini slinky dog, mini tinker toys and mini hot wheels as well as other cute mini toys.
- Mini Light Brite: Yup, it actually works – so cute! Unfortunately my Mini Pac Man Arcade was too big so I’ll have to show it off somewhere else!
- Asterix and Obelix: I don’t remember where I collected these cuties. While living overseas as a child, my brother and I used to read Tin Tin and Asterix and Obelix books all the time. They are witty and hilarious. So much went over our heads as kids, they are even funnier now.
- Mini Night Light: I saw these cute little lights and bought a few for my little nephews. I kept a few extras for me!
Now comes the fun part of filling it up with more minis!
So, what do you think? Do you have any wood furniture you are ready to bleach?
Household bleach works wonders at brightening whites and killing germs. You can also dilute bleach and brush it on wood furniture to lighten it up. It is a great way to remove any yellow or orange tones you have in your wood pieces.
Old letterpress drawers were used to hold the typeset heads for the old print presses. They now have a wonderful nostalgic value amongst collectors for the tiny compartments made terrific spaces to hold itty bitty things. You can hand them on the wall and use each square to hold a number of mini things: miniatures, pictures, figurines and souvenirs from your travels. You are only limited by your own imagination.
If you are enjoying my blog, why not sign up for my newsletter so you won’t miss out on the mini adventures!
How to Bleach Wood
I share my tips on how to bleach wood so you can give any piece of wood furnishings a light, natural and faded look. I used this technique on my coffee table and this vintage printers drawer.
Materials
- Household bleach
- Water
Tools
- Plastic cups
- Paint brushes
- Rubber gloves
- Safety glasses
Instructions
- Remove any dust and dirt on your wood piece.
- Fill one plastic cup with water and another with a 2:1 chlorine to water solution.
- Place your wood piece in an area outside safe for working with bleach and begin brushing the wood with your bleach solution. Be very generous, almost soaking the wood in the bleach solution.
- Let the wood dry completely in the sun for a few hours and brush the wood piece again with with the bleach solution. Add additional coats of bleach to your wood piece until you get the desired effect, letting it dry in the sun in between coats. Keep your brushes in the water while you wait between coats.
- Once you are happy with the way your wood looks, rinse the wood completely with water twice, letting it dry in between washes. You can also neutralize the bleach by spraying your piece with a solution of equal parts vinegar and water.
- The bleach can make your wood coarse, so sand it afterwards to smooth and finish your piece.
- Apply a wood wax to protect your furniture, especially if it is a table top.
Notes
Always work in a well ventilated area and follow all safety precautions when working with chemicals. Always follow the product instructions and don’t combine chemicals that should never be combined.
PS If you try this craft, why not leave a star rating in the direction card right below and/or a review in the comment section further down the page? I always appreciate your feedback.
You can also follow me on Pinterest, Facebook or Instagram. Sign up for my eMail list, too!

Leave a Reply