Making miniature plants for your dollhouse is a lot easier than you might think. Even if you are all thumbs or aren’t very crafty, all you need is some scraps around the house and few flower picks from the craft store and you can fill up your diorama or dollhouse with beautiful plants and flowers.

I love plants. I am that person that buys myself flowers from Trader Joes so I can see something beautiful everyday. My yard is small, but I moved here with a uHaul full of potted plants.
As I worked on my dollhouse, I wanted it to reflect all the things that I love. So yes, my dollhouse is filled with flowers and plants. I made a mini terrarium before I made a big one that sits on my kitchen counter!
When I first started fixing up the dollhouse for my daughter, I did what many of us did: I bought mini plants. Those suckers are EXPENSIVE and there wasn’t a huge selection to choose from either.
I have watched lots and lots of polymer clay tutorials on making miniature plants. I swear I almost went crosseyed and blind taking 4 hours to make this single miniature rose. I love how it turned out, but I didn’t have the eye power or will power to make a bouquet of roses!
I also wanted plants that well, looked like plants. I didn’t like the feel of paper, but even that has evolved. You can coat paper with paint and ModPodge and it won’t be flimsy and can it can look pretty realistic. But even paper, can be a bit time consuming.
So I turned to my craft store and started hunting through the floral picks and found so many tiny flowers. During the holidays, you can even find mini trees in mini pots that are meant to hold a seating card and placed on a dinner plate, but I found them to be perfect as small trees or large bushes for the dollhouse.
And this began my journey into mini gardening, so to speak! From moss balls to flowers to small trees, I have made a large number of plants arrangements using this basic technique.
Anything can be a flower pot, from a marker top to a hot sauce cap. With a little paint or even homemade chalk paint for texture, these things transform into terra cotta or clay pots. You can also make mini baskets and use those as planters.
Got a drawer that didn’t fit the cabinet you made? Don’t chuck it, save it. I used an imperfect old drawer to hold a flower pot. And you’ll love what I used to make the mini brass drawer handle!

While looking around at the craft stores, I soon realized that those smaller floral picks, the ones used for wreaths, were great for miniatures. They are smaller in size and less expensive than the usual flower picks sold all year long.
Many stores mark them down at 40% off when they first come out and then clearance them out for even cheaper after each season or holiday passes. You can also find floral picks at the dollar stores.
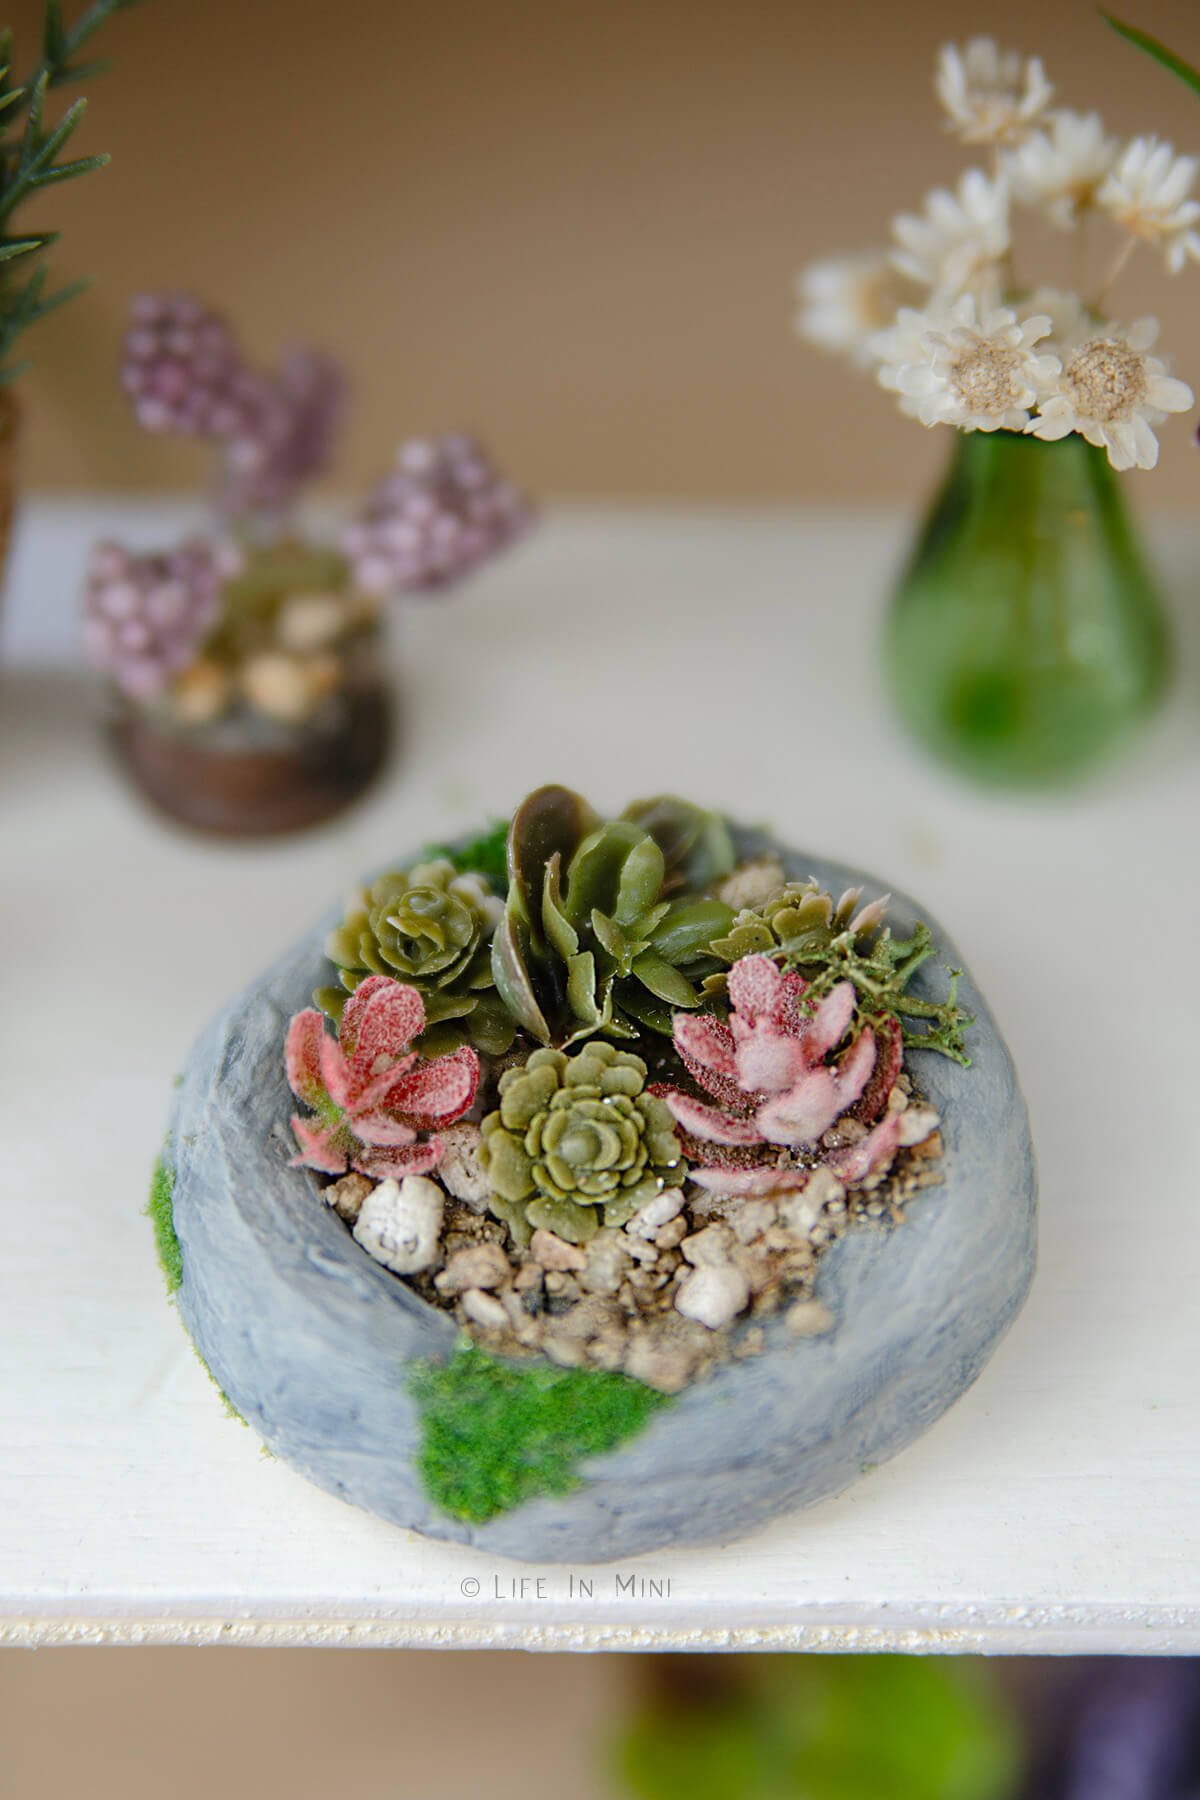
When you buy them on sale, many of these picks cost $1 or less and a single pick can give you several plant arrangements, depending on how you use it. For example, one succulent pick I found contains about 15 small succulents on it. Another floral pick had small flowers that looked like tinier succulents. And that one has 198 mini succulents I could use.
Most importantly, when shopping at your favorite craft stores, look at the floor! You can find all kinds of “garbage” there, i.e. bits of artificial flowers and plants that broke off and will only get swept away and thrown out so you might as well save them for yourself.
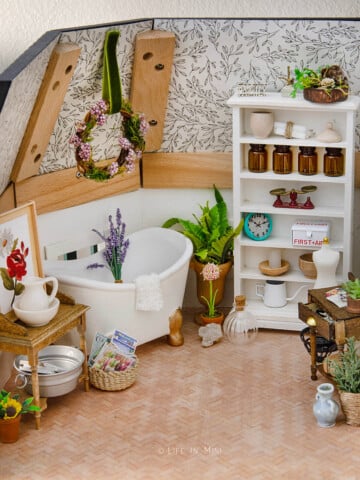
I have also used preserved moss, dried flowers and moss flocking in my arrangements. I scour my yard for what I can find there: seed pods, mini pine cones, gravel, sand, twigs and grape vines.
With twigs from yard and a little polymer clay, I have made miniature berry branches. I have also made my own mini cotton stems with twigs too.
Supplies you need
This post contains some affiliate links for your convenience (which means if you make a purchase after clicking a link I will earn a small commission but it won’t cost you a penny more)! Read my full disclosure policy.
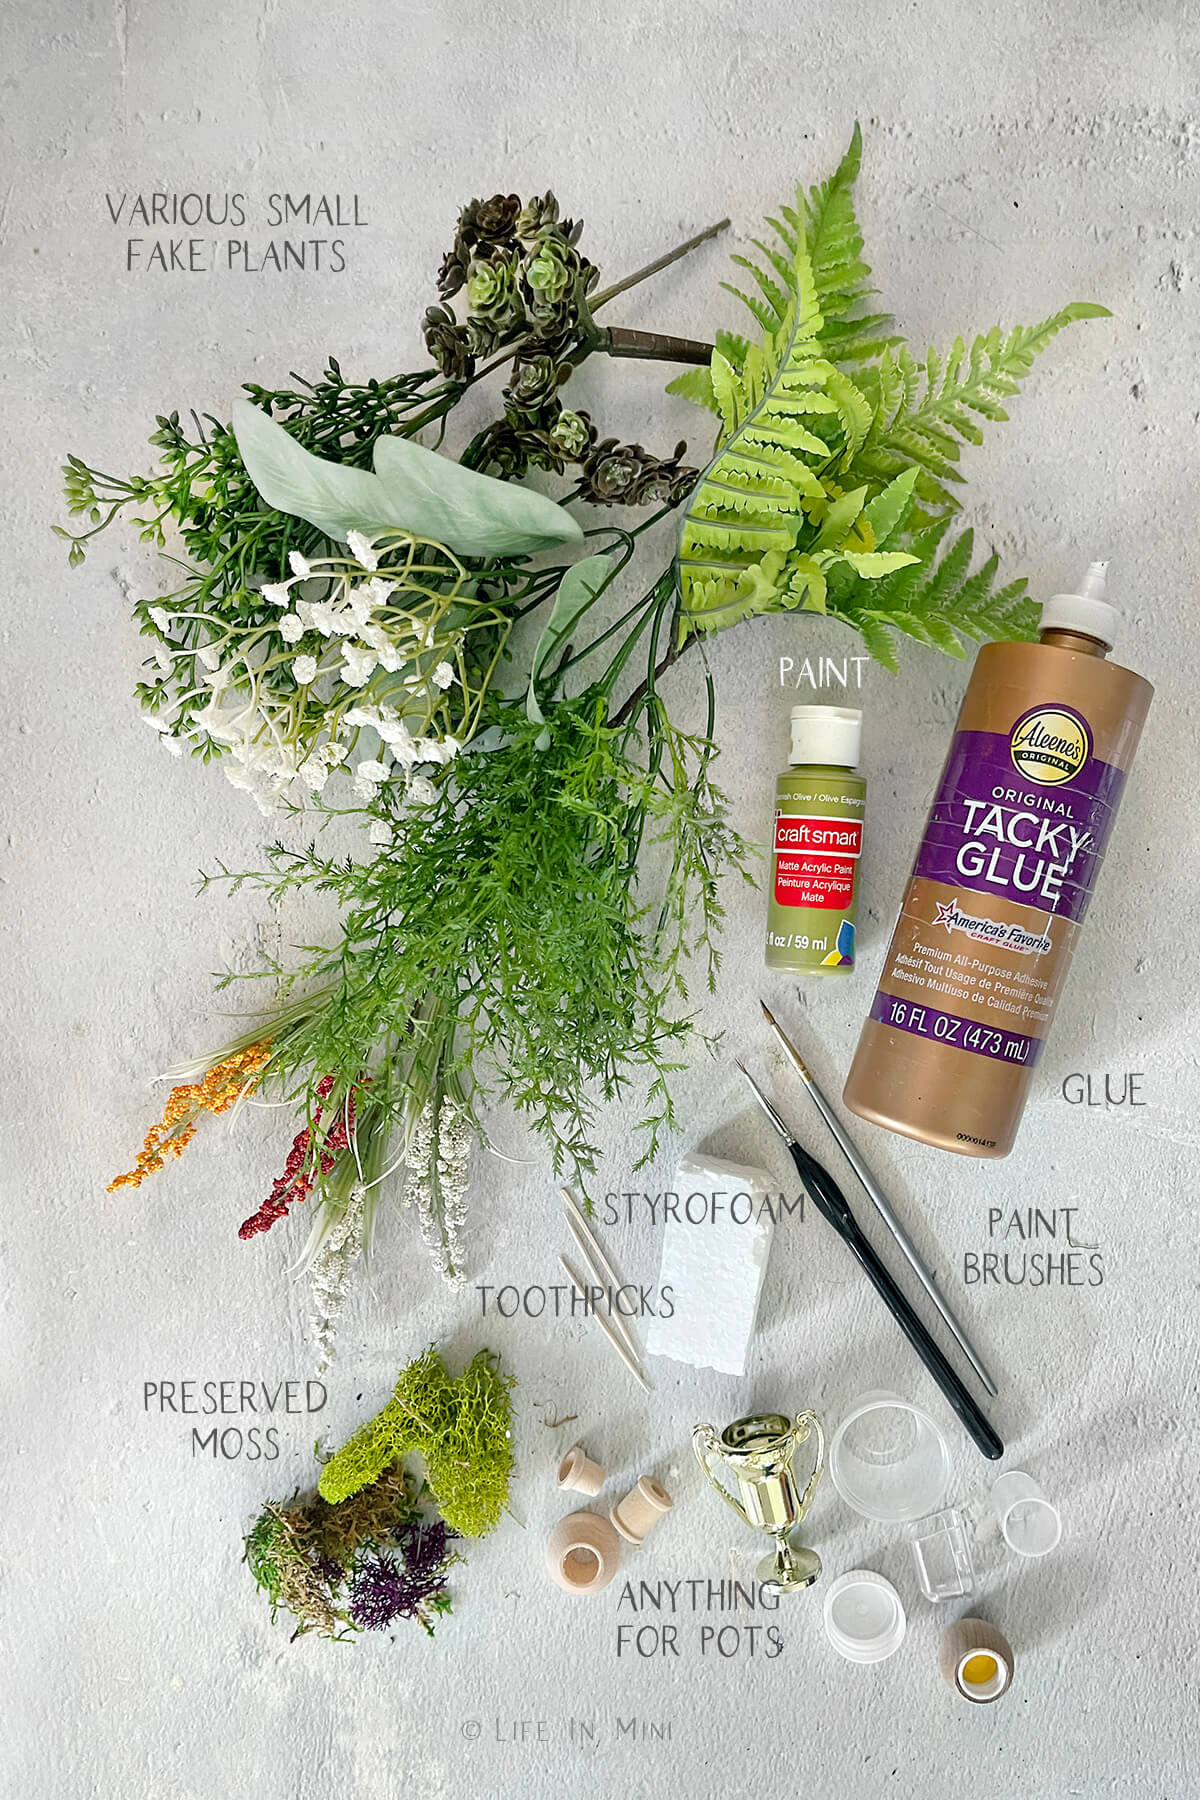
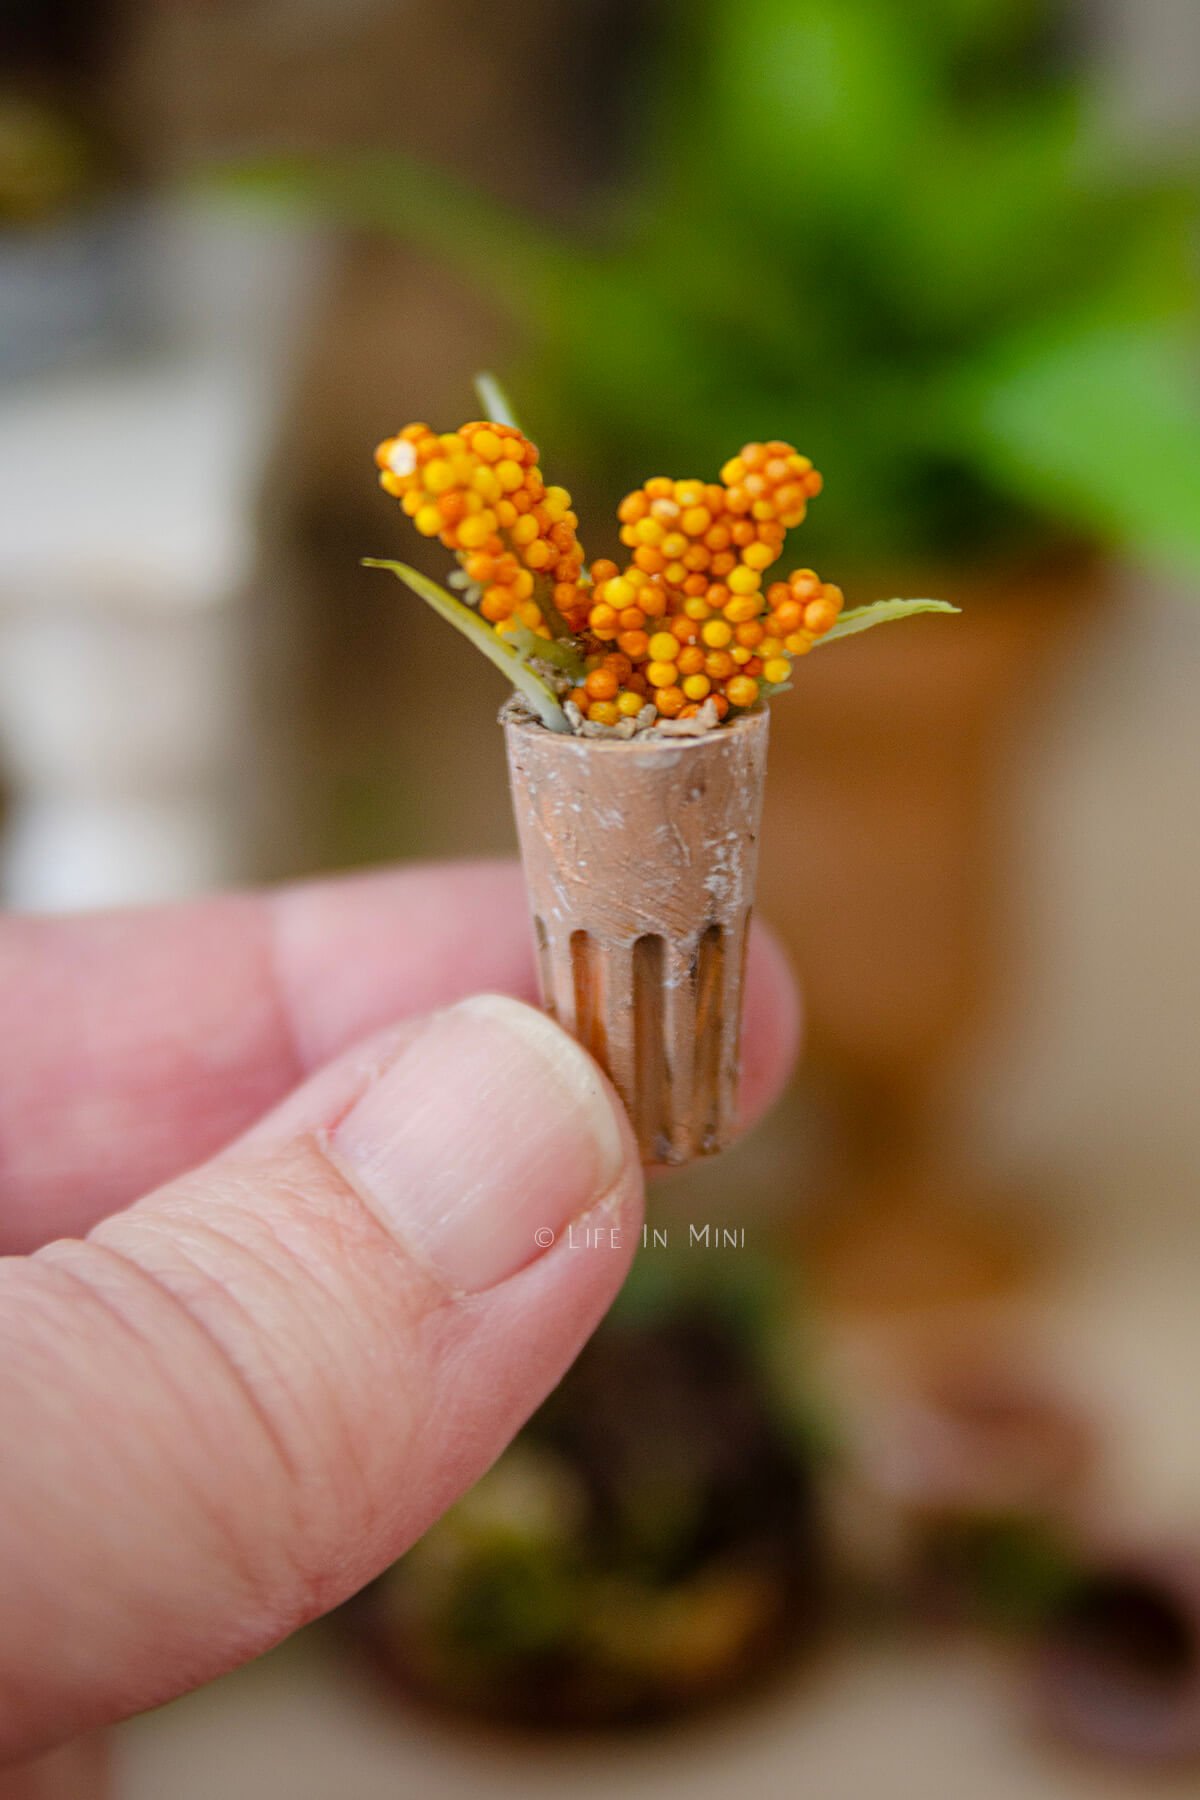
- Artificial plant picks: Look small flowers and leaves. I have used a variety of flower picks that come in different colors and textures. And a little goes a very long way. One pick can make 20 flower arrangements. You can also find picks of just leaves, small leaves, mini succulents, ferns….
- Dried flowers: You can also dry small flowers yourself or find them at craft stores. These come in a variety of colors and sizes, too.
- Preserved moss: You can get packs of preserved moss that are just green or a variety pack. It’s great for moss balls and added a little green and texture to a flower pot.
- Moss flocking: A dab of glue and some moss flocking and your pots get this mossy aged look. You can also add flocking to plastic leaves to give it texture. I covered little wood balls with flocking to make moss balls. Again, a little goes a long way!
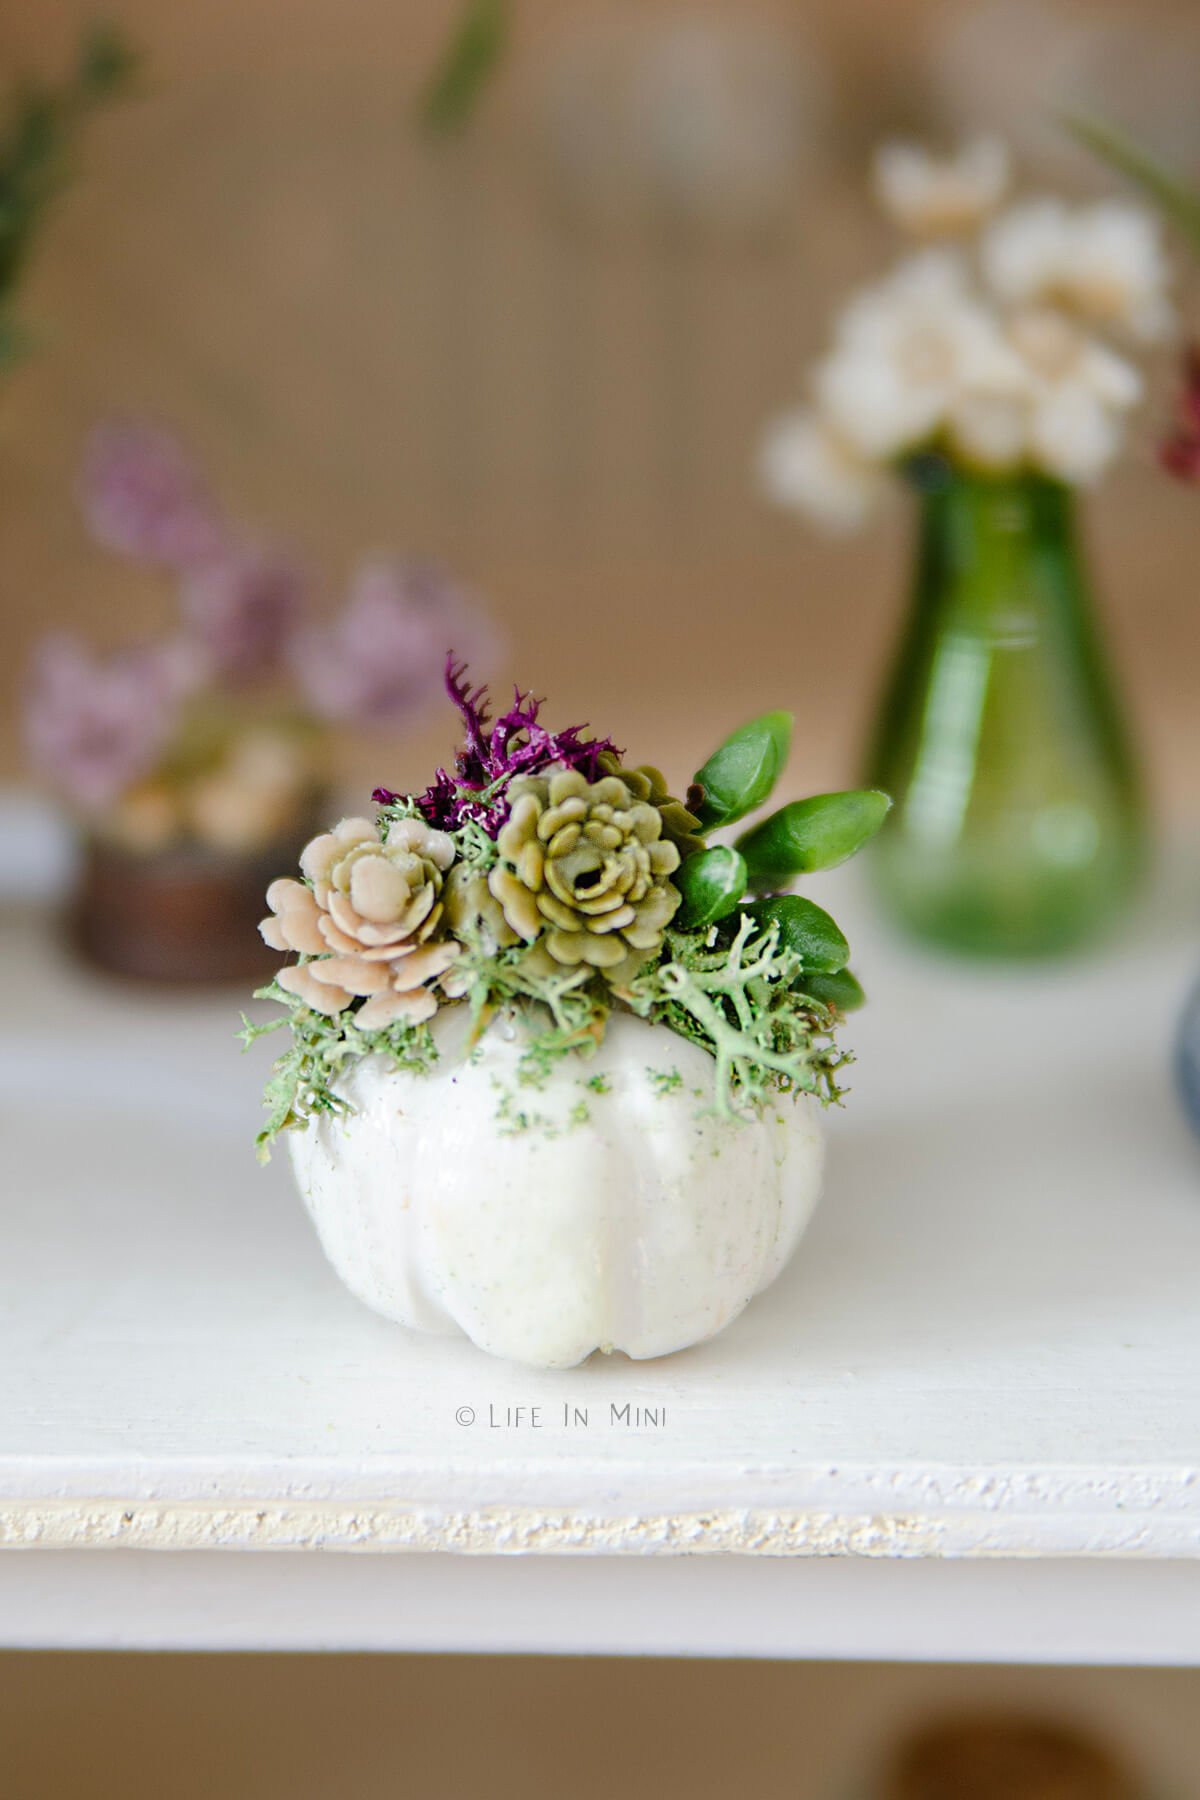
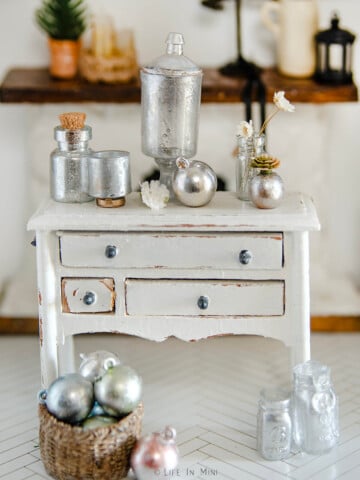
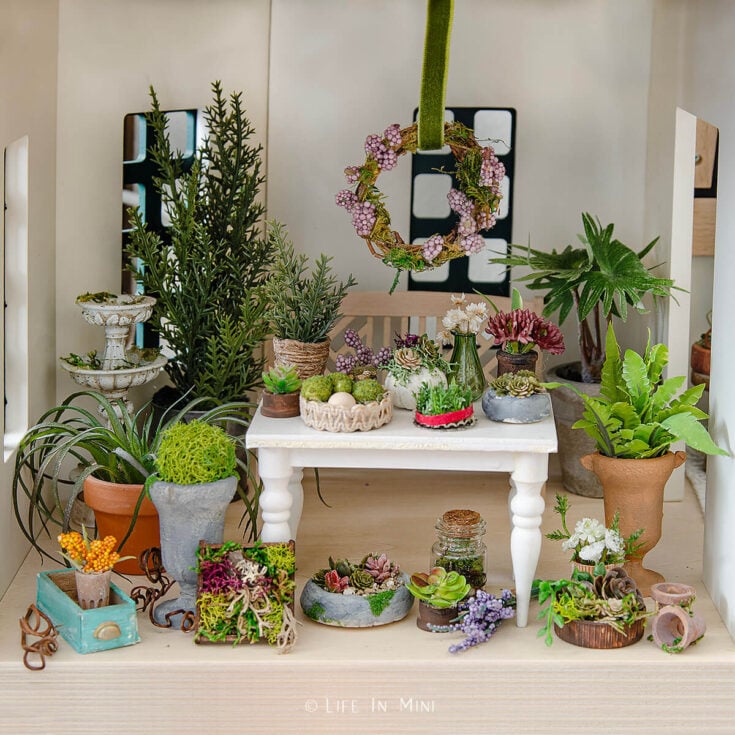
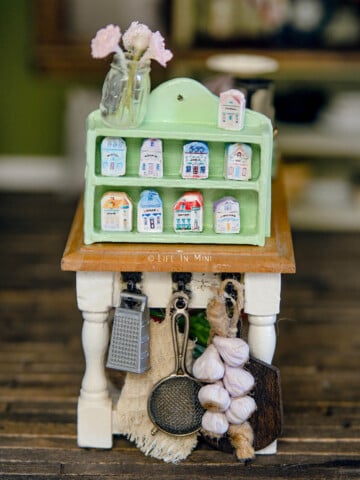
- Small containers for pots: This is where you can get really creative. ANYTHING can be a plant pot. Small pots can be beads, toothpaste caps and even marker caps. Other pots can come from medicine dose cups and larger caps or plastic soda tops. You can also use small wooden plant pots and spools and paint them up to look like ceramic pots. The big urns pictured at the beginning in my post and featured in the tutorial were made from trophy party favors.
- Glue: I love my Aleene’s Tacky Glue to secure the pieces together. You need a glue that dries clear.
- Paint: I used regular acrylic paint to paint the wooden or plastic bits that I used for plant pots. I also adjust the color of some the flowers and leaves with paint.
- Mod Podge: Although I didn’t use this, you can add some gloss Mod Podge for shiny leaves.
- Styrofoam: If you need to fill the inside of a plant pot, bits of styrofoam work great. I just break off a piece from some scrap foam I hoard from my Amazon deliveries!
- Air dry clay: For smaller containers, I use air dry clay instead of foam to fill inside and hold the plant bits. If you want a concrete container, use air dry clay to form it, let it dry and paint it. And white glue sticks to air dry clay very easily.
- Brushes: I used small as well as super fine paint brushes to paint the smaller pieces.
- Toothpicks: I use toothpicks to dab tiny bits of glue and to maneuver plants in their place.
- Cutters: Depending on what you are snipping or trimming, you will need to cut your plants. Sometimes you only need an x-acto blade, other times wire cutters were used. I even used regular scissors for thinner items.
Step-by-step directions
Every arrangement I made for this post was made slightly differently. Even when it comes to arranging a full size planter, what I envisioned in my mind and what I end of up with are usually different. And that’s okay!
Some plants need you to fill the pot with a base for the plants to be inserted into, like foam or clay. Others require just glue, whether it’s a small dab or a good blob. Don’t be afraid to cut the leaves into smaller pieces or to separate a portion of a flower from the pick.
Here are the step-by-step directions on how I made my fern. The large terracotta urn is from a mini plastic trophy. I have instructions on how I made it in my post about how to make miniatures from party favors.
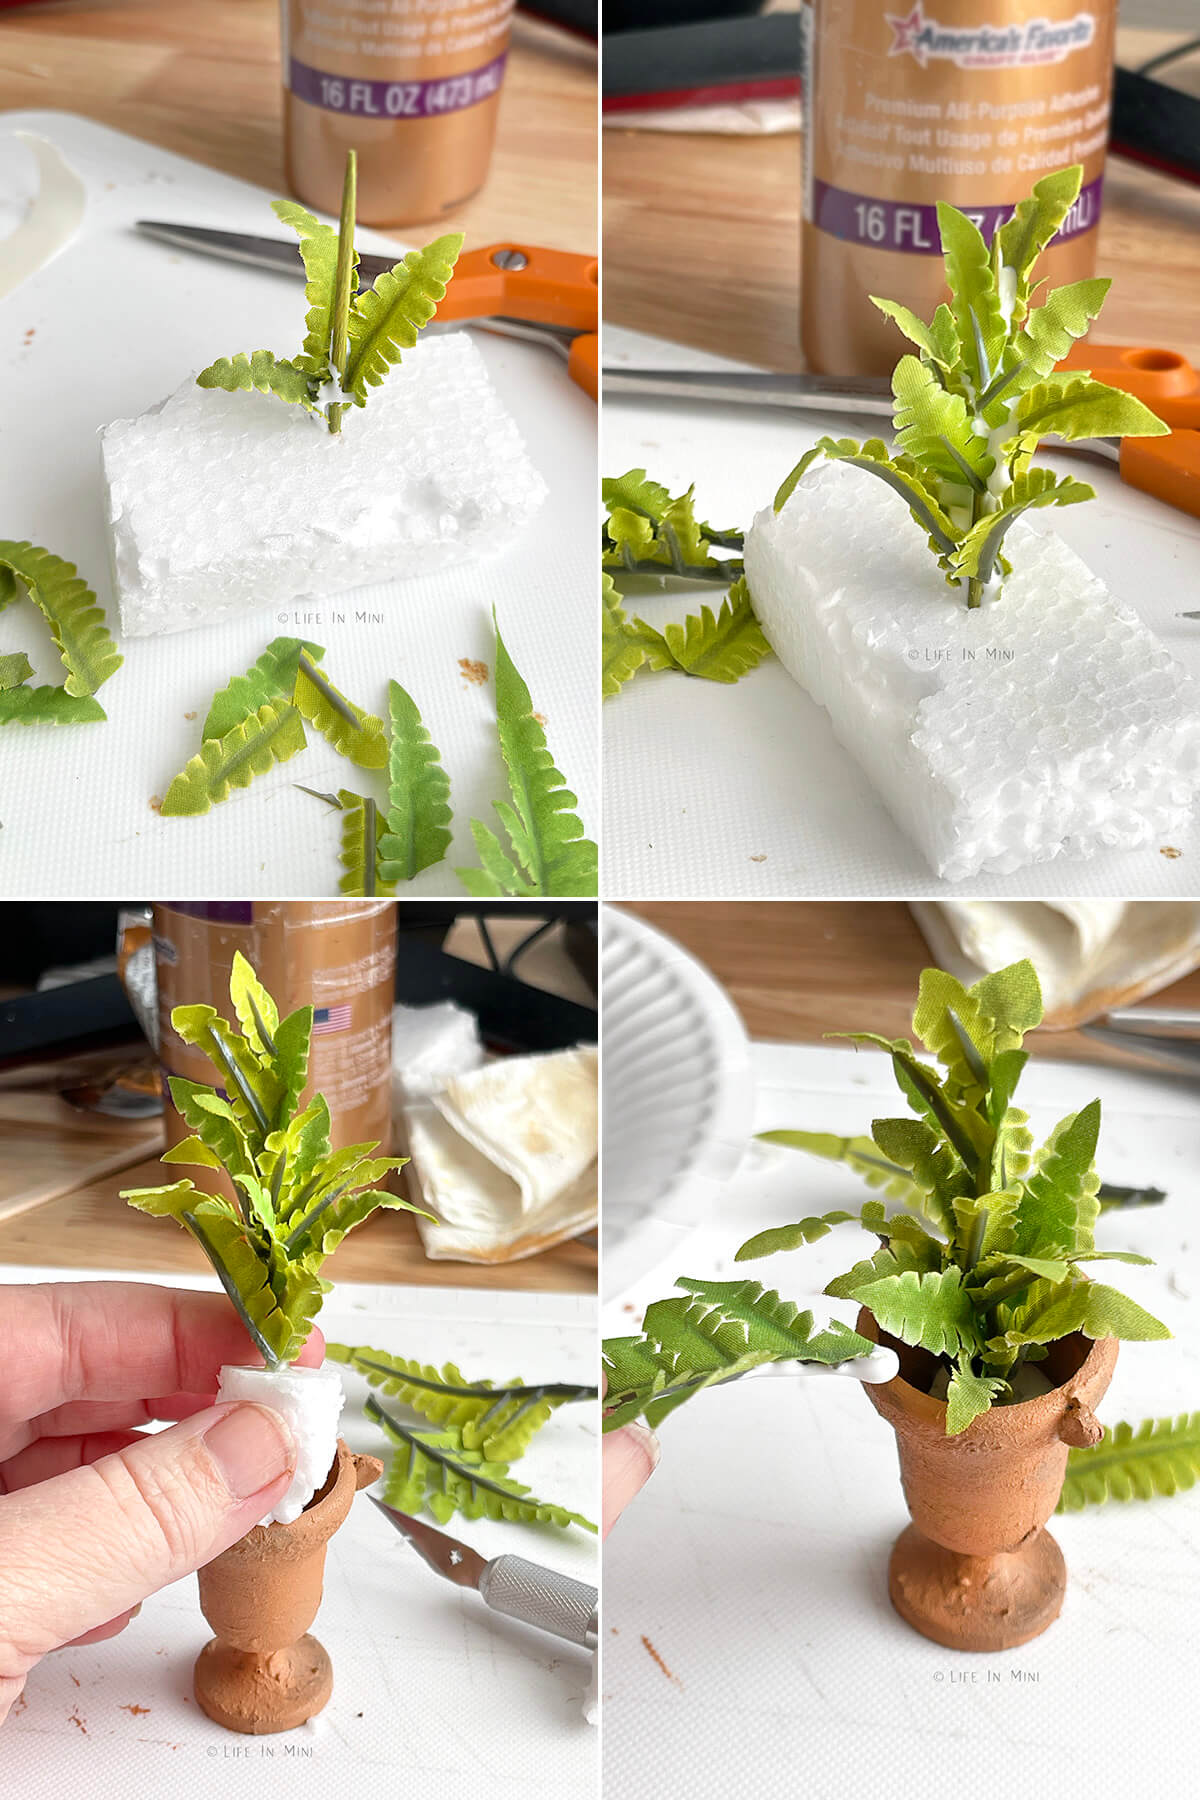
- Insert a toothpick into some styrofoam and paint the toothpick green to match the green of your fern pick.
- Using one or two leaves from an artificial fern pick, cut off the smaller tips choosing various sizes.
- Add dabs of glue to the toothpick or dip the ends of the fern leaves into glue and attach it all around the green toothpick until the toothpick is mostly covered.
- Once the glue is dry, cut the foam holding your plant down to a size to fit inside the pot it is going into.
- Once secured into the pot, glue on more leaves to finish filling up the pot and covering any bald spots.
Project tips and FAQs
When making arrangements look more real, use a variety of flowers, colors and textures. I like mixing in some preserved moss for small touches of green. Moss also comes in browns and purple.
You can cut leaves from one pick and flowers from another. If the colors aren’t quite what you want, paint them!
For soil options, you can use gravel, sand or coffee grounds. Look at what you have in your home, or check out Instagram or Pinterest for more floral inspiration. I had several clay pumpkins I made for the fall and Halloween and topped one of them with mini succulents.
When painting pots and plants, use thin layers of paint. Terra cotta mixed with baking soda for added texture. Add dabs of dark brown or light cream to add a bit of weathering and age to the pots.
Choose the right size flowers for the pots you are using. You don’t want a small pot to topple over because you put too large or heavy of a plant in it.
If you don’t like how your creation turned out, don’t fret. Ask yourself, what is it missing? A touch of green? Some rocks? More dimension with the paint?
Keep creating and you’ll get better with each new project. And as always, use your imagination and have fun!
Miniature flower pots can be made from almost anything! For small posts you can use large ceramic or wooden beads. You can also use bottle caps, sauce caps even toothpaste caps. For concrete looking planters, form a crude bowl using air dry clay. Everything can be painted with acrylic paints to transform it into an aged or brand new ceramic planter.
You can make your own miniature plants using polymer or air dry clay. If you aren’t that good with your hands, you can use artificial flower picks. Look for picks that contain small flowers and leaves. You can also cut the leaves to smaller sizes. One pick can contain many flowers that can make a dozen or so arrangements.
Add layers of paint to vary the color of your pots. Weather them by added dabs of brown or off white. Glue on moss flocking. For a textured look, mix a little baking soda into your paint for homemade chalk paint.

If you are enjoying my blog, why not sign up for my newsletter so you won’t miss out on the mini adventures!
How to Make Miniature Plants for Dollhouses
Making miniature plants for your dollhouse is a lot easier than you might think. Even if you are all thumbs or aren't very crafty, all you need is some scraps around the house and few flower picks from the craft store and you can fill up your diorama or dollhouse with beautiful plants and flowers.
Materials
- 1 plastic mini trophy
- 2 leaves from artificial fern pick
- Green paint
- Terra cotta paint
- Off white paint
- Baking soda (optional)
- White glue
- Toothpick
- Small piece of styrofoam
Tools
- Scissors
- Wire cutters
- Sand paper
- Masking tape
- Toothpick
- Paint brush
Instructions
- Using wire cutters, cut off the big arms on either side of your mini plastic trophy.
- We are going to shorten the urn because I think it stands too tall. Cut the cup from underneath at the narrow point. Sand until smooth and even.
- Cut off some of support from the bottom piece, then sand until smooth and even.
- Reattach the cup to the base with tacky glue. Secure with masking tape if you like to support it while the glue dries.
- Paint as desired. I used terra cotta mixed with baking soda to add texture. For an aged look, I added dabs of off white.
- While this dries, make the fern. Insert a toothpick into some styrofoam and paint the toothpick green to match the green of your fern pick.
- Using one or two leaves from an artificial fern pick, cut off the smaller tips choosing various sizes.
- Using another toothpick, add dabs of glue to the green toothpick or dip the ends of the cut fern leaves into glue and attach it all around the green toothpick until it is mostly covered.
- Once the glue is dry, cut the foam holding your plant down to a size to fit inside the pot it is going in.
- Once secured into the pot, glue on more leaves to finish filling up the pot and covering any bald spots.
Notes
If you can't find a mini trophy, you can also use small medicine dose cups as the plant pot. Just paint as desired.
This basic technique can be used to make smaller plants, using bottle caps and marker caps as pots. You can put air dry clay inside the caps to hold your mini plants and flowers. Even with air dry clay, I still dip the ends of the flowers with glue.
For your pots to have an aged look, use layers of paint, varying the colors, For a muddy look, thin out some dark brown and dab it. You can also dry brush dabs of cream paint.
To add touches of green to your arrangements add bits of preserved moss. Add dabs of glue to your pots and sprinkle some moss flocking on it.
Finish your pots by gluing some sand, gravel or coffee grounds around the base of the plants.
PS If you try this craft, why not leave a star rating in the direction card right below and/or a review in the comment section further down the page? I always appreciate your feedback.
You can also follow me on Pinterest, Facebook or Instagram. Sign up for my eMail list, too!
Written by Laura Bashar
I’m a food blogger and cookbook author that loves miniatures and crafting. I started this blog to share my passion for minis, including tutorials and free printables.
Jasmin says
oh such great ideas and inspiration!
I love reading your articles and tutorials 🙂
Laura says
Hi Jasmin-
Thank you, you are so sweet. I can’t wait to see what you make!
Laura
Judith says
Great ideas! I did buy a craft pick that looks like the ornamental cabbage. Cut them off, add some paint and plant. lol. They looked really good. lots of good ideas. :))
Laura says
Hi Judith-
What a great find!There are lots of great hidden gems in different areas of craft stores we can use for our dollhouses. Thanks for sharing!
Laura
Asha says
You’ve just totally validated a lifelong fear of picking up detritus from craft store floors! I used to do it when I was 7 or 8, and my mom got so mad when she noticed. Said I was stealing…I told her, “Well what are they gonna do with it?” 😂 Can’t wait to make some of these for my little greenhouse cafe! It’s a kit, but…gotta start somewhere right? Thanks for sharing this, take care!
Laura says
Hi Asha-
I totally debated with myself about writing that little personal tidbit. So happy to hear I’m not the only one! I figure that I’ve given Michaels and Hobby Lobby plenty of my shopping dollars over the years to validate picking up trash off their floors and taking it home with me!
Have fun building your kit!
Laura
Jerri says
I look on the floor at Michael’s mostly. I have so much stuff that I really need to stop looking. However, I am so happy I am not alone in floor surfing. I already had the habit of looking down from growing up on the coast and looking for shark teeth and teeny tiny shells for displays in my dollhouse. It is a lifelong habit.
Laura says
Hi Jerri-
Floor surfing – I love that term! ha ha! Seriously so many goodies get forgotten and ignored on the floors of craft stores. I love looking for hidden treasures at the beach and on my walks around the hood. Glad to see I’m not alone in this!
Laura