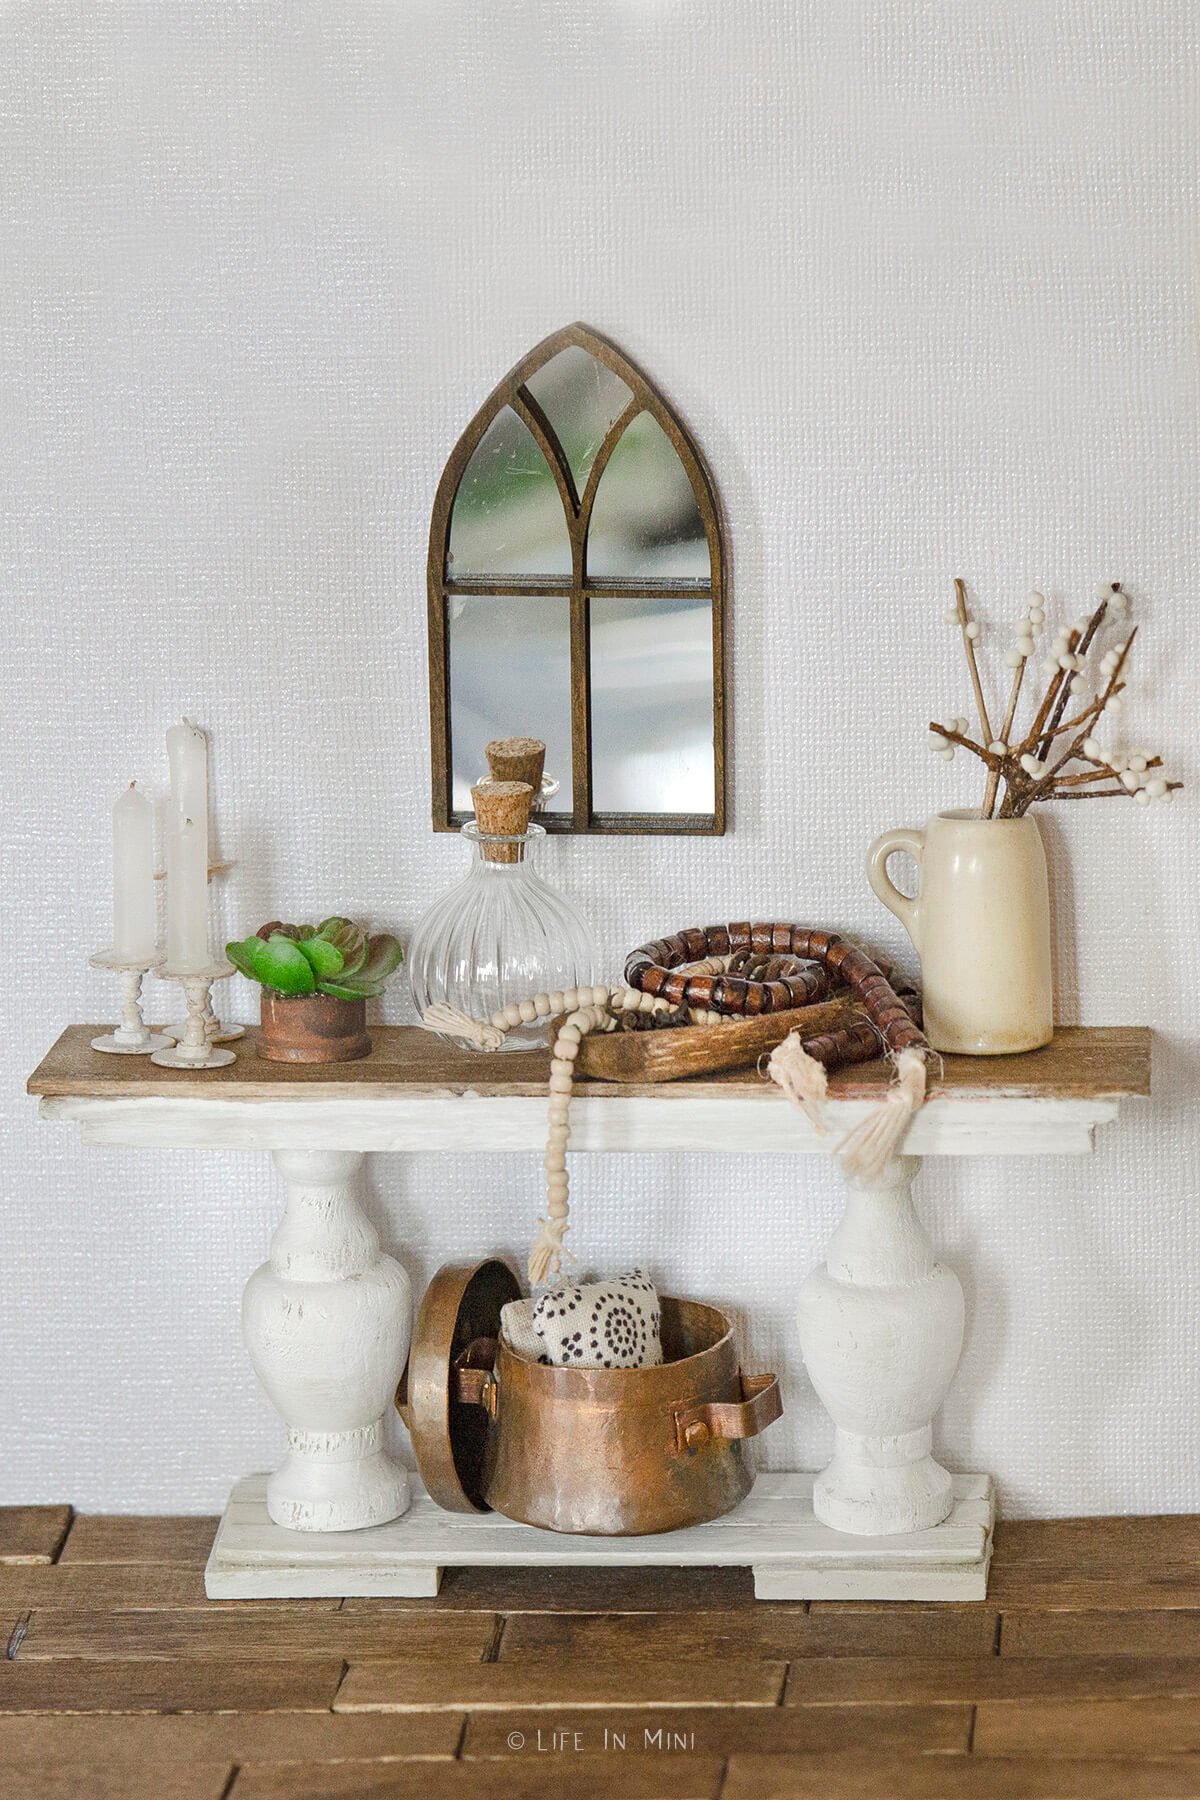
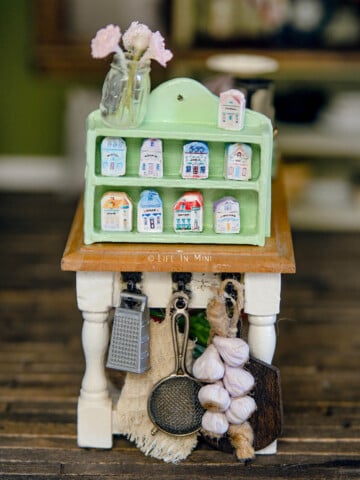
Purchasing dollhouse furniture can be expensive. This miniature console table is really easy to make and gives your modern dollhouse a little farmhouse chic.
As we all know, dollhouse furniture can very costly. There are so many cute pieces to choose from and you can easily break your budget with just one piece.
When I find some miniature furniture that I love, I try to figure out how to make it. Sometimes it is a full size piece of furniture that catches my eye and inspires me to figure out how to make it in miniature.
I have been looking at console tables for my own house and this beauty caught my eye. Although I couldn’t fit it into my real house, I immediately began figuring out how to make a miniature console table for my dollhouse.
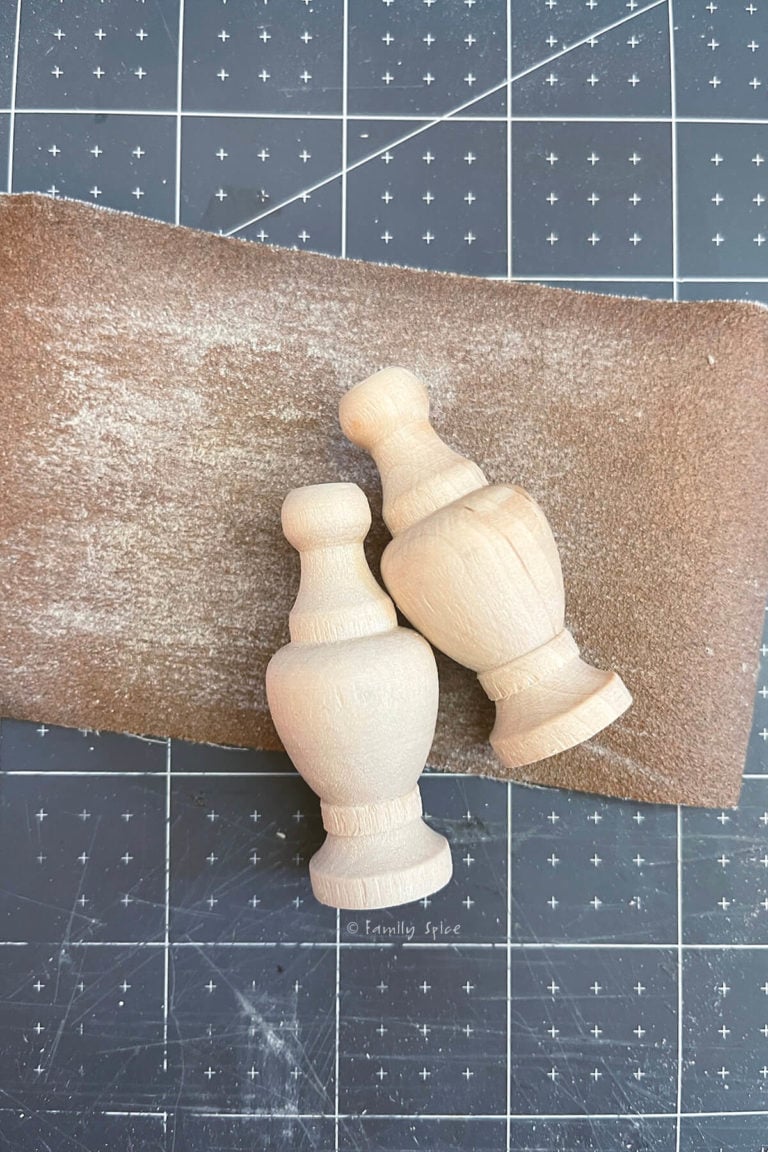
On a recent trip to Hobby Lobby I found small wood finials. With a little trimming and sanding, I knew it would be perfect for this console table. Nothing like a little dollhouse DIY to get me excited!
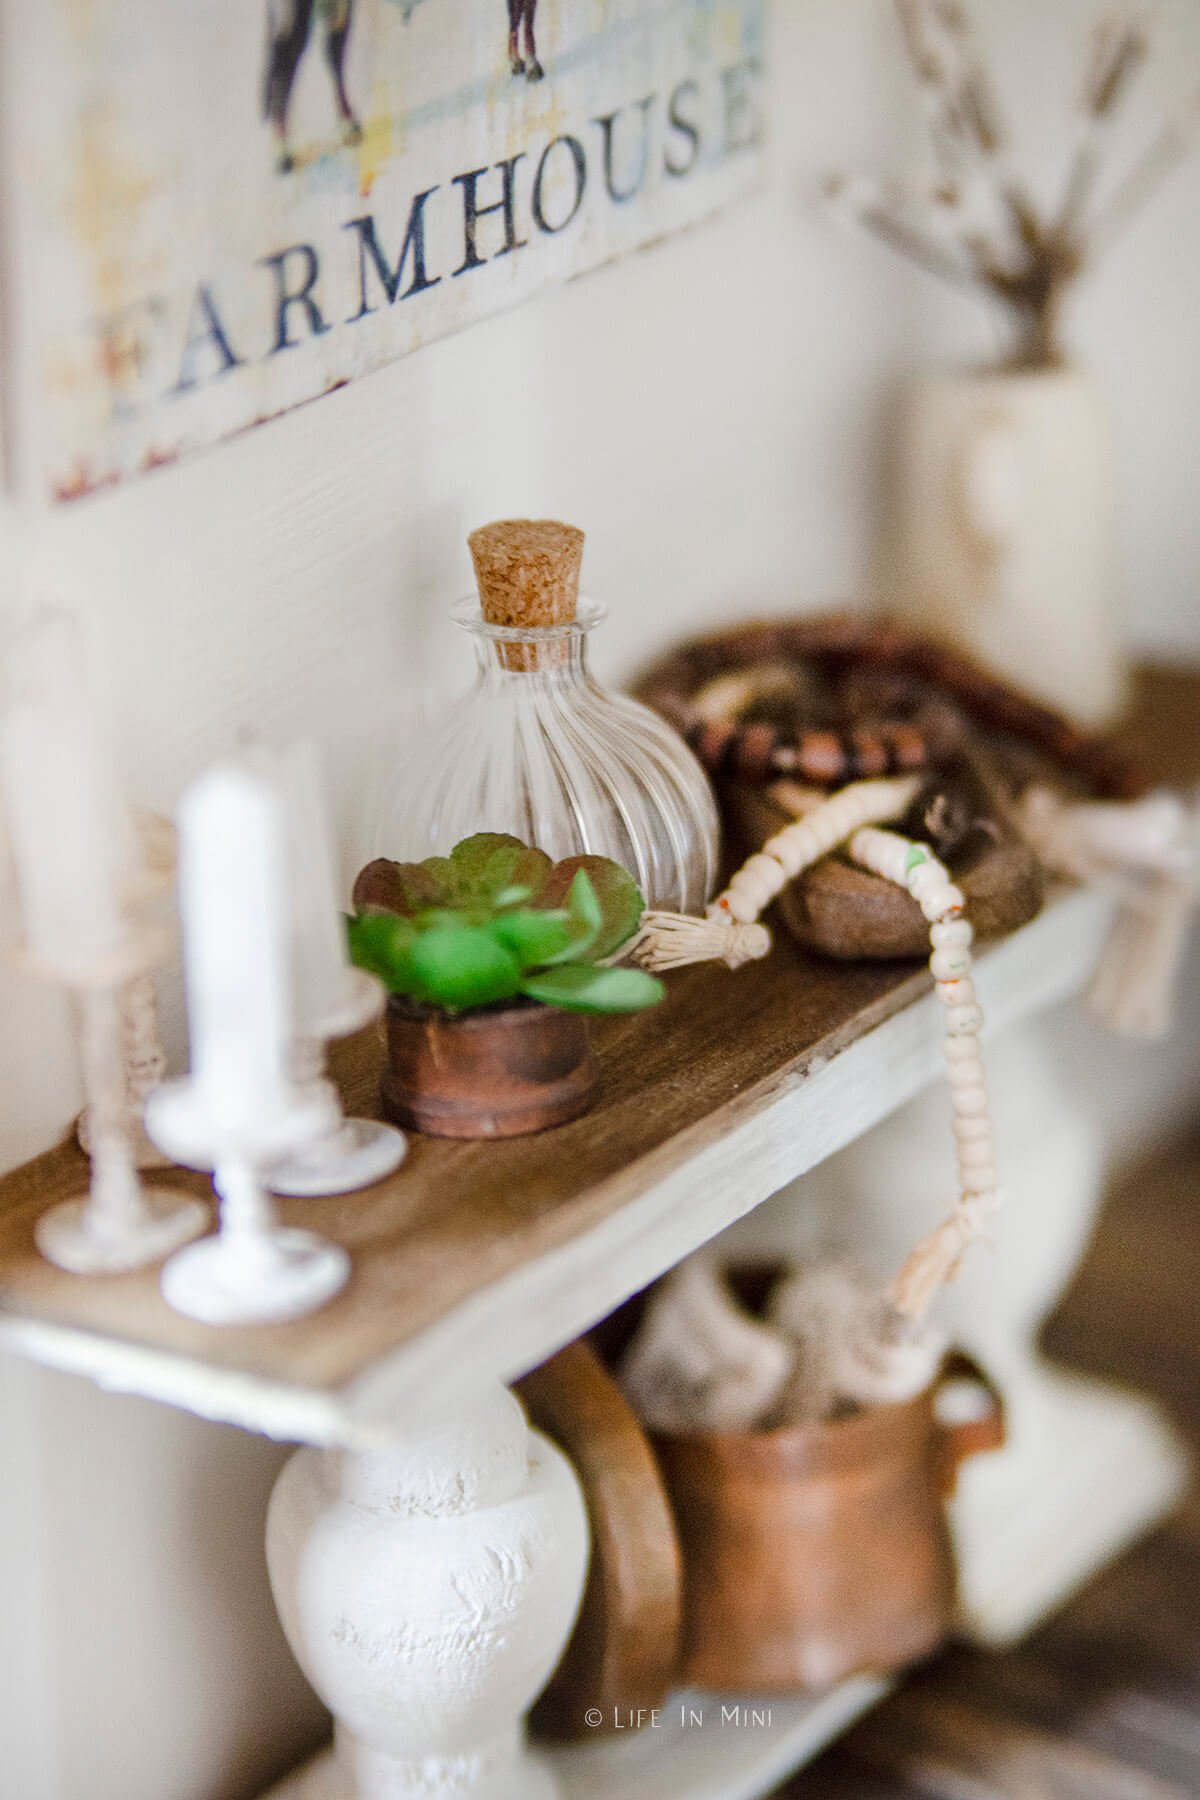
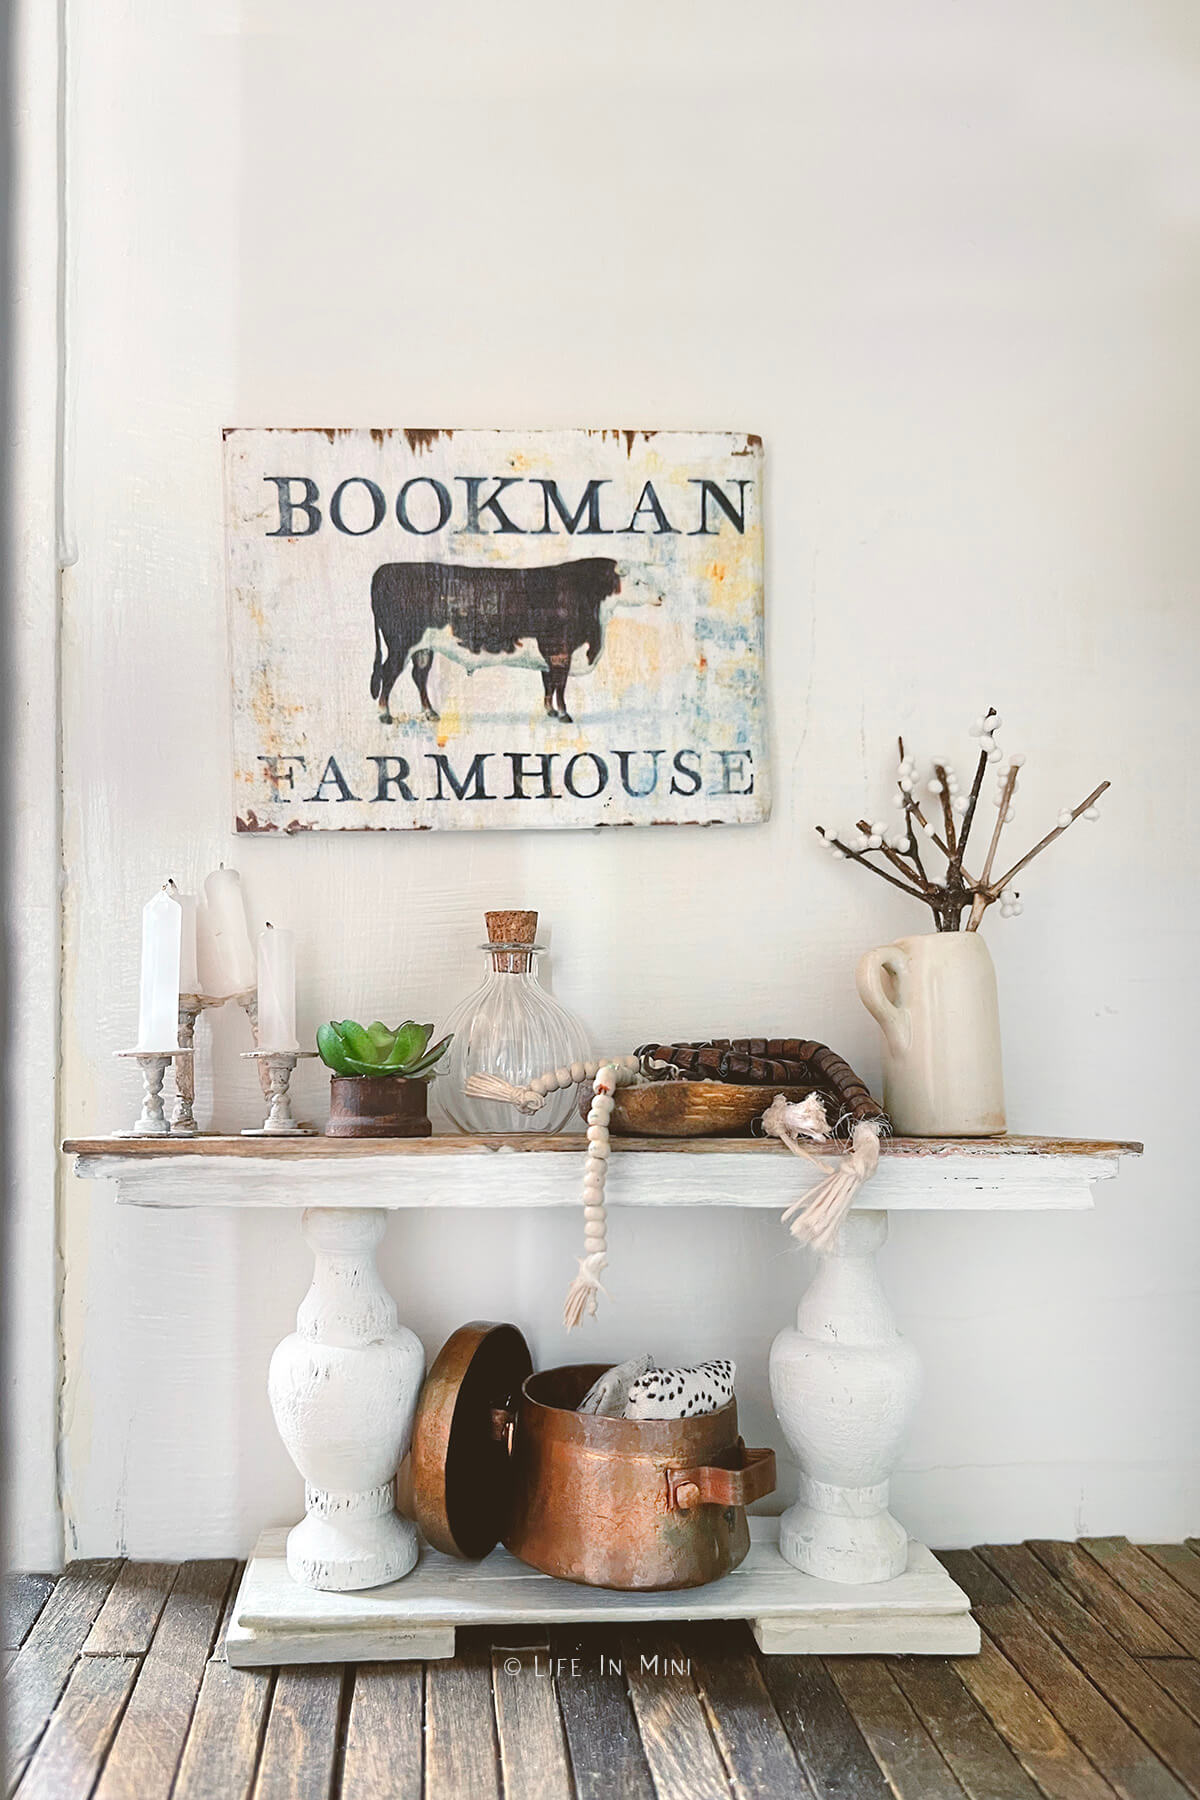
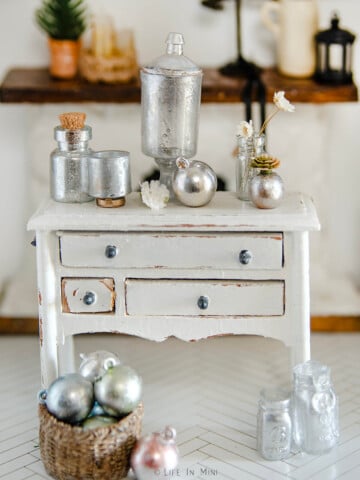
Usually with wood dollhouse furniture, I keep the piece stained and natural looking. But I also loved how the painted piece turned out, so I ended up painting the base with a rustic and worn white finish but kept the top of the table natural with a wood stain.
I have seen similar 1:12 console tables selling for $40. Since I had scrap pieces of wood, glue and stain, I only purchased the finials, which were $3 at Hobby Lobby (for 3). Overall, I think the total cost of the wood is about $5-$7.
This replaced a store bought console table that didn’t quite fit with my taste. You can see the old one in my post about how to make miniature candlesticks, yes the same candlesticks you see in the picture above.
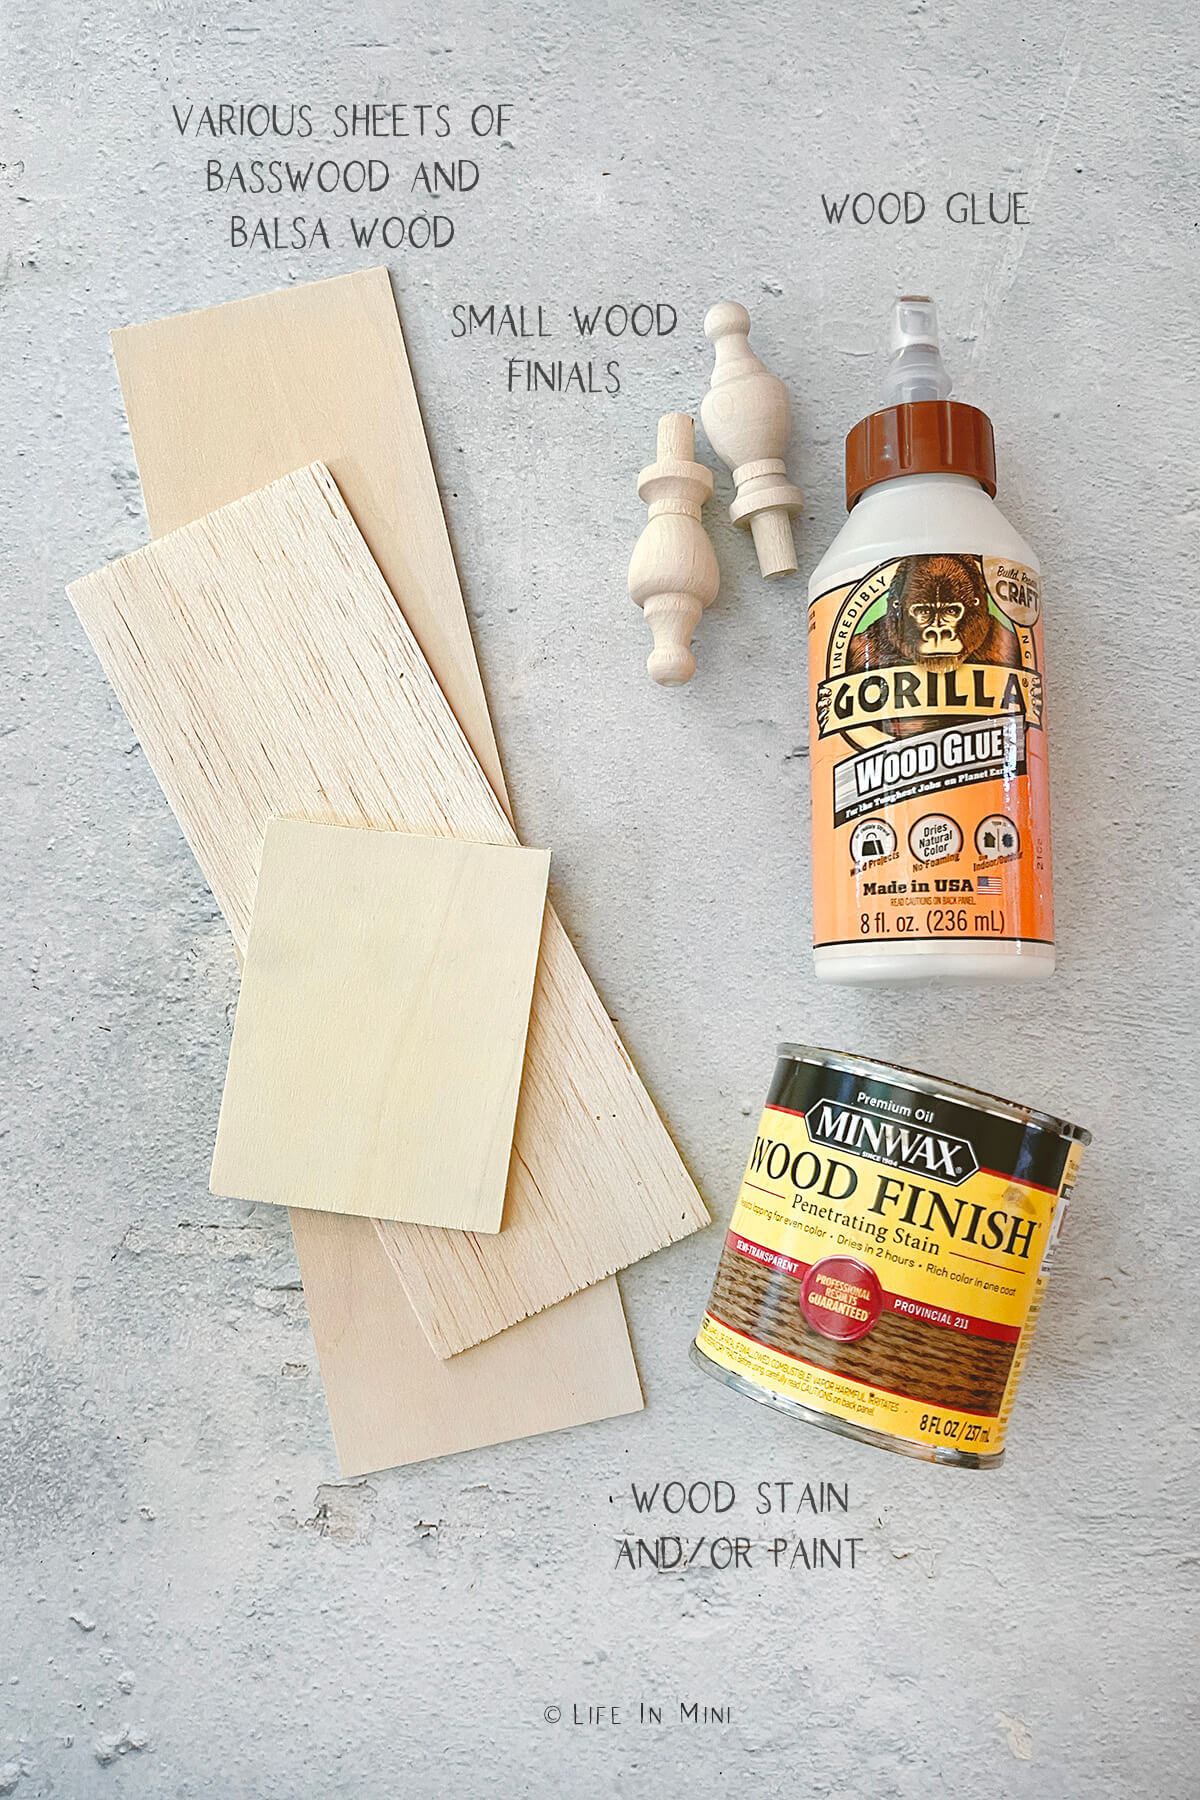
Supplies you need
This post contains some affiliate links for your convenience (which means if you make a purchase after clicking a link I will earn a small commission but it won’t cost you a penny more)! Read my full disclosure policy.
- Assorted flat pieces of wood: I used various types of wood: popsicle sticks, basswood and balsa. They were also in different thicknesses. For this specific design, I have the exact dimensions below in the directions.
- Small wood finials: To mimic pedestals of the table, I used these wood finials that I found at Hobby Lobby. They are ⅜″ and 15/16″ x 2 ⅞″. You can find similar finials on Amazon. They are also similar to mini wood balusters. You will need to trim off the peg at the end.
- Sand paper: After trimming the wood pieces they need some light sanding.
- Wood stain: I stained the top of the table (which is basswood) using minwax provincial 211.
- Acrylic paint: I wanted the rest of the console table to have this rustic white finish. I used white and cream paints. You can also use chalk paints.
- Small paint brushes: You will need one to paint the wheels and another to brush on glue.
- Wood glue: You can also use Aileen’s tacky glue, as long as it dries clear, but I find that wood glue gives a stronger bond.
- Wood cutters: You can use an x-acto blade, miter shears or a mini table saw to trim the pieces to desired lengths. If using an x-acto, use a metal ruler with cork backing as your guide.
- Clamps: While the wood pieces are glued and drying, you will need some small clamps or large binder clips to insure a tight hold.
Step-by-step directions
- Cut your wood. For this particular design, I used the following pieces:
- Top of the table: 1/16-inch thick basswood 6″ x 1.5″
- “Beveled” top underneath: ⅛-inch basswood 5.75″ x 1.5″
- Thick table section: 3/16 to ¼-inch balsa wood 5.5″ x 1.5″
- Wood slats: 3 popsicle sticks with rounded ends cut off
- Square feet: 2 ¼-inch basswood squares 1″ x 1″
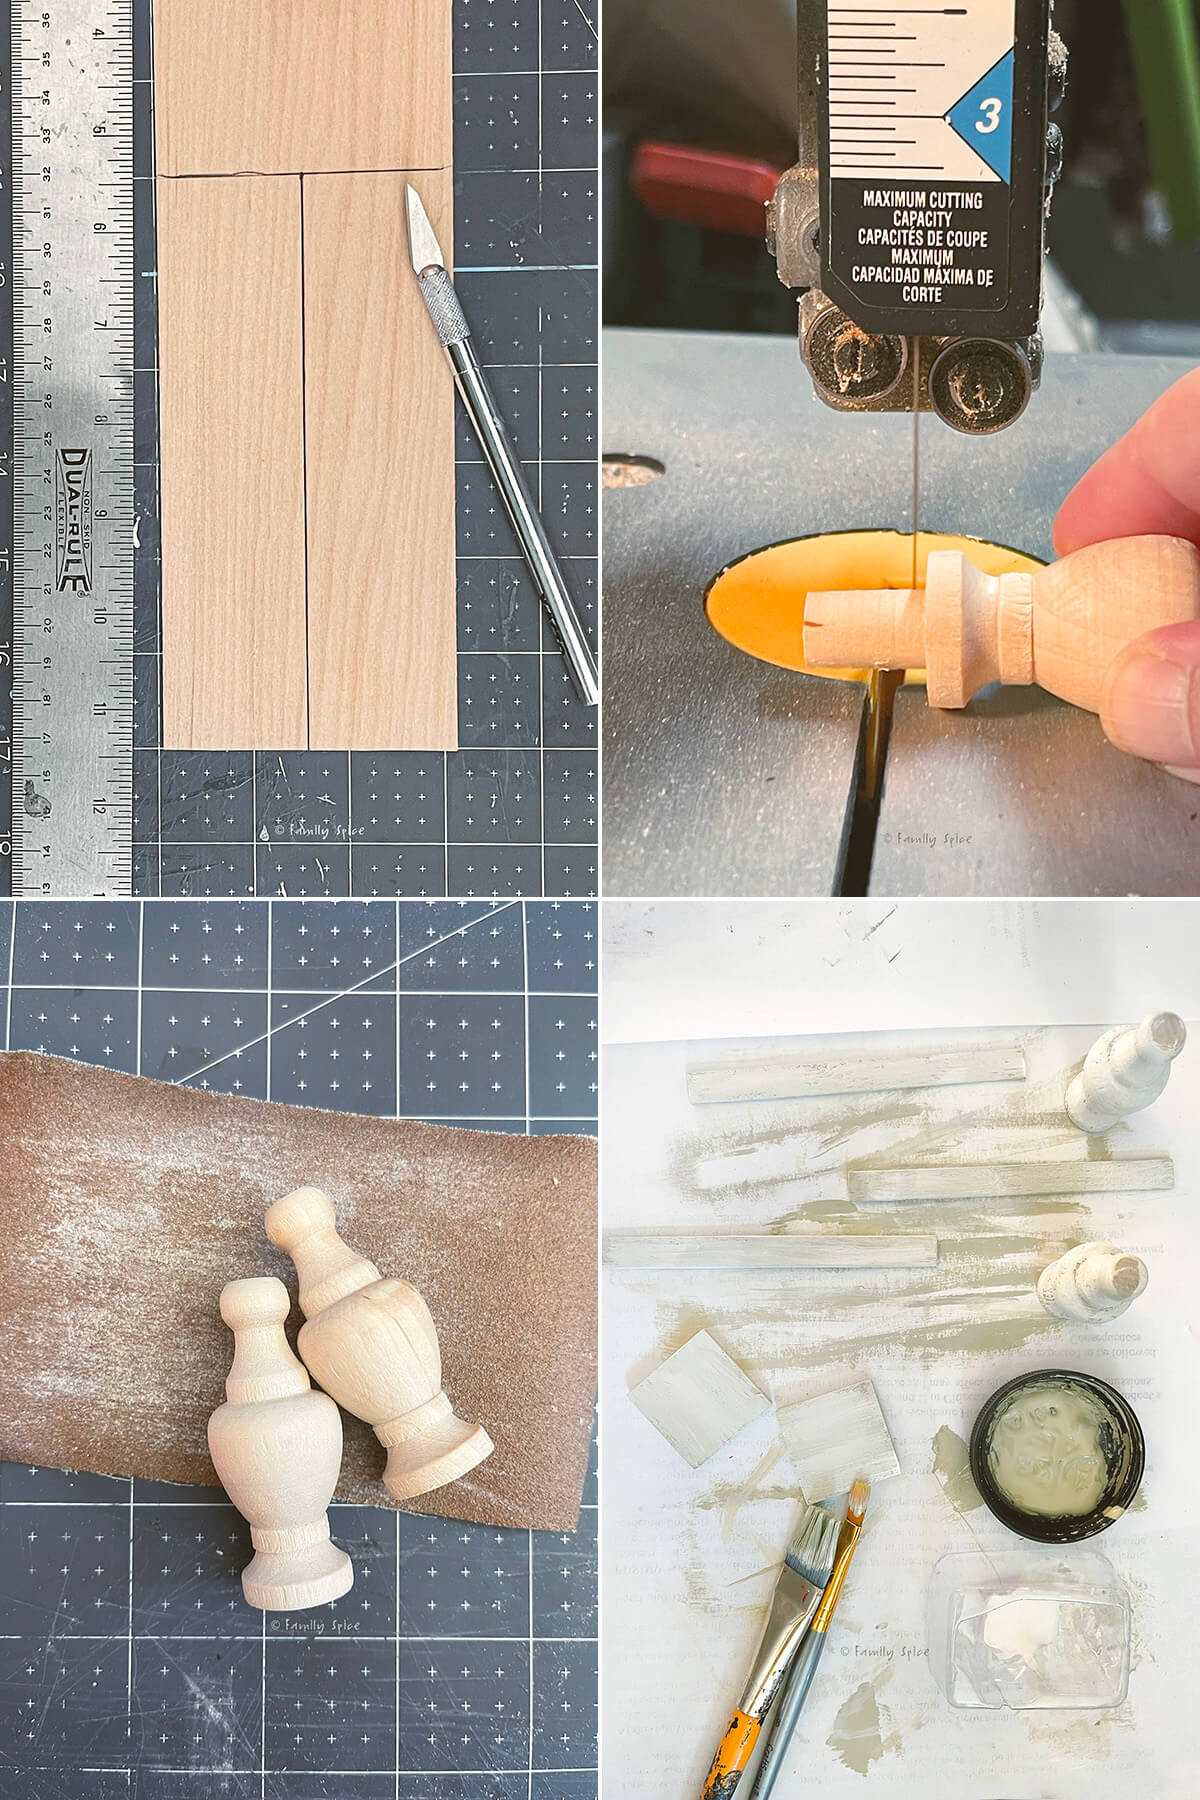
- Cut the finial. You will need to cut the little peg on the end of the finial. Cut it as close to the flat base as possible then sand it flat and smooth. The top of the finial is rounded like a ball. Sand a little off the top so it is flat. This end will be glued to the bottom of the table top.
- Sand all the wood pieces. You should also sand the bottom and rounds of the finials.
- Stain/paint the wood. If you are staining the whole piece, stain it before gluing because if you drip some glue, you cannot stain glue. If you are painting the piece, you can paint it before or after you glue everything together. You can paint over glue blobs.
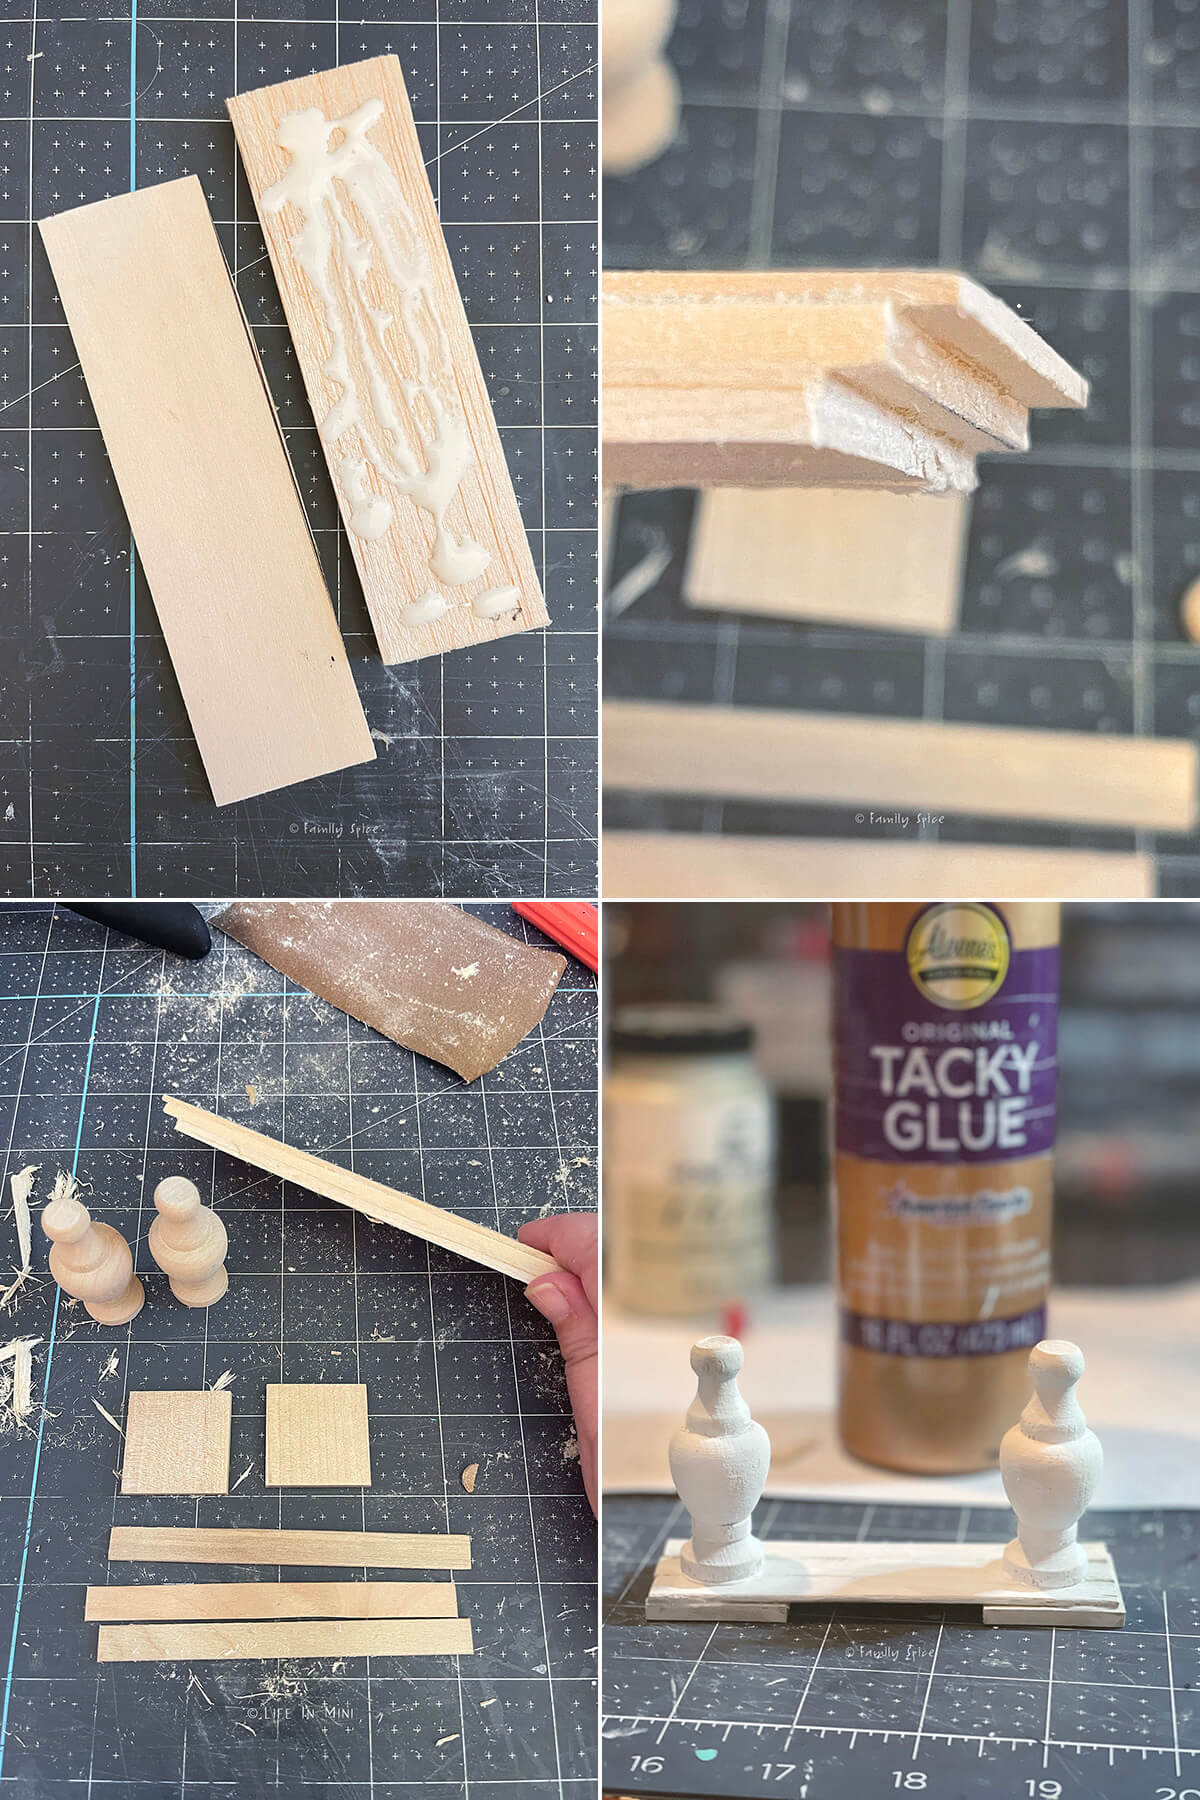
- Glue and assemble the table top. There are three layers of the table top of various lengths. The stained wood top is the longest and thinnest piece. Glue that to the slighter thicker smaller piece, finishing with the thick balsa base underneath it. Clamp it tight until the glue is set.
- Glue and assemble the base. Glue the ends of the cut popsicle sticks on top of each wood square. There will be about a 1.5-inch gap between each wood square. Clamp to set the glue.
- Glue the finials. Position and glue each finial over the popsicle sticks so they are placed in the center of each square foot.
- Glue the table top. Add glue to the top of each finial and center the table top over the base. Let it dry completely.
Laura’s Top Pick:
If you find these mini wood finials and spindles, snag them up! They are awesome for making dollhouse furniture, table lamps, vases and so much more!
Project tips and FAQs
The miniature console table measured to be about 3-inches tall, which is a good height for 12th scale dollhouses. If you have a small leveler, use it while you glue the top on. I forgot and mine glued a little off balance!
I recently purchased a magnetic gluing jig and completely forgot I had it. This too can help keep things level while waiting for the glue to dry.
Just like when you paint life furniture, give your mini table a few layers of paint- especially if you are distressing it. The farmhouse look isn’t about perfection. So a few dings and scratches will enhance the look and not take anything away.
Shopping tip: Hit the dollar stores and buy the wood kit projects. You can use them for miniature furniture making at the fraction of the cost of buying wood at the craft store.
Wood candlestick bases also make terrific table bases. Check out my simple dollhouse side table trick that can also be used to make a dollhouse dining table.

If you are enjoying my blog, why not sign up for my newsletter so you won’t miss out on the mini adventures!
Miniature Farmhouse Console Table

Purchasing dollhouse furniture can be expensive. This miniature console table is really easy to make and gives your modern dollhouse a little farmhouse chic.
Materials
- Assorted flat pieces of wood
- Small wood finials
- Wood stain
- Paint
- Wood glue
Tools
- Sand paper
- Small paint brushes
- Wood cutters
- Clamps
Instructions
- Using whatever wood cutters you have, cut your flat pieces of wood. The sizes will vary depending on your design. For the exact dimensions I used see the notes below.
- Cut the little peg on the end of the finial. Cut it as close to the flat base as possible then sand it flat and smooth. The top of the finial is rounded like a ball. Sand a little off the top so it is flat. This end will be glued to the bottom of the table top.
- Sand all the cut pieces of wood smooth.
- If you are staining the whole piece, stain the wood before gluing. Because if you drip some glue, you cannot stain glue. If you are painting the piece, you can paint it before or after you glue everything together. You can paint over glue blobs.
- There are three layers of the table top of various lengths. The stained wood top is the longest and thinnest piece. Glue that to the slighter thicker smaller piece, finishing with the thick balsa base underneath it. Clamp it tight until the glue is set.
- Glue the ends of the cut popsicle sticks on top of each wood square. There will be about a 1.5-inch gap between each wood square. Clamp to set the glue.
- Position and glue each finial over the popsicle sticks so they are placed in the center of each square foot.
- Add glue to the top of each finial and center the table top over the base. Let it dry completely.
Notes
For this particular design, I cut the wood pieces to these sizes:
PS If you try this craft, why not leave a star rating in the direction card right below and/or a review in the comment section further down the page? I always appreciate your feedback.
You can also follow me on Pinterest, Facebook or Instagram. Sign up for my eMail list, too!
Written by Laura Bashar
I’m a food blogger and cookbook author that loves miniatures and crafting. I started this blog to share my passion for minis, including tutorials and free printables.
Leave a Reply