Add a little rustic charm to your dollhouse furniture with this miniature farmhouse coffee table with pulley wheels. Includes a tutorial on making this with a Cricut Maker, basswood and black kraftboard.
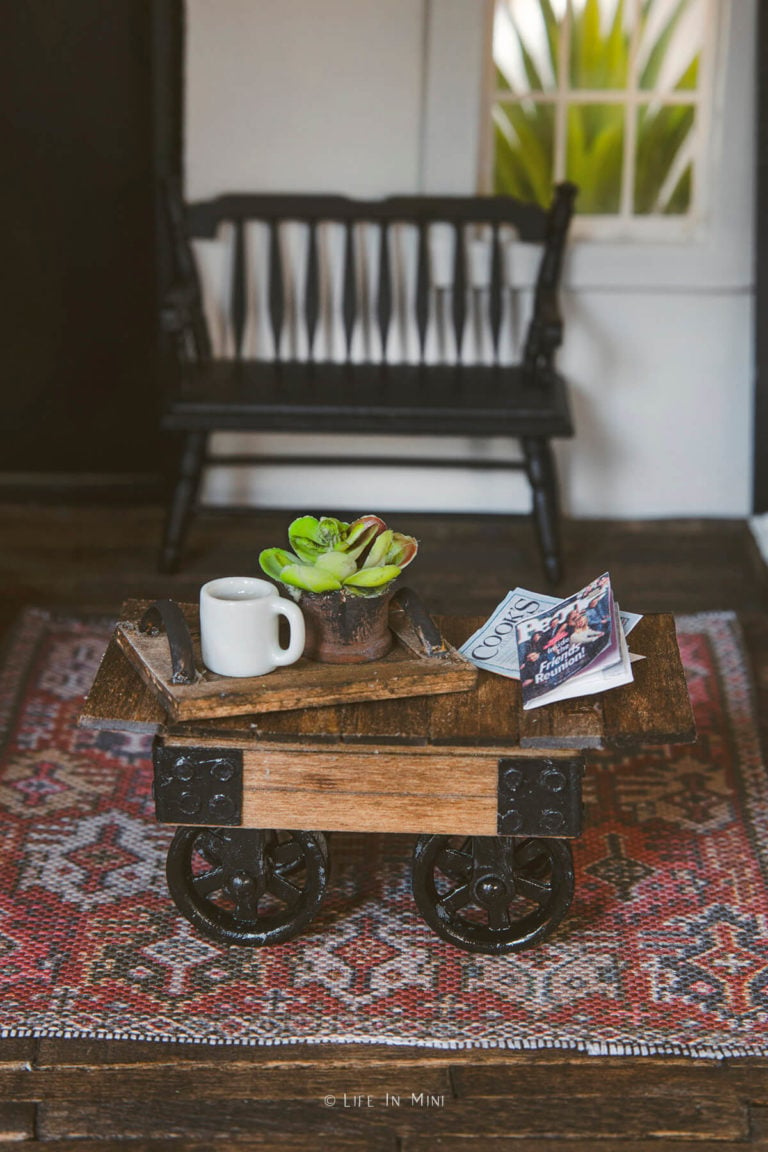
When I was kid, there were two styles of dollhouse furniture available: traditional Victorian type furniture and turn-of-the century rustic country. Today you can find more modern dollhouse furniture on Amazon, craft websites/stores and etsy.
Some pieces I like to purchase, things like chairs and more ornate style furnishings that are way beyond my skill level to recreate. Lately I decided it was time to dabble a bit outside my comfort zone and start building my own miniature furniture.
I found these mini pulley wheels on clearance at Hobby Lobby or Michaels and added them to my ever growing collection of minis, trying to figure out how to use them. They sat there for almost a year!
While hunting for furniture inspiration on Pinterest, I found this fabulous farmhouse coffee table. It had a great industrial feel with the wood and wrought iron. And look at those wheels! Just my style!
I decided it was time to make my own pulley wheel table. I cut all the pieces using my Cricut Maker. The wheels are a bit on the large side for 1:12, but I like that they look larger than life.
Do you like the rug I have it sitting on? You can make it, too. Check out my dollhouse rug tutorial. And I made that miniature wooden tray from scraps.
This post contains some affiliate links for your convenience (which means if you make a purchase after clicking a link I will earn a small commission but it won’t cost you a penny more)! Read my full disclosure policy.
Supplies you need
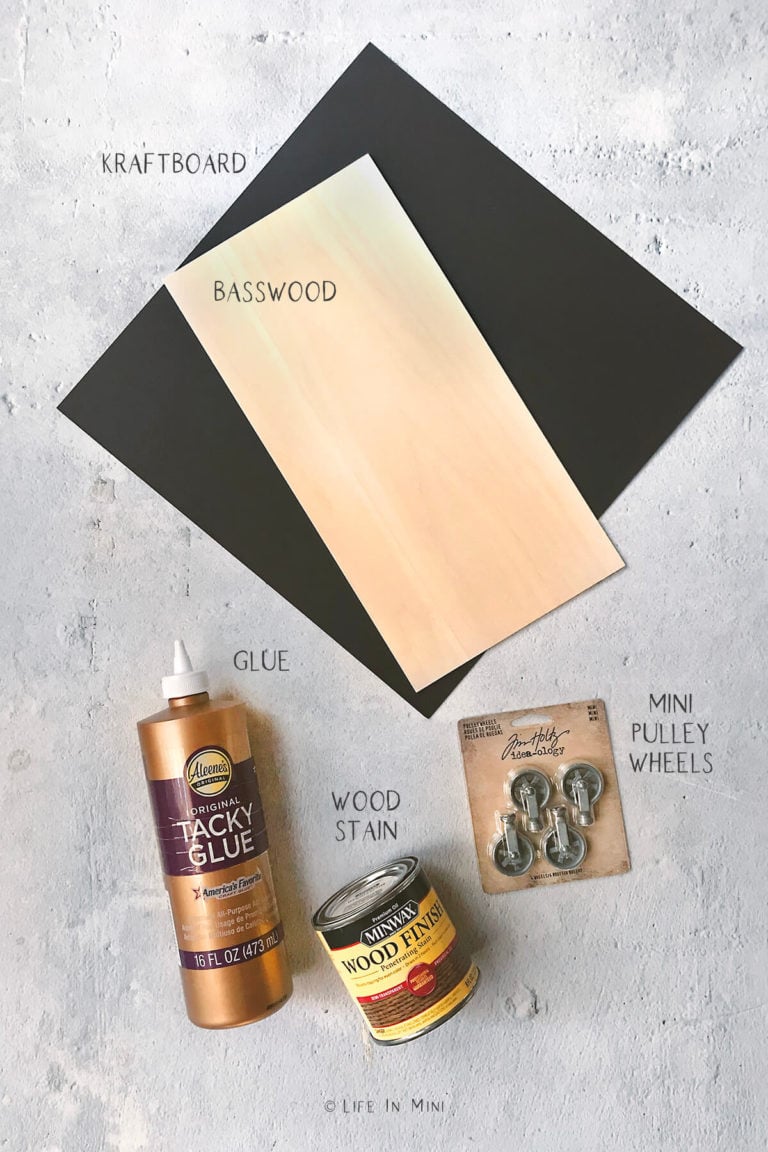
- Cricut maker: I provide you with an SVG file which is compatible with a variety of wood cutting machines. I have tested this out with this Cricut maker.
- Cricut blades: Since we are cutting balsa wood, you will need the knife blade. And for the kraft board, you will need the fine point blade.
- Cricut strong grip and standard grip mat
- Sheet of basswood
- Piece of black kraftboard: You only need a small 5″ x 5″ square.
- Painters tape: You will need to adhere the bass wood sheet onto the cutting mat.
- Sand paper: Some of the pieces might need light sanding once cut.
- Wood stain: You can leave it natural or use apply wood stain. I used minwax provincial 211.
- Black enamel paint: The pulley wheels are metal and gray in color. I wanted black, so I painted mine black. I found the black enamel paint used for models works really well on these wheels.
- Small paint brushes: You will need one to paint the wheels and another to brush on glue.
- Aileen’s tacky glue: You can also use wood glue, as long as it dries clear.
- Mini pulley wheels: I built this coffee table for these specific Jim Holtz Idea-ology Pulley Wheels. They are about 1-inch tall. You can also find these at Michaels and Hobby Lobby, so you can save a few dollars by using those coupons!
- Industrial coffee table SVG file: I’m offering this for 99¢ to see how you like it. It also comes with a PDF file, in case you do not have a cricut machine.
- Flat head screwdriver
Step-by-step directions
1. Upload your SVG file into Cricut Design Space. Place the image into a new project. As is, the images are scaled for 1:12. The pulley wheels you use in this project are on the large side, so you can easily enlarge the cut files for 1:6. Use the yellow square box as your guide. For 1:12, the box is 1-inch, for 1:6 it is 2-inches. Once resized, hide the yellow box.
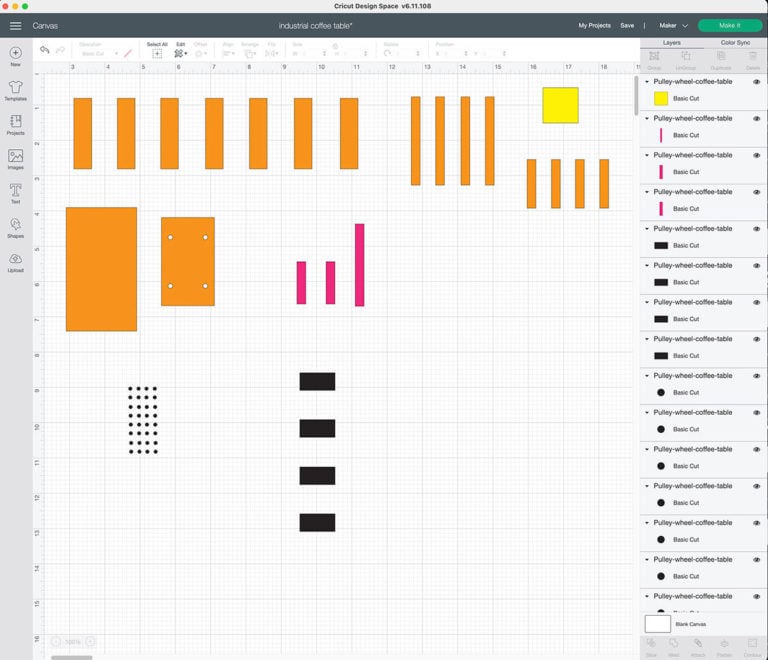
2. The orange images are cut on basswood while the black images are cut on black kraft board. Start with the basswood images, and hide the kraft board images. Arrange the files on your mat (6×12 if using Cricut basswood), then attach the files. Select “Make It” then set material size.
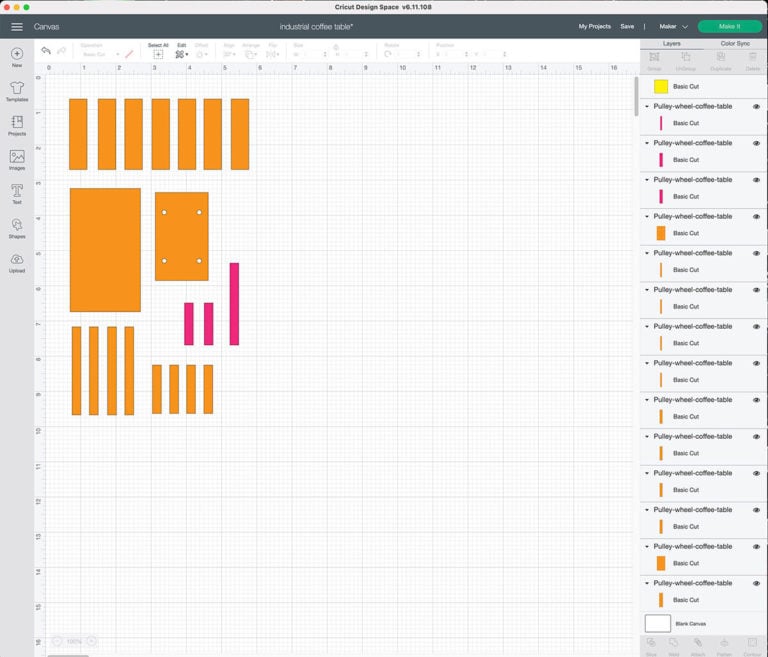
3. Place your basswood sheet onto your cutting mat and tape it down. Insert into the Cricut maker, making sure that the rollers are moved all the way to the right. Insert the knife blade into your Cricut maker.
Using Cricut Design Space, select your material size and basswood as your material. Once everything is loaded and ready press the Go button on your machine to begin cutting. Once cut, gently remove the pieces and sand edges, if needed.
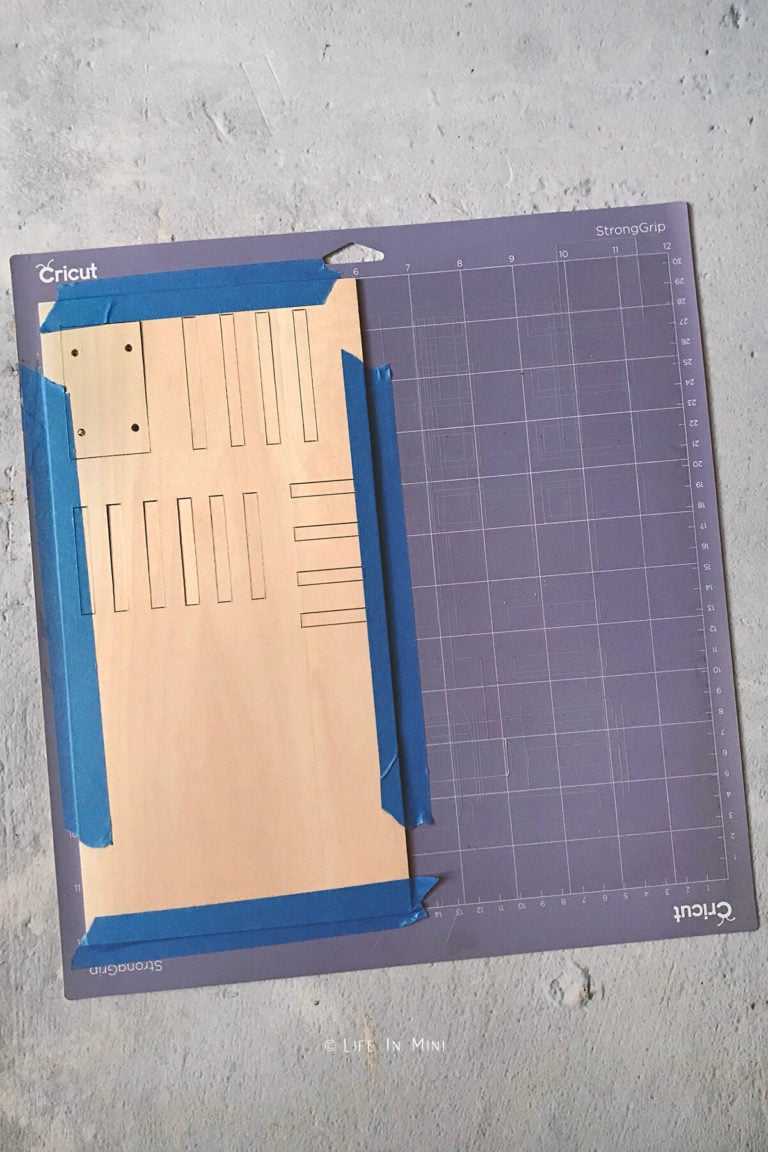
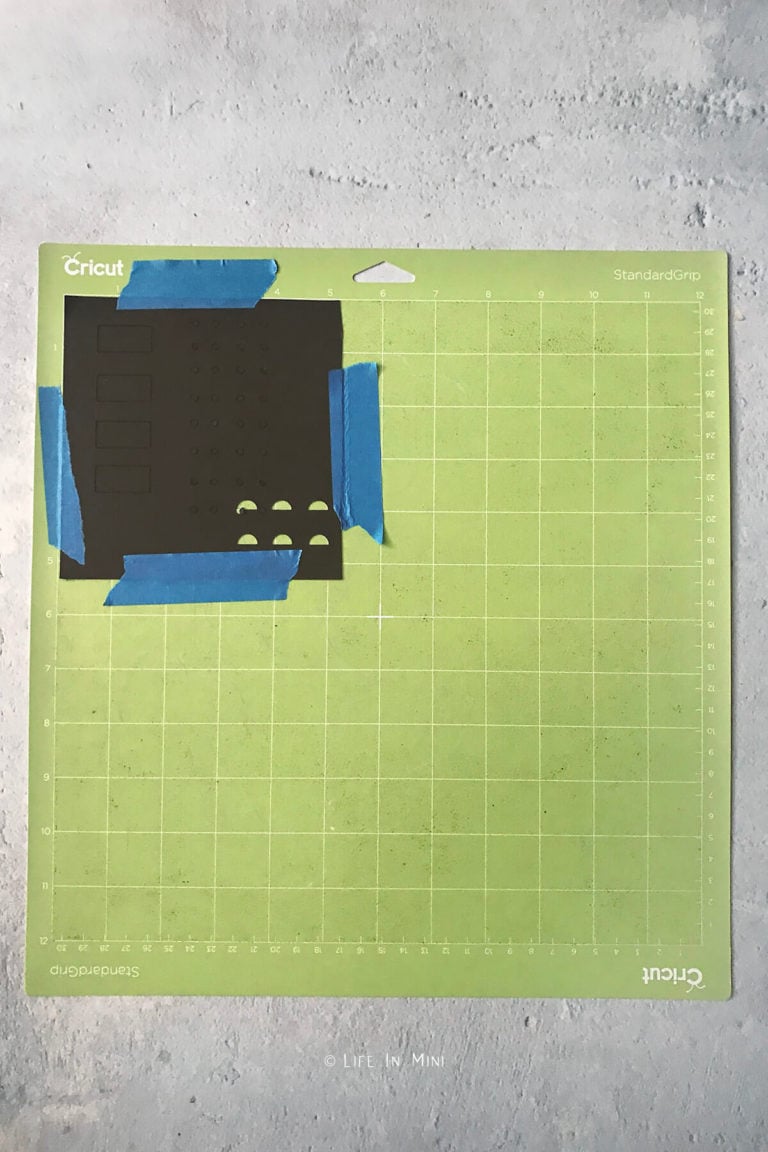
4. Detach the basswood images and hide them. Arrange the images for kraft paper and attach them. Select “Make It” then set material size. Place your black kraft paper onto your cutting mat and tape it down, if you prefer. Insert into the Cricut maker, making sure that the rollers are moved all the way to the right.
Insert the fine point blade into your Cricut maker. Using Cricut Design Space, select kraftboard as your material. Once everything is loaded and ready press the Go button on your machine to begin cutting.
5. Stain the wood pieces and allow them to dry completely before you start glueing it together. If you want black wheels, use enamel paint to paint them black.
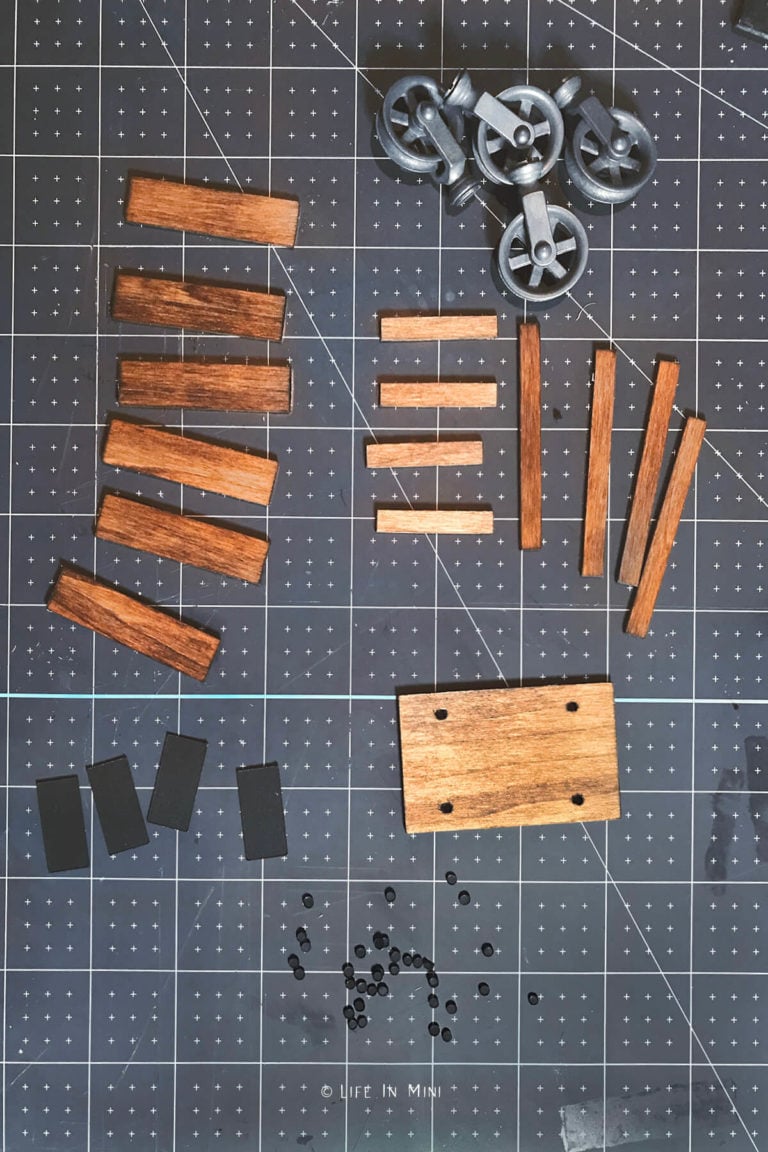
5. Start glueing table side long and table side short pieces around the sides of rectangle with the holes in it. Once dry, stack and glue the second layer of sides. I didn’t take many pictures during this part of the assembly, so this shows the sides with the table more assembled.
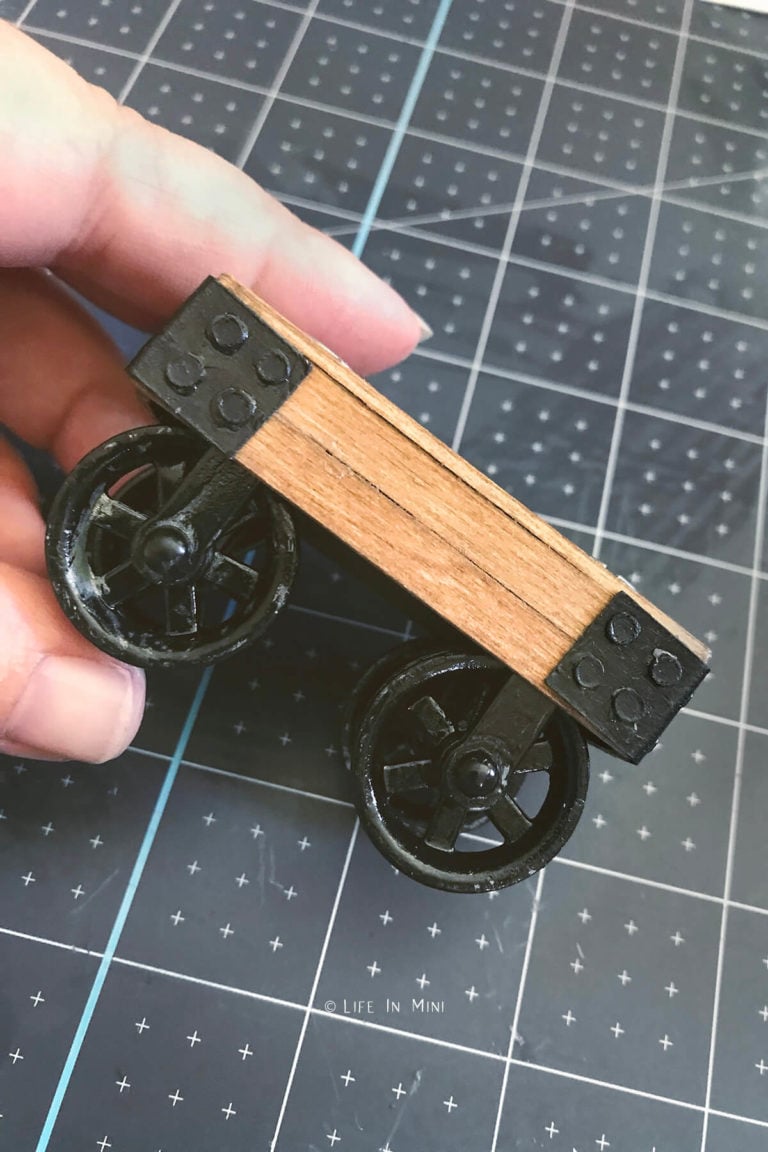
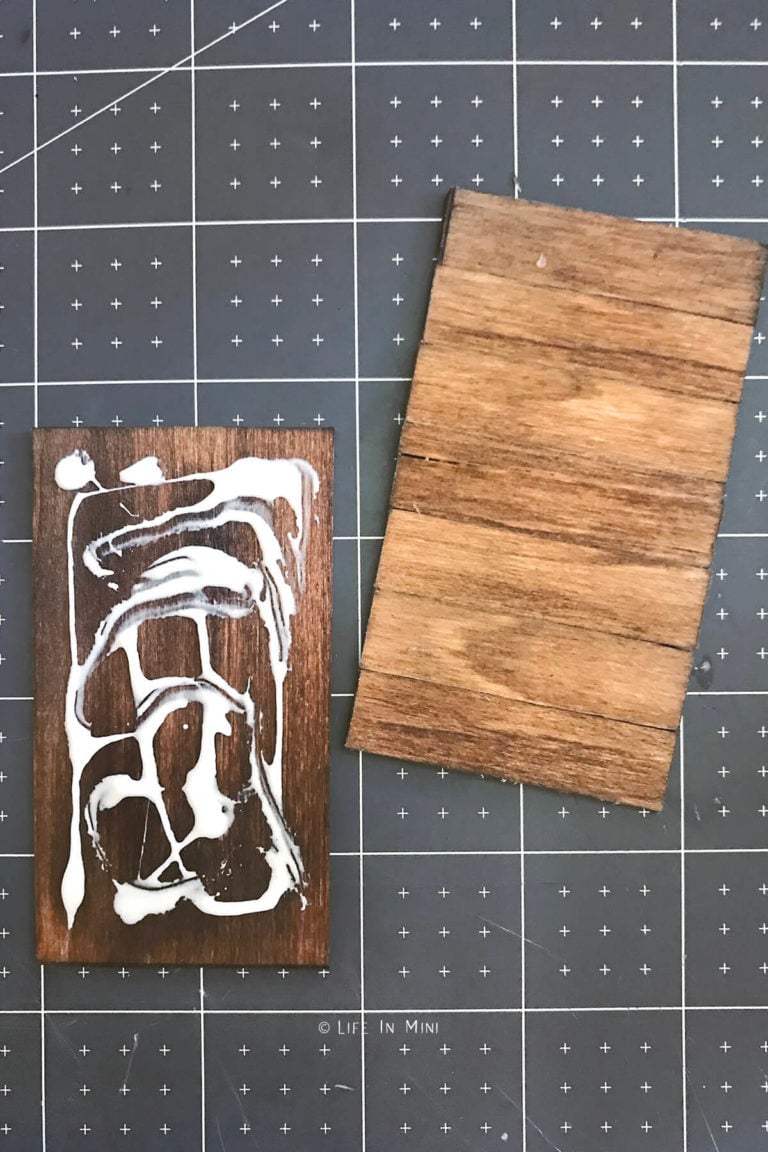
6. Glue the 7 rectangles to each other and onto the big rectangle without the holes. This is the top of the coffee table. Use clips and to keep it all flush and dry flat.
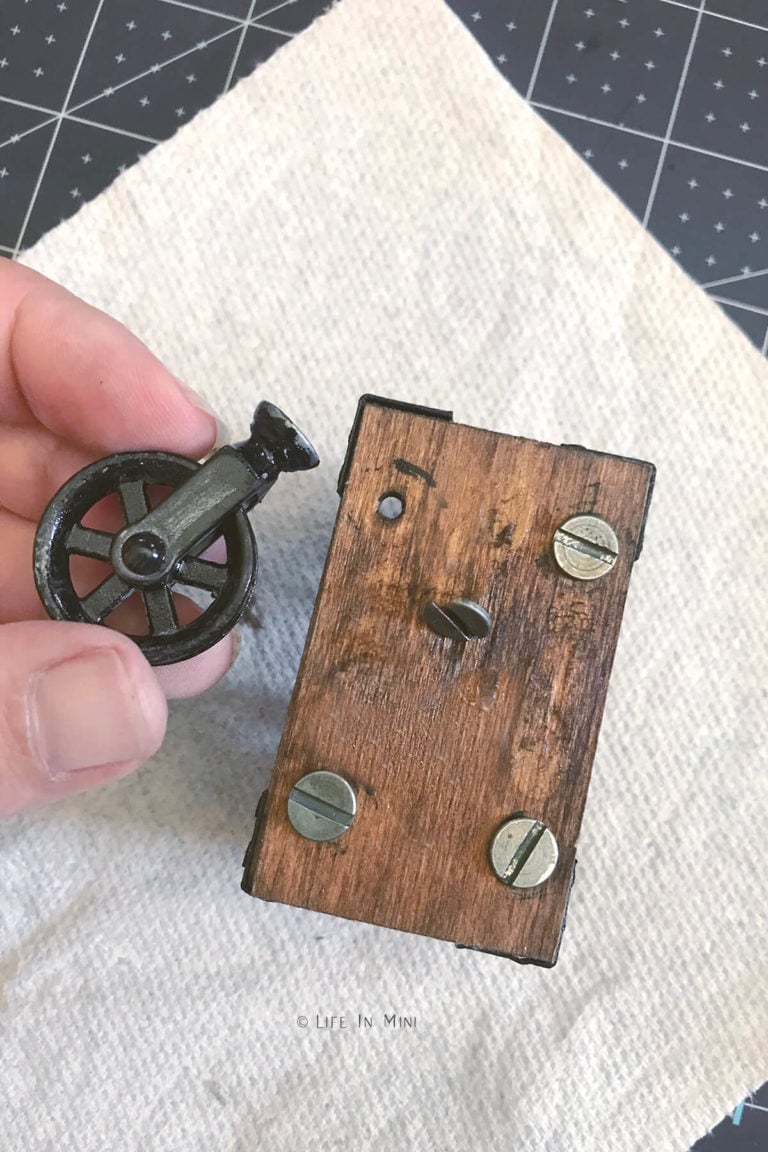
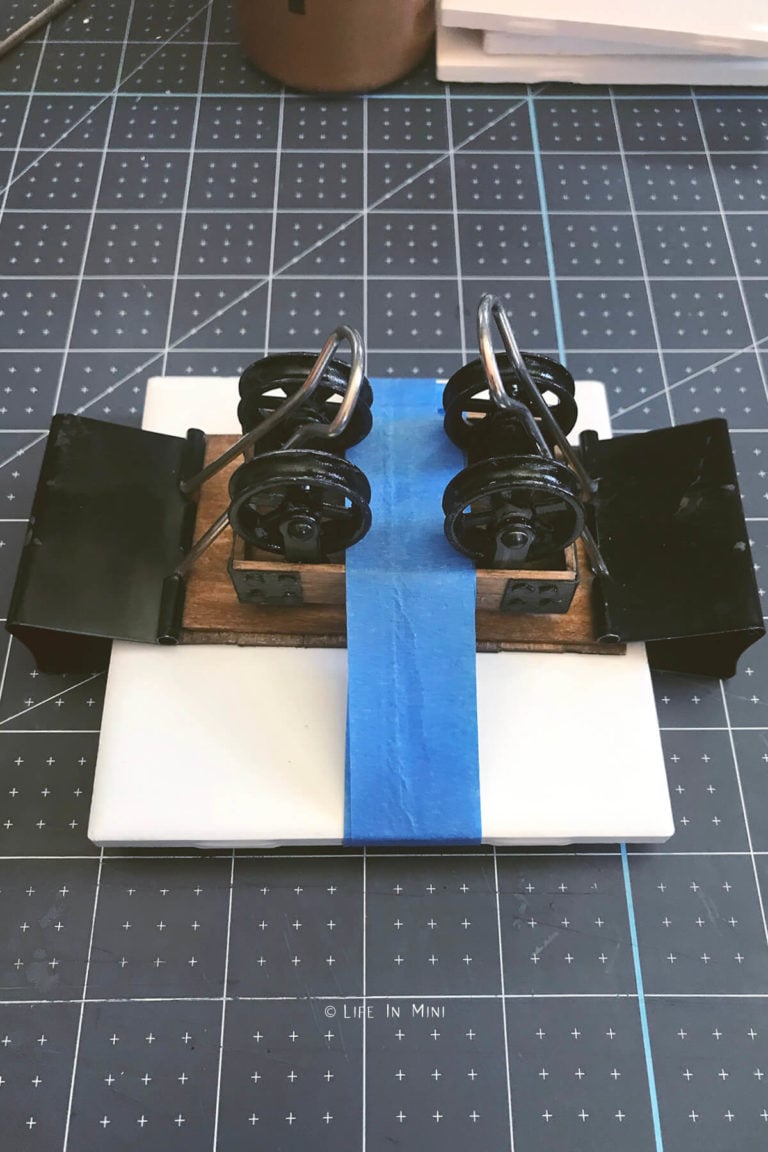
9. Unscrew the pulley wheels and insert into your box, flat side up. The wheels will be partially inside the box. Screw the wheels in tight.
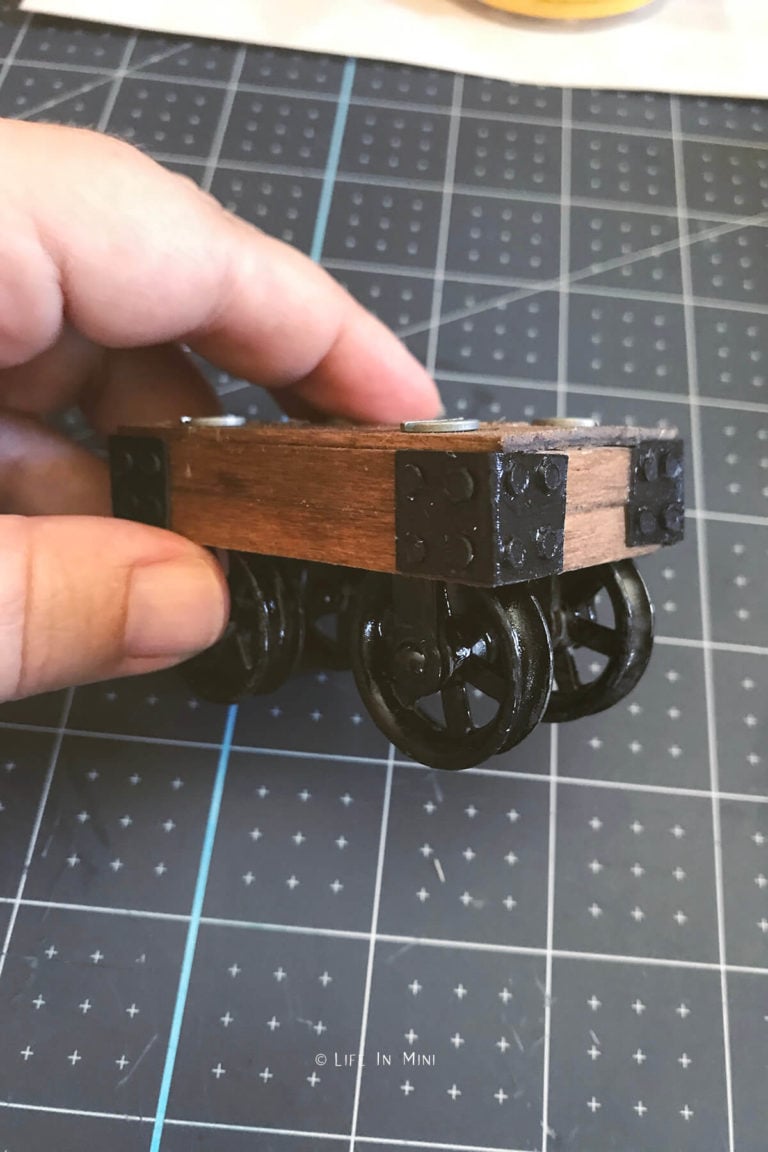
10. Fold the black kraftboard rectangles in half by placing your xacto or ruler down the center and fold it over 90-degrees. Glue each folded rectangle along each corner of your box. Dab four dots of glue on each of the outside folded squares and place the small black circles on each dab of glue. Each square will use 4 circles, “iron nail heads.” Brush it all with white glue or Mod Podge for sheen.
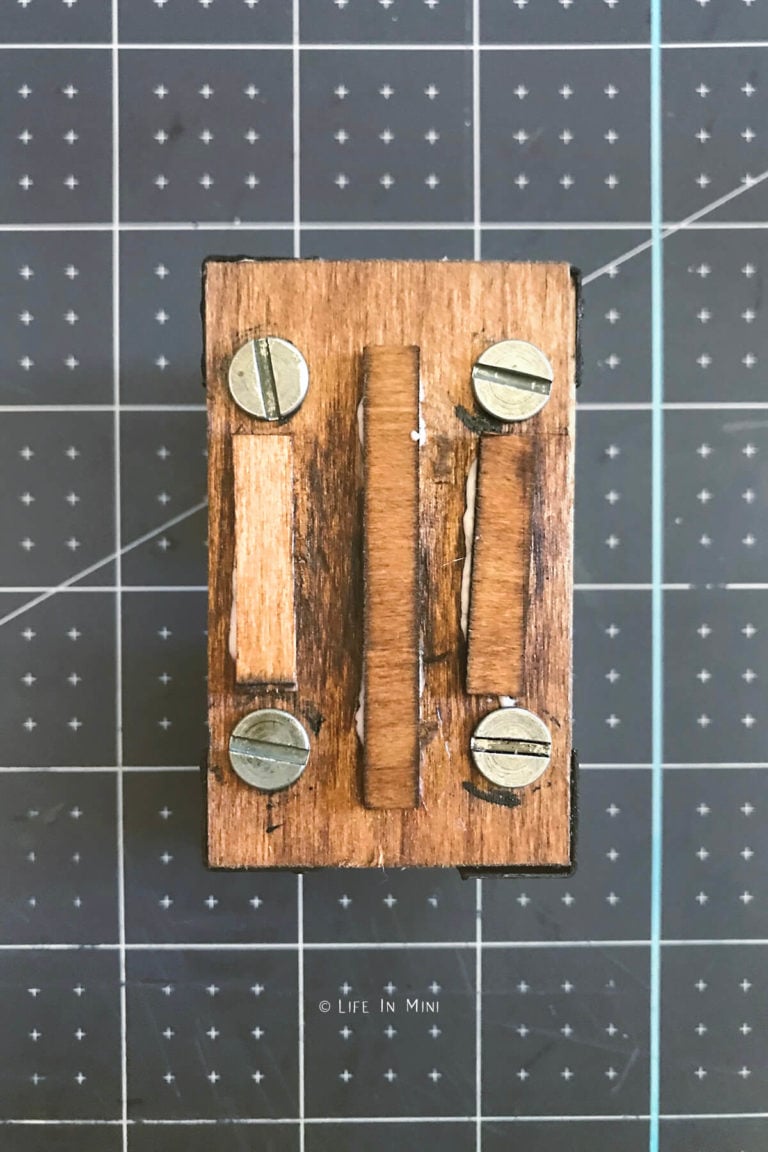
10. Glue down the support pieces onto the main coffee table box: the larger piece down the center and the two smaller pieces between the wheels. Now these are a bit thicker than I liked, so you could cut these onto kraftboard instead.
11. Glue the top down onto the support pieces. Secure with clips and tape to keep it flat.
Project tips and FAQs
I added the 3 support pieces on the coffee table to accommodate the height of the screws. But afterwards, I found them a bit too tall despite being 1/16th of an inch thick. So consider cutting those pieces with the kraftboard instead.
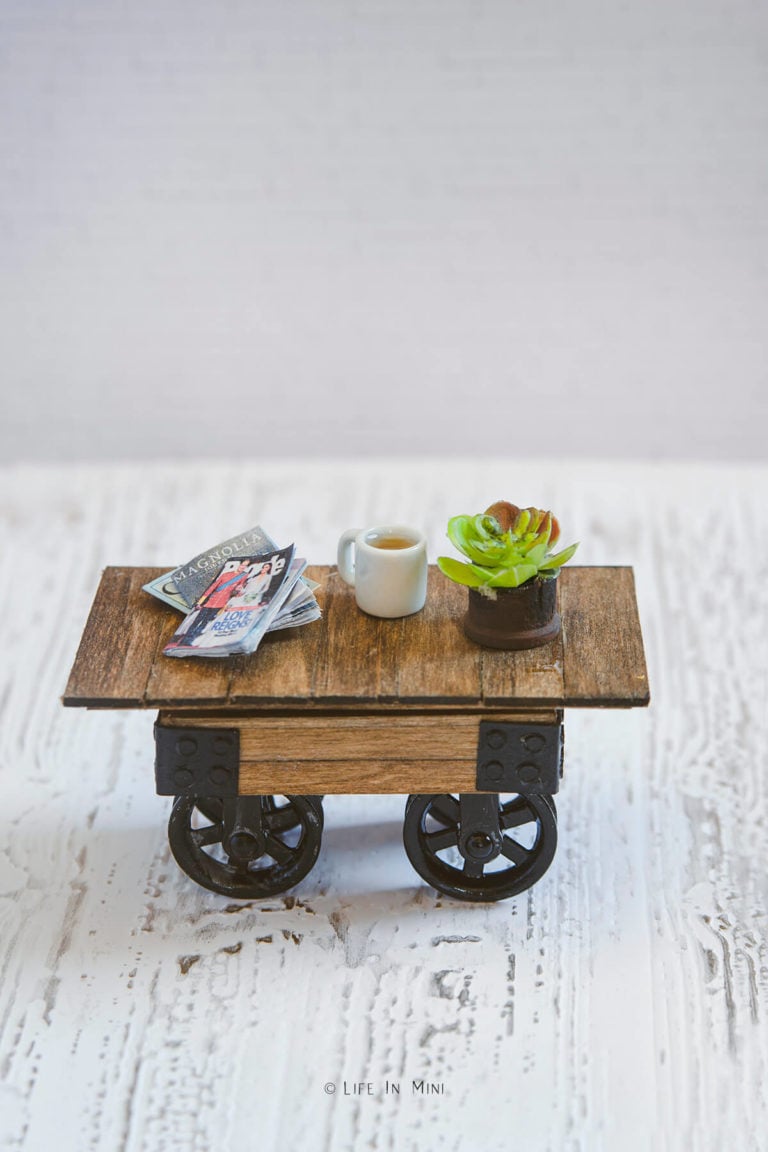
Warts and all, I really love how this piece turned out. Yes, the wheels roll and move, even after I painted them black. I kinda want this in my real family room…
If you have any troubles with this build, please let me know.
If you are enjoying my blog, why not sign up for my newsletter so you won’t miss out on the mini adventures!
DIY Dollhouse Industrial Coffee Table with Pulley Wheels
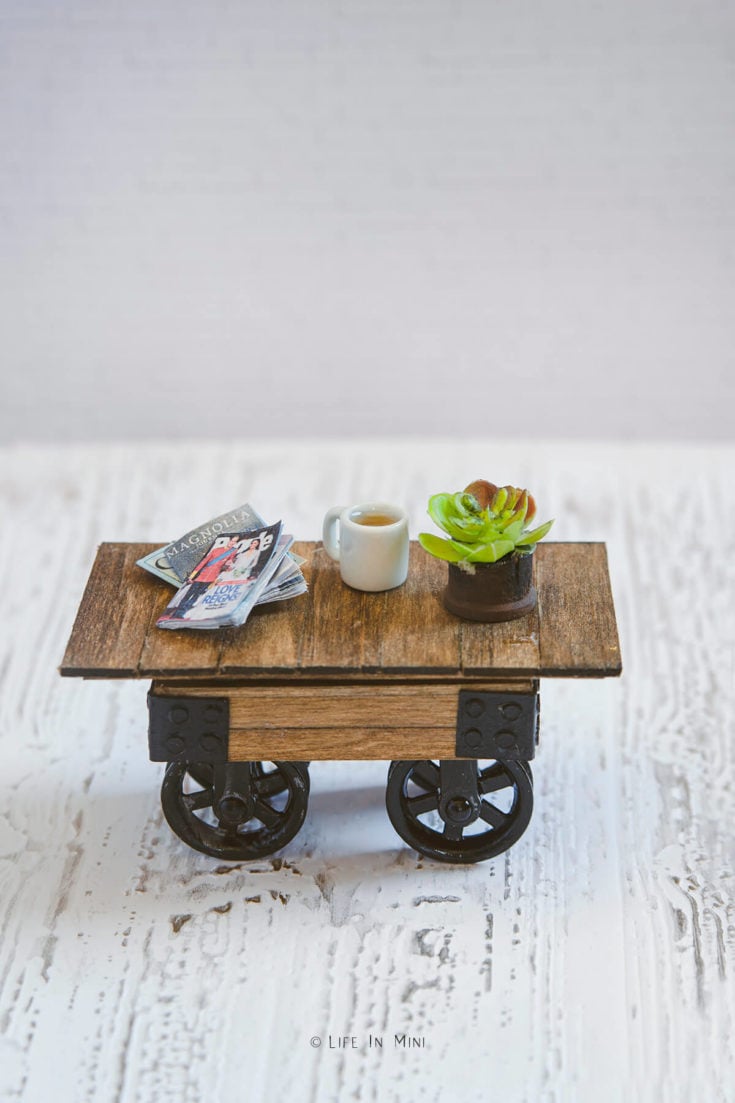
Add a little rustic charm to your dollhouse furniture with this miniature farmhouse coffee table with pulley wheels. Includes a tutorial on making this with a Cricut Maker, basswood and black kraftboard.
Materials
- Sheet of basswood
- Piece of black kraftboard
- Wood stain
- Black enamel paint
- Aileen's tacky glue
- Mini pulley wheels
Tools
- Cricut maker
- Cricut knife blade
- Cricut fine point blade.
- Cricut strong grip
- Cricut standard grip mat
- Painters tape
- Sand paper
- Small paint brushes
Instructions
- Upload your SVG file into Cricut Design Space. Place the image into a new project. As is, the images are scaled for 1:12. The pulley wheels you use in this project are on the large side, so you can easily enlarge the cut files for 1:6. Use the yellow square box as your guide. For 1:12, the box is 1-inch, for 1:6 it is 2-inches. Once resized, hide the yellow box.
- The orange images are cut on basswood while the black images are cut on black kraft board. Start with the basswood images, and hide the kraft board images. Arrange the files on your mat (6x12 if using Cricut basswood), then attach the files. Select “Make It” then set material size.
- Place your basswood sheet onto your cutting mat and tape it down. Insert into the Cricut maker, making sure that the rollers are moved all the way to the right.
- Insert the knife blade into your Cricut maker.
- Using Cricut Design Space, select your material size and basswood as your material. Once everything is loaded and ready press the Go button on your machine to begin cutting.
- Once cut, gently remove the pieces and sand edges, if needed.
- Detach the basswood images and hide them. Arrange the images for kraft paper and attach them. Select “Make It” then set material size.
- Place your black kraft paper onto your cutting mat and tape it down, if you prefer. Insert into the Cricut maker, making sure that the rollers are moved all the way to the right.
- Insert the fine point blade into your Cricut maker.
- Using Cricut Design Space, select kraft board as your material. Once everything is loaded and ready press the Go button on your machine to begin cutting.
- Stain your wood pieces and allow them to dry completely before you start glueing it together. If you want black wheels, use enamel paint to paint them black.
- Start glueing the thin pieces (A &B) around the sides of rectangle with the holes in it. Once dry, glue the second layer of sides.
- Glue the 7 rectangles onto the big rectangle without the holes. This is the top of the coffee table. Use clips to keep it all flush and flat.
- Unscrew the pulley wheels and insert into your box, flat side up. The wheels will be partially inside the box. Screw the wheels in tight.
- Glue down the support pieces onto the main coffee table box: the larger piece down the center and the two smaller pieces between the wheels.
- Glue the top down onto the support pieces.
Notes
I added the 3 support pieces on the coffee table to accommodate the height of the screws. But afterwards, I found them a bit too tall despite being 1/16th of an inch thick. So consider cutting those pieces with the kraftboard instead.
PS If you try this craft, why not leave a star rating in the direction card right below and/or a review in the comment section further down the page? I always appreciate your feedback.
You can also follow me on Pinterest, Facebook or Instagram. Sign up for my eMail list, too!






Leave a Reply