Not all papers are alike. Here are my tips and tricks for high resolution printing whether you are making miniature books or printing your children’s artwork.
Before I got married and became a stay-at-home mom, I worked in the advertising industry. Although I was an account executive, I learned early on about design and printing right before everything went digital.
Ad boards were created, color sheets were cut by hand, copy machines and wax machines were a necessity. Then everything went digital. Ads were sent to newspapers via internet and digital PDFs replaced our beloved ad boards.
But there is something about holding your artwork in your hand that gives you a sense of pride and accomplishment. Your digital image is brought to life.
At the ad agency, we used laser printers. They were the best way to print out high resolution artwork. And back then, they only printed in black and white. No one could afford laser printers at home, but boy have times have changed.
I currently do not own a laser printer. I do have an ink jet printer. I have owned Epson, HP and even Canon printers. This post is not a review of printers. I am very picky about printers and have yet to own one that I love.
But I will share with you some tips on how to print high resolution pieces for your miniature projects, even if you have a mediocre ink jet printer.
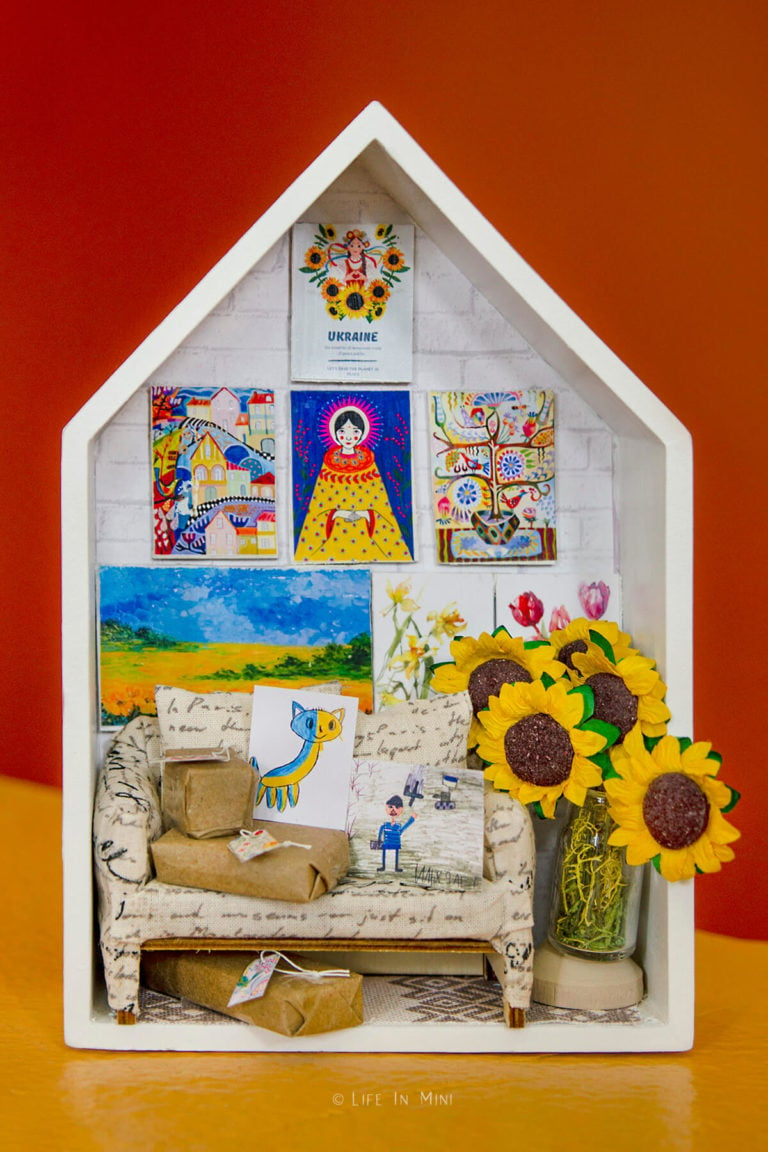
For this example, I am sharing this miniature scene I created this past week. I have personally found the war in the Ukraine to be disturbing. I have not been very focused on my food work and easily got distracted by updates and news reports.
There are many talented Ukrainian miniaturists that I have been following on YouTube and Instagram who have lost everything and are huddled in subway tunnels with their children and pets. Instead of posting polymer clay tutorials on Instagram, they are sharing daily updates of their survival.
The artwork I printed in this scene are all created by Ukrainian artists selling on Etsy. They offer digital downloads you can easily purchase for $3 to $12 each on Etsy. The money goes directly to the artist you purchase from, and Etsy is waving all fees for the sellers from the Ukraine.
It’s a small way to help and you just need to download the file then print them out. I also purchased some beautiful embroidery PDFs and even a crochet pattern (that’s going to you, Mom). There are lots of options to choose from and help.
Resolution
The key to printing clear and vivid images in normal scale or miniature is resolution. Pixels are the small dots your computer monitor or phone uses to create the text and images you see. Image resolution is measured using DPI (dots per inch).
For online images, you do not need the same quality of image as you would to print. So for online, most images are 72 dpi. If you have ever printed out an image you found online and noticed it was grainy, this is the reason why.
For printing, you need a higher resolution. The standard in printing is 300 dpi.
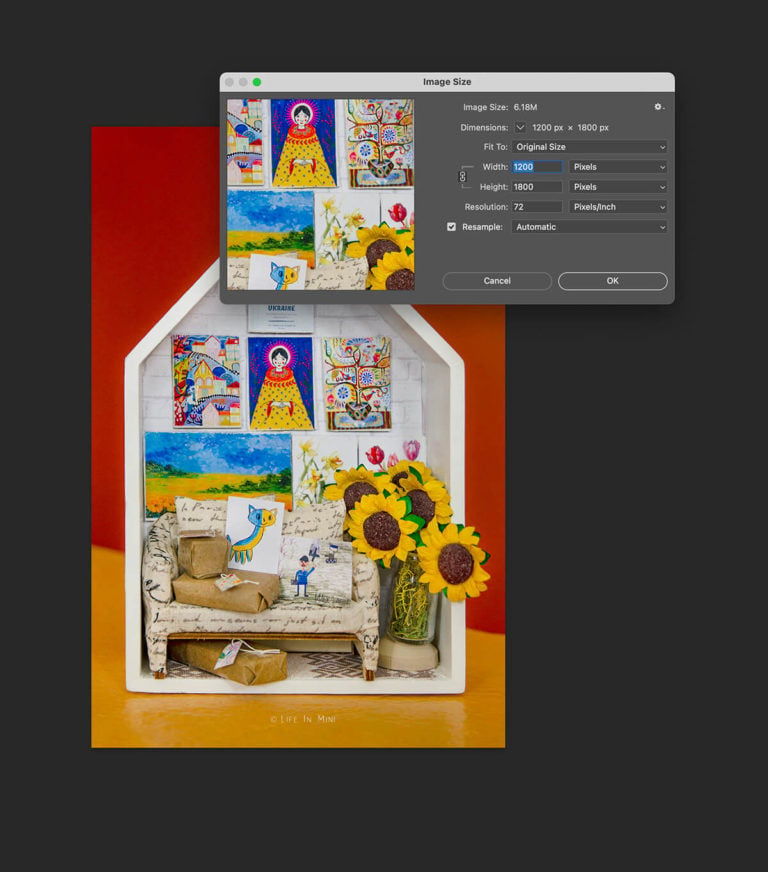
So if you pull an image into an editing software, like Adobe Photoshop, you will see that it is measured in pixels. The images on my blog are 1200×1800 pixels with 72 dpi. Let’s say you want to print this image – what do you do?
Well, at its normal size, you will have a grainy printout. But with miniatures, you can resize the image and increase the dpi so it will look sharp and crisp. This just requires some multiplication, so clear the cobwebs if you haven’t used these skills in awhile!
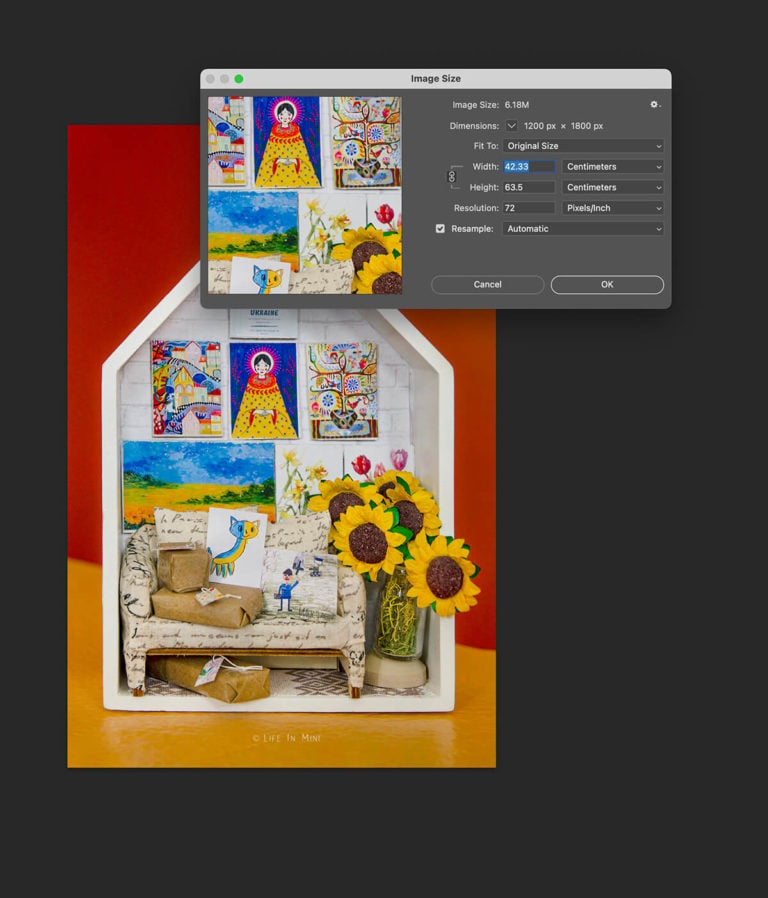
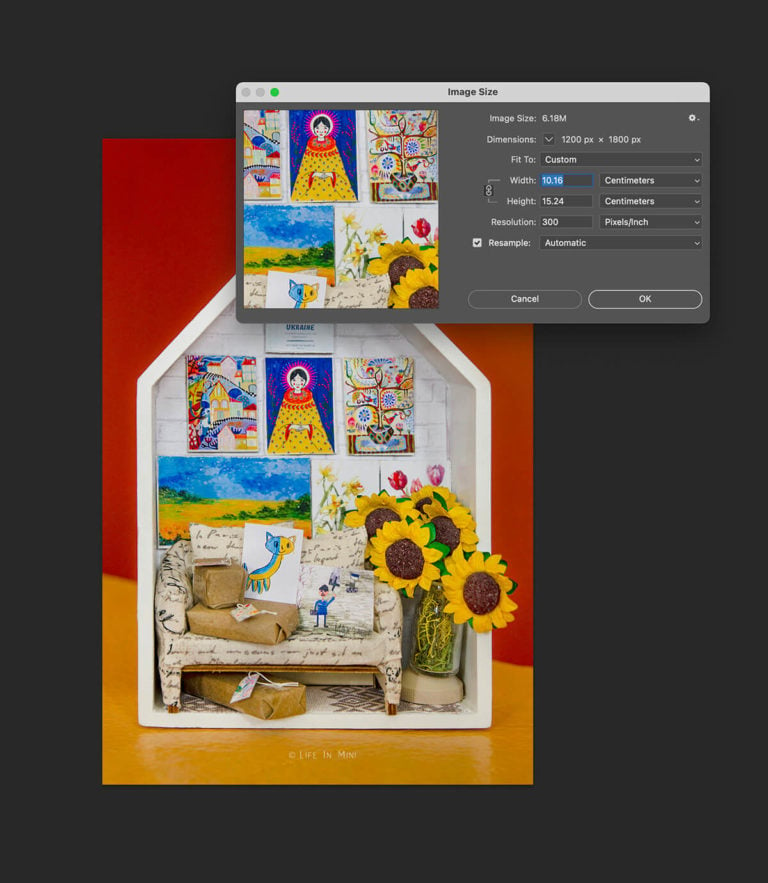
At 72dpi, my 1200×1800 image measures 42×63 cm. To print this, change the resolution to 300 BUT keep the same pixel dimensions, 1200×1800. Now if you look at the physical size of the image, you will see it is smaller, 10x15cm.
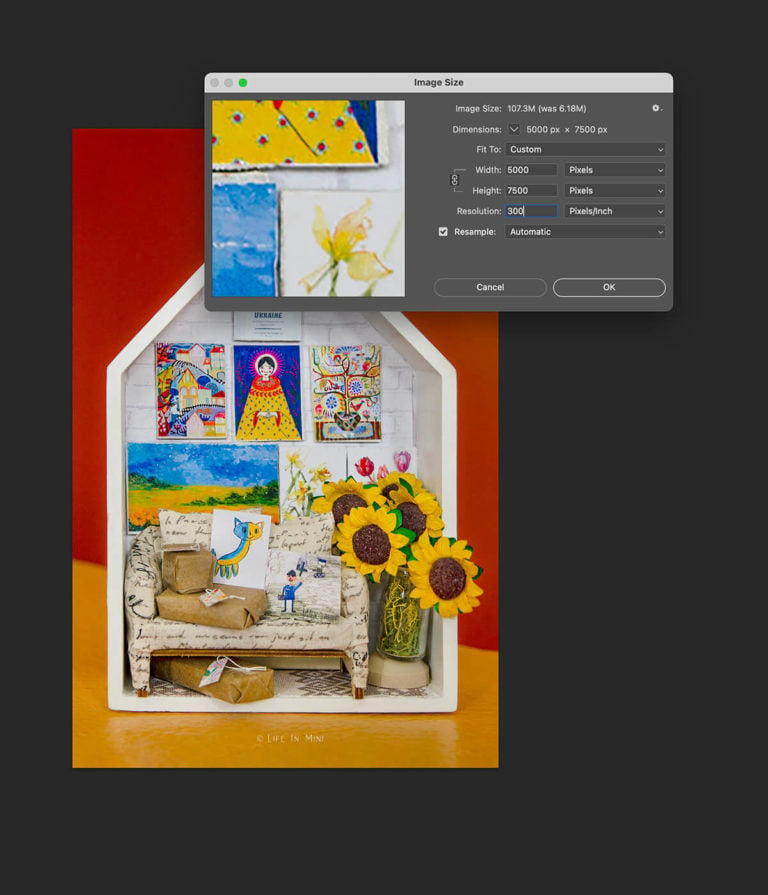
This is the maximum size you can print this image and have it look crystal clear and sharp. And for minis, you can go make them smaller and keep the high resolution.
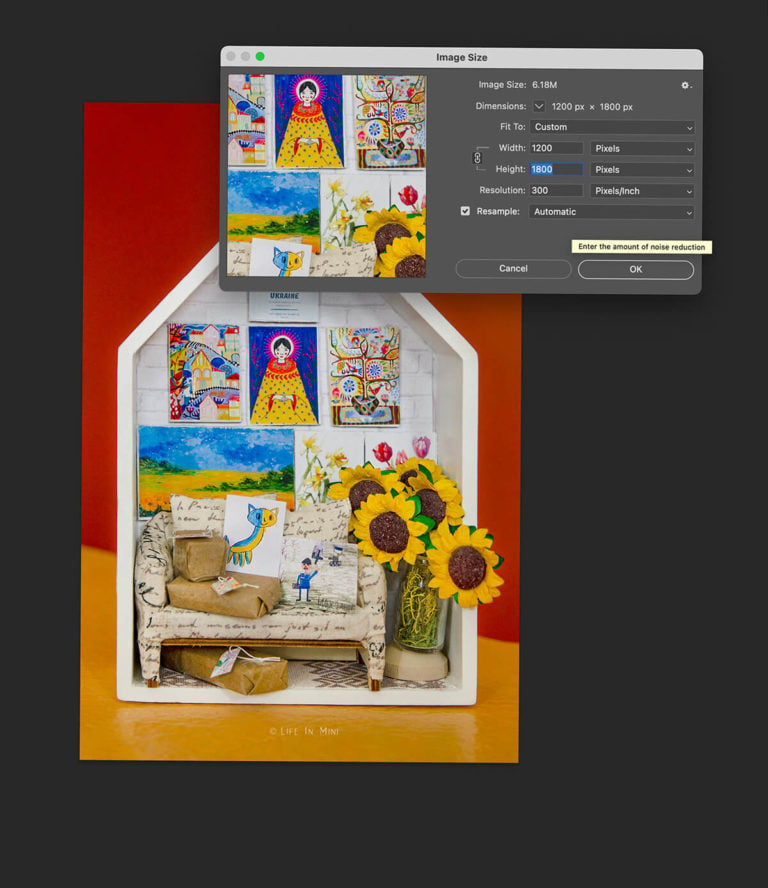
Luckily all images that I downloaded from my Ukrainian artists were high res. I could print crisp copies of them in large sizes or as small as I want. The great thing about printing minis is that a small image you find on the internet can easily be printed at 300dpi when you are scaling it down to 1:12.
Paper
This post contains some affiliate links for your convenience (which means if you make a purchase after clicking a link I will earn a small commission but it won’t cost you a penny more)! Read my full disclosure policy.
The second important factor for high resolution printing is the paper you use. Not all papers are created equally. If you are printing photos at home, the paper choice is easy. You have glossy photo paper and matte photo paper.
But photo paper is thick and not the best choice for all of your miniature projects. Sometimes you just need paper.
When you shrink things down to 1:12, you will loose some quality in your prints. This is where the printer you have can make a world of difference. But again, we all have ink jet printers at home.
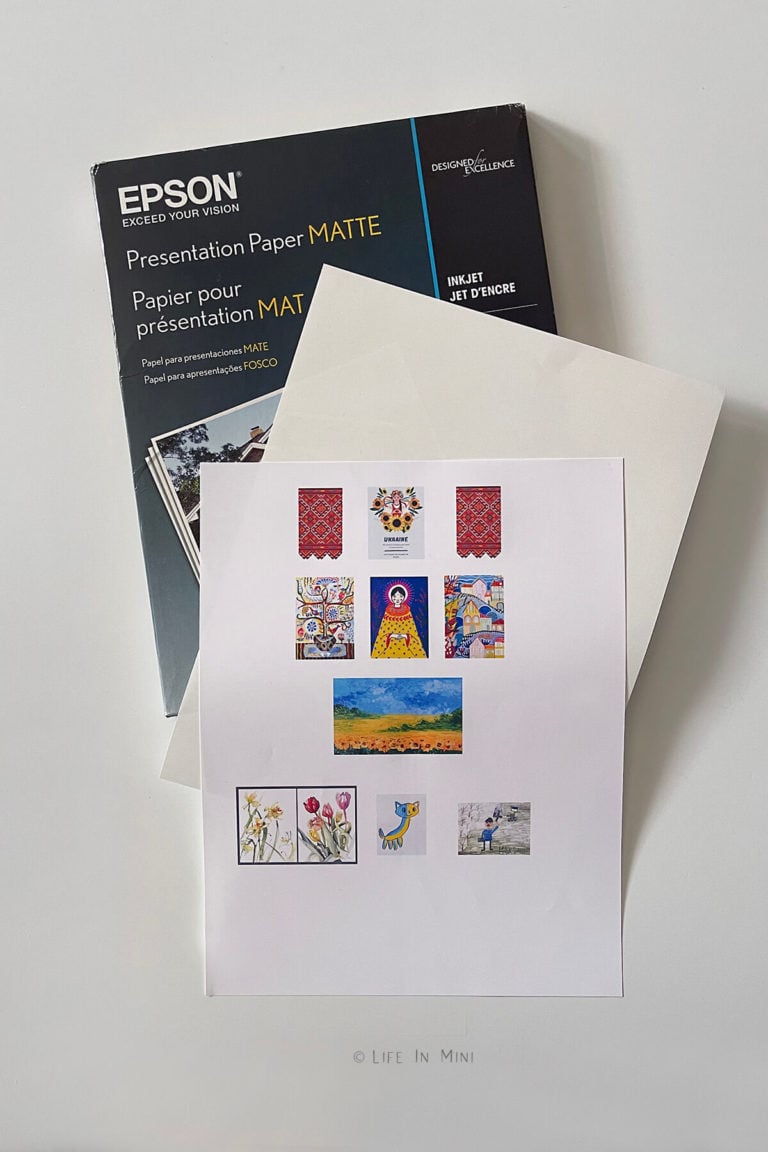
I noticed that even with a decent ink jet printer, the type of paper you use can make the world of difference. For regular printing of forms and schoolwork, I use whatever cheap paper I bought. What I have right now is Target’s brand of printer paper.
But for my mini projects, I discovered Matte Presentation Paper. It is a little thicker than normal paper, but certainly not thick like card stock or photo paper. One side of presentation paper is bright white and the other side is more like cream or off white.
You print on the white side, so be sure to place it in your printer properly. For most printers this means you place the paper in the paper tray with the white side down. When you print, be sure to select ‘Photo Matte Paper’ and ‘Best Quality’ in printing.
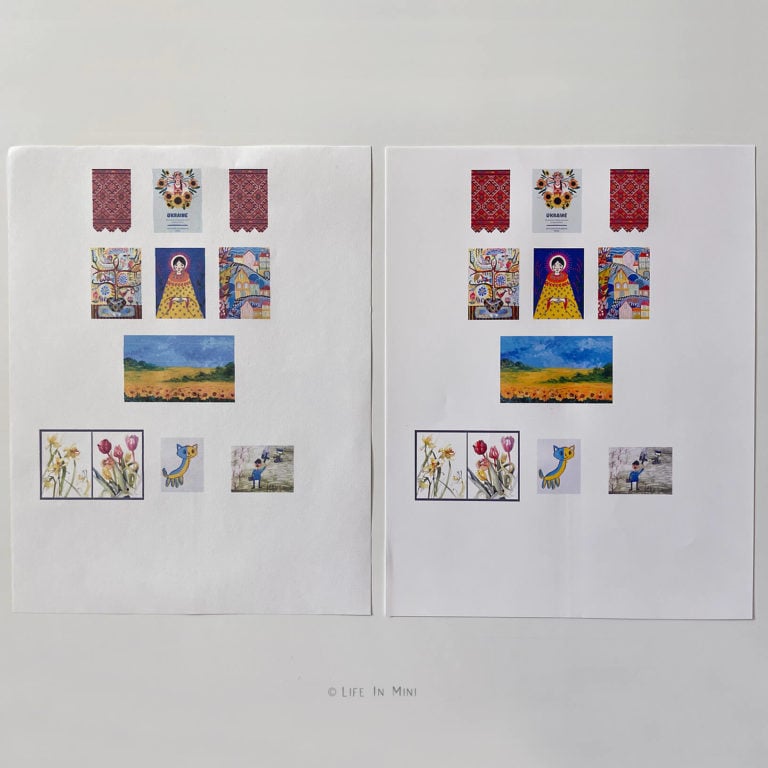
You can see what a difference the paper you use can make. The left one was printed on plain printing paper (Target brand) and the right on photo matte paper. For both I selected ‘Best Quality’ for printing.
As you can see, the one on the left (regular paper) is drab in color and contrast. You also can not see a lot of small details. The one on the right (presentation paper) shows more vibrancy and details.

Laura’s Top Pick:
There is such an amazing different when printing with matte presentation paper. Your mini printouts will come out vibrant and clear!
Mini Scene
I found these cute house shaped boxes at Target and snatched them up. They are perfect to set up themed scened in one small project. And since I am continue to avoid making more kitchen cabinets in the main dollhouse, I have thoroughly enjoyed created little scenes in this boxes.
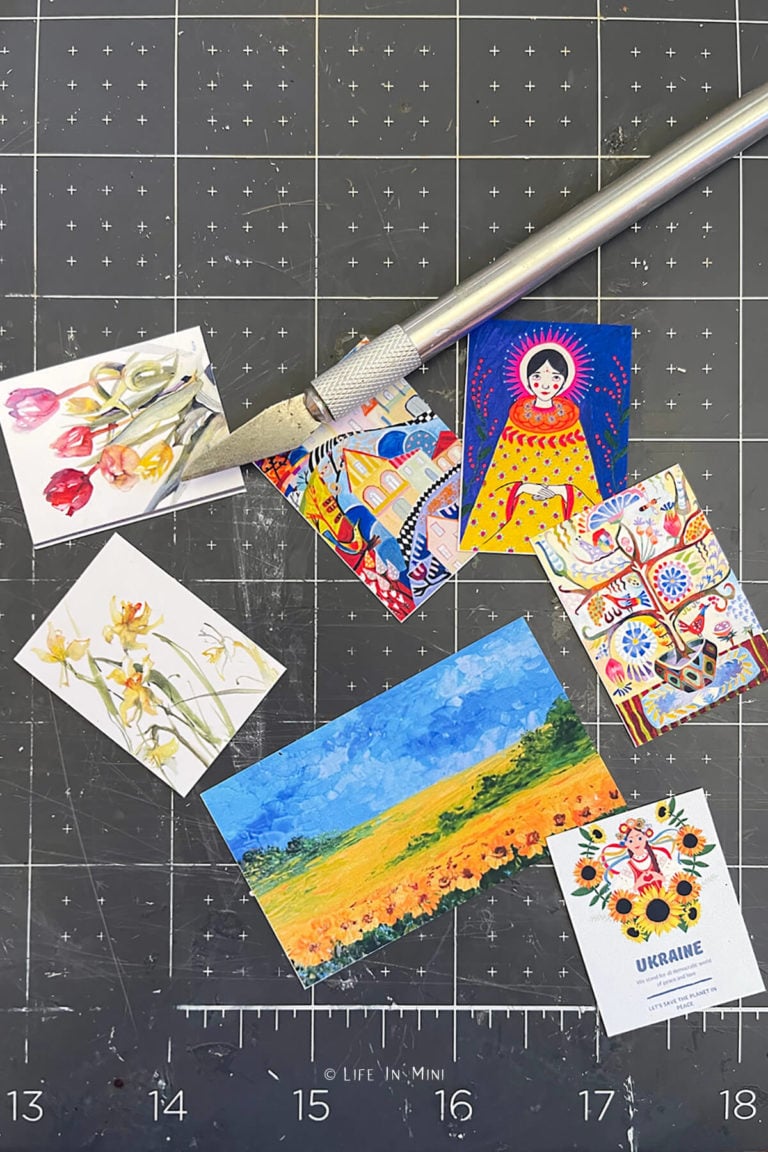
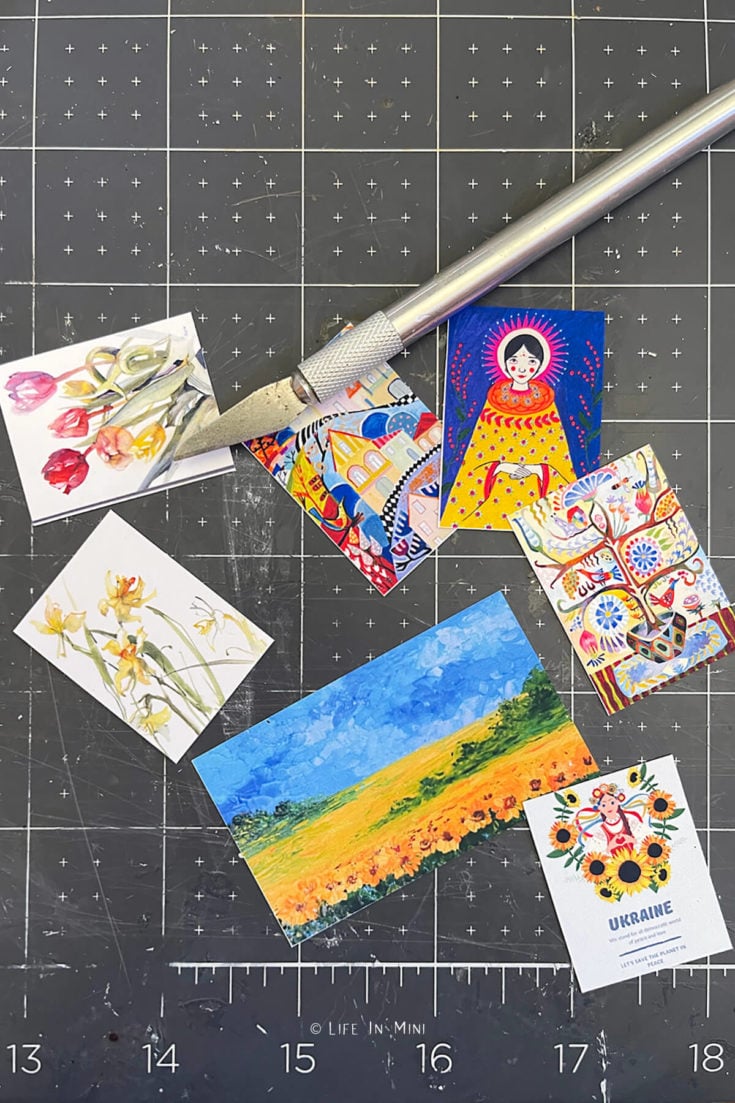
The digital Ukrainian artwork I purchased on Etsy are featured here. I printed them out on presentation paper and mounted them on small pieces of wood and kraft board using the techniques detailed in this post about making dollhouse artwork.
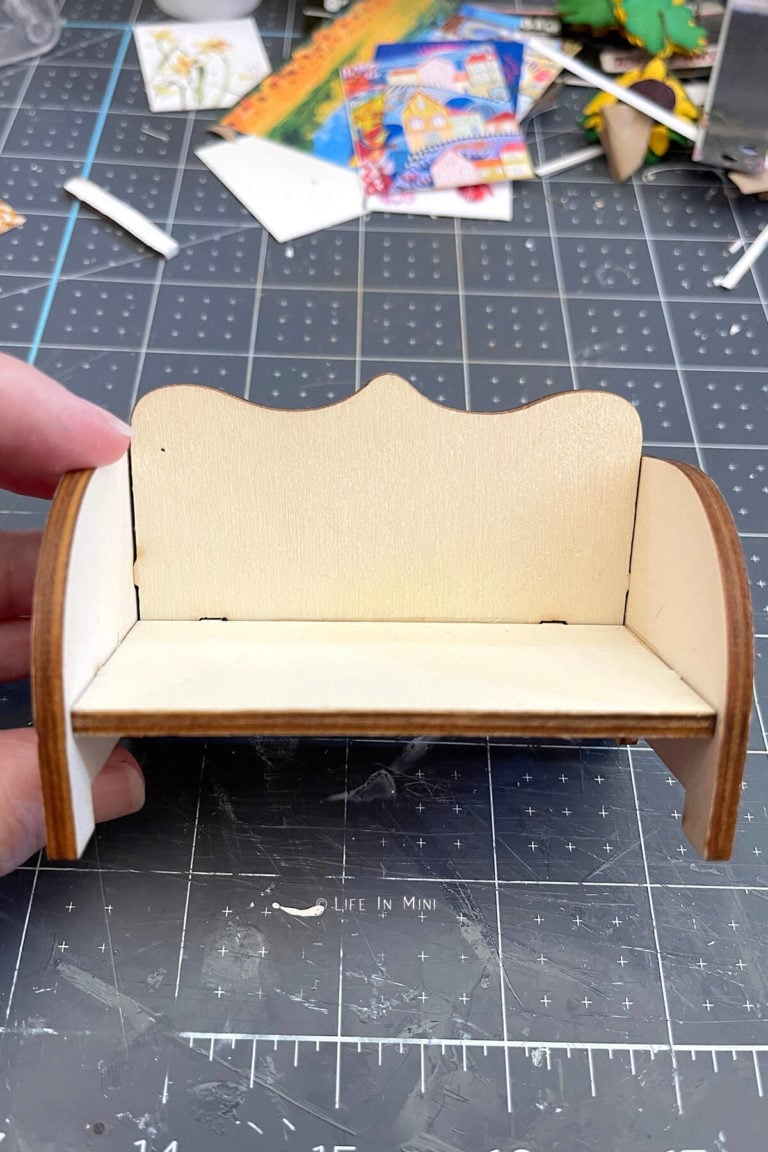
The brick background is scrapbook paper. The couch was one of those plain wood pieces Michaels sold last year with their dollhouse line. I upholstered it as best as I could – not as as easy as it sounds!
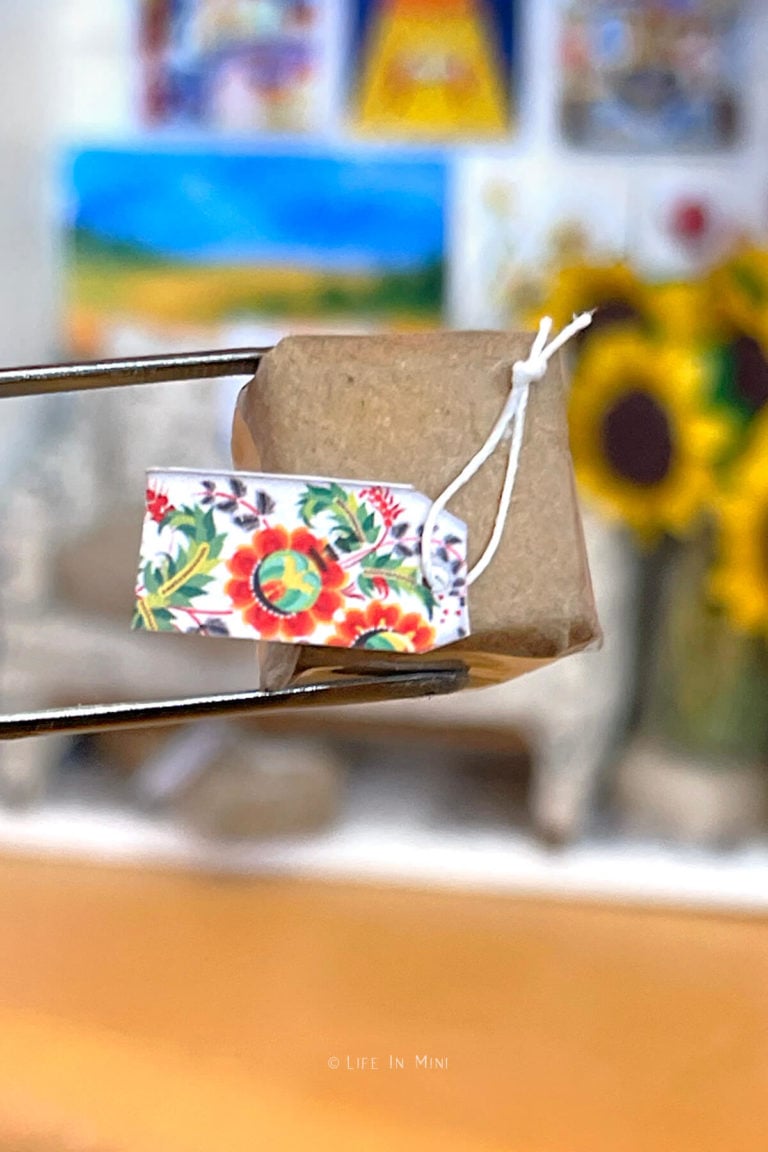
The packages are pieces of wood wrapped in pieces from a brown paper lunch bag. The mini tags? Those were also designed by a Ukrainian artist on Etsy.
A local Ukrainian group here in San Diego is collecting and sending medical supplies to the war effort in Ukraine. These small packages represents all the small things people are doing all over the world to help.
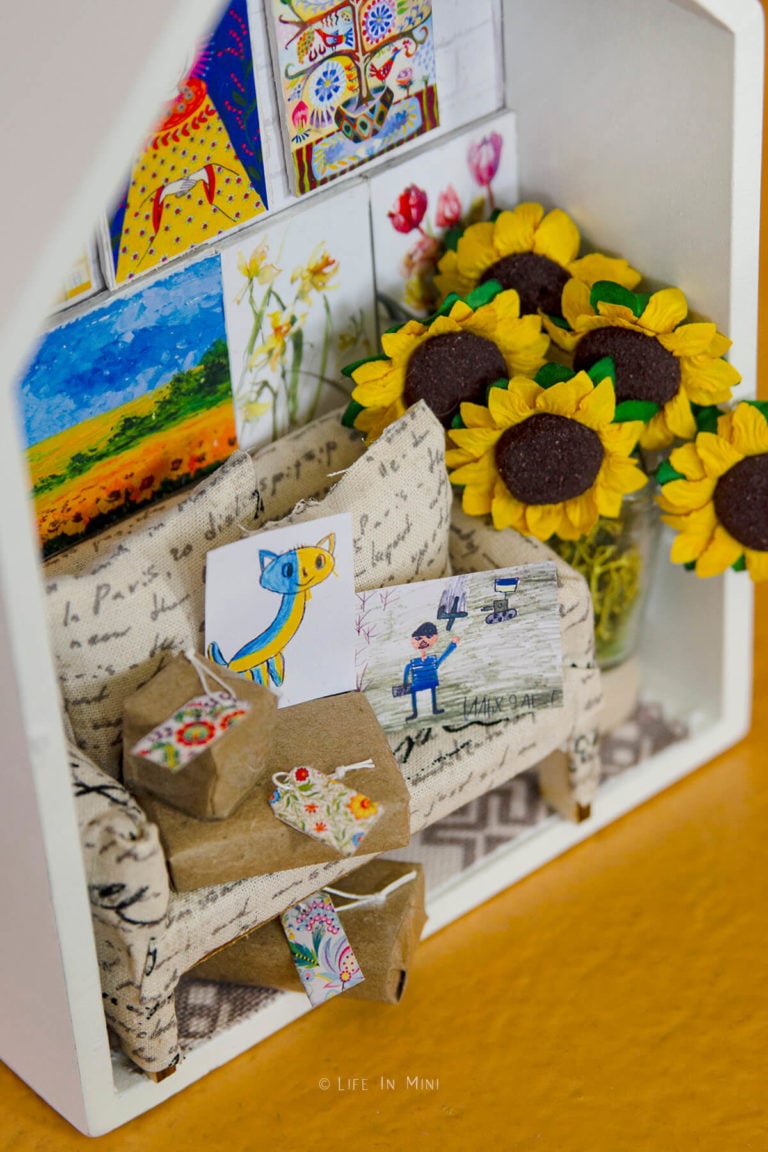
The children’s artwork were also digital images purchased on Etsy. A reminder of all the children traumatized and killed because of this terrible war. And of course, the sunflowers are the national flower of Ukraine.
The rug design is one of the cross stitch patterns I purchased. I printed it on cross stitch fabric following the instructions on my dollhouse rug tutorial post.
Below are the artists I featured their artwork in this post:
- Woodlexx
- DruganovArtAndCraft
- Vpodoba
- JuliaDattaPaint
- MeriteWatercolour
- ZoraArt
- HandyHappyFabrics
- SharmStudio
If you are enjoying my blog, why not sign up for my newsletter so you won’t miss out on the mini adventures!
High Resolution Printing
Not all papers are alike. Here are my tips and tricks for high resolution printing whether you are making miniature books or printing your children's artwork.
Materials
- Matte Presentation Paper
Tools
- Computer
- Photo Editing Software
- Ink Jet Printer
Instructions
- Open your image into Adobe Photoshop, or any photo editing software.
- If your image is not showing 300 dpi, change it to 300 dpi. Your original image dimensions (IN PIXELS) will automatically change. Keeping the dpi set at 300, set your original dimensions to be the same as before IN PIXELS.
- If you look at your image in terms of centimeters or inches, this is maximum size you can print at without losing sharpness.
- Now you can resize your image to whatever size you need.
- Insert Matte Presentation Paper into your printer. You will notice one side is whiter than the other. You want to print on the white side so make sure you place the paper correctly in the printer. For many printers, this means the white side (the printing side) faces down in the paper tray.
- To print, select 'Photo Paper' and print using the 'Best' quality.
- Allow print to completely dry before framing or gluing.
PS If you try this craft, why not leave a star rating in the direction card right below and/or a review in the comment section further down the page? I always appreciate your feedback.
You can also follow me on Pinterest, Facebook or Instagram. Sign up for my eMail list, too!
Written by Laura Bashar
I’m a food blogger and cookbook author that loves miniatures and crafting. I started this blog to share my passion for minis, including tutorials and free printables.

Oleksandra says
thank you very much! It is really very very helpful article. And I was really happy to meet words about support of Ukrainian artists. I am Ukrainian and it’s very important for me. Thank you very much!
Laura says
I am so glad this was useful for you! I still have this hanging on my wall and all the colorful artwork still makes me smile!
Wishing you all the best-
Laura
Sylvia says
Hi! Thanks for sharing this post. I’m looking to buy a color printer for making minis and was wondering if you’d share the brand and model of the printer you use for your miniature projects. Hope to hear from you—thanks!
Laura says
Hi Sylvia-
I have had mixed issues with printers over the years. I don’t have one to recommend except to make sure you choose one that can print photo quality. And most of them do this nowadays. I have an Epson ET-3750 and it has been nothing but a PIA. Yes it prints nicely, but it gives me lots of issues like plugged jets and then it prints all faded for no reason. If you can get ahold of a Consumer Reports magazine, I suggest looking at their reviews. If I could afford a new printer, I certainly would replace mine, but it’s not in the budget for me right now.
Laura