Add a touch of whimsy to your dollhouse Halloween decor with these easy to make no sew miniature Halloween gnomes.
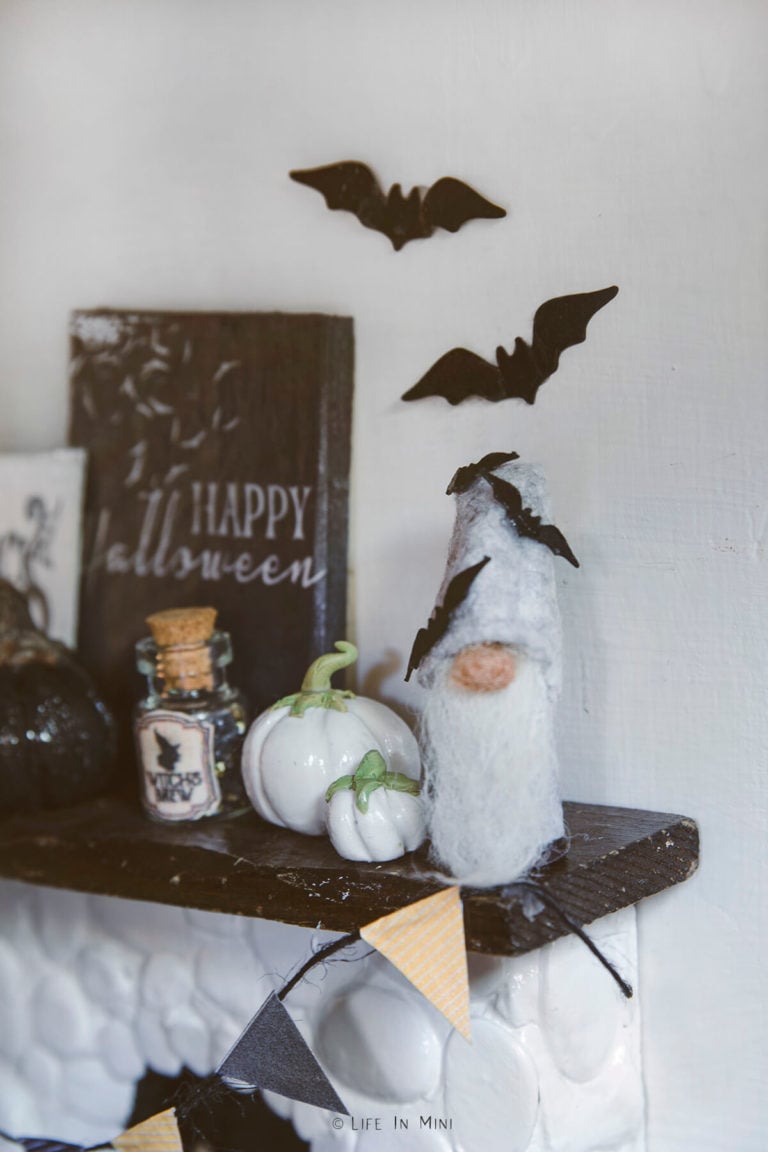
It’s September! Fall is here, although the weather in San Diego is always hot and sticky until October. Although I prefer summer to fall, my almost 16-year old daughter is ready for Halloween.
She likes to decorate her room in September for Halloween. She reminds me of the silly stores that break out the Halloween decorations in July! My girl wanted new decor, so I took her to The Dollar Store to splurge on skeletons, ghosts and other spooky stuff.
I suppose it’s her fault that I got started feeling the Halloween mood. I wasn’t ready to break out the real decorations from the garage, but instead decided to add some miniature halloween decorations to the dollhouse.
What a great distraction to keep me from dealing with the bigger miniature projects that my dollhouse needed. I quickly went thru pinterest for some more Halloween inspiration and settled on gnomes.
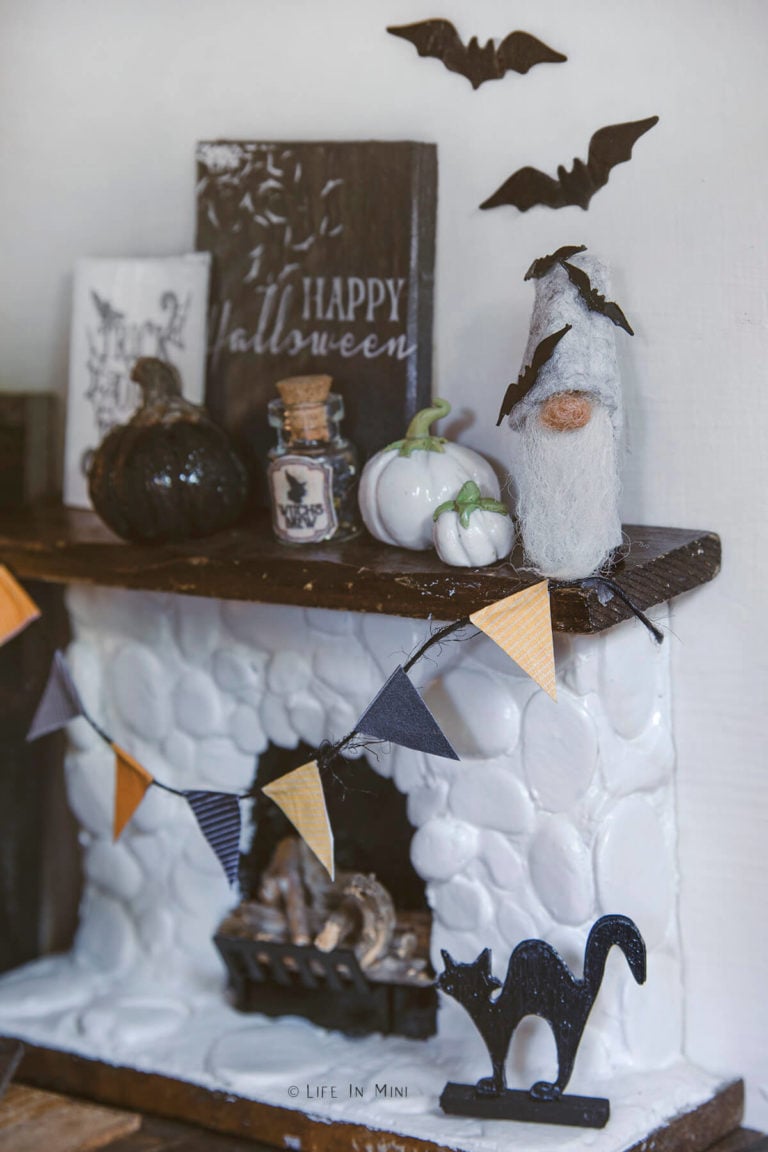
I have several of these adorable gnomes in my bins of Christmas decorations. But as we have learned, gnomes are no longer restricted to lawn ornaments or the Christmas mantle.
In fact, you can make (or buy) a gnome for any season and holiday. So I decided to get a jump start on fall decorating to make a few miniature gnomes of my own. As I quickly discovered, I couldn’t stop at making just one.
I made several for fall and halloween. They turned out super cute and are incredibly easy to make – and the supplies are cheap.
Now we are ready for trick-or-treating and some miniature pumpkin pails filled with miniature candy bars!
Supplies you need
This post contains some affiliate links for your convenience (which means if you make a purchase after clicking a link I will earn a small commission but it won’t cost you a penny more)! Read my full disclosure policy.
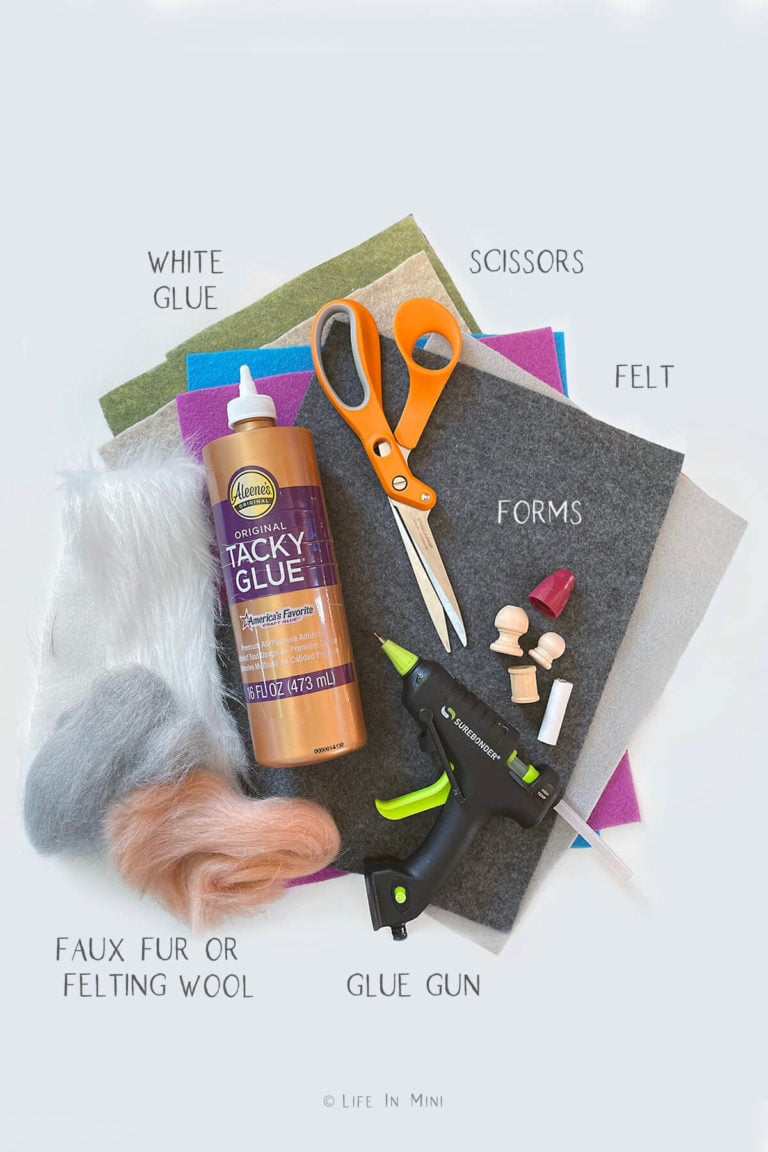
- Felt: I used felt for the body, coats and hats for my gnomes. The hats need to be stiff in material to hold it’s shape, but you can use cotton or other fabrics, too.
- Faux fur or felting wool: For the beard, I found the felting wool to be more cooperative than faux fur. I also used felting wool to make the nose and ball on the end of the gnome’s hat. If you have mini pom poms, you can use these instead.
- Forms: I used whatever I had on hand for the base form of the gnome. Some were made with cardboard cylinders cut from the end of my dog’s poop bags. I also used miniature wood finials. You can even use cone like caps from nasal sprays.
- Aleene’s tacky glue: I used a combination of white glue and hot glue. The white glue helped me shape the gnome’s beards.
- Hot glue: I preferred the quick drying hot glue for gluing everything together.
- Scissors: You will need sharp scissors to cut the felt. I love my fabric scissors because they cut everything so neatly with no frays.
- Accessories: To decorate your gnomes, you can use beads, confetti, paper punches and anything else you like. For this tutorial, I had my Cricut Maker cut some mini bats and used them.
Step-by-step directions
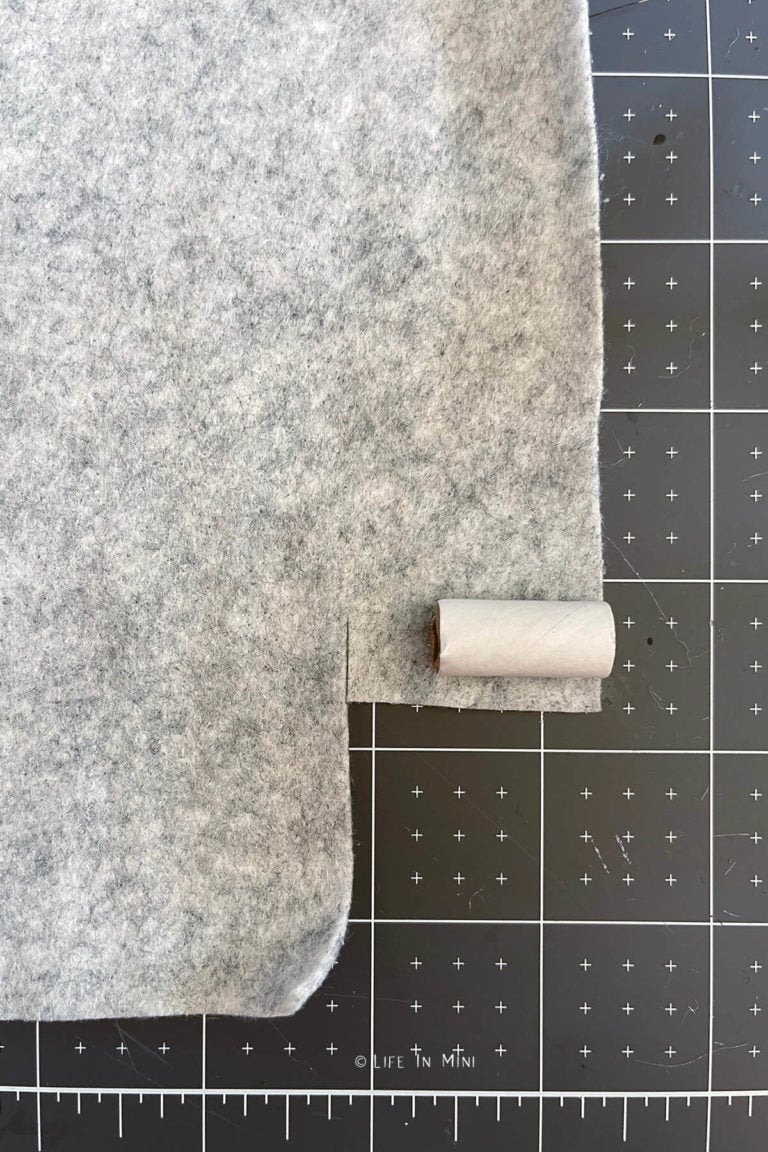
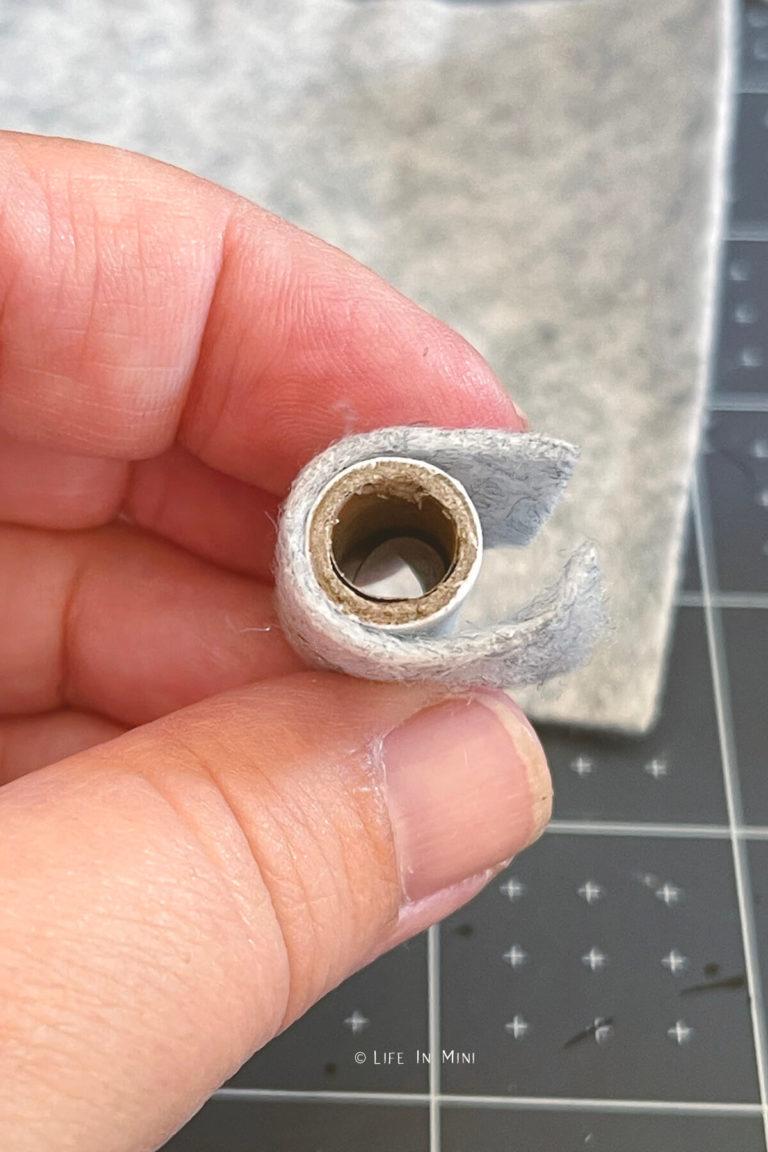
1. I used a cardboard tube for my form and had to cut it to the size I wanted. Other form do not need cutting. Lay your form on your felt and cut the fabric you need. You want to cover it lengthwise and have enough to roll and cover the entire form.
2. Add hot glue to one end of your cut felt and lay your form over it. Add hot glue to remaining felt and roll the form to adhere to the felt.
3. Cut off a section of felting wool for your beard. If using faux fur, start with a rectangular piece. You can cut it to shape once glued on. Cut off a longer piece than needed. You can always cut off the excess.
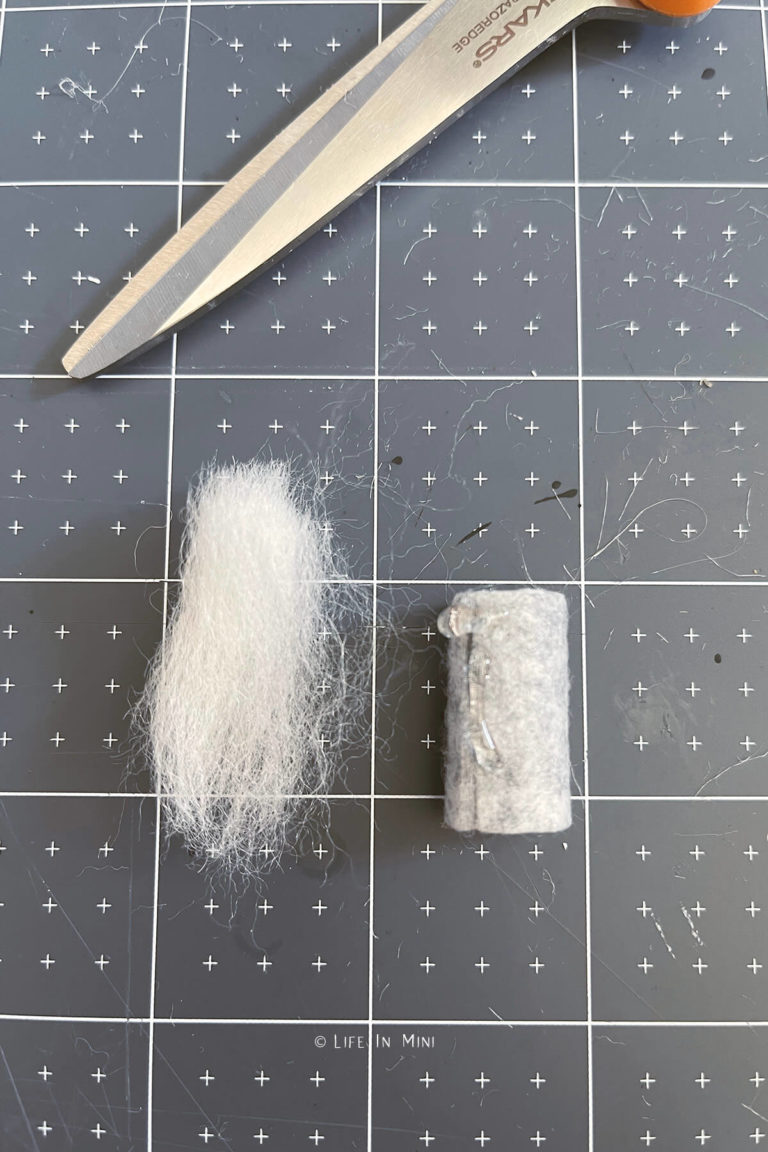
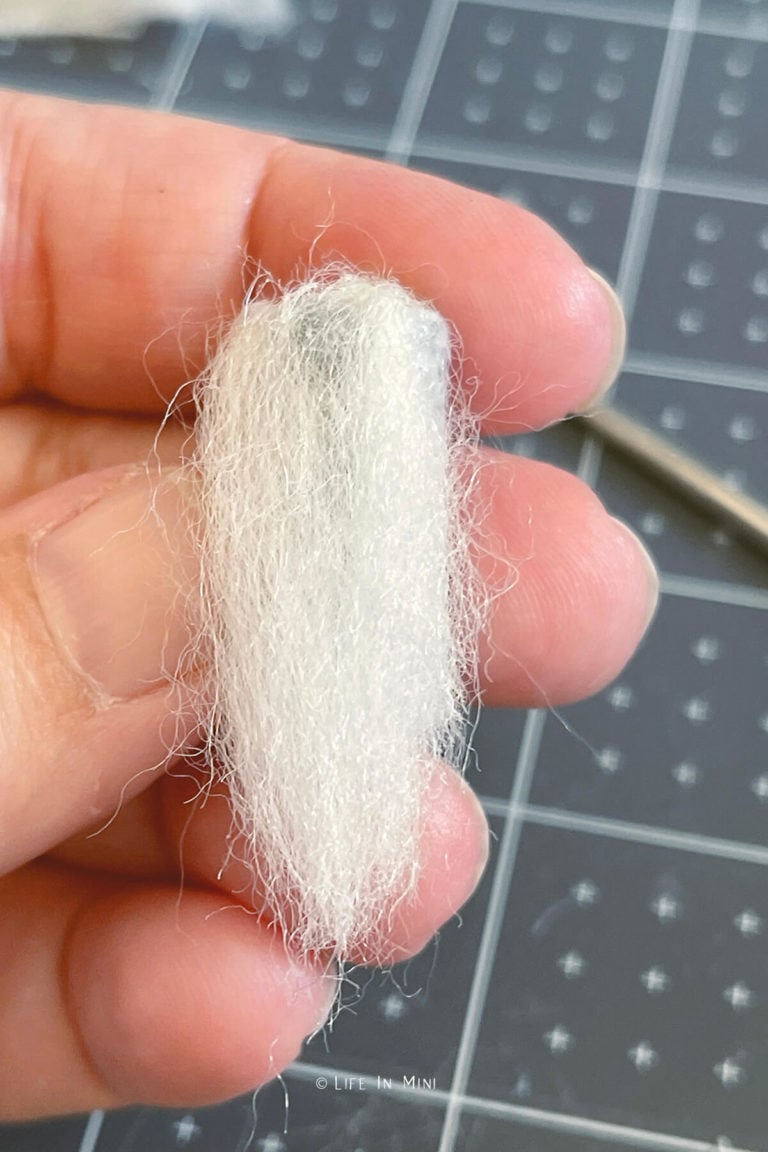
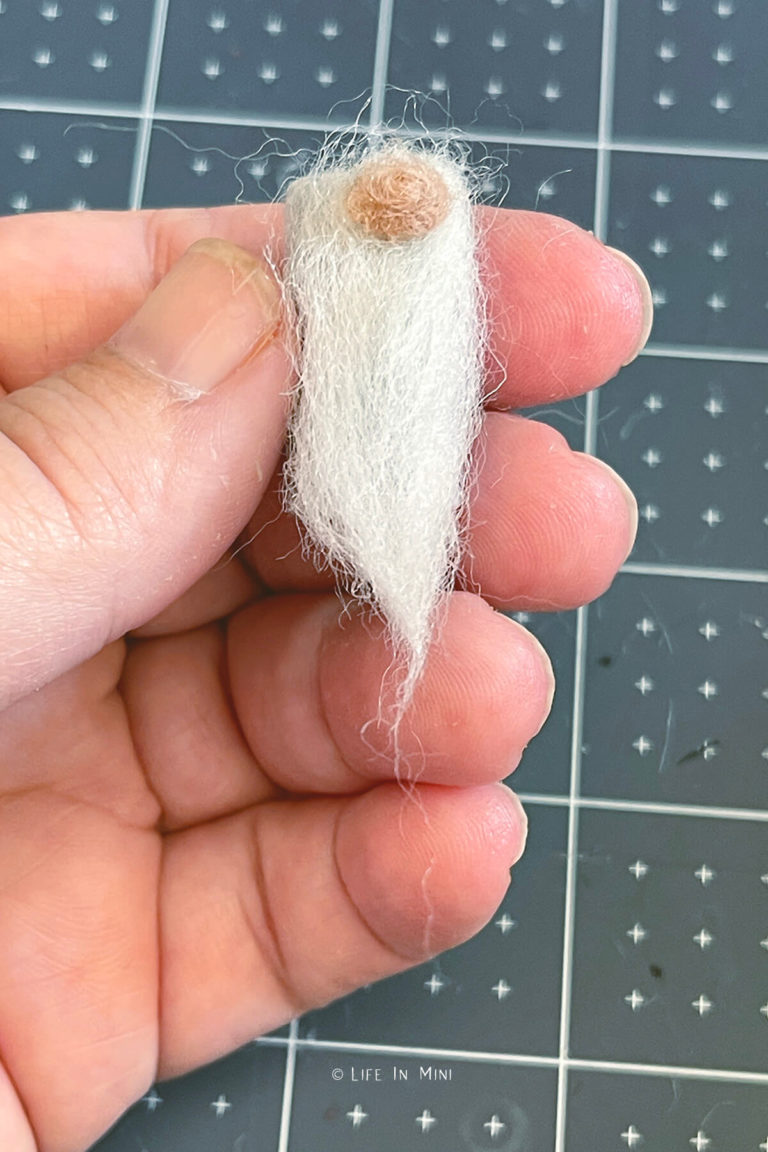
4. Attach the beard onto your felt form using hot glue. Once the glue is cooled, use scissors to cut the beard to the shape you want. I cut the beard to a pointy tip. Using your fingers, dip them in water and add a dab or two of white glue. Rub your fingers together and rub this mixture over the beard to smooth it together. Twirl the tip so it is pointy. This should hold the shape of the beard.
5. Cut a small bit of felting wool for the nose. Dip your fingers in water and roll the ball tight. Add a little white glue with water to your fingers and roll the ball to size.
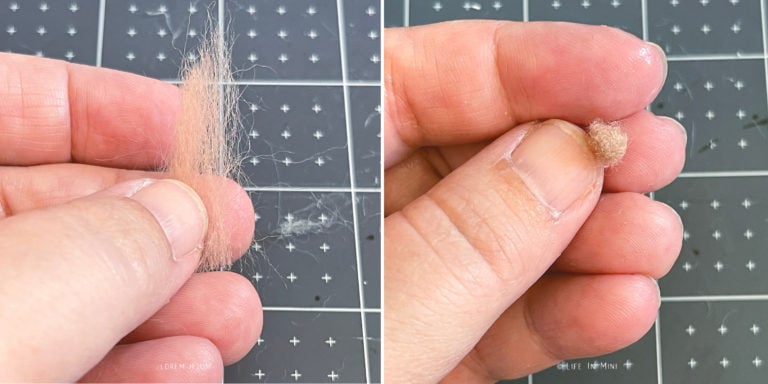
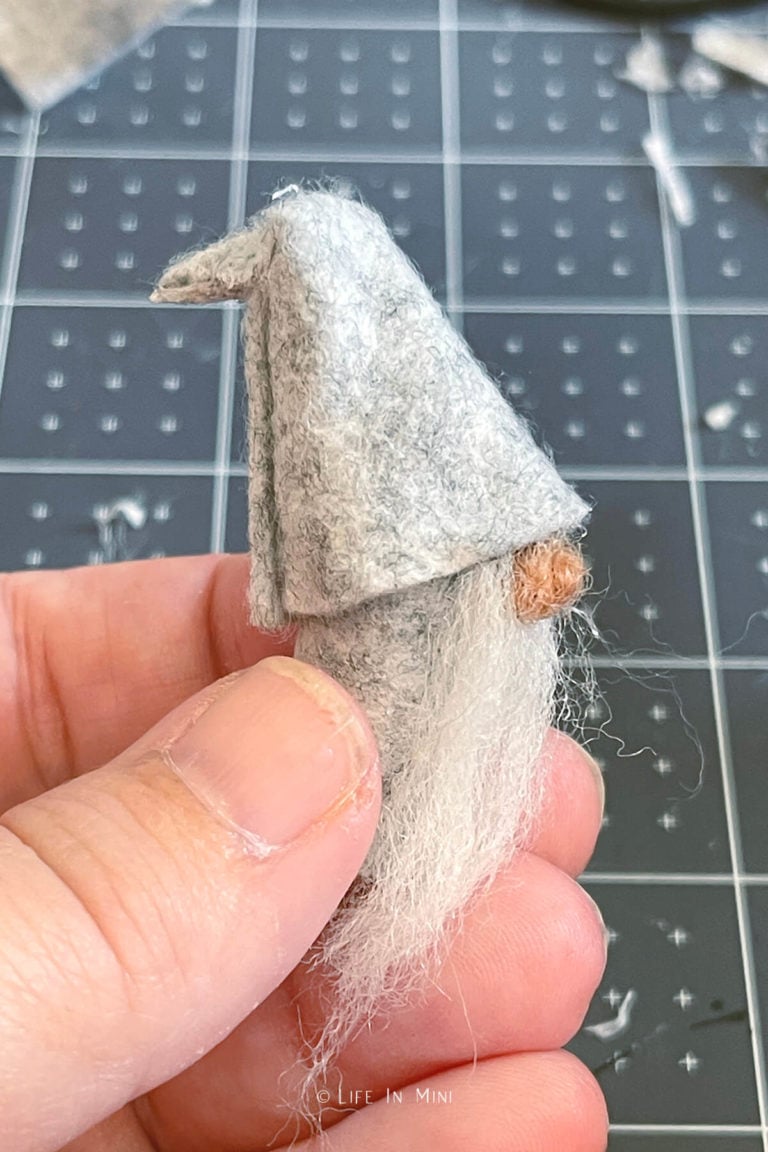
6. Glue the nose on top end of the beard, centered in the beardy fluff.
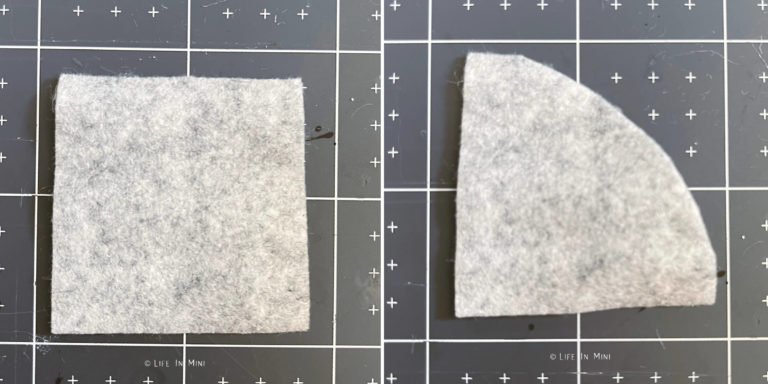
7. To form the cone hat, cut a square piece of felt. Mine was about 2″ x 2″. Then cut off one corner of your square, curving it as you cut to join the other two corners. See picture below.
8. To shape the hat, grab one end of the curved corner and roll it to form the cone. This makes glueing easier. Add a line of hot glue to the bottom edge of your hat, roll your felt to make a cone and press into the glue to seal.
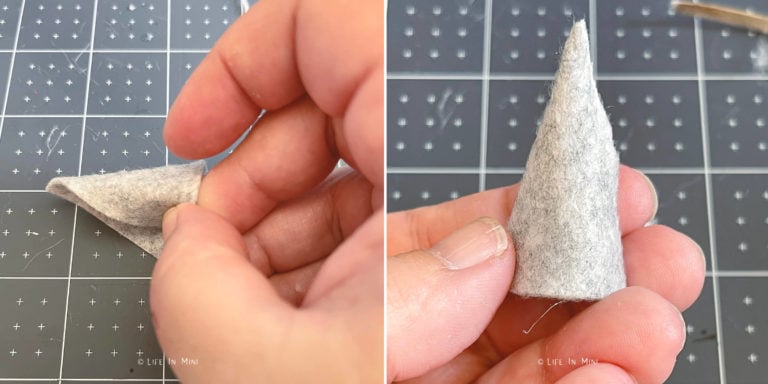
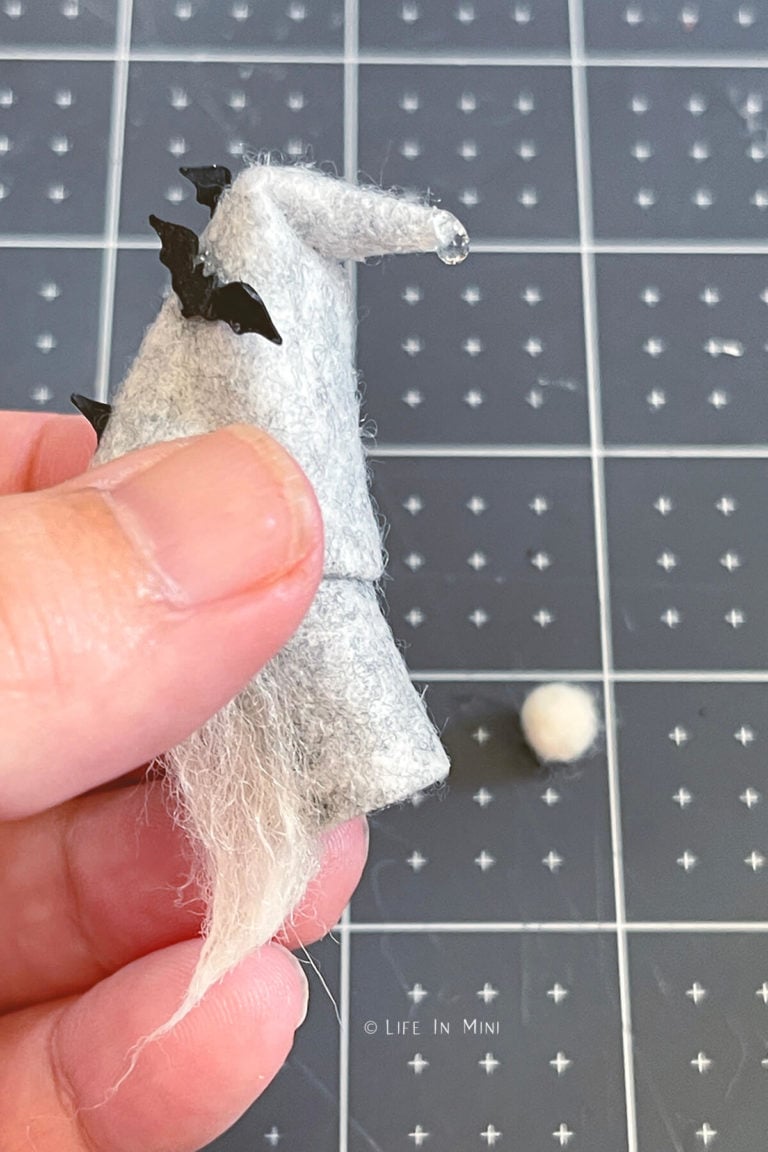
9. If you want the tip of the hat to bend over, fold the tip down to form the crease first. Then add a bit of hot glue into the crease, pressing the pieces together until the glue has set. This step is optional.
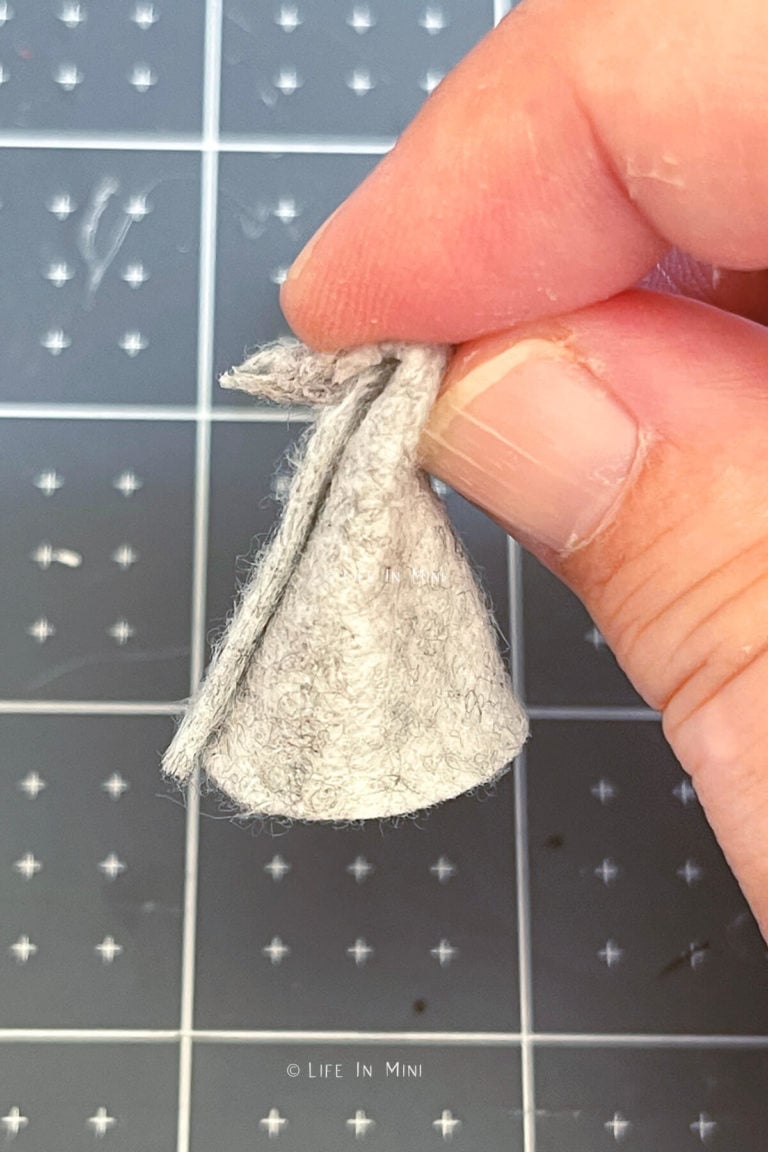
10. Before glueing the hat down, make sure it fits your gnome. Add hot glue over the form (for me it was the cylinder) and press the hat down. For a little brim, press your fingers down until the glue sets. The hat should sit just over the nose.
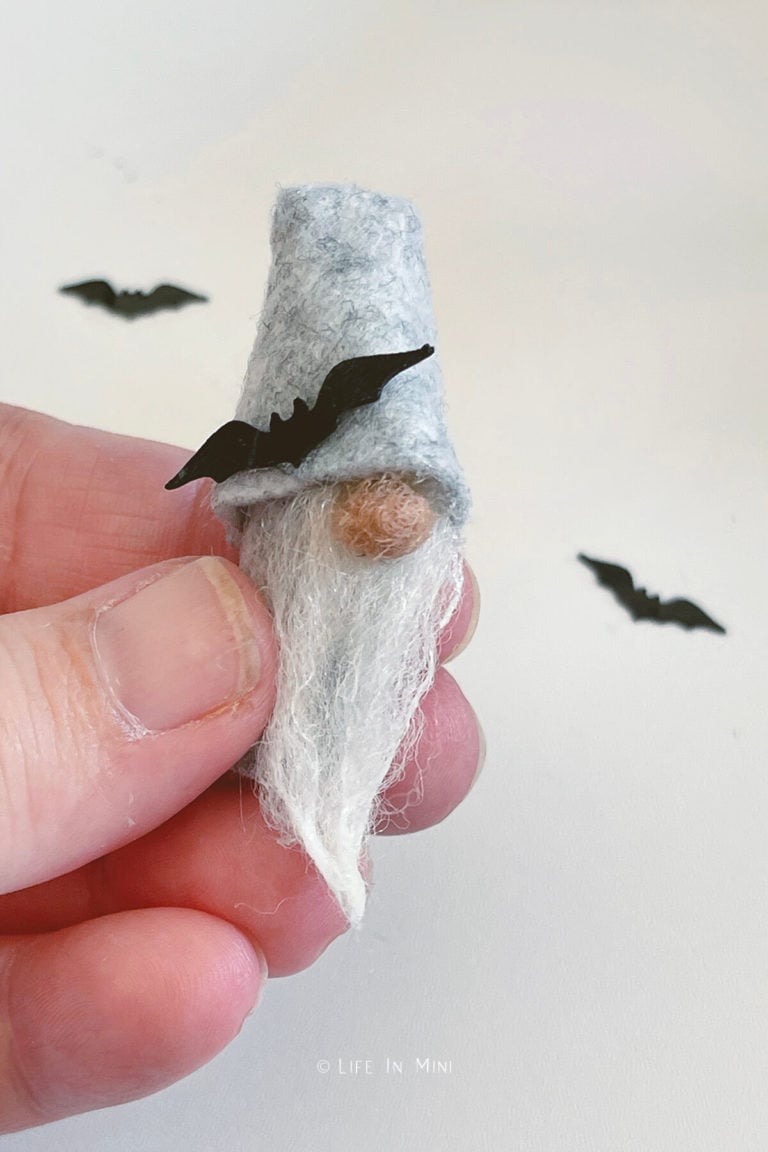
11. You can decorate your gnome anyway you want. For the tutorial, I had my Cricut Maker cut out little black bats from card stock. I wanted a bit of shine to the bats, so I added a coat of Mod Podge first, then hot glued to the hat.
12. For the pom pom end, I rolled a piece of felting wool like I did with the nose. Use a little water and white glue to keep it a ball. Attach it to the tip end of you hat using hot glue.
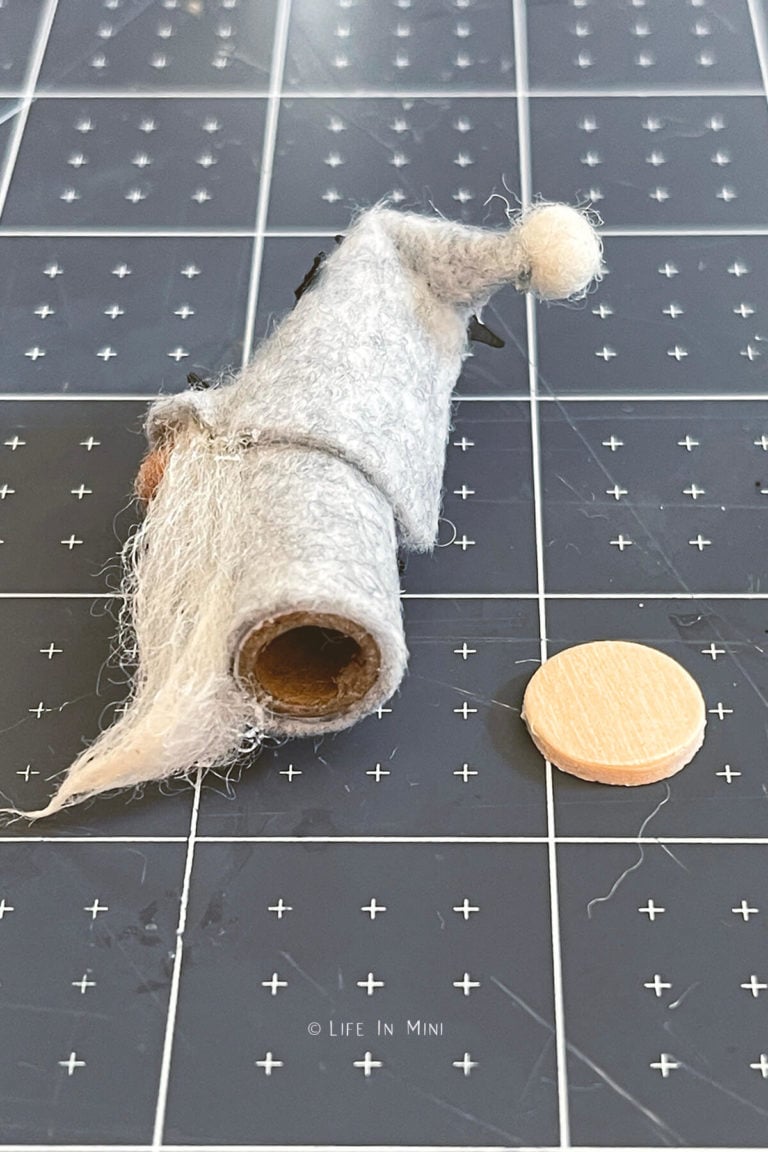
13. For my cardboard forms, I decided to add a small wood circle for a base. This is totally optional. You can keep it natural wood, stain it or paint it. I ended up painting my black with a sharpie!
Project tips and FAQs
After the gnome making, I continued my halloween decorating in a few different spots in the dollhouse. I made some miniature halloween signs and cut out more spooky accents with my Cricut.
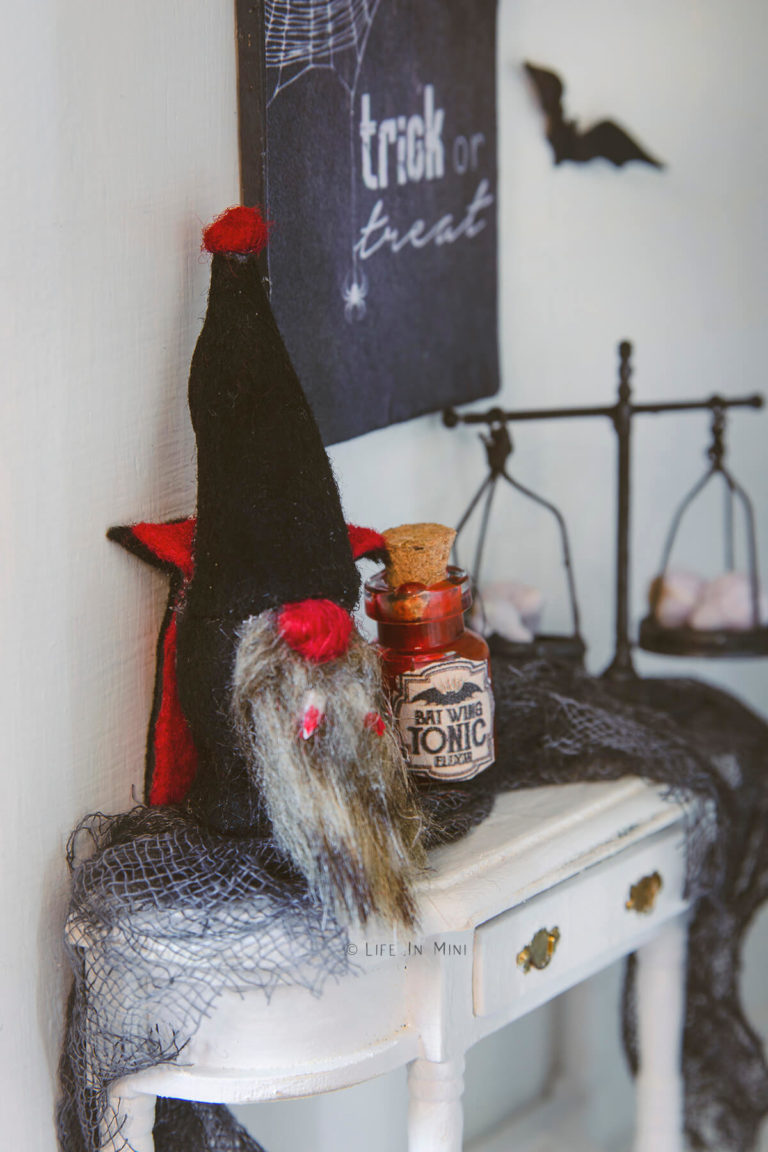
As you can see, you can make all kinds of mini gnomes for Halloween. I made a vampire gnome after seeing this one from Little Yellow Wheelbarrow. For the base of my mini vampire gnome, I used one of those wood finials I mentioned above.
This beard is made with some faux fur I had. The fangs are cut from a sheet of white craft foam, but you can also use white card stock. I used red paint for the blood.
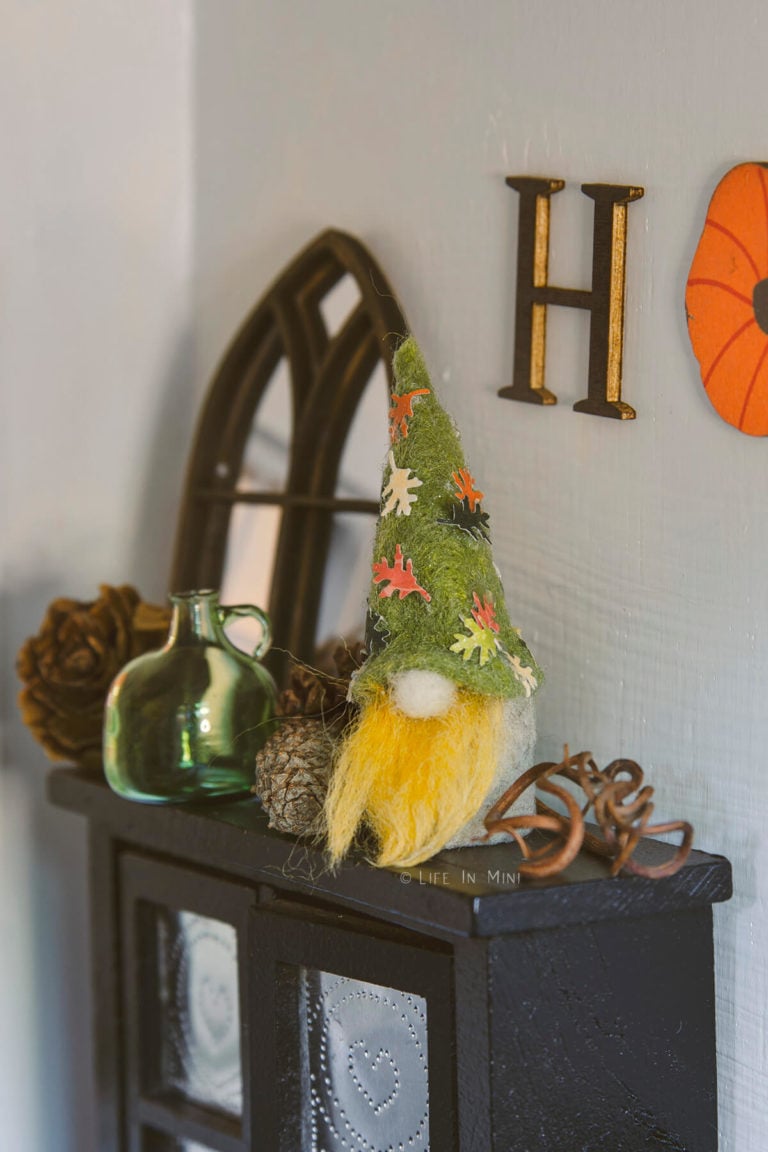
And for fall, I made Father Autumn. I used my leaf paper puncher to cut out leaves from different colored pieces of scrapbook paper I have amassed over the years. Add a little bit of straw and you can make a scarecrow gnome.
Try saying that three times fast!
If you are enjoying my blog, why not sign up for my newsletter so you won’t miss out on the mini adventures!
Miniature Halloween Gnomes
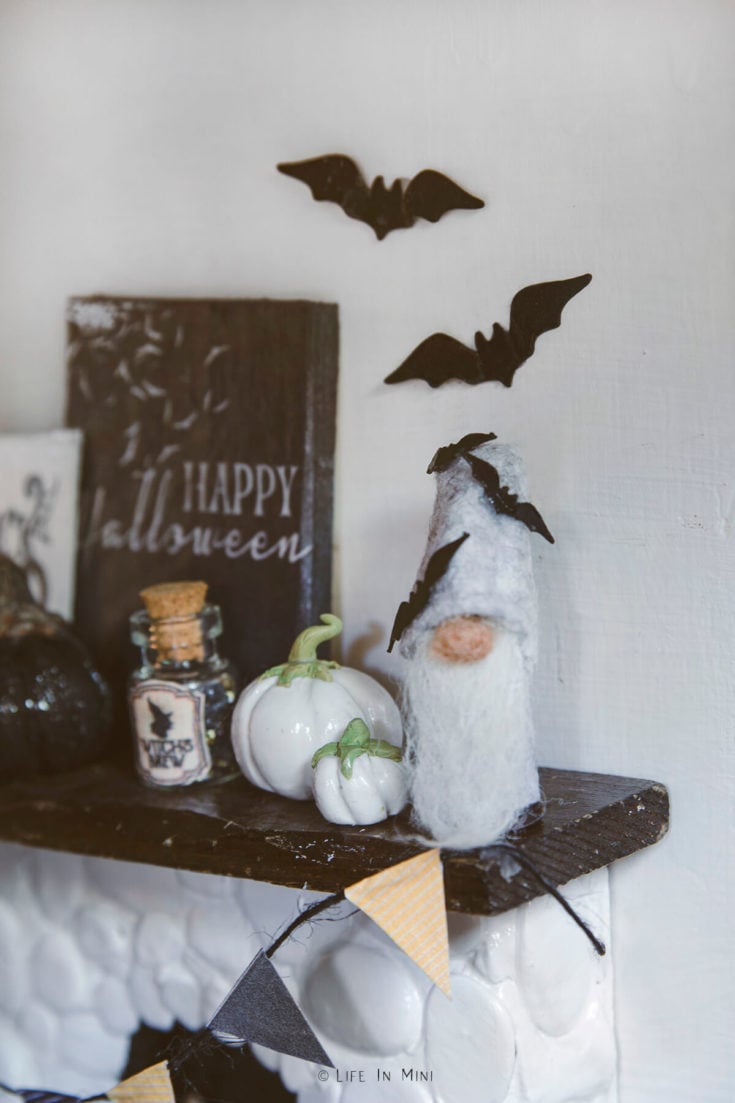
Add a touch of whimsy to your dollhouse Halloween decor with these easy to make no sew miniature Halloween gnomes.
Materials
- Felt
- Felting wool or faux fur
- Forms like cardboard tubing, mini wood finials or nasal spray tops
- Aleene’s tacky glue
- Hot glue
Tools
- Scissors
Instructions
- If you are using a cardboard tube for the form, cut it to the size you want. Other form do not need cutting.
- Lay your form on your felt and cut the fabric you need. You want to cover it lengthwise and have enough to roll and cover the entire form.
- Add hot glue to one end of your cut felt and lay your form over it. Add hot glue to remaining felt and roll the form to adhere to the felt.
- Cut off a section of felting wool for your beard. If using faux fur, start with a rectangular piece. You can cut it to shape once glued on. Cut off a longer piece than you think you need.
- Attach the beard onto your felt form using hot glue. Once the glue is cooled, use scissors to cut the beard to the shape you want. I had the beard cut to a tip.
- Using your fingers, dip in water and add a dab or two of white glue. Rub this over the beard to smooth it together. Twirl the tip so it is pointy.
- Cut a small bit of felting wool for the nose. Dip your fingers in water and roll the ball tight. Add a little white glue with water to your fingers and roll the ball to size.
- Glue the nose on top end of the beard, centered in the beardy fluff.
- To form the cone hat, cut a square piece of felt. Mine was about 2″ x 2″. Then cut out one corner of your square, curving it as you cut.
- To shape the hat, grab one end of the curved corner and roll it to form the cone. This makes glueing easier. Add a line of hot glue to the bottom end of your hat, roll the felt to make a cone and press into the glue to seal.
- If you want the tip of the hat to bend over, fold the tip down to form the crease first. Then add a bit of hot glue into the crease, pressing the pieces together until the glue has set. This step is optional.
- Before glueing the hat down, make sure it fits your gnome. Add hot glue over the form (for me it was the cylinder) and press the hat down. For a little brim, press your fingers down until the glue sets. The hat should sit just over the nose.
- You can decorate your gnome anyway you want. For the tutorial, I had my Cricut Maker cut out little black bats from card stock. You can also use craft paper punches. To add a bit of shine to the cut paper, add a coat of Mod Podge first, then hot glued to the hat once dried.
- For the pom pom end, roll a piece of felting wool like you did with the nose. Use a little water and white glue to keep it a ball. Attach it to the tip end of you hat using hot glue.
- You can add a base to your gnome. I used a small wood circle that you can keep natural or paint. Secure with hot glue.
Notes
You can decorate your gnome with practically anything. Bling it up with rhinestones, beads or glitter. You can use layers of fabric, too, to add color and texture.
PS If you try this craft, why not leave a star rating in the direction card right below and/or a review in the comment section further down the page? I always appreciate your feedback.
You can also follow me on Pinterest, Facebook or Instagram. Sign up for my eMail list, too!





Leave a Reply