
I couldn’t find the perfect dollhouse refrigerator so I decided to rework a fridge I already had. It’s amazing what a little bit of scrap wood, paint and bits of jewelry can do!
Furnishing your dollhouse can get really expensive, so I try to build what I can from scratch. But I won’t lie. I’m not that great with building furniture.
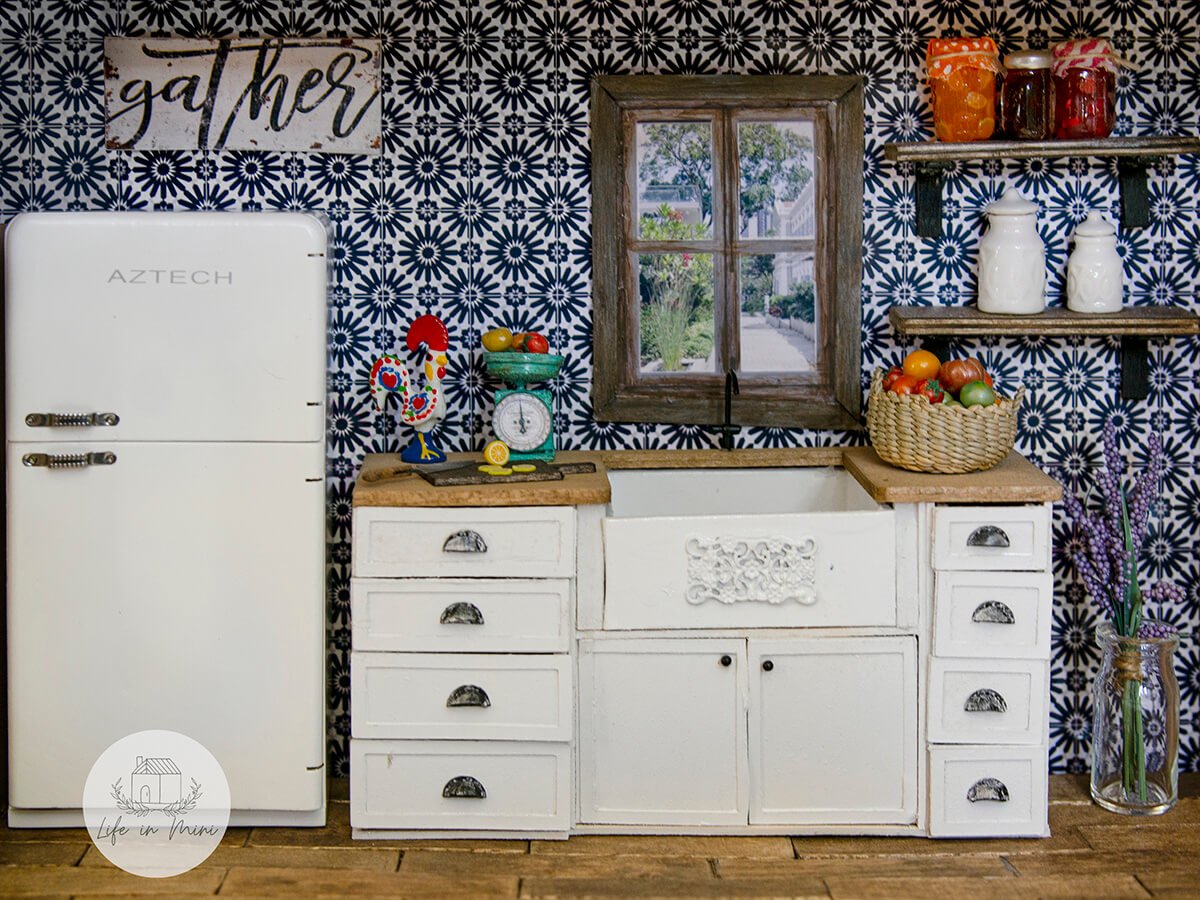
My old childhood dollhouse is slowly making progress, despite the big gaps of time when I stop working on it. The basic kitchen cabinets took me a couple tries and a month or two to make. The big French oven, another month.
Hinges are a huge frustration for me. The pin trick does not really work well for me as it usually splits the wood in my cabinet doors. My stove hinge uses black electrical tape. Hmmm… sounds like another tutorial I need to explore.
By the time I got to the refrigerator, my frustration was at its peak. A friend 3D printed me a retro fridge, but after I sanded and painted it, I realized that the hinges broke off. DOH!
I looked online for retro dollhouse refrigerators and it was slim pickings. The nice ones were crazy expensive and the ones in my budget, well, were lack luster. I tried to make one and it looked like a big rectangular box. So I bought the cheap smallish lack luster fridge.
Then I waited forever to work on that kitchen again. Instead, I bought a second dollhouse (can you say mom brain?!) and decided to make that one into a bakery-cafe-bookstore thingie. And before I even finished assembling it, I bought some items for it on Ali Express.
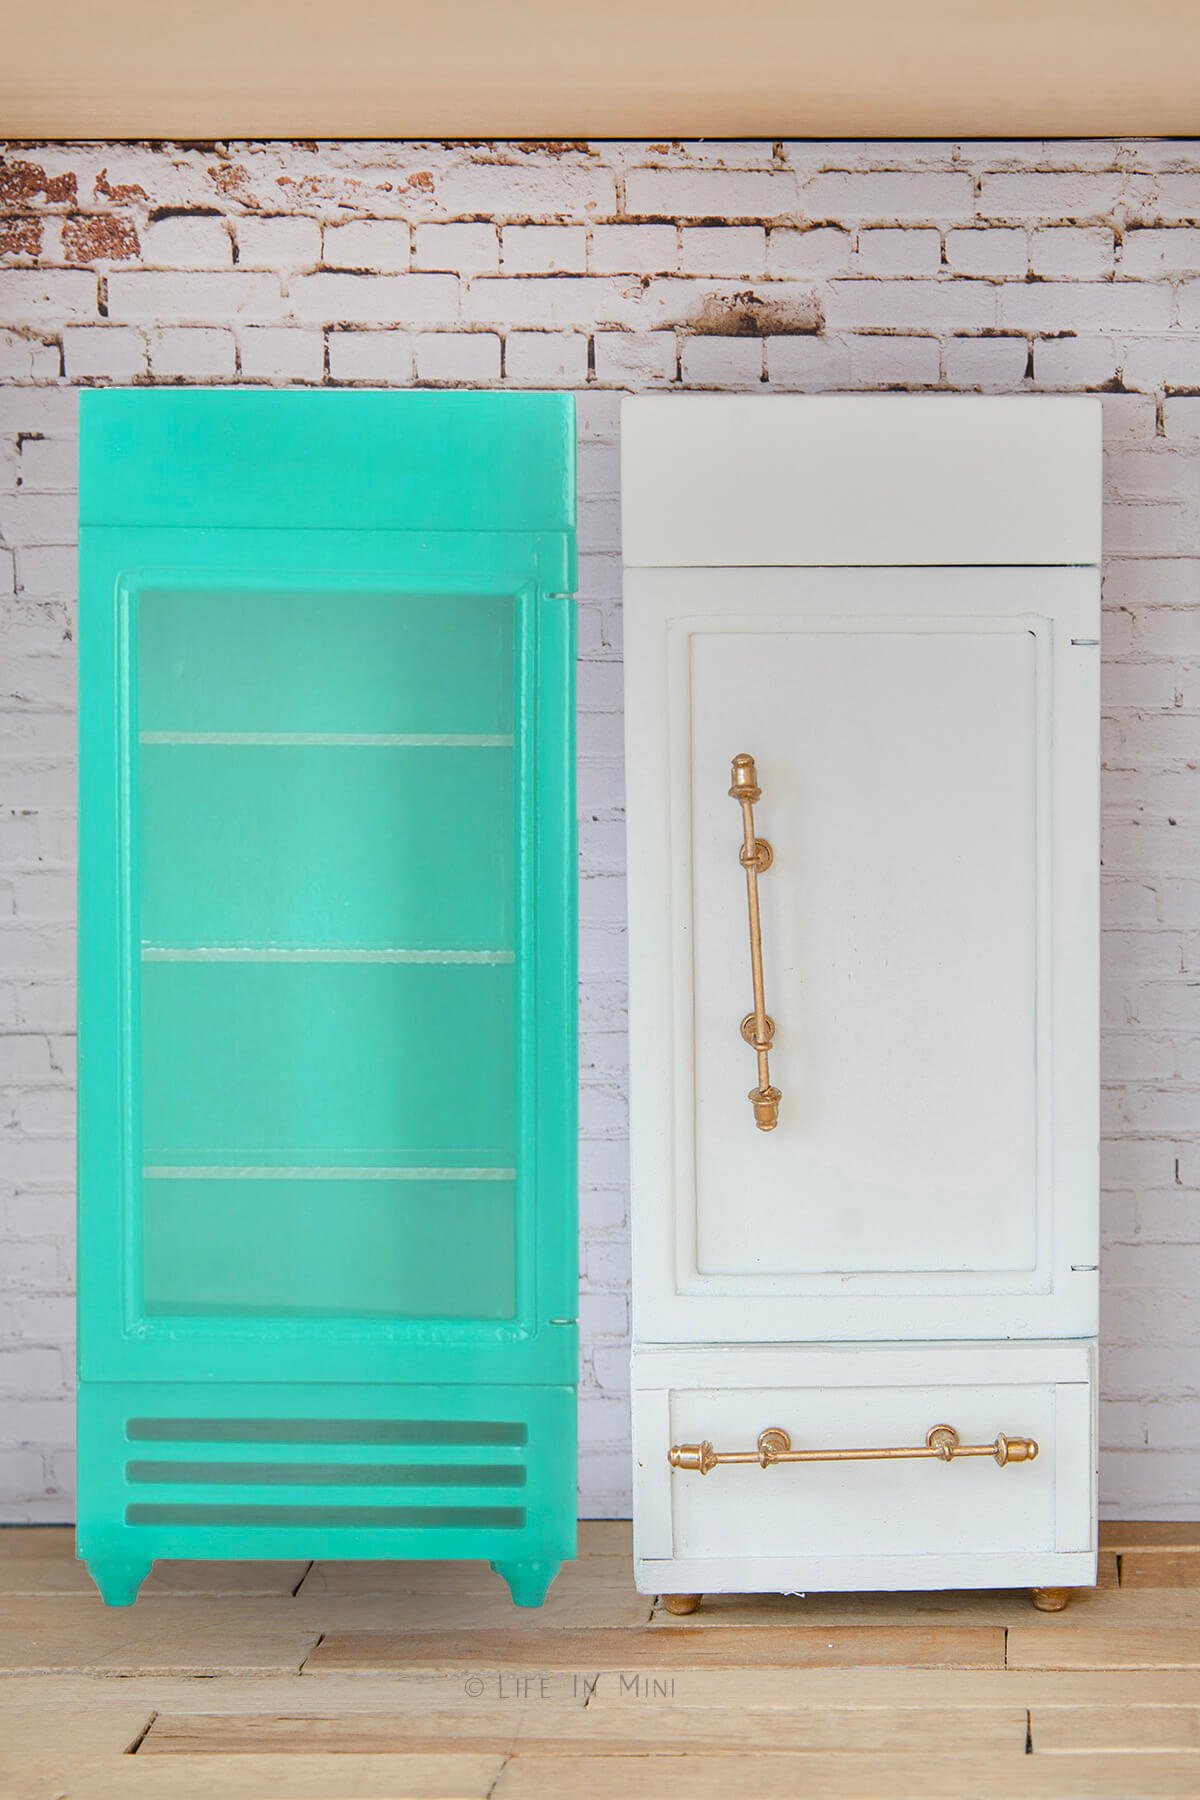
That’s how I ended up with that teal green commercial drink refrigerator. I got it for $5 and waited 6 weeks for it to arrive, then it sat in a box for over a year. I finally pulled it as I got recharged and started adding wall paint, flooring and wallpaper to my bakery-cafe-bookstore thingie.
I put in the big drink fridge, and it totally did NOT go with my store’s eclectic vintage-ish vibe. So what should I do with it now?
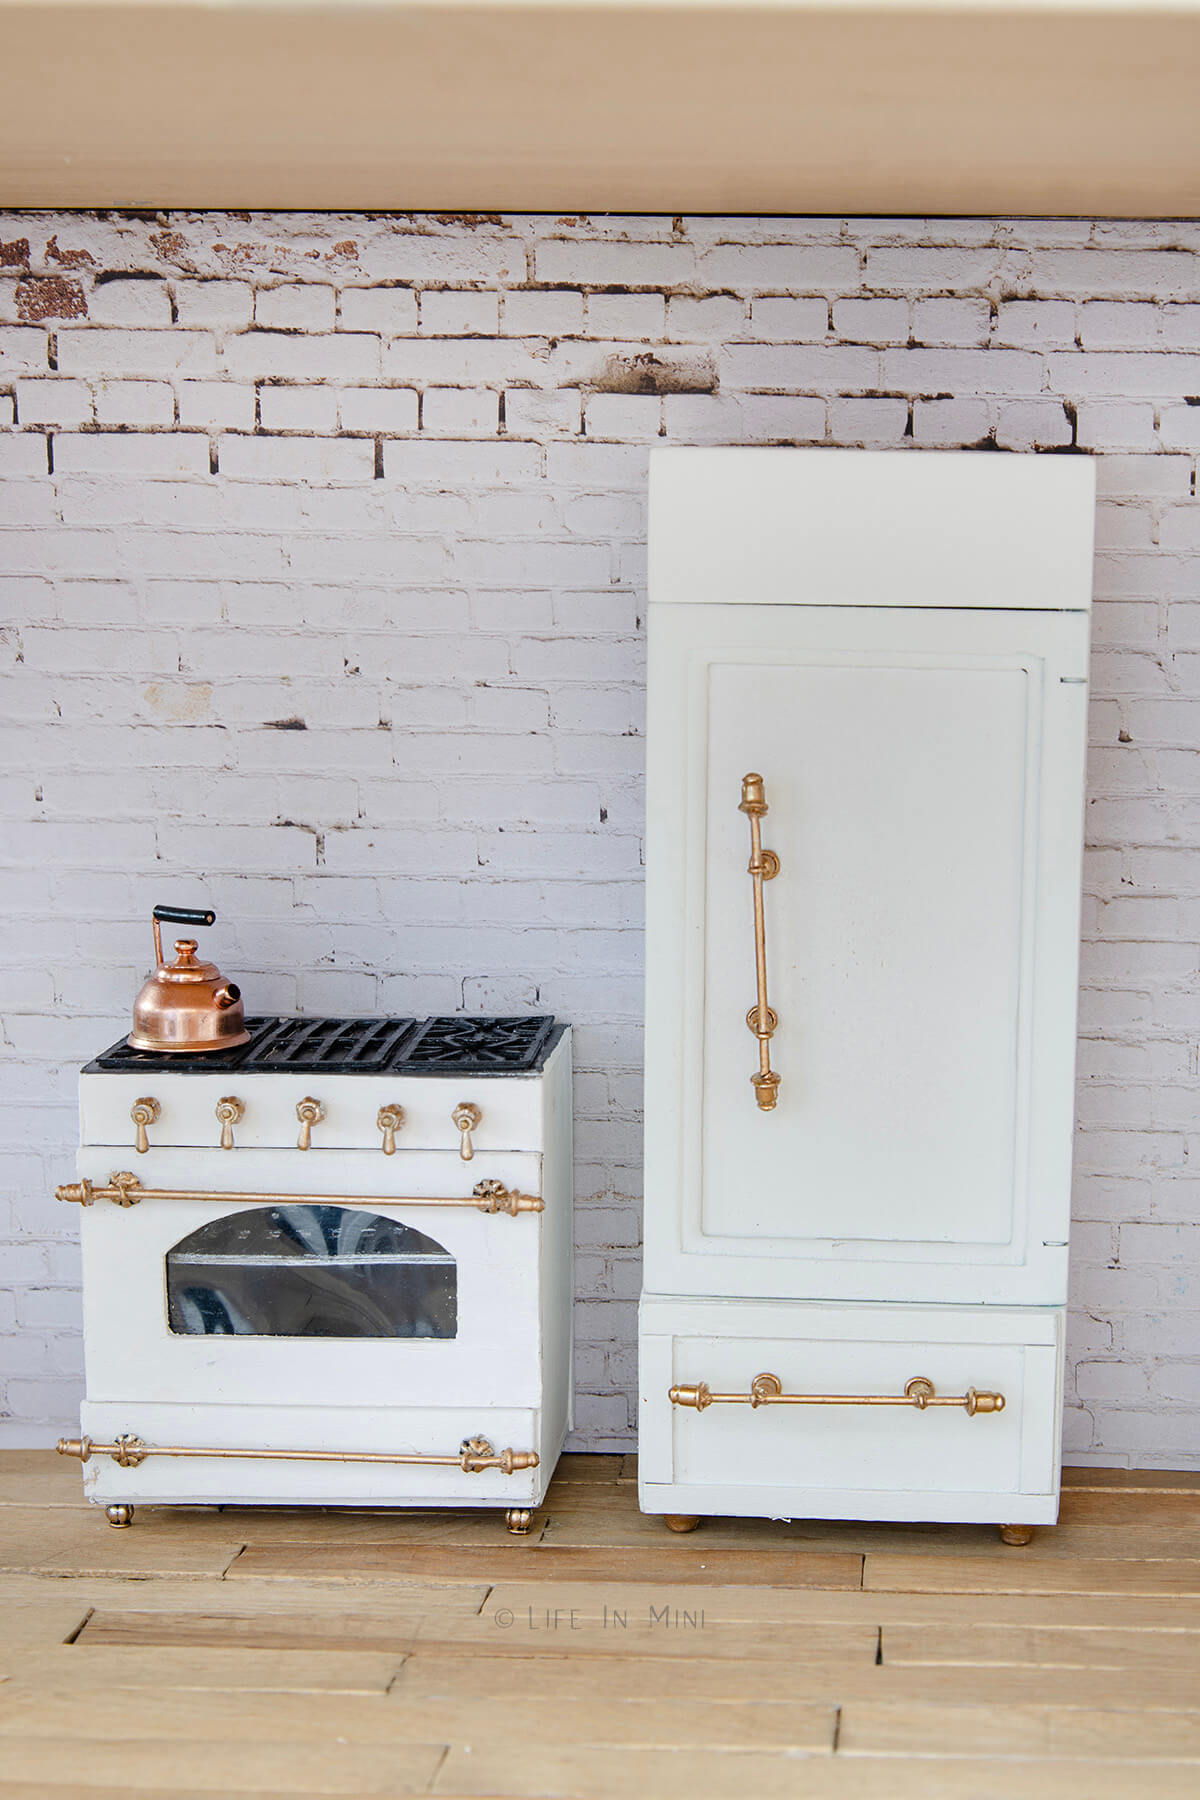
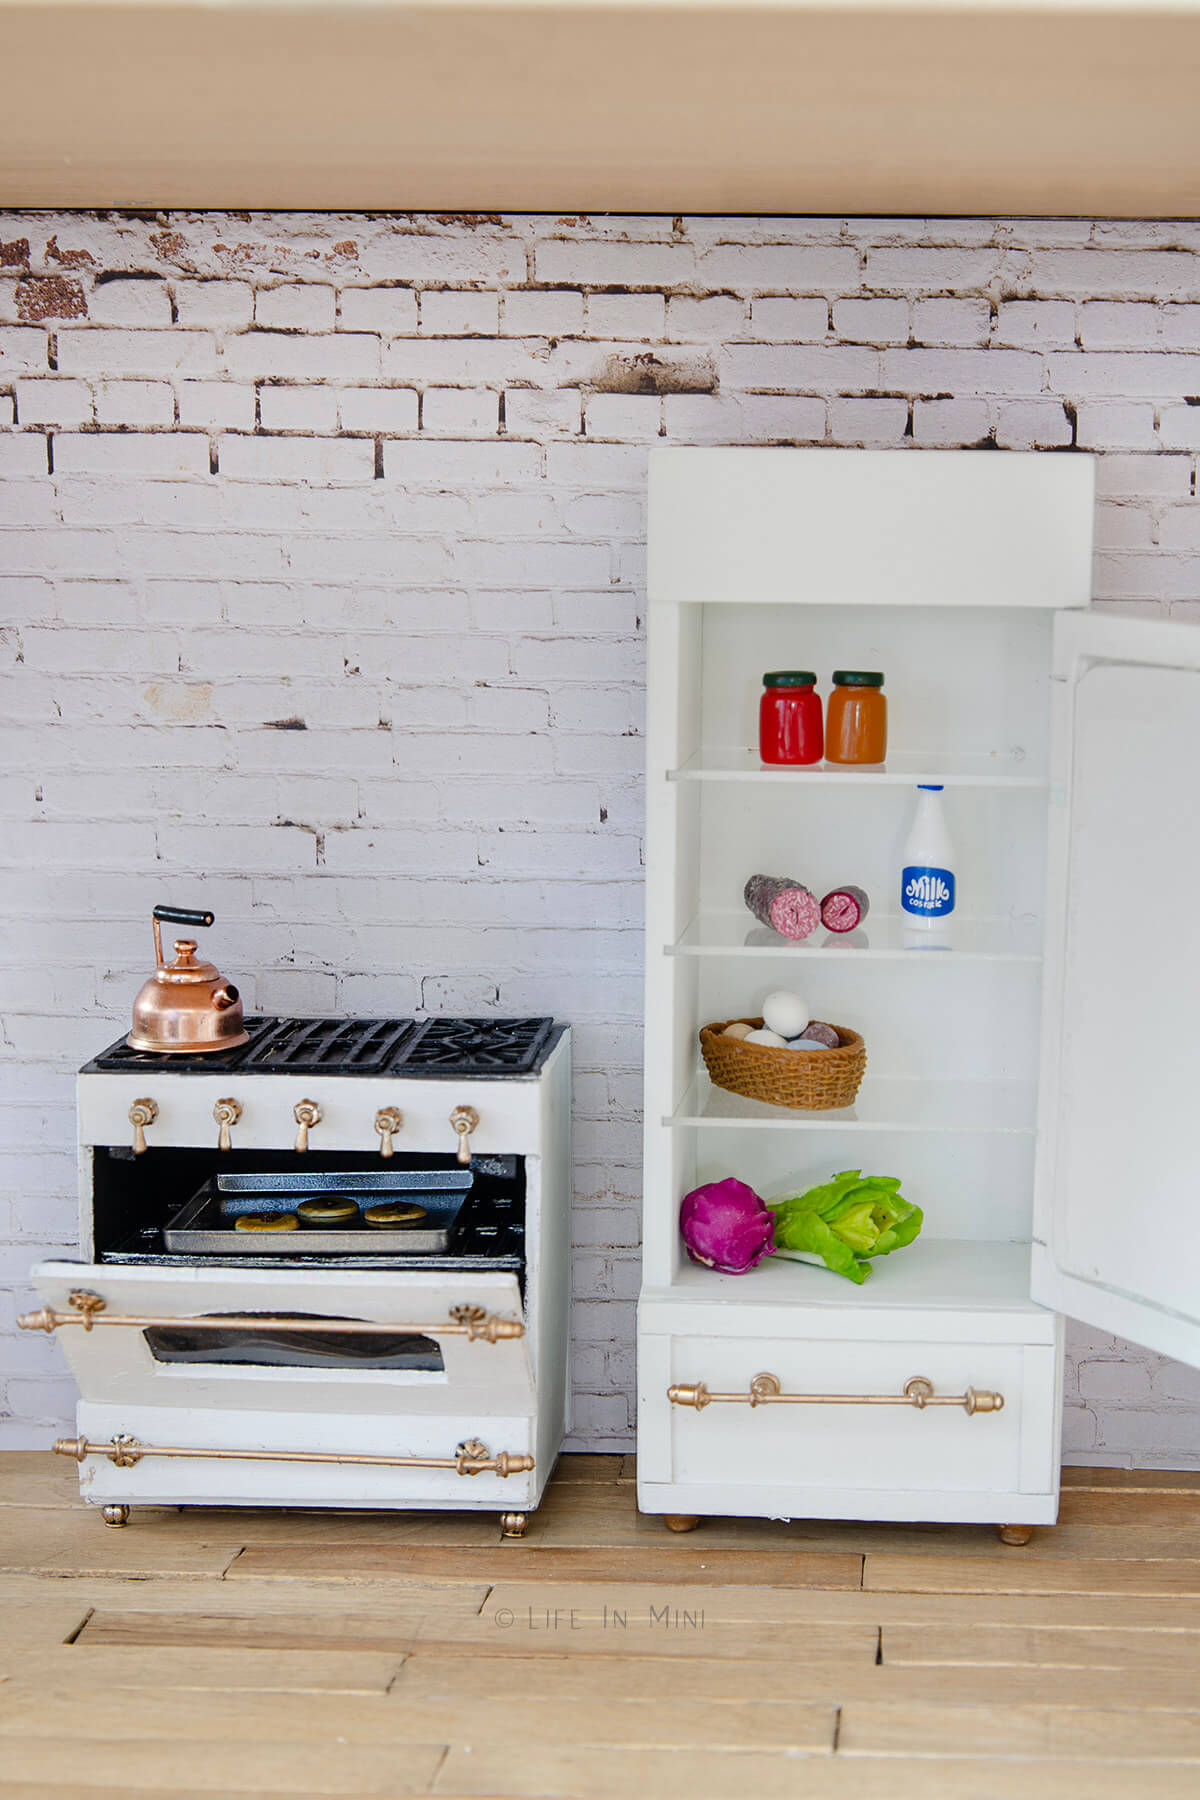
That’s when I decided to glam it up and make it into a SubZero style fridge for my original dollhouse kitchen. And I love how it turned out!
Supplies you need
This post contains some affiliate links for your convenience (which means if you make a purchase after clicking a link I will earn a small commission but it won’t cost you a penny more)! Read my full disclosure policy.
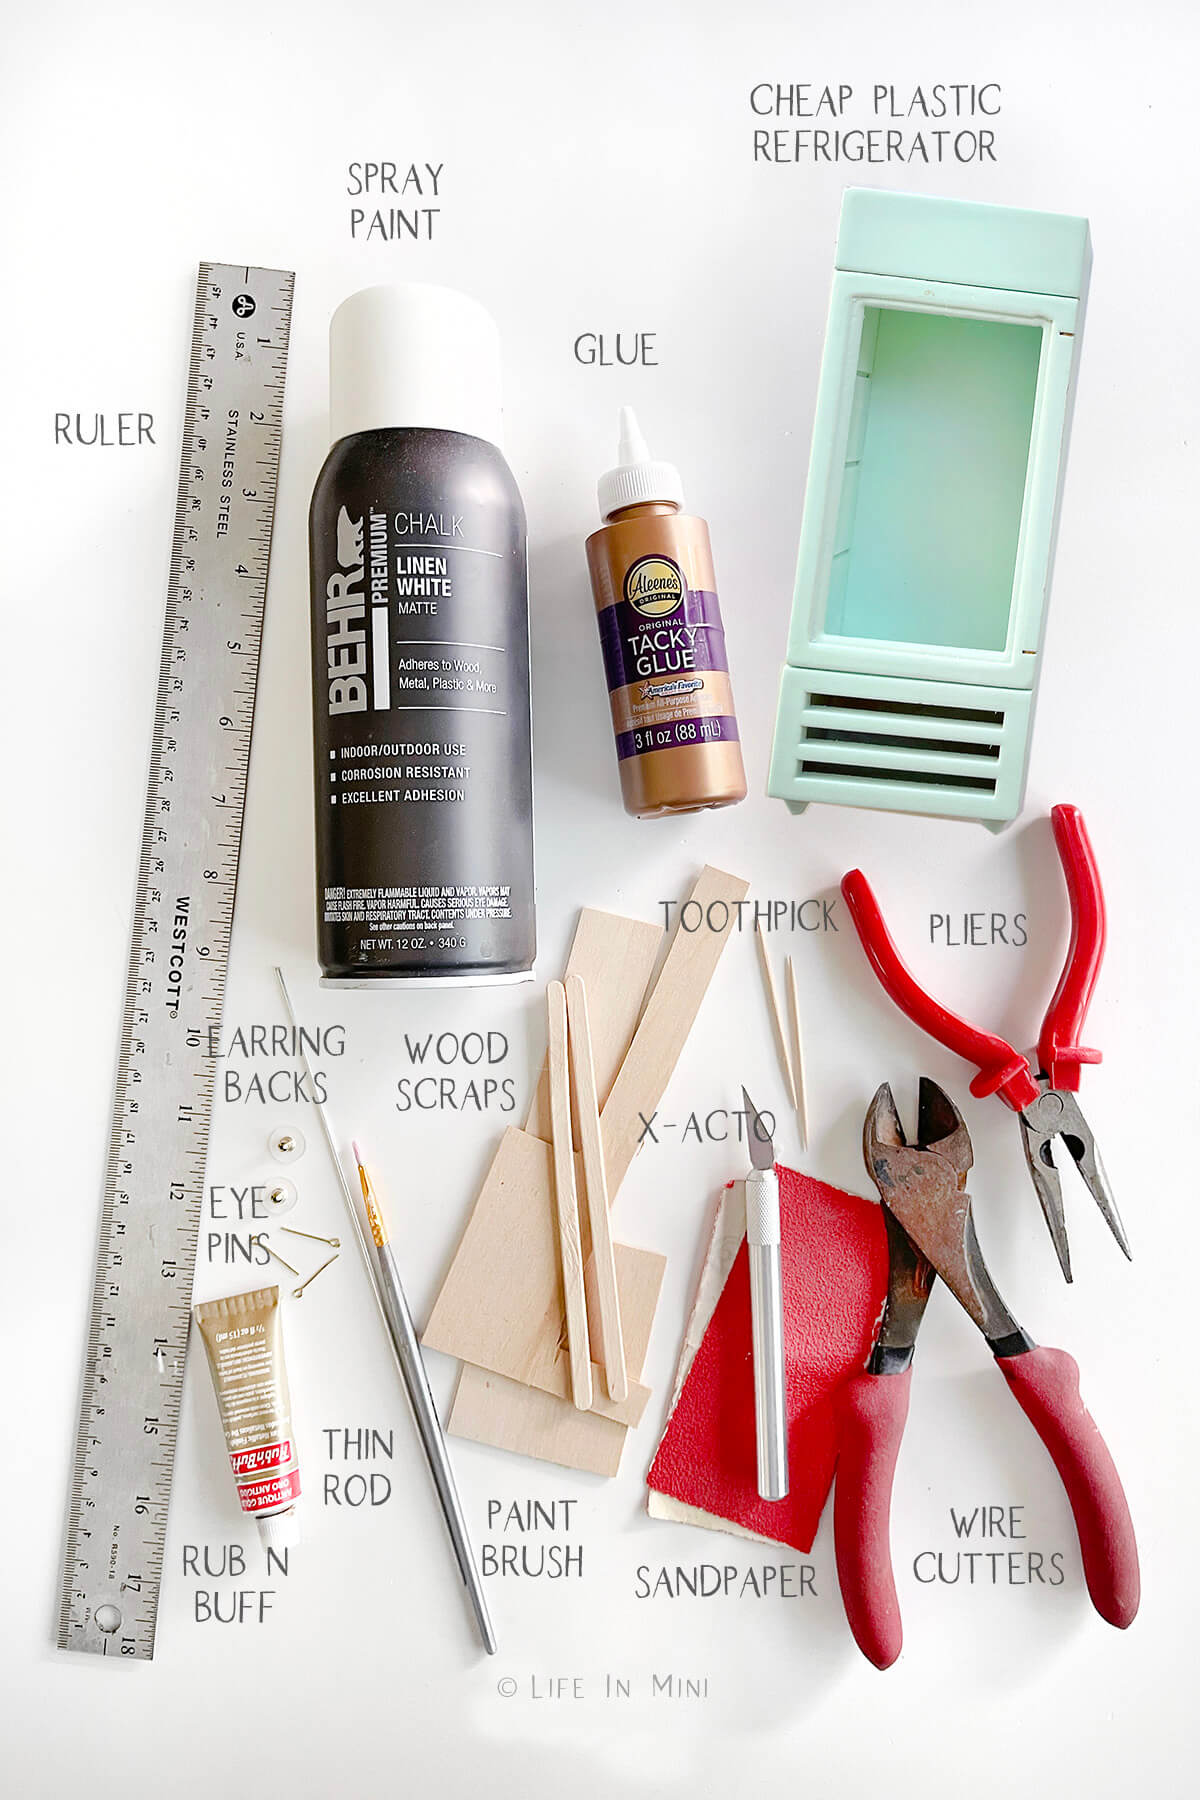
- Plastic fridge: I originally bought this basic store fridge from Ali Express for $5. You can find it on Temu and Amazon, too. But remember, you can glam up any basic fridge you have with a little paint, moulding and wood.
- Spray paint: I used Behr Linen White Chalk Paint on my fridge but you can use any paint, matte or gloss, you like.
- Wood scraps: you can use scrap wood, popsicle sticks and/or thinner coffee stir sticks to embellish your piece to make it look more like a custom refrigerator.
- Sandpaper:
- Aleen’s tacky glue: I use this glue for everything, it is so versatile.
- X-acto knife: I didn’t like the boring knobs on the original dresser so I cut off. If you do this, you need beads or other baubles to make drawer pulls.
- Paint brushes: You will need small paint brushes for applying your metallic paint or wax.
- Sand paper: You will need to sand your refrigerator so the paint will stick to it. You also need to sand the pieces of wood.
- Pliers: When making the door handles, I found it easier to handle the tiny pieces using pliers. You could also use long tweezers.
- Wire cutters: I used this to cut the metal pieces to make my door handles.
- Handle bars: I used earring backs, eye pins and a thin rod to make the pulls/handles on my fridge. You can use most anything, including toothpicks, to make your handles.
- Gold paint: This is totally optional, but I wanted to my fridge hardware needed to be painted. You can use gold foil, gold leaf or gold paint. You can also do this with silver or bronze paints. I used antique gold Rub ‘n Buff.
- Other items: You will also need a metal ruler for measuring your scrap wood, a cutting mat and some scrap cardboard or newspaper for spray painting.
Step-by-step directions
1. Sand the fridge. With a little brute force, I removed the clear shelves and the clear window on the door of the fridge. Then I sanded the whole fridge, inside and out, to give the spray paint something to hold onto.
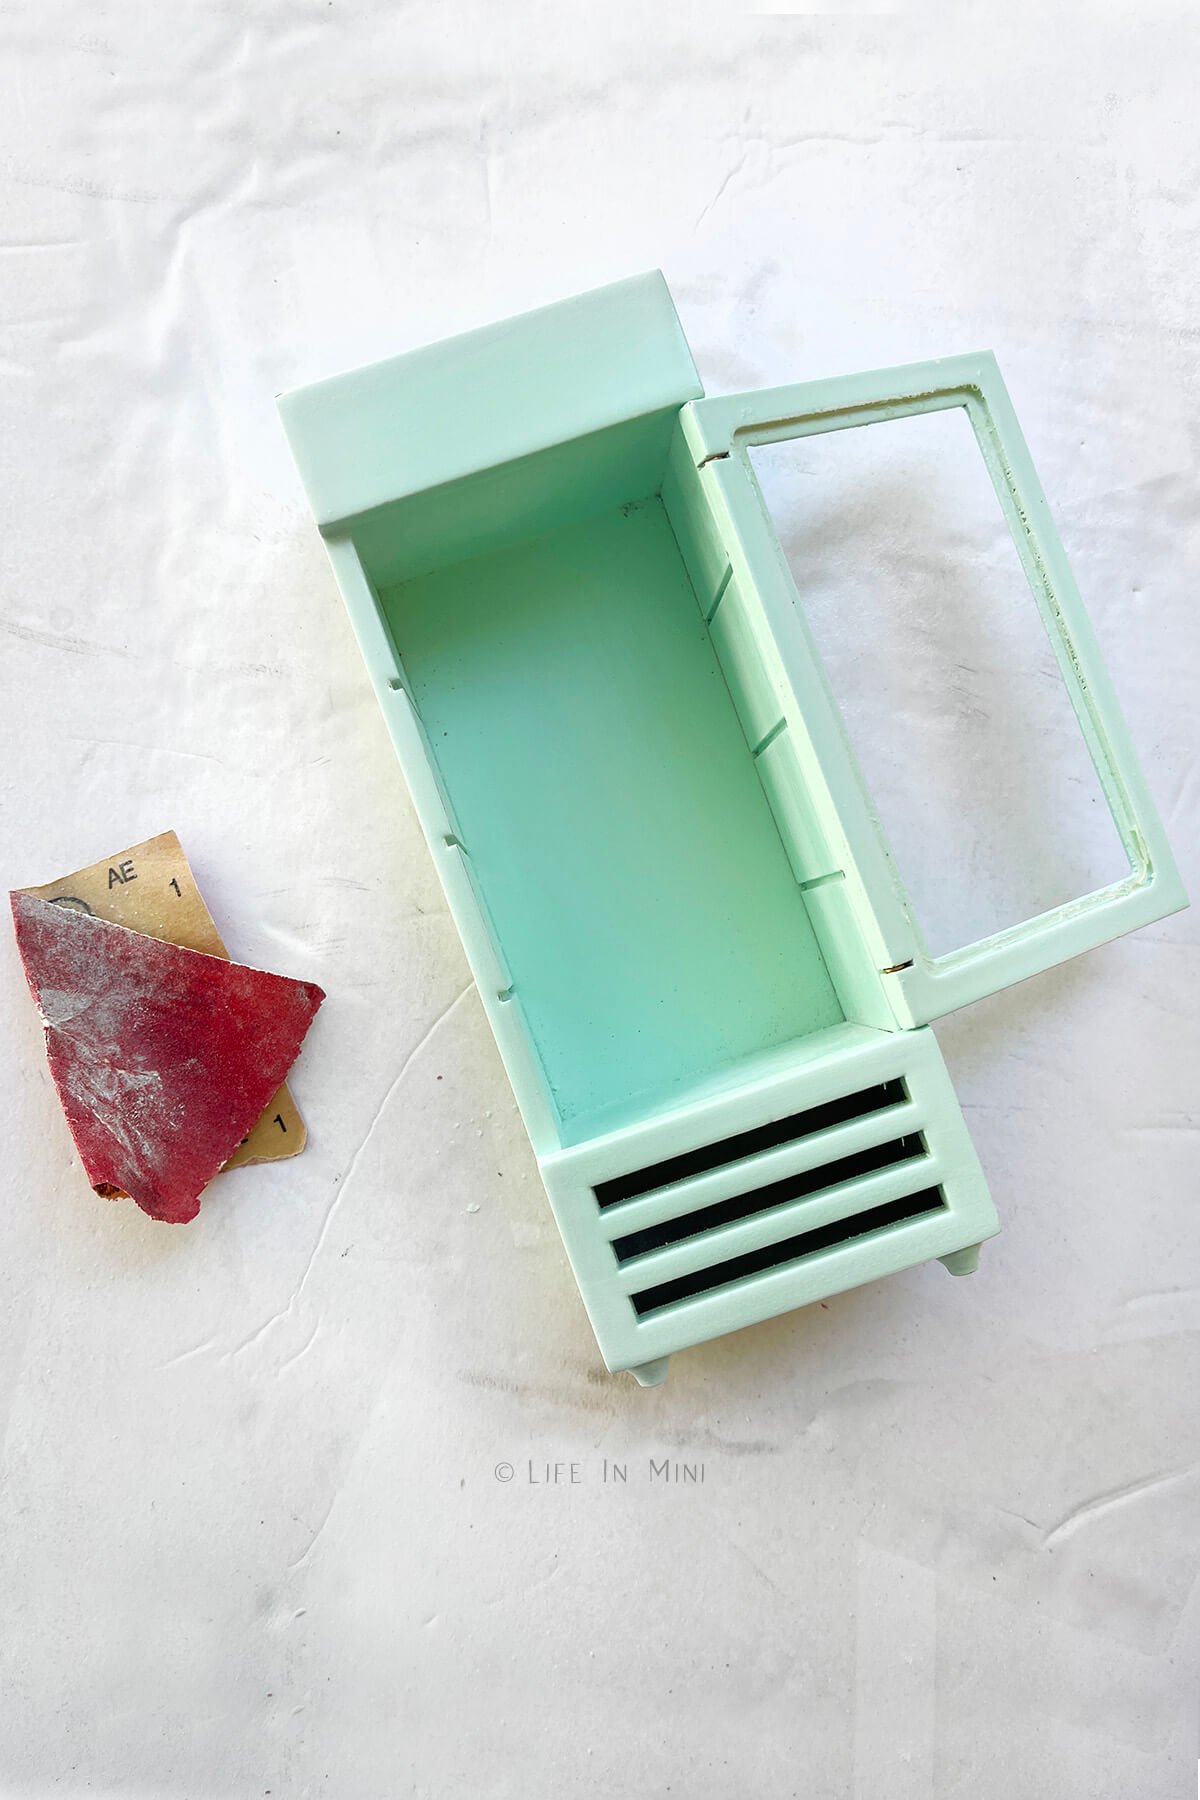
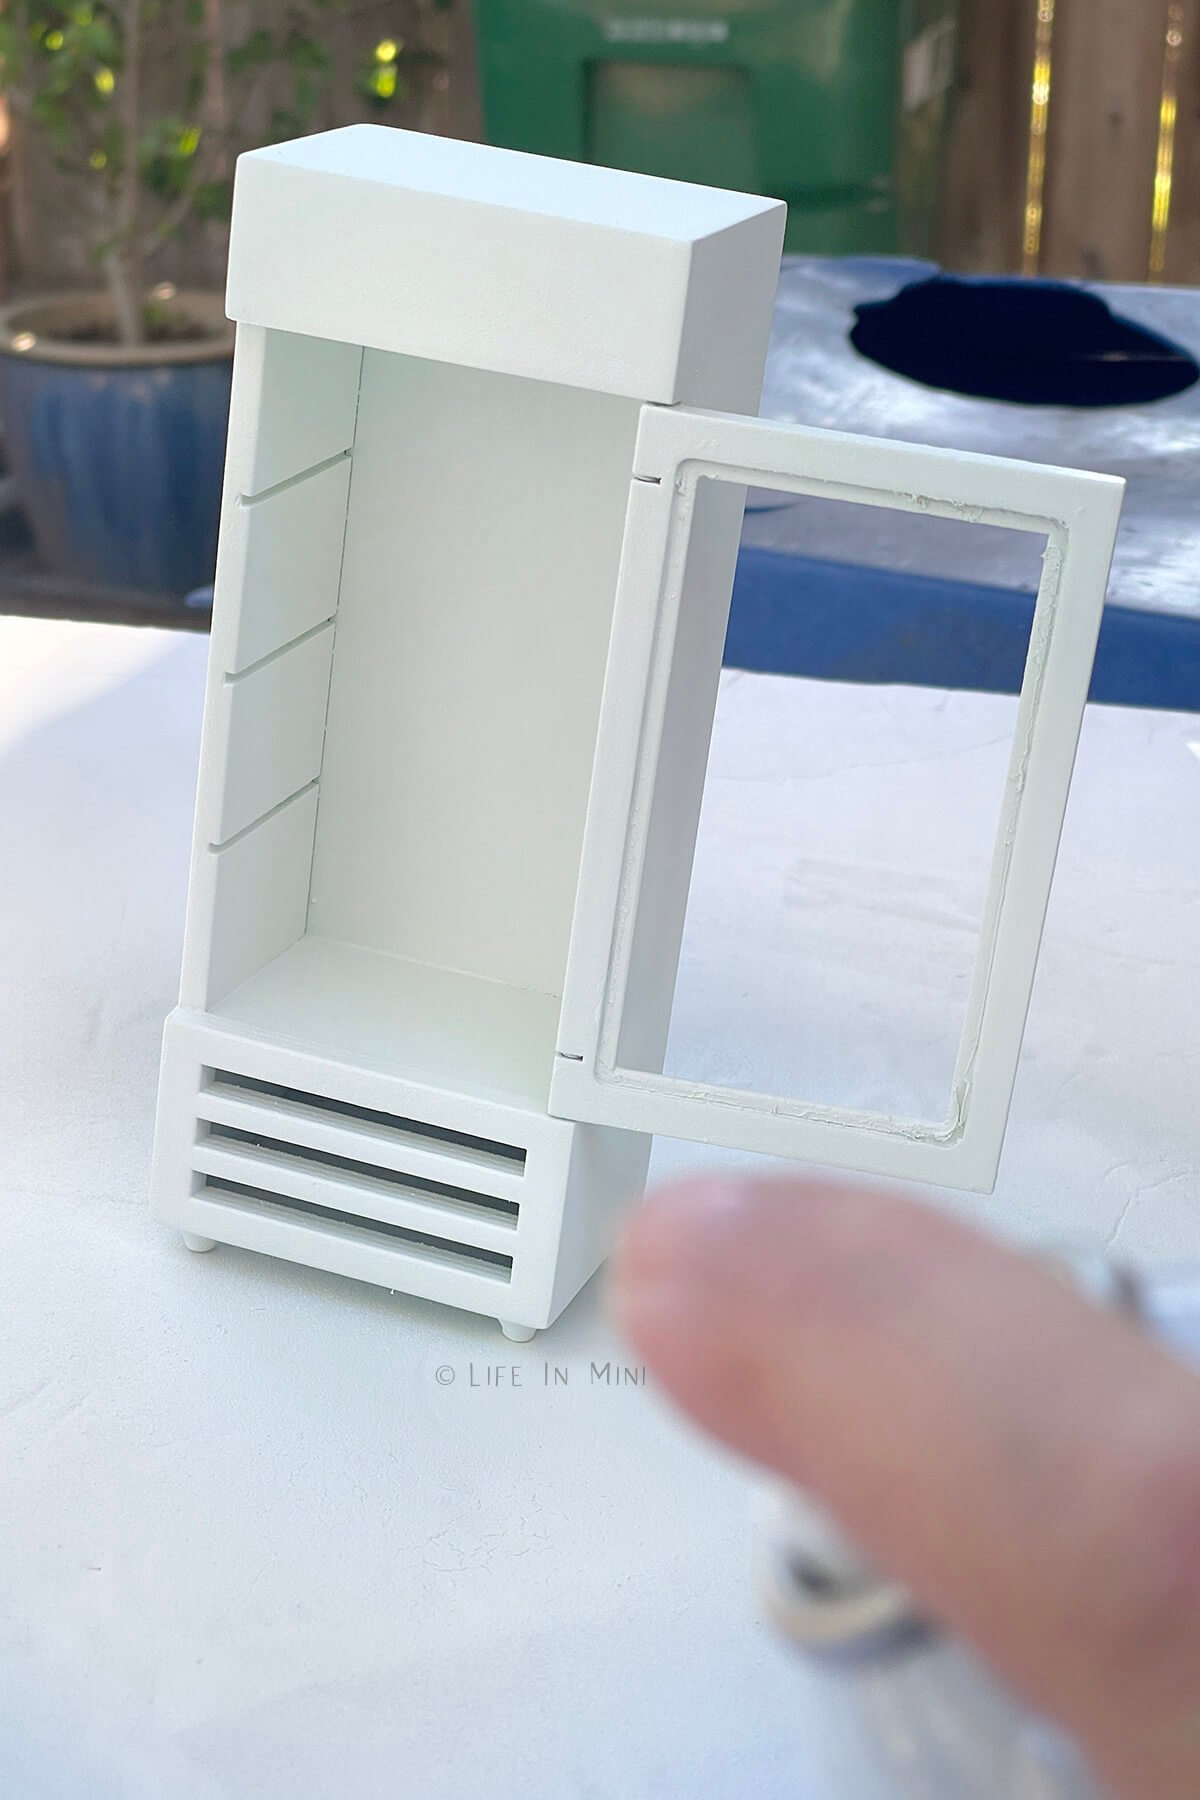
2. Paint the fridge. I chose white chalk spray paint as I wanted the fridge to look like my kitchen cabinets and a piece of furniture. In batches, I spray painted the piece, letting it dry between the layers, until it was full covered.
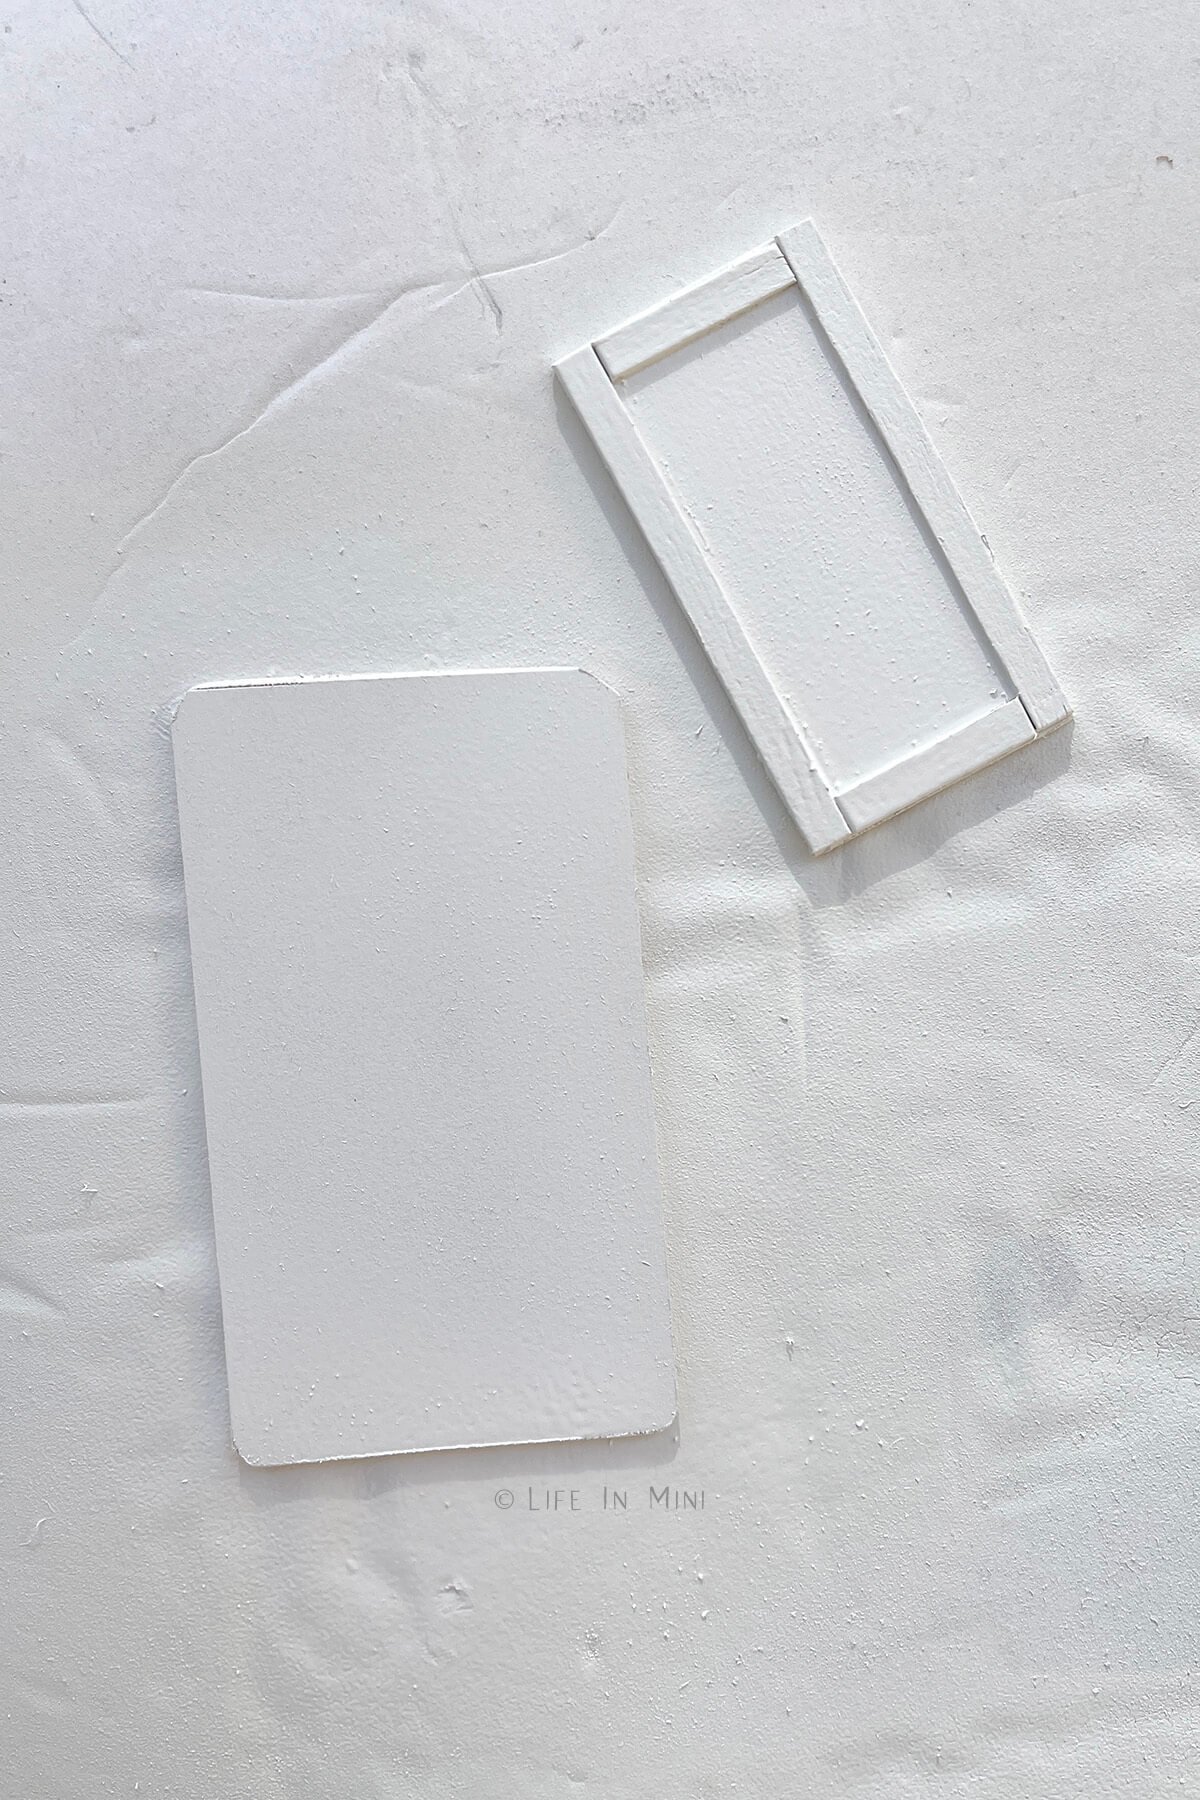
3. Add the trim. I did not paint the clear door window as I wanted the option to use it again, since I always seem to change my mind! So I cut and sanded a piece of wood to fit inside the door.
I used simple coffee sticks for trim to match the look of my kitchen cabinets. But If you are using miniature moulding for your trim, you will need miter shears to cut the angles. I like to use them to cut my popsicle sticks.
I realized that I did not like the vents on the bottom of the fridge, so I covered them up with wood and trim to make a faux freezer drawer. I painted both pieces of wood with the same spray paint. Once dry, I glued them onto the fridge.
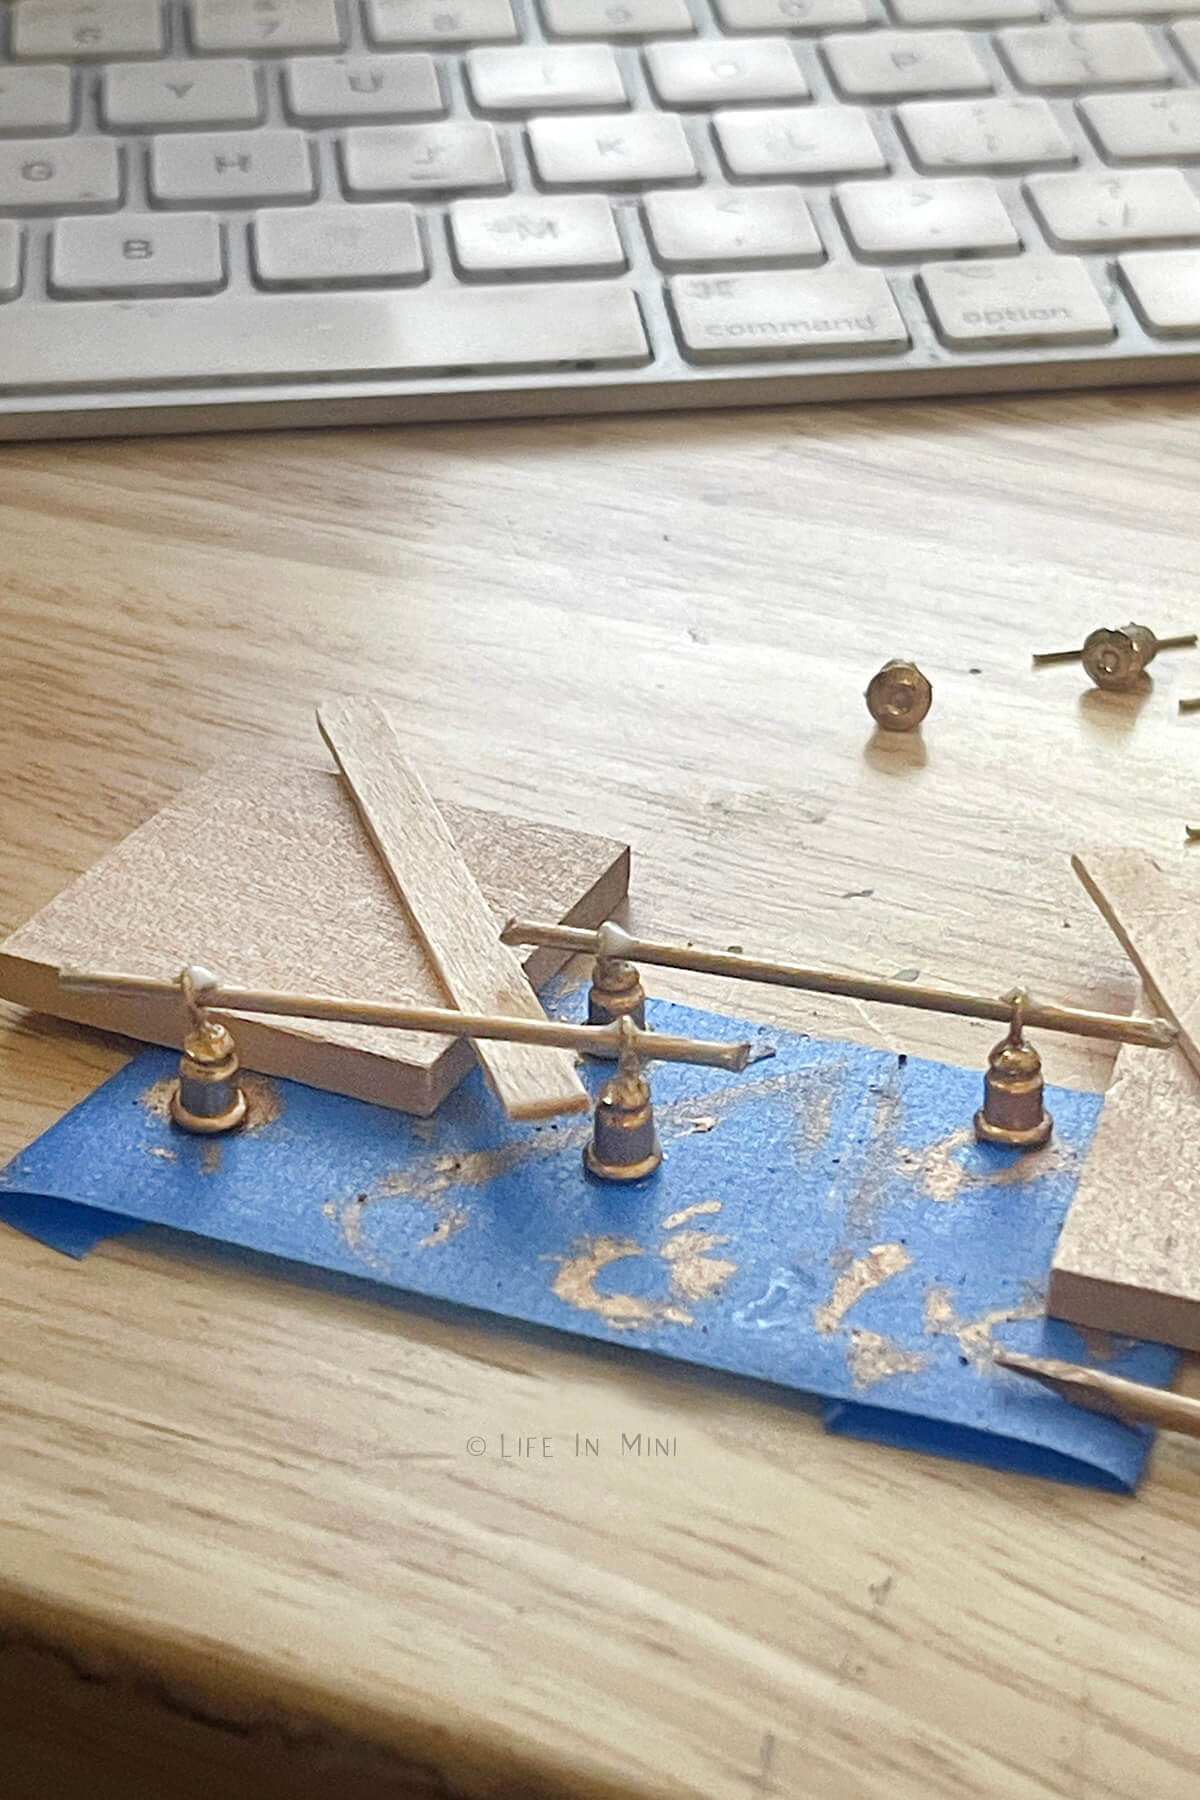
4. Make and add the hardware. I wanted the fridge to match my oven, so I made the gold hardware to match. I used earring backs, eye pins and a thin rod for the handles. I “painted” them with my antique gold rub and buff.
Once the gold wax dried, I glued them onto the fridge. I also painted the feet gold, although you can’t see it very well.
Project tips and FAQs
Do your best not to scratch up the paint as you push the clear shelves back in. This fridge is plastic, so to pull the shelves in and out I had to gently widen the opening of the fridge by pulling it apart. GENTLY. You don’t want to break it.
I wrote up this post mostly to show that you can recycle the dollhouse furnishings you have without having to buy new pieces. I am constantly changing my mind about colors, flooring and the furniture pieces in my dollhouse. It certainly is cheaper to redo a dollhouse kitchen than my real kitchen!
In fact, the more I look at those fridge handle bars, the more I think I want something more simple. I’m sure I’ll redo them when I should be doing something else. But until then, I am happy that my mini family have a large fridge.
It’s time for them to stock up at Costco!
On another note, I found this book of brick scrapbook paper on Amazon. Since I couldn’t find any similar designs in the three different craft stores near me, I ordered it. There are lots of different brick designs and colors, and the paper is nice and thick.
Some designs are larger than 1:12, but most will work just fine if you need brick paper for your scene. It comes in 12×12 sheets and smaller 6×6 sheets. One of the designs is featured as the brick wall for these pictures.
If you are enjoying my blog, why not sign up for my newsletter so you won’t miss out on the mini adventures!
How to fix up a dollhouse refrigerator

I couldn't find the perfect dollhouse refrigerator so I decided to rework a fridge I already had. It's amazing what a little bit of scrap wood, paint and bits of jewelry can do!
Materials
- Plastic dollhouse refrigerator
- Thin sheets of scrap wood
- Coffee stirrer sticks
- Spray paint
- Aleen's Tacky Glue
- Earring backs
- Eye pins
- Thin rods
- Antique gold rub 'n buff
Tools
- Sand paper
- X-acto blade
- Ruler
- Cutting mat
- Wire cutters
- Pliers
Instructions
- Remove the clear shelves and the clear window on the door of the fridge. Sand the inside and outside of the refrigertor.
- In batches, spray paint your piece, letting it dry between the layers, until it was fully covered.
- I did not paint the clear door window as I wanted the option to use it again, So I cut and sanded a piece of scrap wood to fit inside the door.
- I also did not like the vents on the bottom of the fridge, so I covered the vents up with wood and trim for a faux freezer.
- Paint these pieces of wood with the same spray paint. Once dry, glued them onto the fridge.
- Make the hardware for your fridge. I used earring backs, eye pins and a thin rod and "painted" them with antique gold rub and buff.
- Once the gold wax dried, I glued it onto the fridge. I also painted the feet gold, although you can't see it very well.
Notes
This tutorial is not how to make a refrigerator but how to reuse what you already have. I trasnformed an inexpensive store fridge and made it look like a fancy built SubZero dollhouse refrigerator. You can use the techniques in this tutorial to fix up whatever refrigerator you do have.
PS If you try this craft, why not leave a star rating in the direction card right below and/or a review in the comment section further down the page? I always appreciate your feedback.
You can also follow me on Pinterest, Facebook or Instagram. Sign up for my eMail list, too!
Leave a Reply