I tried four different methods to make miniature stained glass pieces for my dollhouse and share which method I prefer. I also have a free PDF that includes 3 cute stained glass designs for you to download and use.
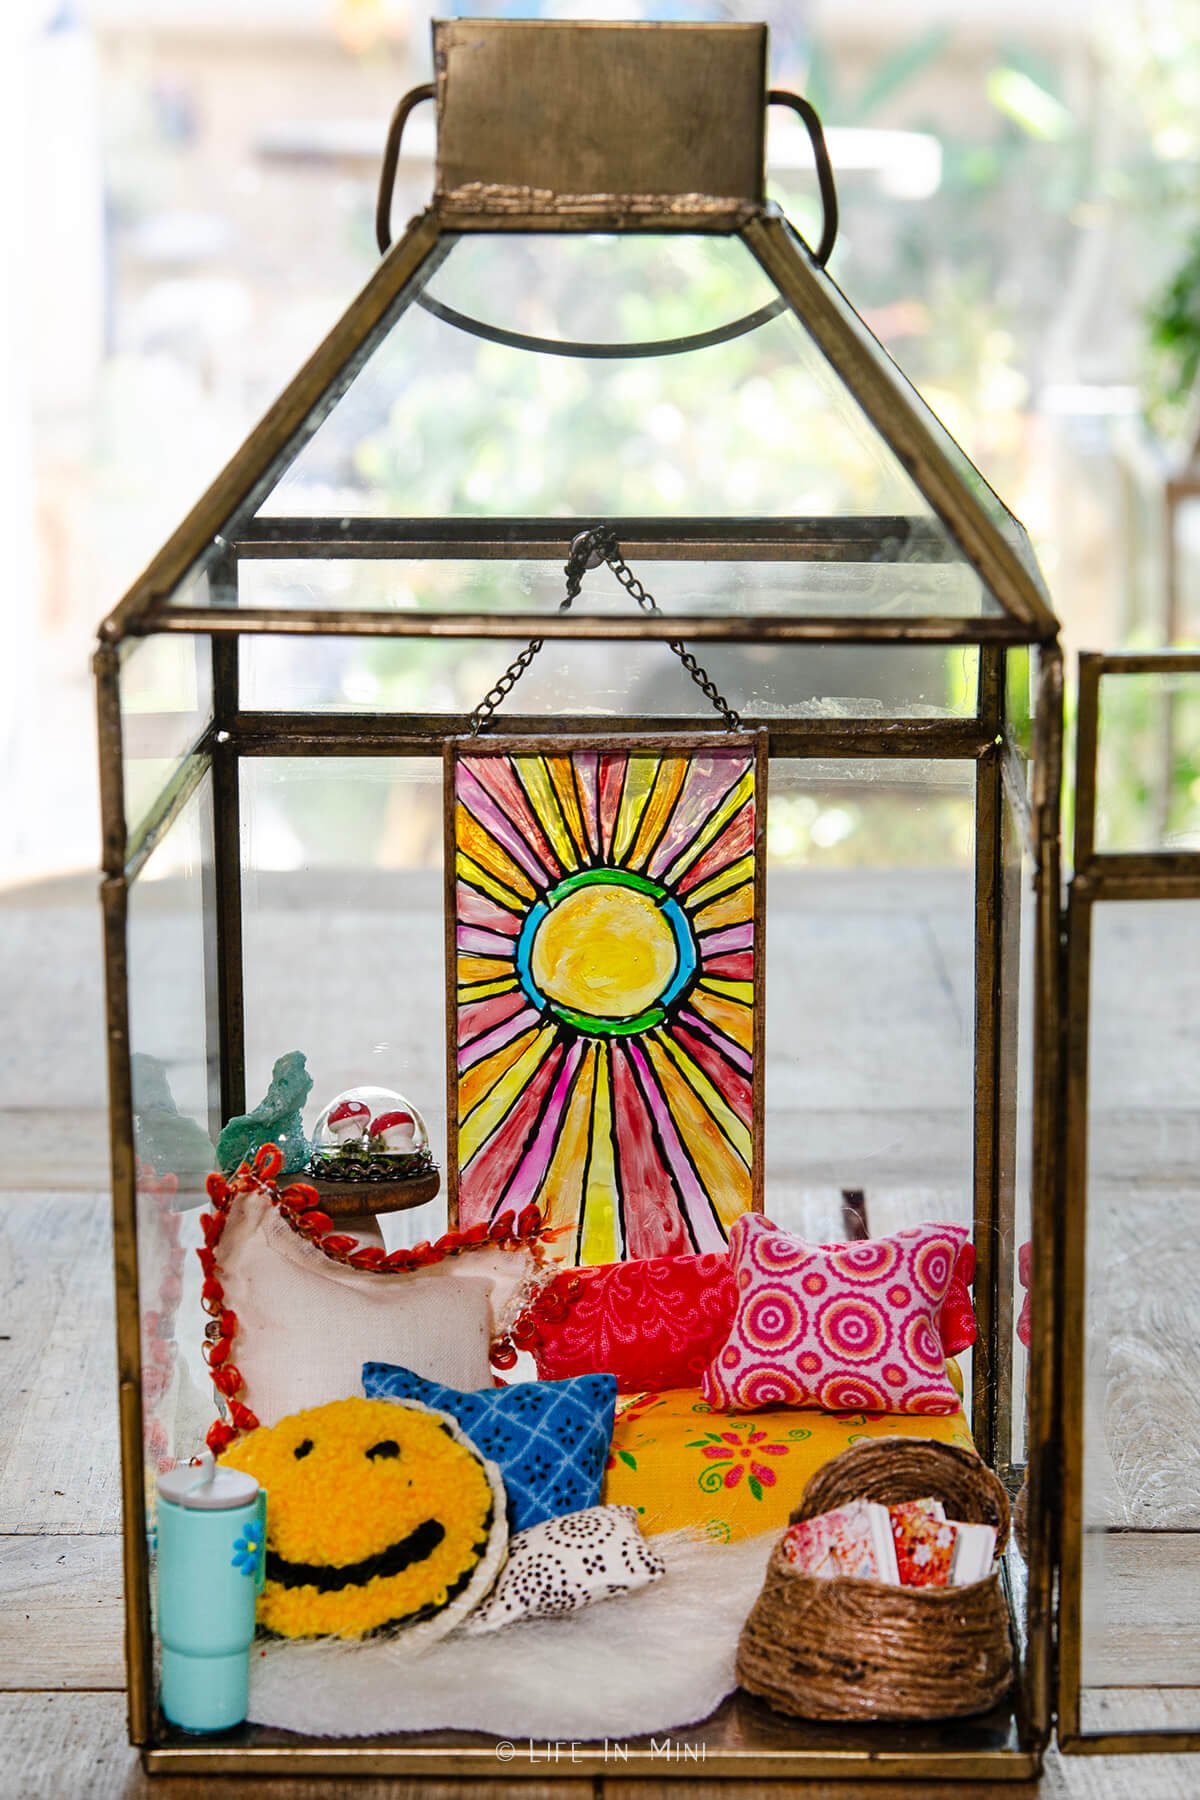
Tell me I am not the only one who finds themselves working on several mini projects at the same time? There’s a lot of down time while waiting for glue and paint to dry, so I tend to start another project when this happens.
Or if I come across a little snag while making one mini, I distract myself by working on a completely different project until I figure out how to fix my problem. And next thing you know, there are five unfinished projects on my desk and several bins scattered on my floor!
This miniature stained glass tutorial was an idea given to me by a friend of mine. I was stumped at what to make and write about for you guys and she suggested this. I quickly went online to hunt for stained glass inspiration.
I didn’t want to do a complicated design, like you would see in a church, and I didn’t want some fancy or traditional stained glass that I wouldn’t hang in my own house. I did find a few fun ideas that inspired me to make these three designs.
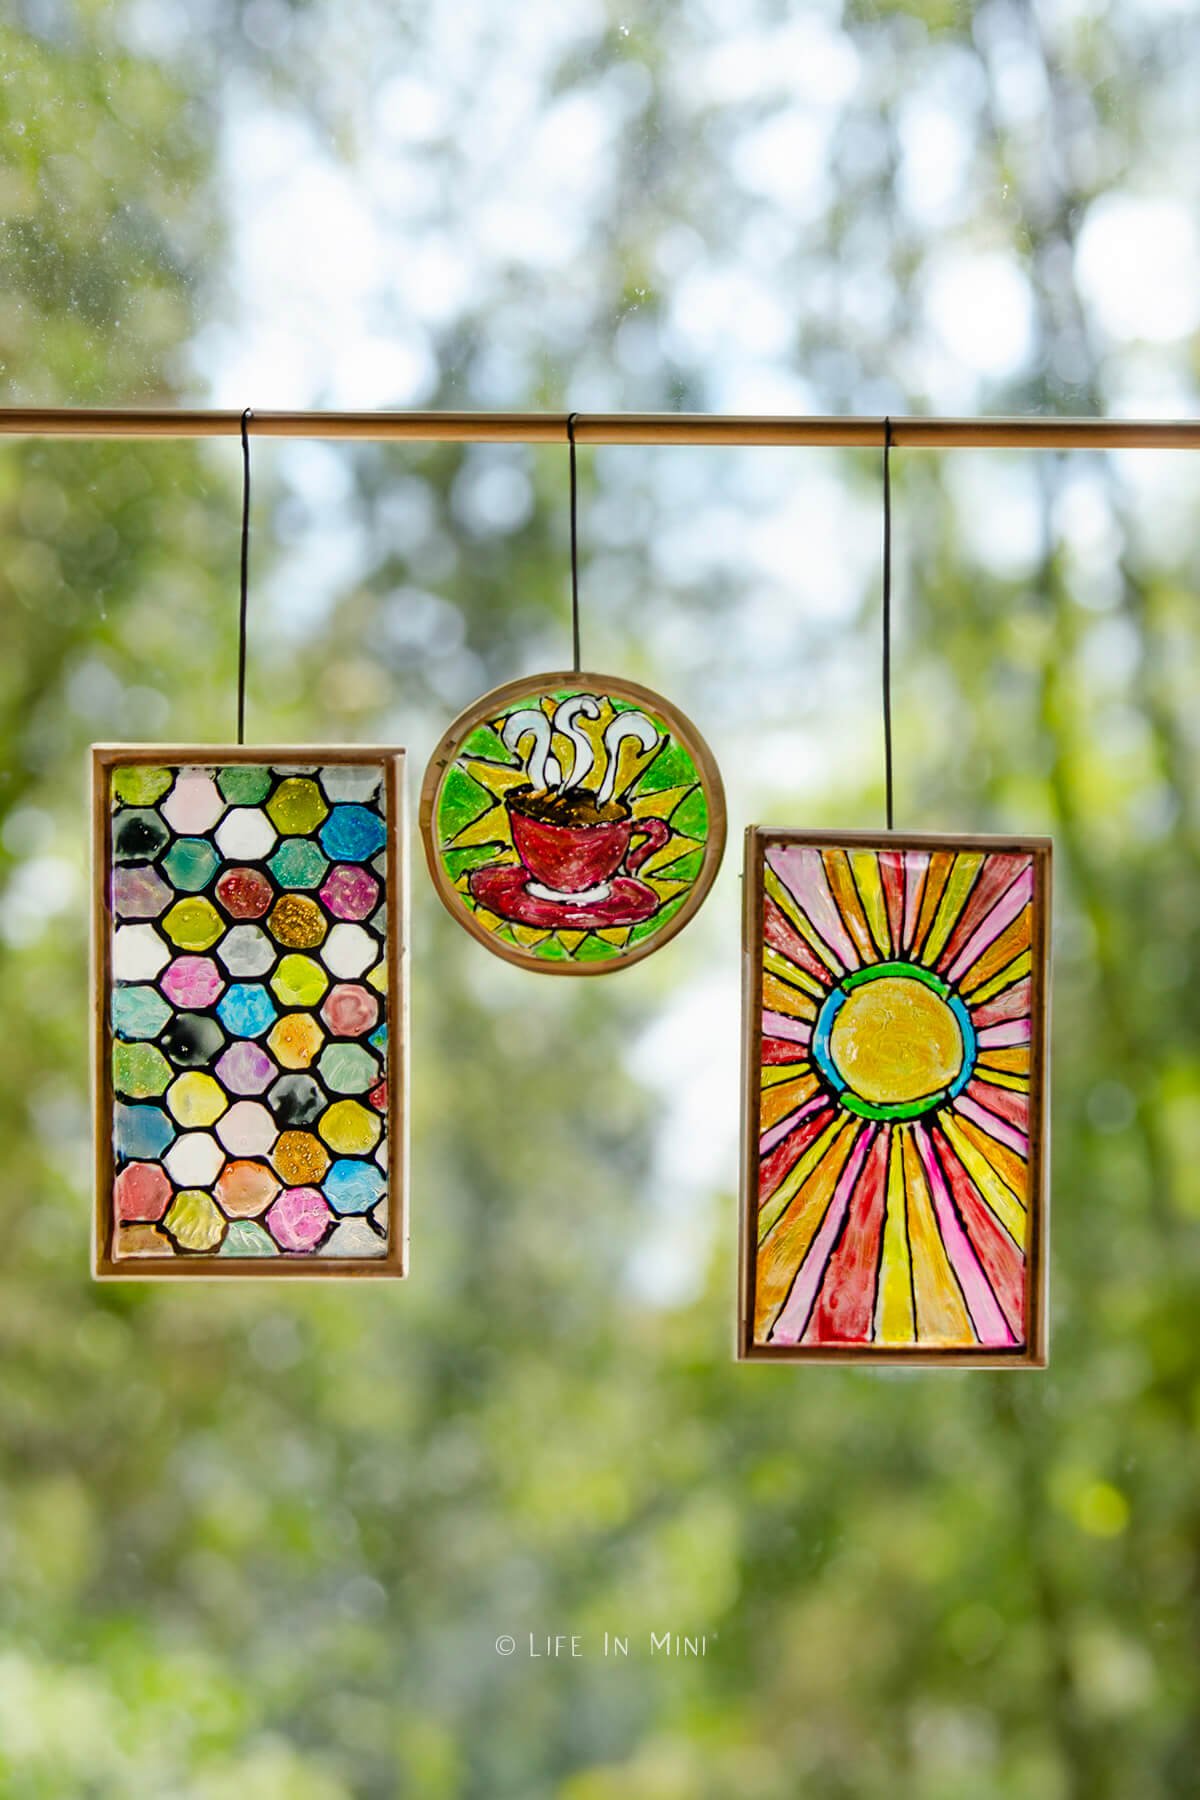
At first I was annoyed with my not-so-steady hand with the outline, but after a few days I started to love my little pieces. Their little imperfections make the pieces look more authentic, I think. I tried several different methods on making these stained glass artworks and this tutorial features the method I prefer the most.
I share the other options in the FAQ section at the end of the post so you can compare how the different options look. You can use pieces of clear plastic leftover from store bought products or purchase small pieces of acrylic. I also chose to frame these pieces and hang them versus have them replace a full window.
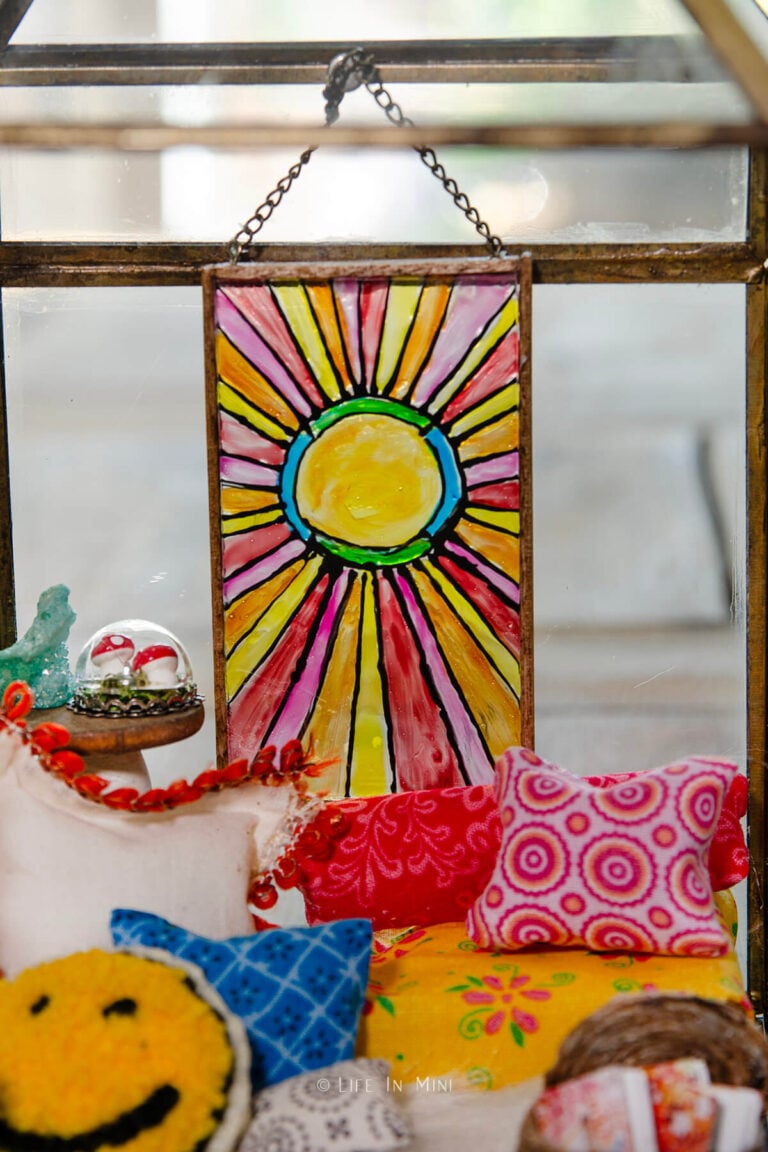
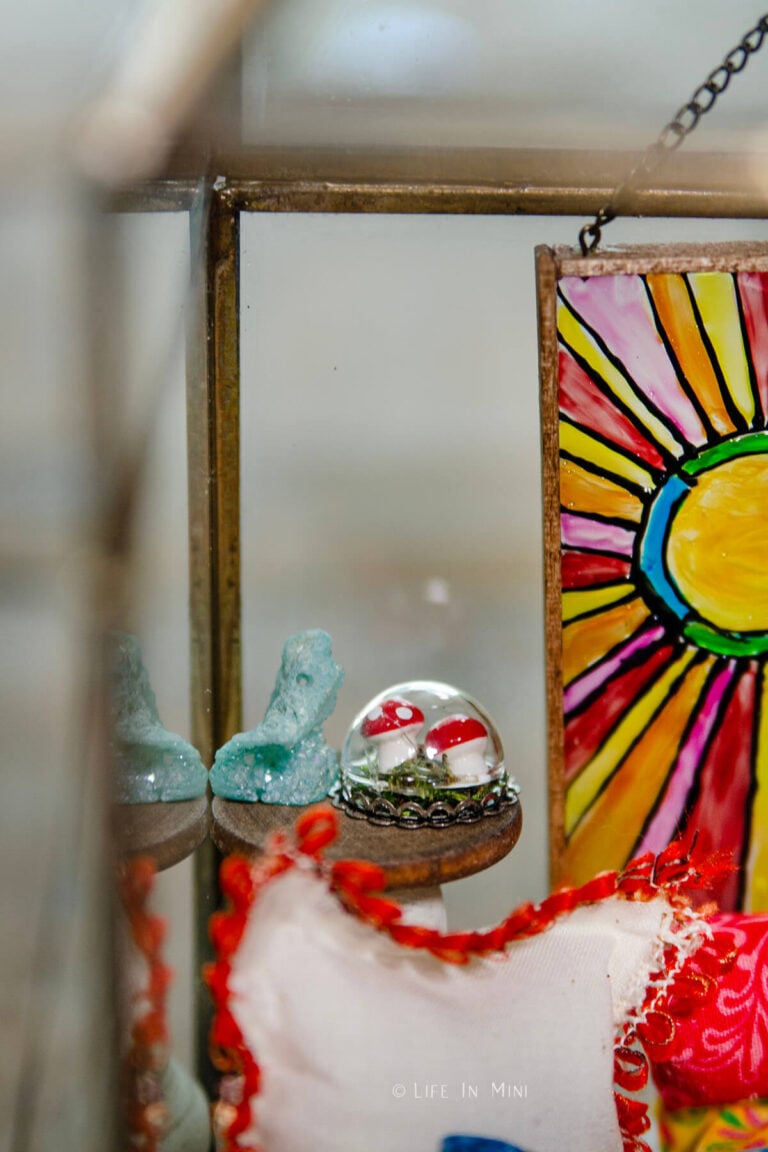
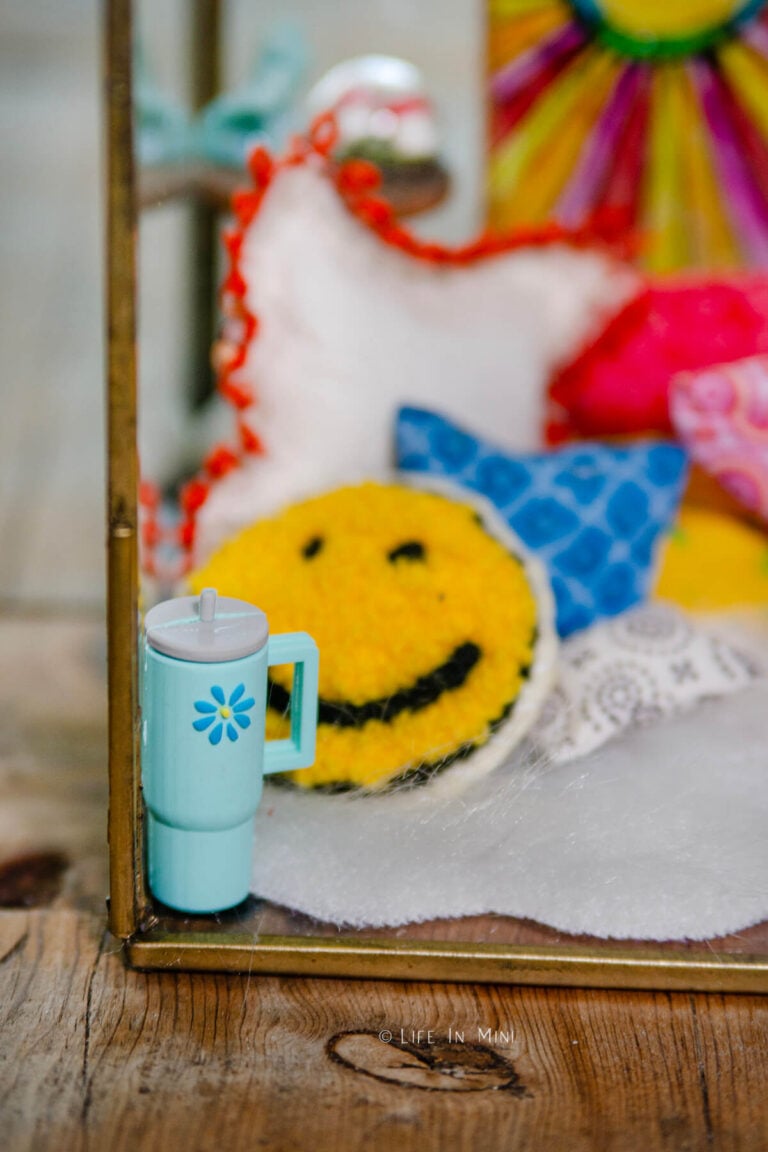
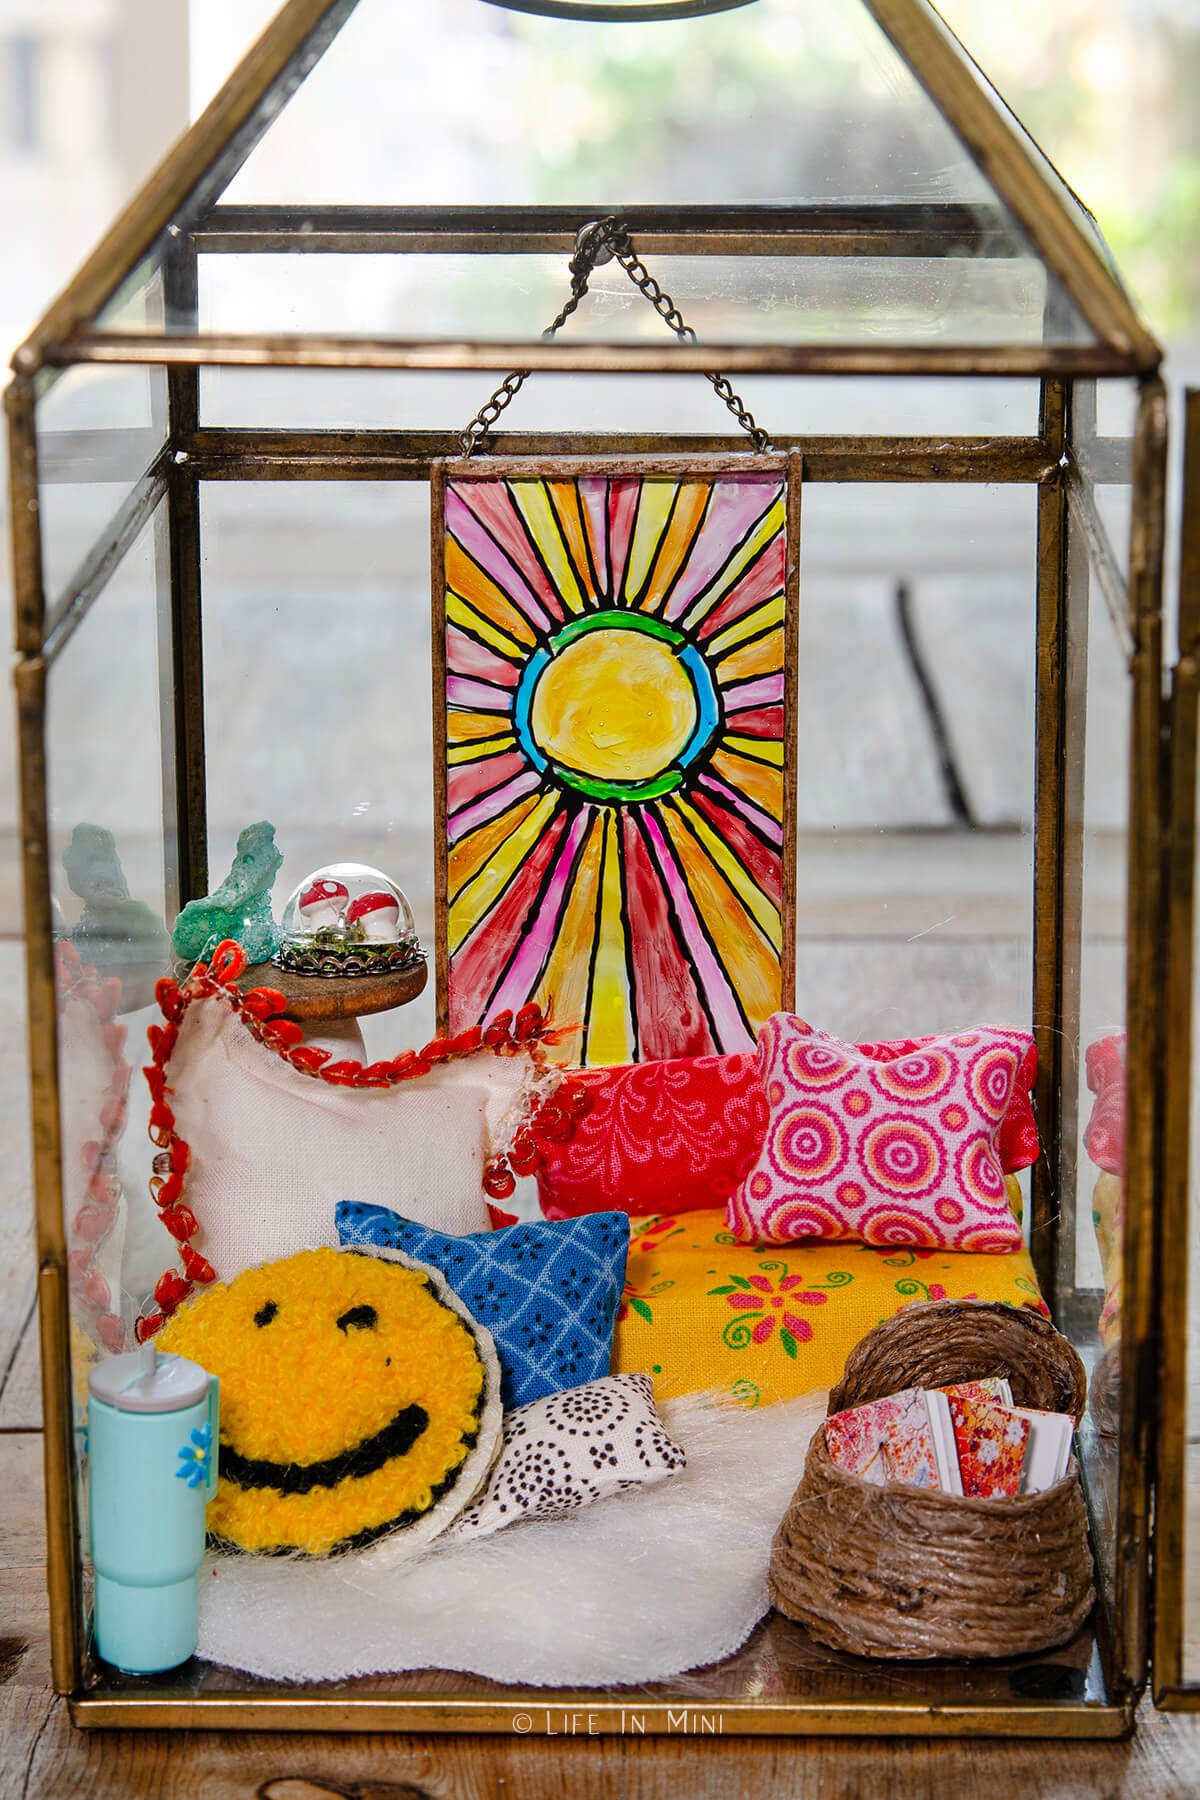
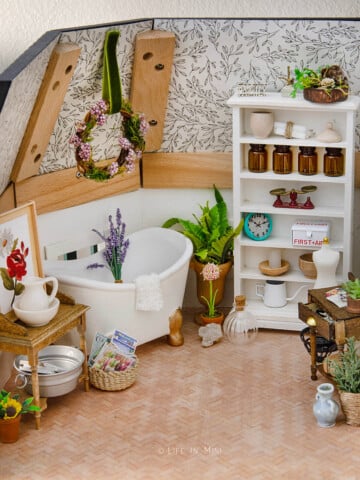
Which brings me to my little scene. I decided to show off the sunburst stained glass piece and created this colorful boho reading nook in a lantern. I have lots of fabric swatches and created tons of no sew pillows (including a no sew bolster pillow).
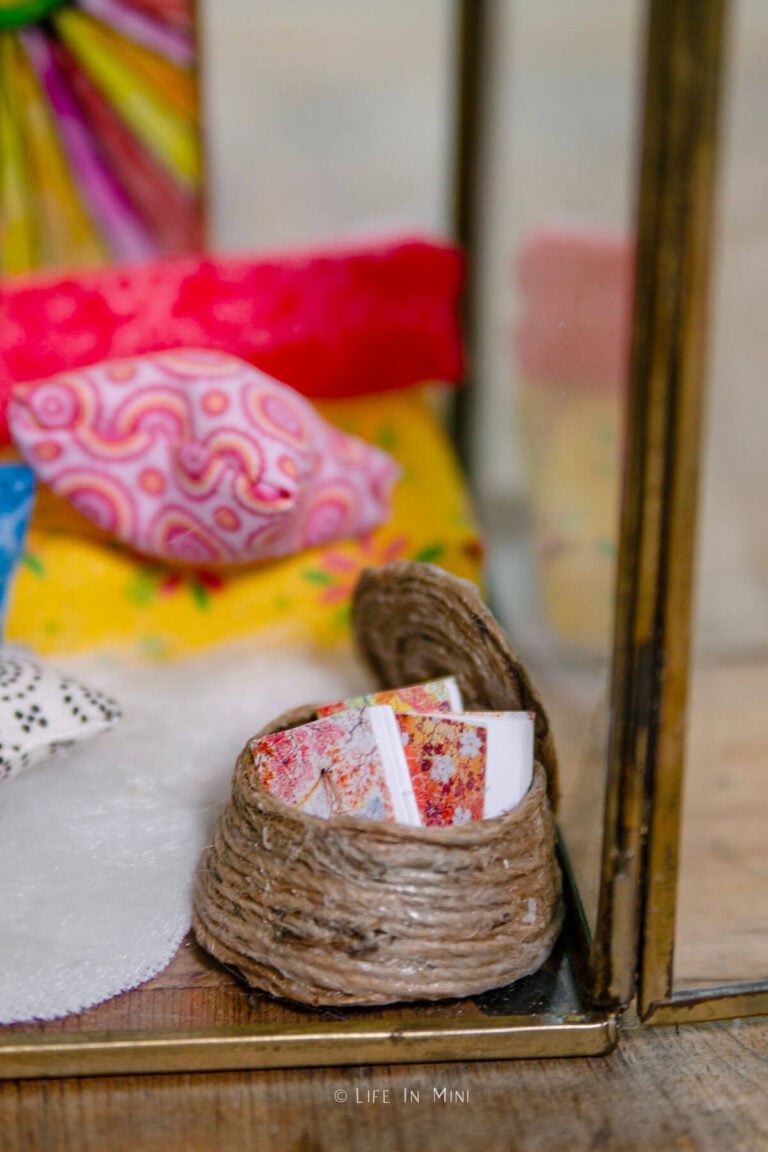
I added a basket I made (use this tutorial on how to make mini baskets) and filled it with some colorful books. The smiley face pillow is the only one I didn’t make – it’s a pin I found on clearance at a craft store and I removed the pin part.
This post contains some affiliate links for your convenience (which means if you make a purchase after clicking a link I will earn a small commission but it won’t cost you a penny more)! Read my full disclosure policy.
I channeled a lot of my daughter’s energy into this scene so I added side table with the little dome with moss and mushrooms and a crystal. And of course, every teen nook needs a colorful Stanley mug!
Supplies you need
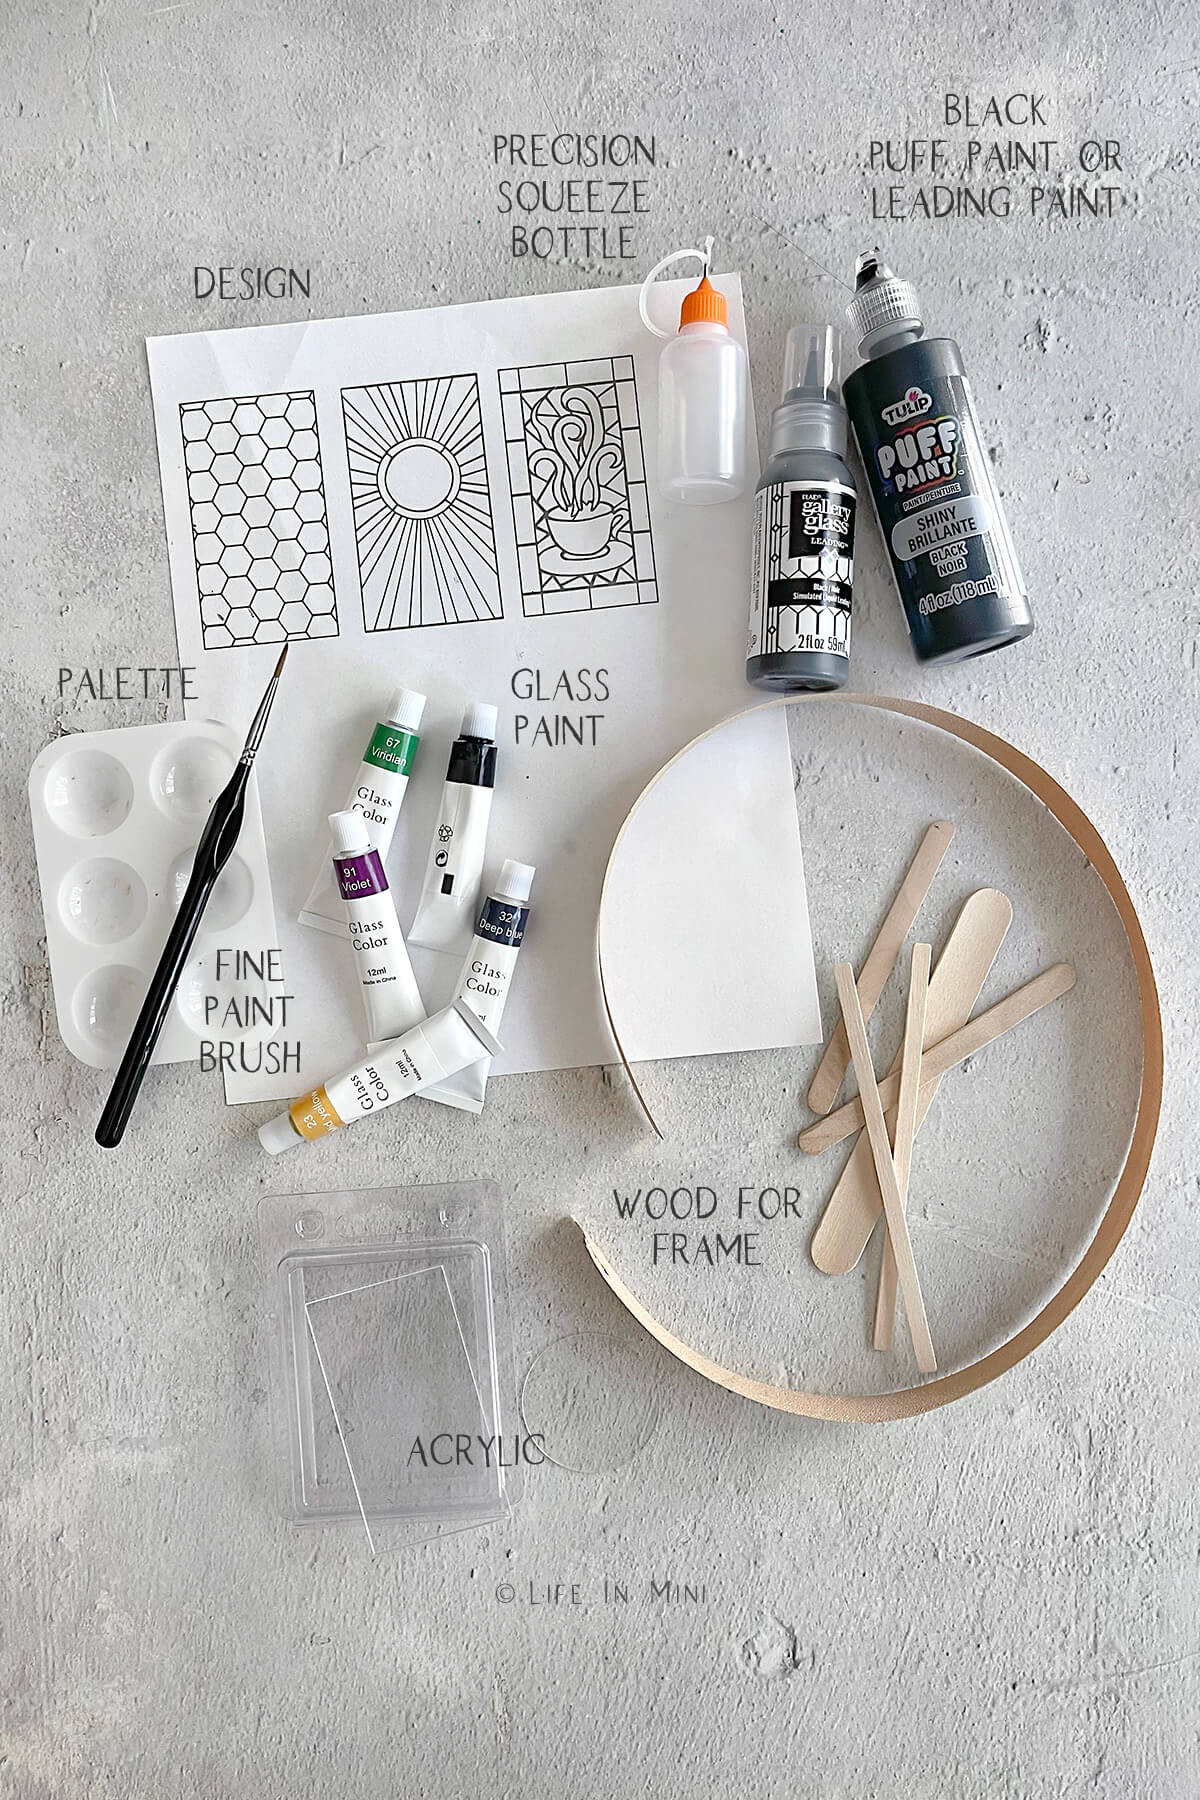
- Acrylic: You can use plastic sheets from discarded containers or you can buy acrylic pieces for something thicker. I used clear acrylic place cards and these clear acrylic circles, which were thicker than the plastic sheets and easier to frame.
- Glass paint: I loved the look of glass paint on the acrylic. It gives a lot of texture and dimension to miniature stained glass. And you can mix colors, too. This set comes with a palette, which you will need to mix the colors.
- Puffy paint: I wanted the leading to have a raised effect, mimicking actual stained glass. I tried puff paint and leading paint and both worked well. Puff paint is less expensive, but the leading paint had more texture. Another cheap option is white glue and a little black paint. You can learn more about this option in the FAQ section below.
- Precision tip squeeze tubes: The tips to the black paint I purchased were not super fine and I needed more control to draw the outline of black leading. I transferred some of the black paint into one these squeeze tubes and it was much easier to control, and gives you finer lines especially in tight spots. You will get 12 in an order and you can use some for glue or any other liquid for you need more precise control.
- Paint brushes: You will need super fine paint brushes so you can paint into the small spaces without making a mess. You can also trim excess brushes from existing paint brushes you have to make a thinner detailed brush.
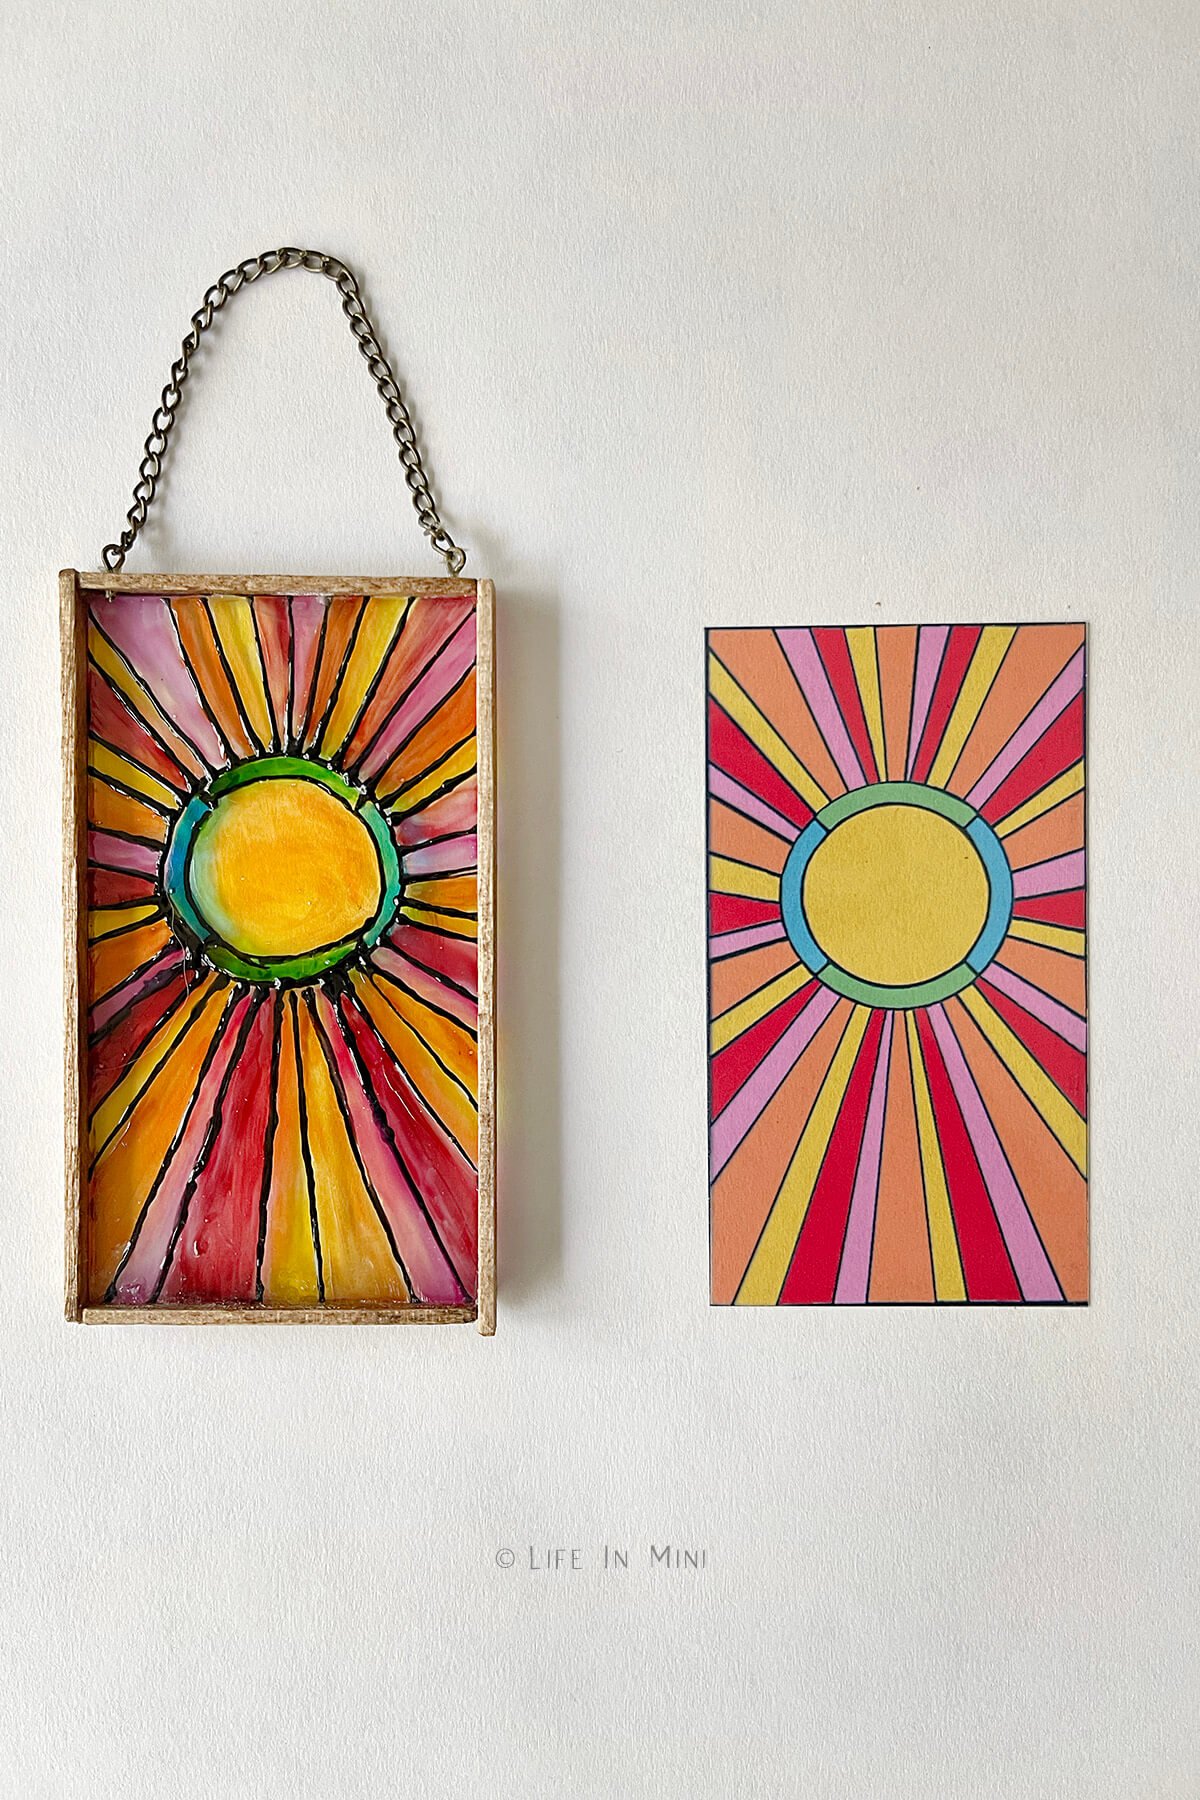
- Your design: Use your own design or one of my free mini stained glass designs. You will need to print it out first. The designs are each 2.5 inches x 3 inches .
- Other items: If you are framing your stained glass pieces, you will need wood. For the rectangles I used coffee stir sticks and for round I cut a piece of wood veneer (I found a small roll at Daiso). I thinned down a little of this wood stain with mineral spirits (since it is an oil based stain) and glued everything with Aleene’s Tacky Glue. Since we are painting, you will also need a little water, paper towels and a work surface. I used painted everything with the print out as my work surface.
Step-by-step directions
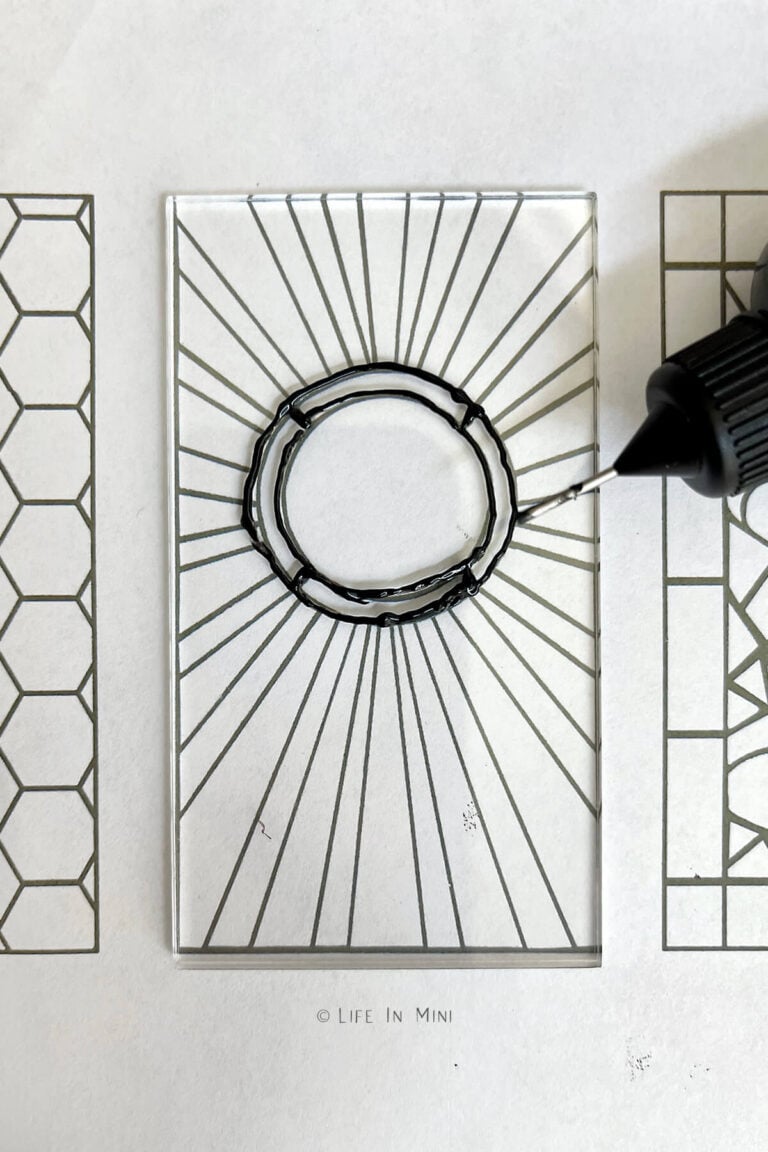
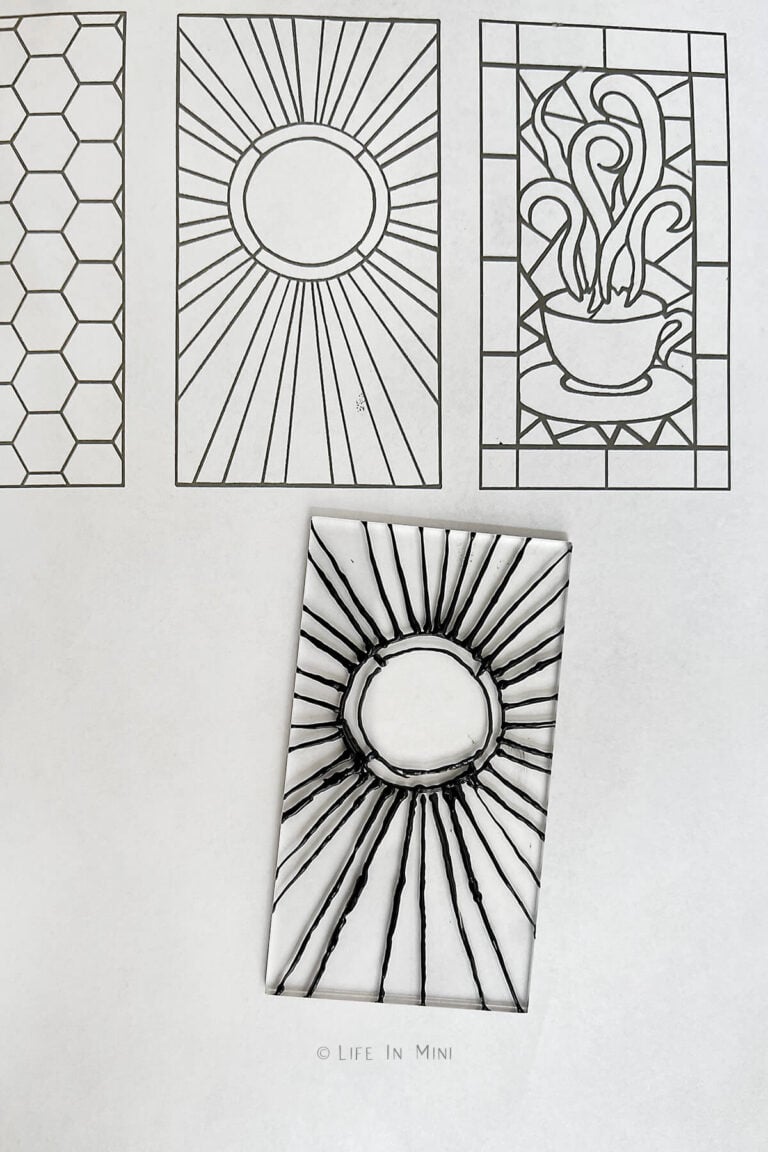
1. Transfer the black paint you are going to use for the leading into a precision tip squeeze tube. Place your plastic or acrylic sheet over your printed design and begin to draw out your outline. I suggest practicing on a scrap piece first until you get the hang of the flow of the paint. Let this completely dry before you start adding your glass paint.
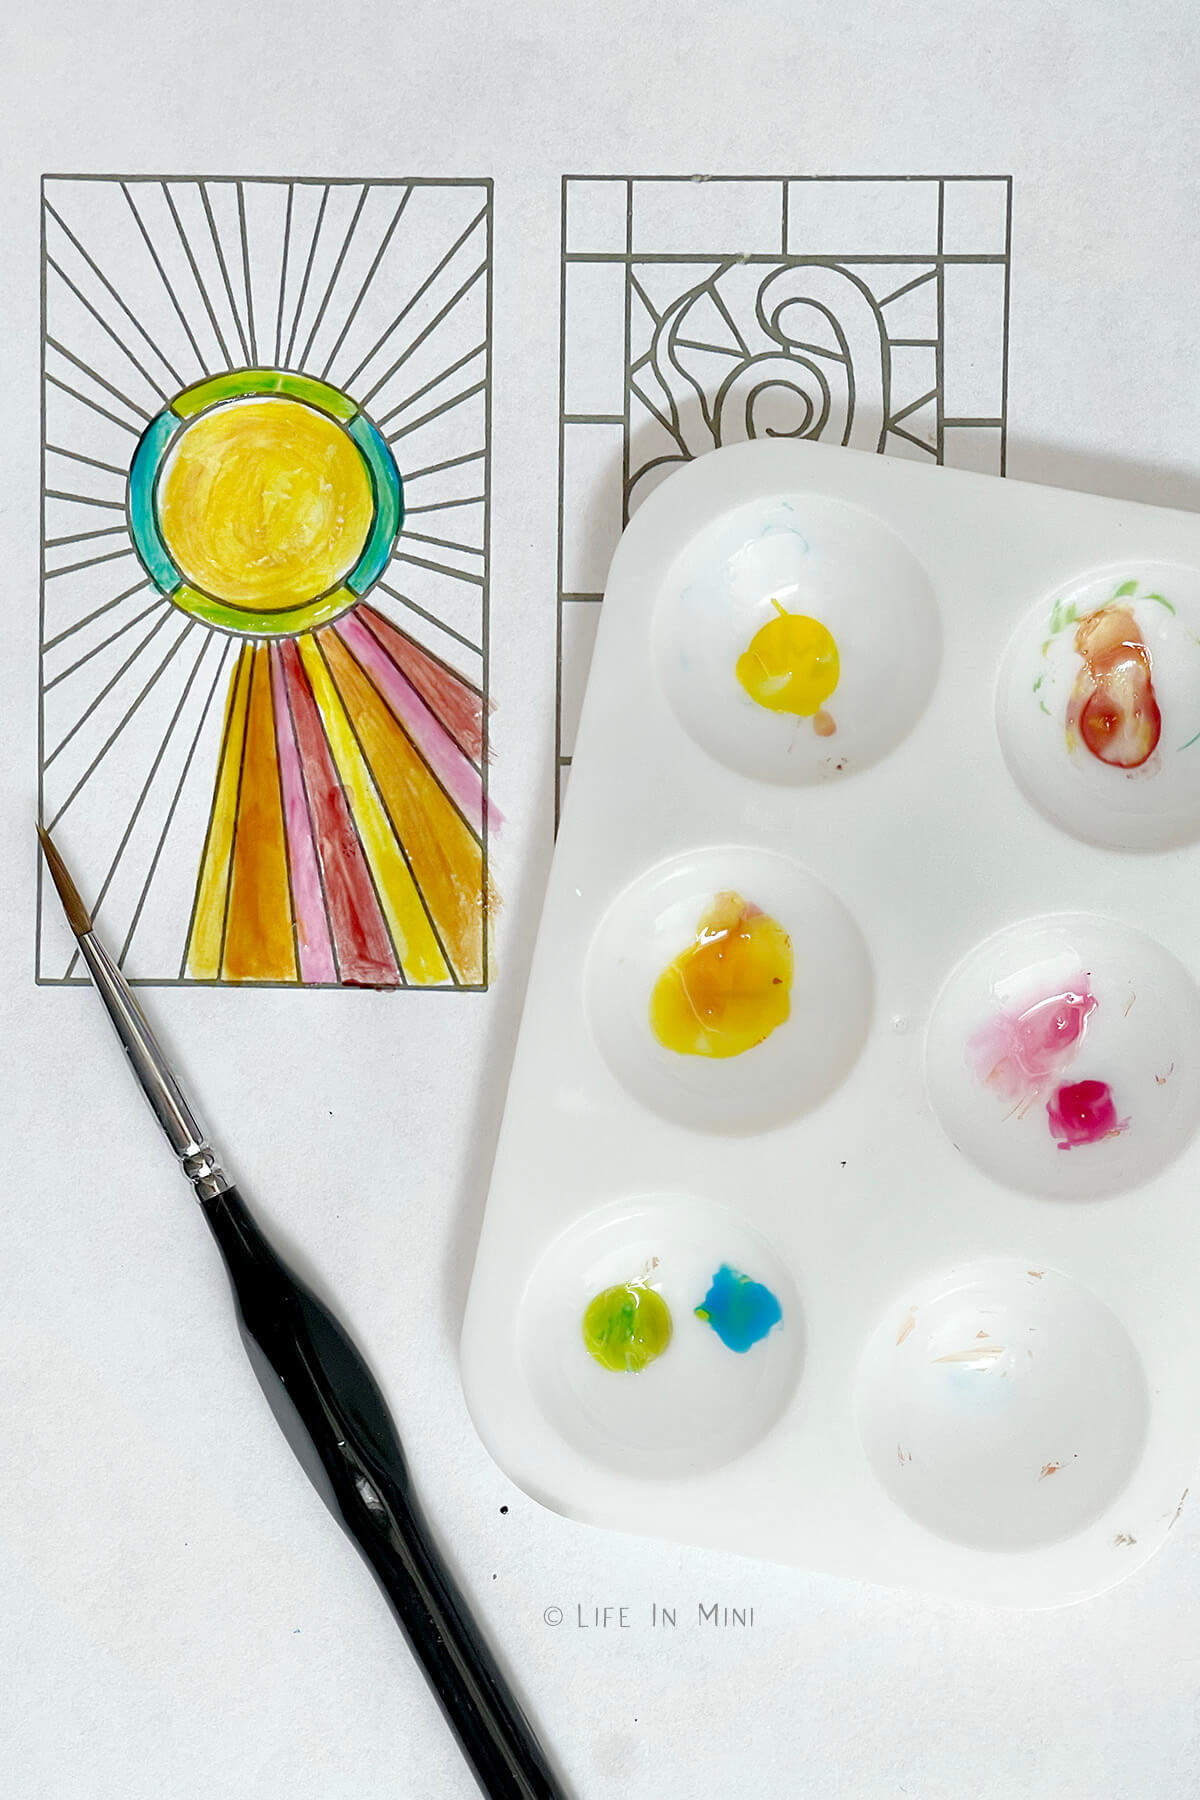
2. If you don’t know how the colors will work, I suggest painting your paper piece first. This way you know which colors you need and where they will go. It will be your guide to painting the stained glass.
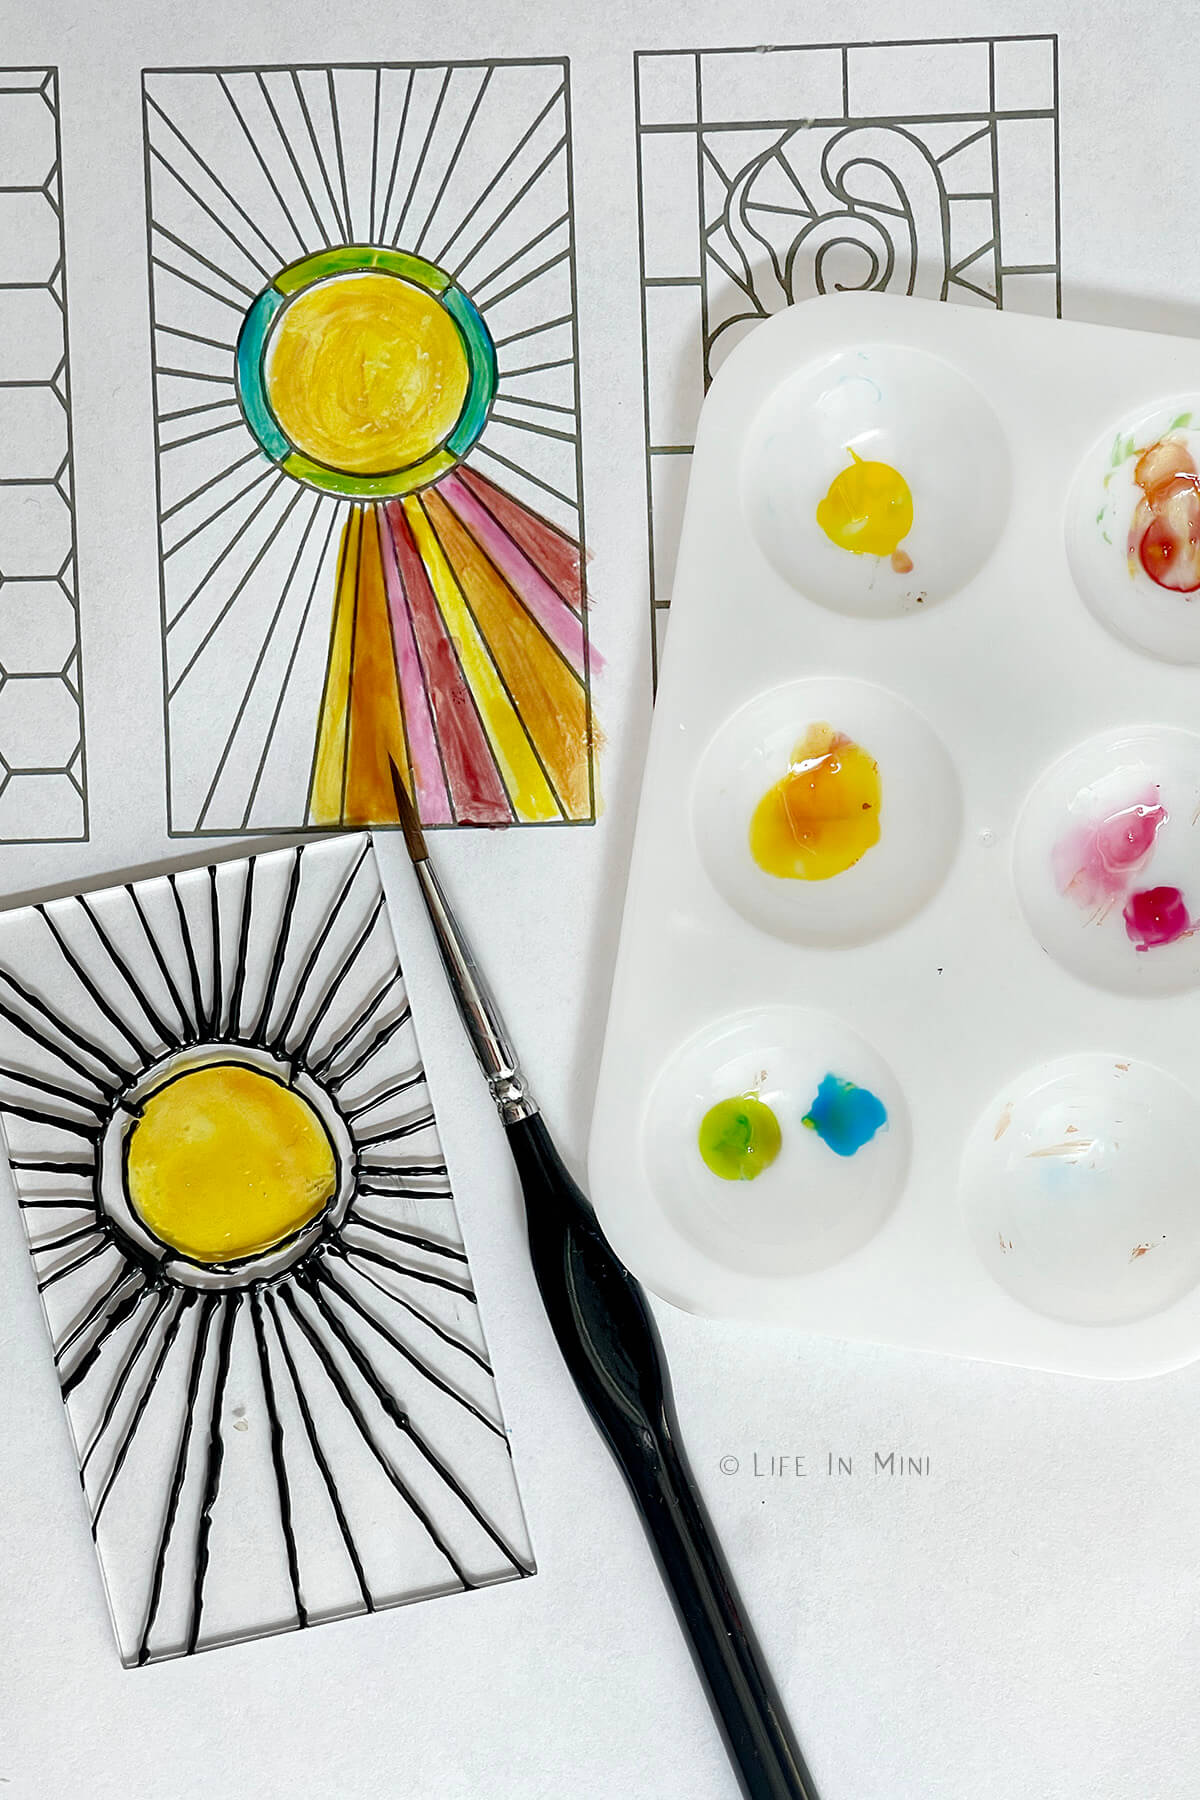
3. Using a palette, mix up your colors and begin painting. You can paint first and then add the leading, but this leads to the different colors getting muddled together. I wanted clear and distinct different colors so I painted the leading first.
Color lightly in the beginning, then let the piece dry and then add additional coats and colors as needed. Remember, your piece will look brighter and more vibrant while sitting on top of a white piece of paper. It will be more transparent when held up.
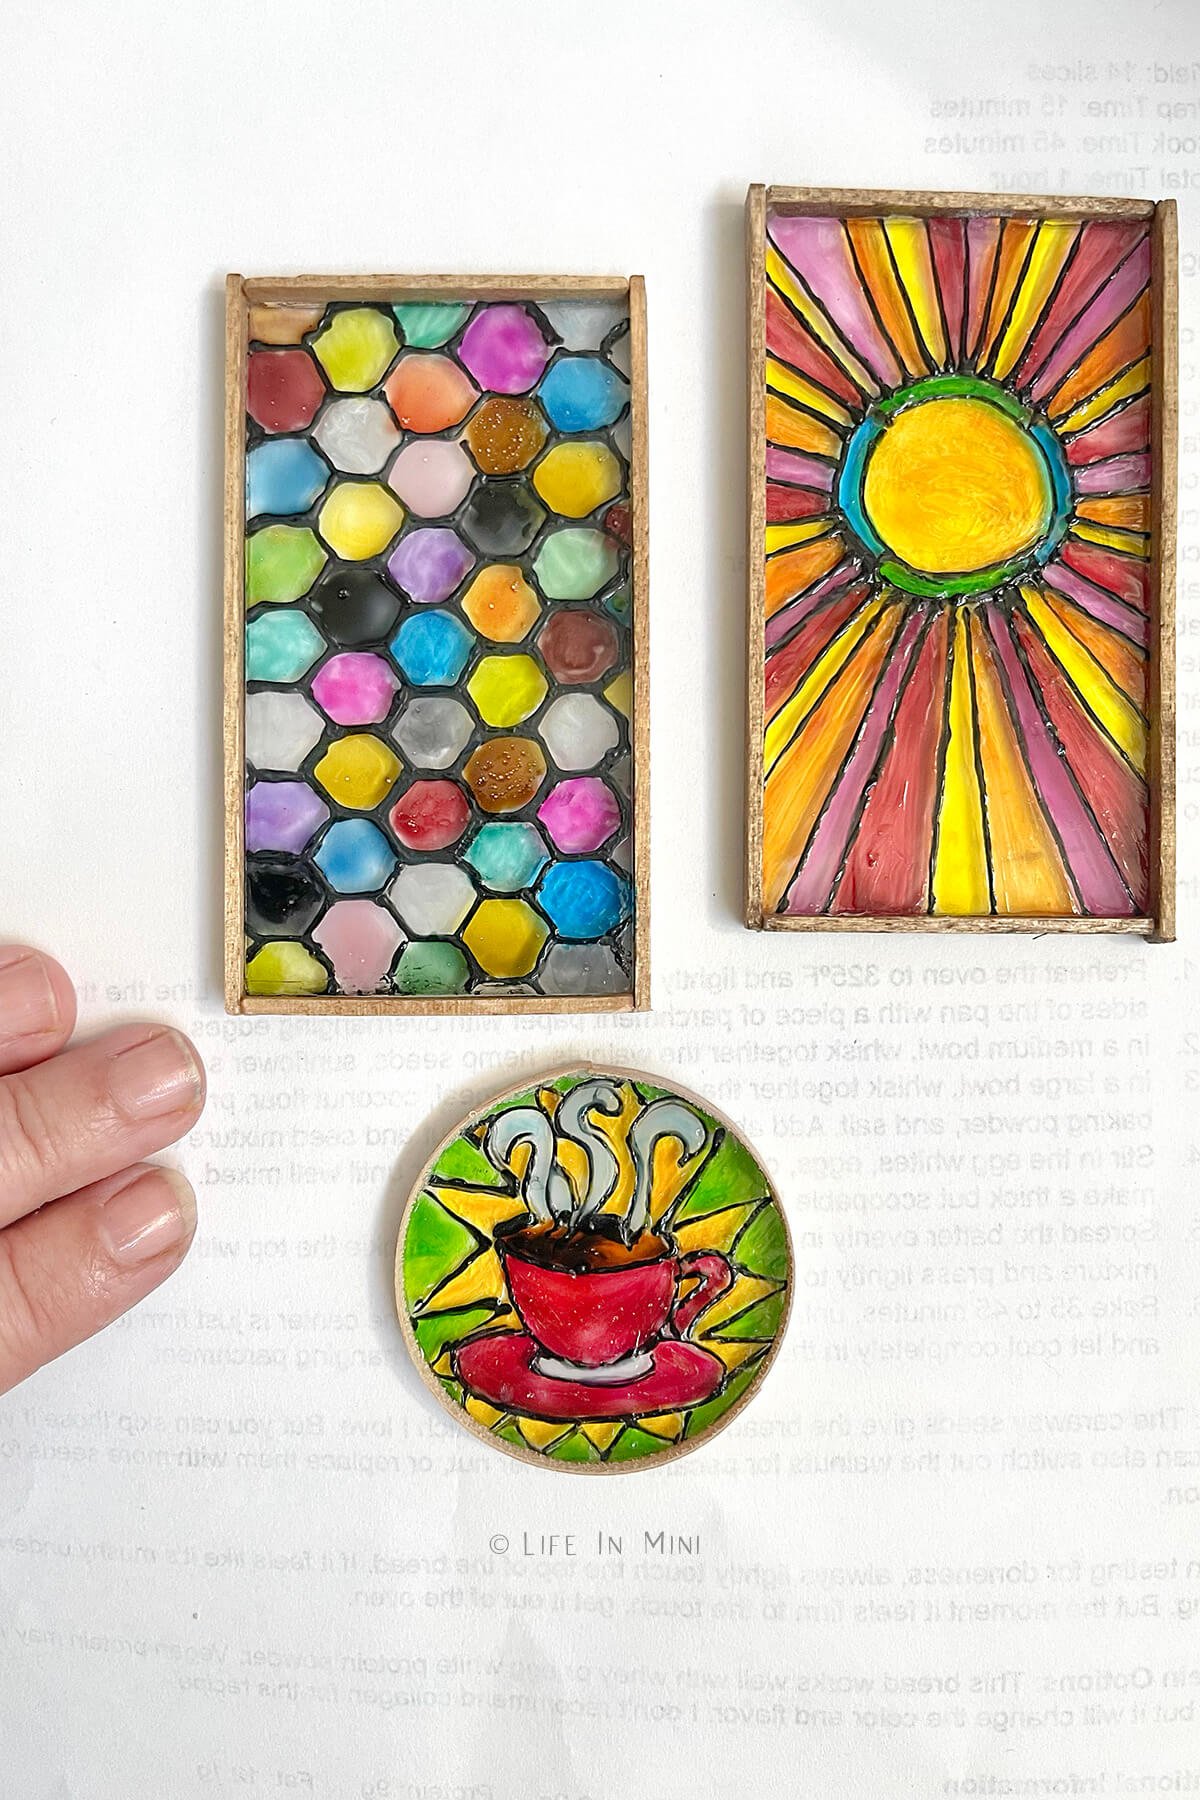
4. Once everything is dry, you can now frame it or use it as you like. I framed mine using the techniques in my miniature gallery wall tutorial. I used my tiny hand drill (similar to this one) to make little holes, then attached and glued in jewelry eye pins and the chain to finish the look.
Project tips and FAQs
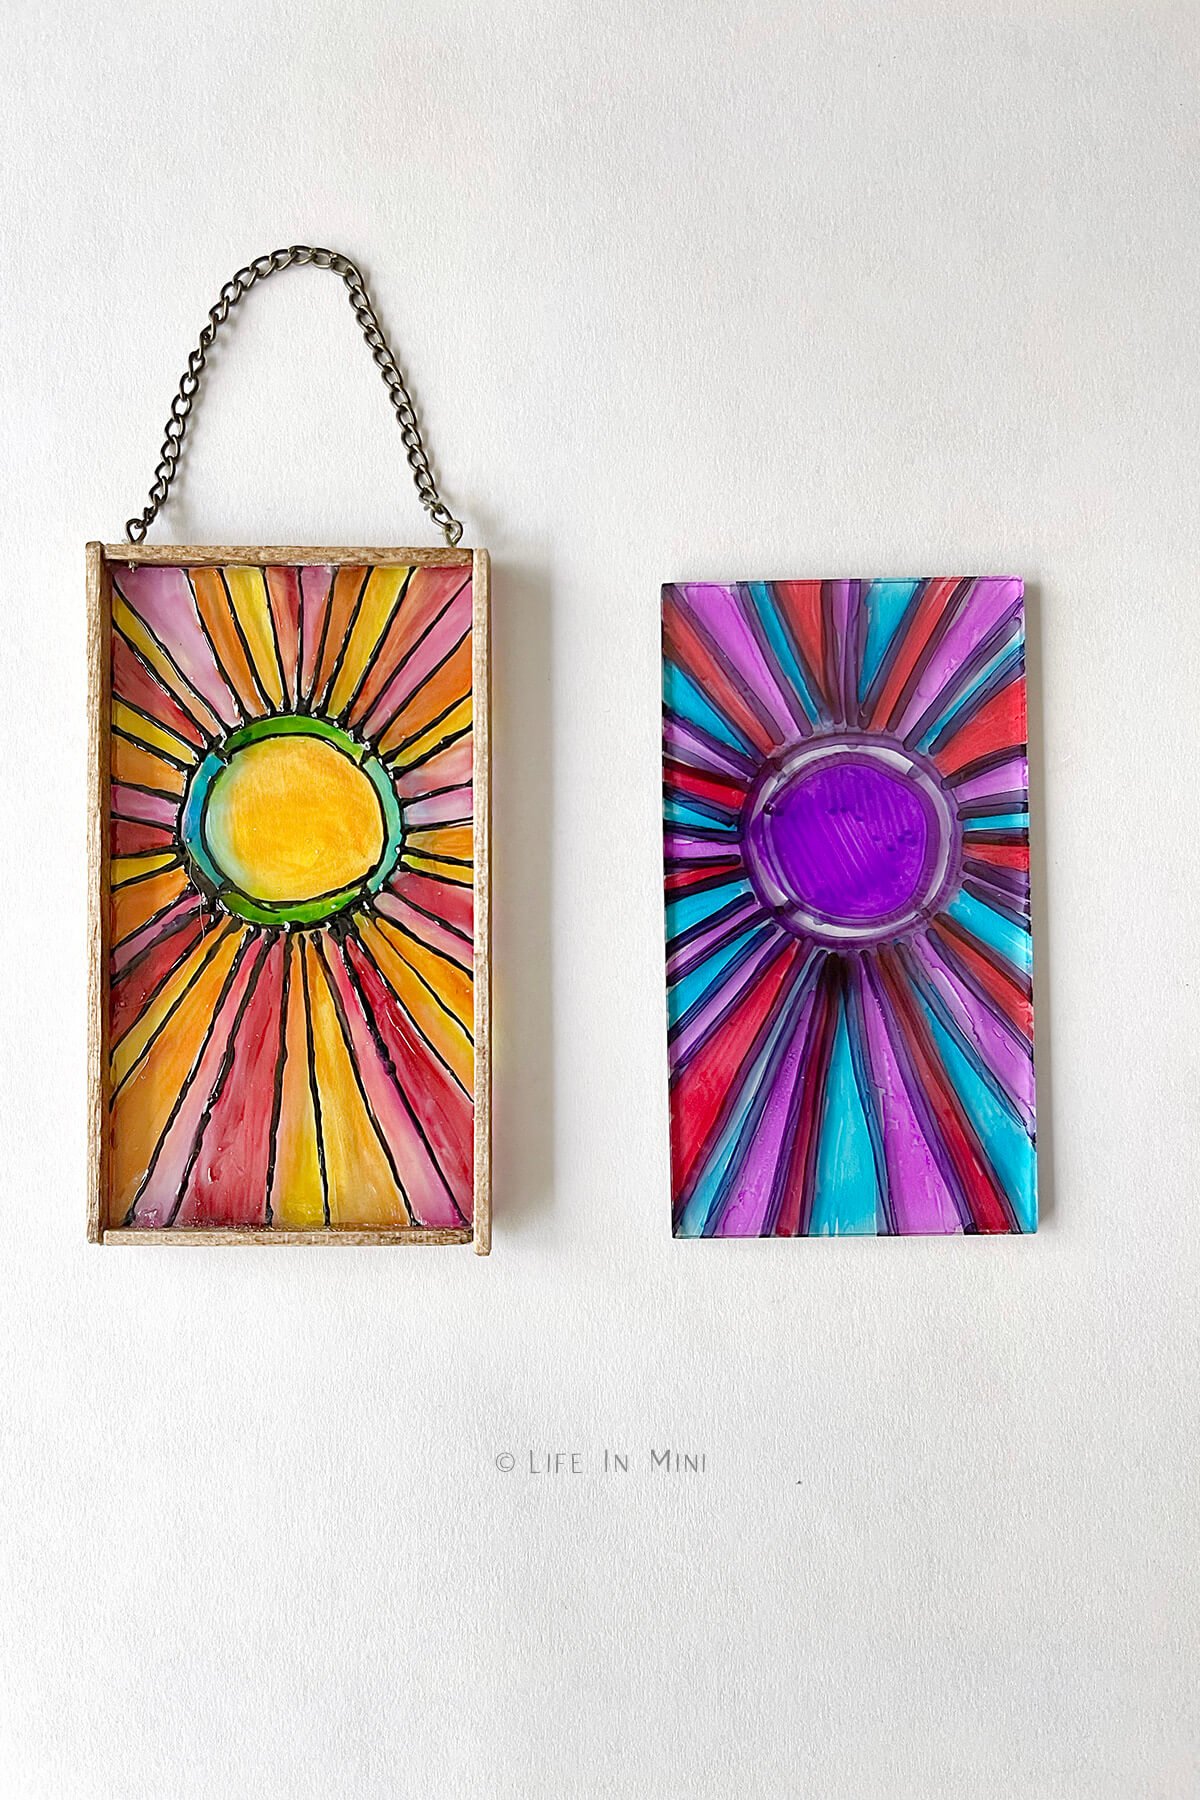
Like most things, there are a number of other ways to produce a stained glass affect in miniatures other than using glass paint. I tried out a few of these methods, but I still prefer the look of glass paints.
Permanent markers. A very low tech way of creating stained glass for your dollhouse is to sharpies. They come in an array of colors and not just black. I didn’t have the same colors that I used in the glass paint version, so it isn’t an exact comparison. But you can still tell if you like this method or not despite the color differences.
- Pros: You can use rulers for straight lines, the colors come out bright and vibrant and it is easy and inexpensive.
- Cons: You can only use the colors you have and can not mix colors. It is very flat with no dimension or texture. Also, you can see your color strokes.
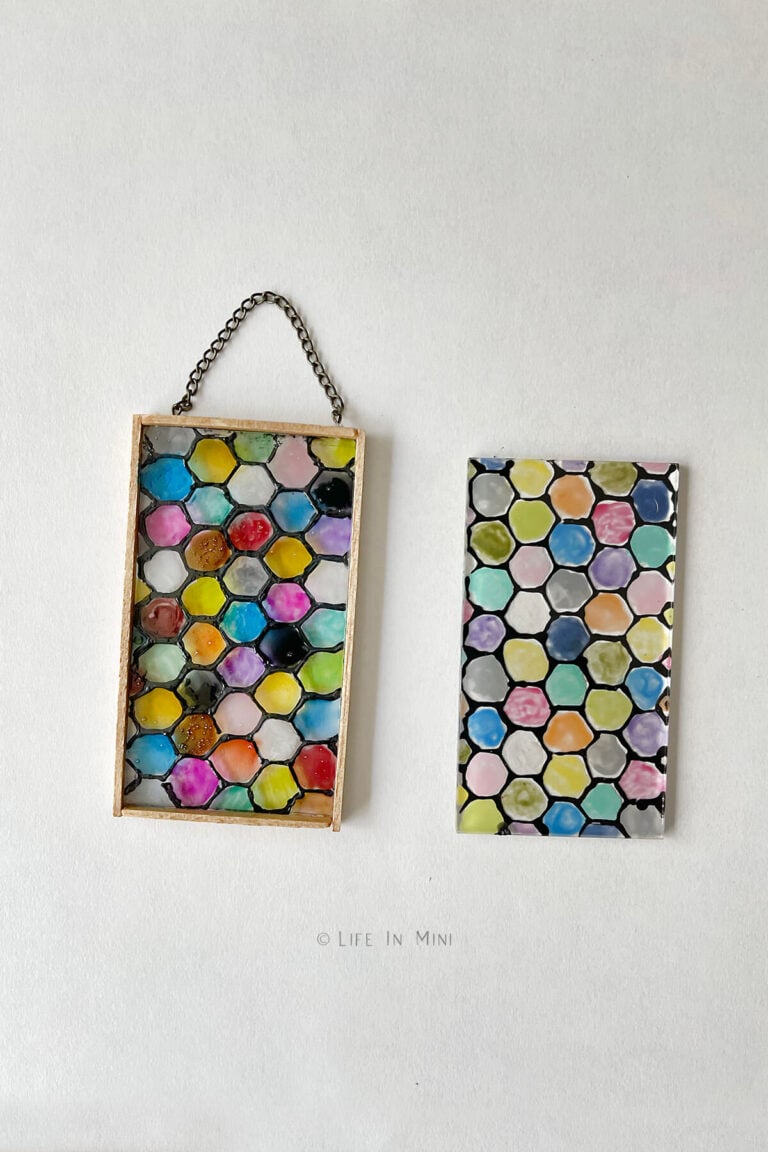
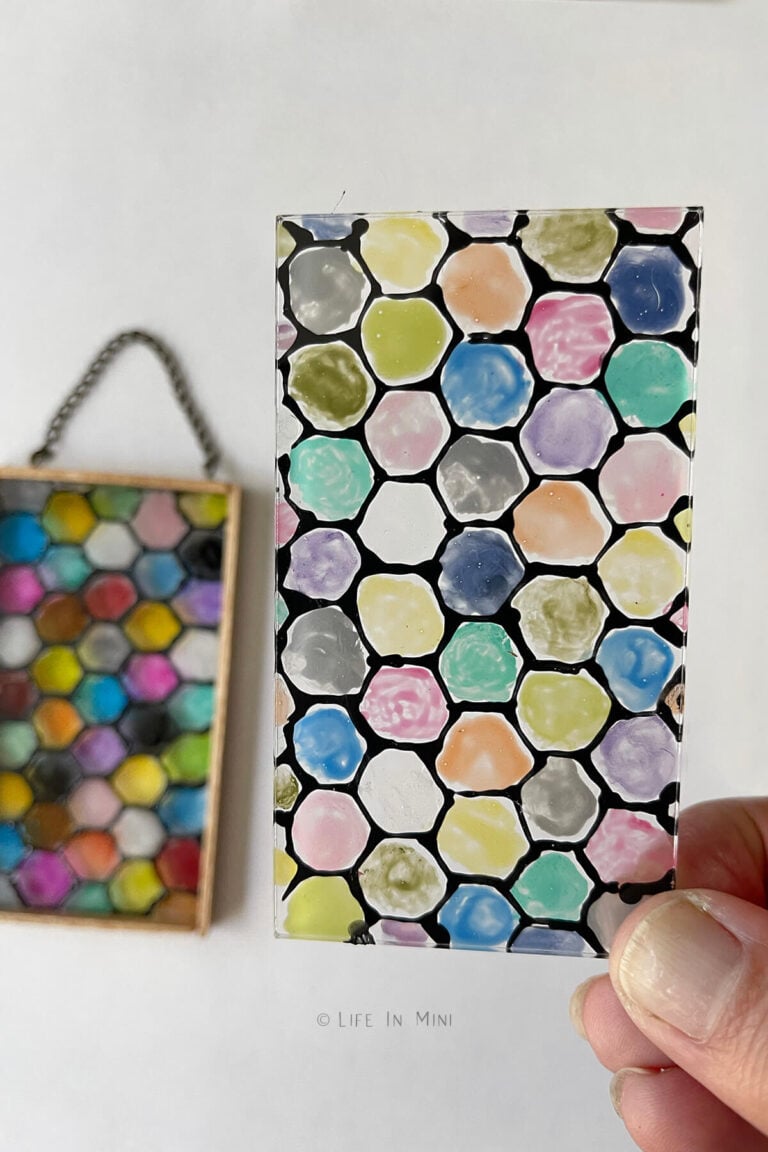
Glue and paint. Another technique I found that was intriguing was mixing acrylic paint with glue. If you dabble some white glue that dries clear or clear glue onto your acrylic sheet and let it dry, it will dry clear, but give the illusion of clear textured glass.
- Pros: This is another very inexpensive low tech option. I did love how the black leading turned out so this is great option if you don’t want to buy puff paint or leading paint.
- Cons: The colors dry a little opaque and muted. Also it is a gloopy mess to work with. As I tried to paint in the honeycombs, the glue would pull away from the edges. The design did look cleaner on the flip side, the unpainted side, but then you lose the texture.
Print on transparencies. A great option is to use your ink jet printer and to print your entire design onto transparency film.
- Pros: You can control the colors and they come out very vibrant. This is an awesome option for intricate designs, like church windows.
- Cons: You need an inkjet printer and software like Photoshop to color in the image. And like the permanent marker option, these come out a flat with no texture. You could print out on transparency and then hand draw the leading, if you want. You can also brush the design with some glue or ModPodge to add some texture.
Vinyl. A final option is to cut out your leading design from vinyl using a Cricut machine, transfer it to your plastic/acrylic sheet and then color away. I have not tried this method, but you can learn about it in this tutorial.
- Pros: I love this idea as the leading has a raised effect and the lines are super clean. It is also a great option for more complicated designs. You can color in the stained glass using any coloring method you like. Cons: Well, you need a Cricut and upload the design, cut it and weed it and…. well, you get the idea!
I have to say that I wasn’t sure if I was going to like this project when I first started it. And then I got discouraged with my practice pieces. But the more pieces I made, the more confident I became and I started to get excited about what I was creating.
And my little boho book nook is pretty different from what I have made before. I am so glad my friend challenged me to try something new and to get out of my comfort zone. I hope you have fun making your mini stained glass pieces, too!
If you are enjoying my blog, why not sign up for my newsletter so you won’t miss out on the mini adventures!
Miniature Stained Glass
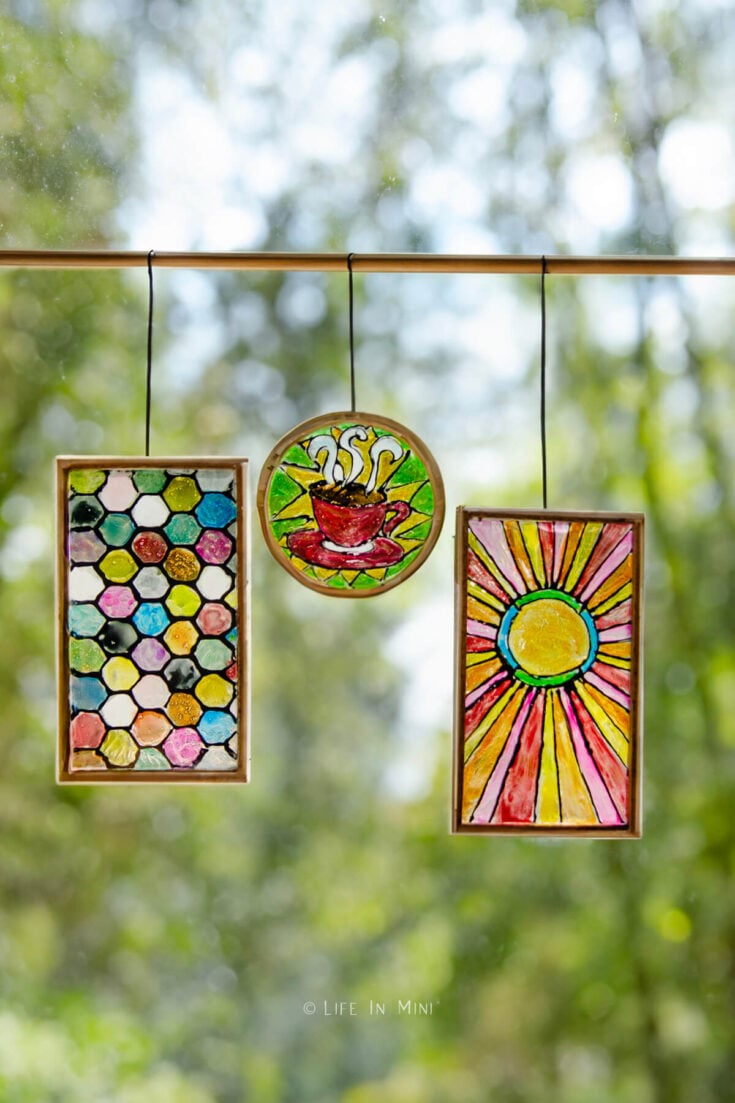
I tried four different methods to make miniature stained glass pieces for my dollhouse and share which method I prefer. I also have a free PDF that includes 3 cute stained glass designs for you to download and use.
Materials
- Clear pieces of plastic or acrylic
- Glass paint
- Puffy paint
Tools
- Precision tip squeeze tubes
- Fine paint brushes
- Stained glass design
Instructions
- Transfer the black paint you are going to use for the leading into a precision tip squeeze tube.
- Place your plastic or acrylic sheet over your printed design and begin to draw out your outline. I suggest practicing on a scrap piece first until you get the hang of the flow of the paint. Let this completely dry before you start adding your glass paint.
- I suggest painting your paper piece first so you have a guide to painting the stained glass.
- Using a palette, mix up your colors and begin painting onto your clear acrylic. Color lightly in the beginning, then let the piece dry and then add additional coats and colors as needed. Remember, your piece will look brighter and more vibrant while sitting on top of a white piece of paper. It will be more transparent when held up.
- Once everything is dry, you can now frame it or use it as you like
Notes
I wanted the leading to have a raised effect, mimicking actual stained glass. I tried puff paint and leading paint and both worked well. Puff paint is less expensive, but the leading paint had more texture. Another cheap option is white glue and a little black paint. You can learn more about this option in the FAQ section above.
Once everything is dry, you can now frame it or use it as you like. I framed mine using the techniques in my miniature gallery wall tutorial.
Other ways to make stained glass include:
- Use permanent markers
- Mix a little acrylic paint with clear drying glue
- Print on transparency film
- Cut out your leading design from vinyl using a Cricut Maker
You can learn details about these alternate methods in the post above.
PS If you try this craft, why not leave a star rating in the direction card right below and/or a review in the comment section further down the page? I always appreciate your feedback.
You can also follow me on Pinterest, Facebook or Instagram. Sign up for my eMail list, too!


Lina E Jamison says
I just love your tutorials and the different methods you tried for the best results!
You give me the courage to try different crafts that I have wanted to try but hesitate to do them. Thank you for the free PDFs for the stained glass windows. Thanks so much
Laura says
Hi Lina-
Sorry for the delay in answering you. I didn’t get notification on your comment. I’m glad you like my tutorials. I tend to dive into new projects head first and mull my way through them! And there are so many ways to make miniatures, depending on your skill set and time constraints. I hope you share what you make!
Laura