You can easily make your own miniature mason jars using UV resin and a silicone mold. This tutorial also shows you how to make mini jars of jam to stock your dollhouse kitchen.
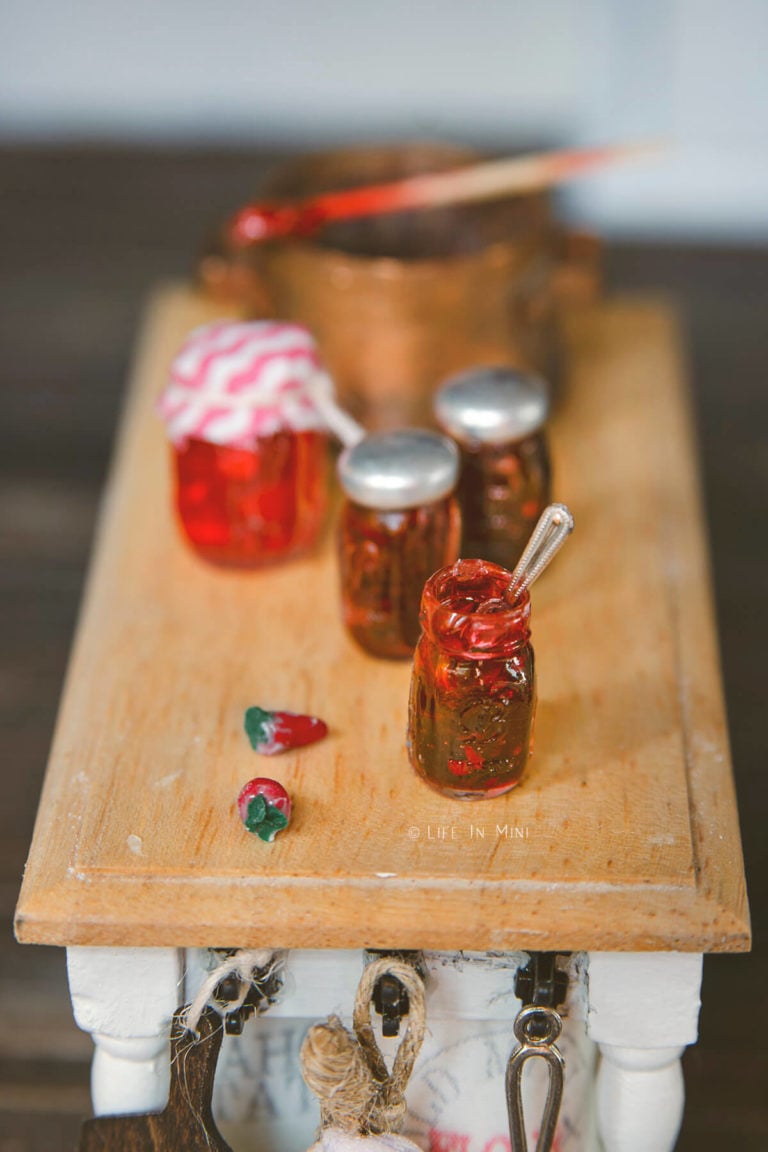
Besides loving all things small, I love making miniatures because you can work with a number of different mediums. There’s wood working, electricity, polymer clay and paint. And when you combine everything together, you get something special.
For me, it means never being bored. I get to learn new things and new ways of creating art. Today I am sharing with you a beginner’s guide to using UV resin, another fabulous tool in the miniature tool box.
Making minis with UV resin
My husband has a garage full of tools and supplies for his many handy projects. I don’t usually venture in there unless I am feeling up for an adventure and prepare myself to get lost in the hunt for replacement blades or a specific wire cutter.
I have seen him use 2 part epoxy resin before, but put off trying to work with these mediums. I admit, it was a little intimidating.
I learned about UV resins this past year and watched its popularity rise among miniaturists, jewelry makers and crafters. While traditional resin requires the combining of two chemicals and waiting days for it to harden, UV resin is a one part mixture that cures in minutes under a UV light.
UV resin does shrink at it cures, so it is best to add it in layers. UV resin is perfect for small projects, like miniatures. You can combine it with polymer clay projects, wood or metal.
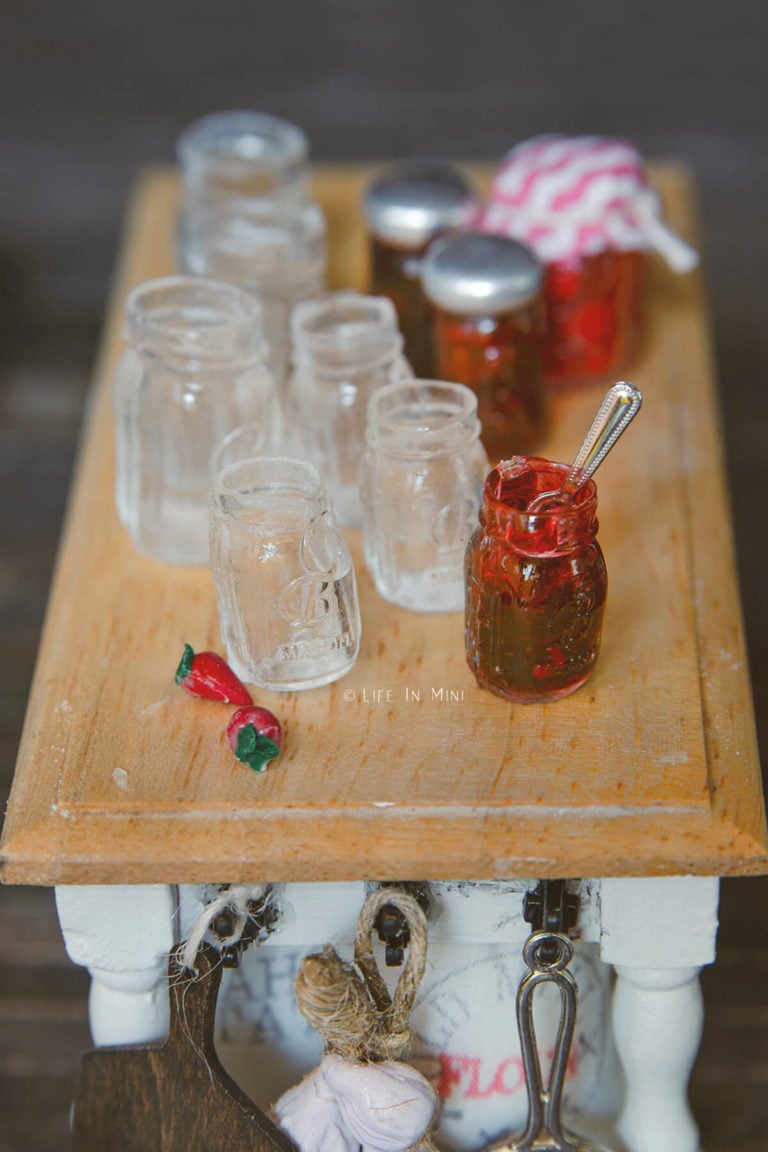
When pouring your resin into a mold, pour the resin in slowly and carefully. You will need to remove the bubbles before you cure it in UV light. Large bubbles can be popped with a straight pin and small bubbles can be removed with a heat gun or blow dryer.
Curing times varies on the size of the project and the strength of your UV lamp. You can cure with sunlight, but it will take longer. Once cured, resin can be sanded, filed and drilled. Here are even more tips on using resin.
Some resins will yellow over time, but there are more products out there that are of higher quality and will remain crystal clear longer.
Supplies you need
This post contains some affiliate links for your convenience (which means if you make a purchase after clicking a link I will earn a small commission but it won’t cost you a penny more)! Read my full disclosure policy.
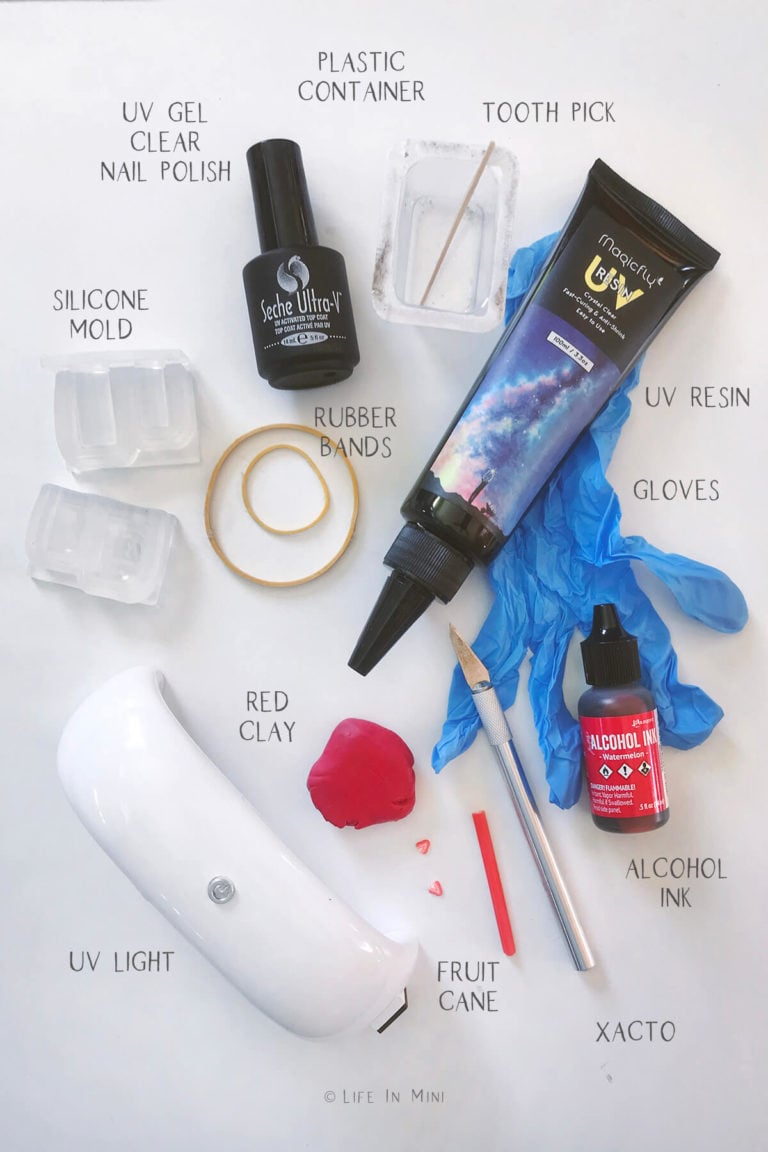
- UV resin: You want to use a UV resin that dries crystal clear. Some yellow or get cloudy. I used Magicfly UV Resin and was happy with it. I have also heard that these brands also dry clear.
- Latex gloves: When working with resin, always use gloves as it gets messy.
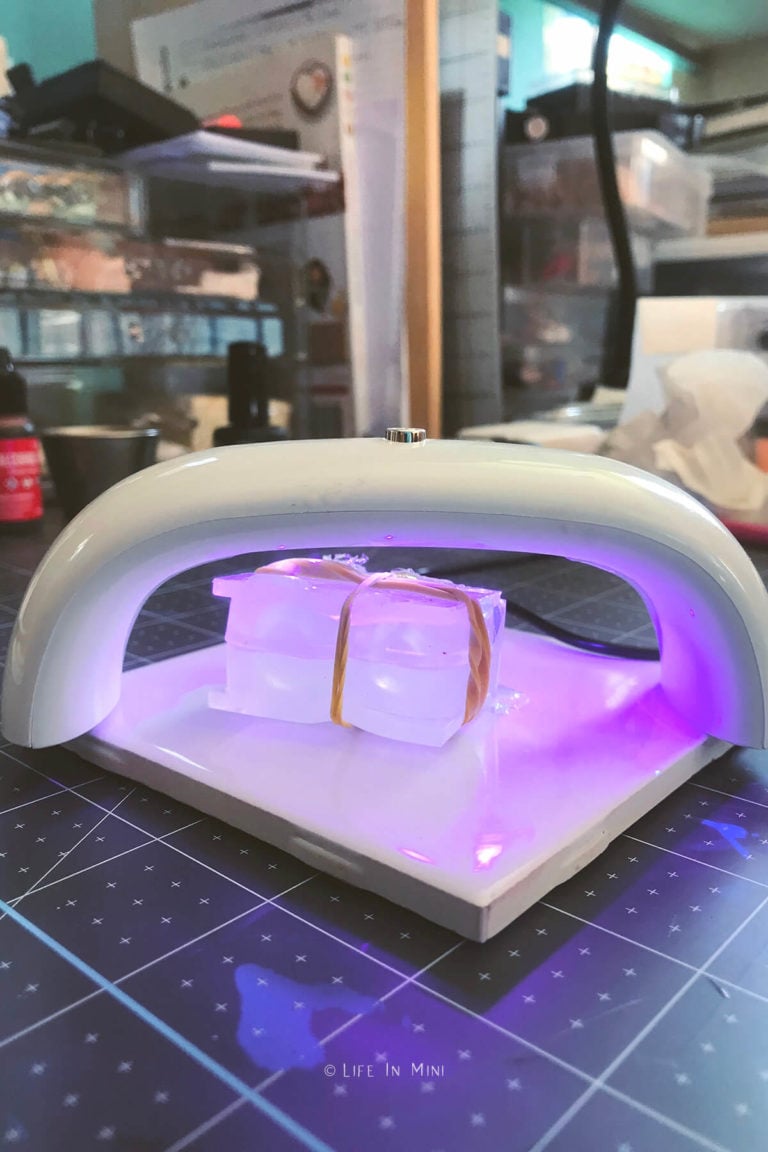
- UV light: You will need a UV light. I bought mine from Michaels (similar to this amazon model). I like it because it is small but not too small, and you can leave your item to sit under the light without having to hold it. The light stays on for 60-seconds, so you can easily time how long your piece cures. Since we are working with small miniatures, we do not need a large light. But if your light isn’t super strong, you just need to let it cure longer.
- Silicone mold: There are many molds out there you can use with UV resin. I found these miniature mason jar molds on etsy and they work great. This etsy shop also has them. You can buy them on Amazon, but they are much more expensive.
- Rubber bands: The molds usually come in various pieces. You will need to hold it together with rubber bands.
- Small tray and toothpick: Some kits come with silicone cups to mix the resin. You can also use those plastic covers you get your minis in and use that.
- Colorant: If you want your resin to be clear, you will need alcohol dyes to color it. If you don’t want it clear, you can use pastels or eye shadow to color the resin. I am making clear jars with strawberry jam in it, so the red dye is for the jam.
- Red clay: For bits of “strawberry” in the jam, I baked a bit of red clay first then cut it into pieces. You can also slice up a strawberry fruit cane, like the ones used in nail art.
- Clear gloss nail gel: Although the jars are clear once cured, they aren’t shiny. I found that adding a coat of clear nail polish (the kind that cures with UV light) works really well.
- Xacto: You will need a sharp blade to cut the clay as well as cut the excess pieces of cured resin.
- Sand paper: The edges of the resin jars will need a quick sanding to smooth it out.
- Resin safe work surface: You can use a piece of glass, tile or parchment paper. The cured resin will come off all of these types of surfaces.
Step-by-step directions
1. Secure your silicone mold with rubber bands. I used two, one for each direction. Do not cover the holes where you will need to pour in the resin.
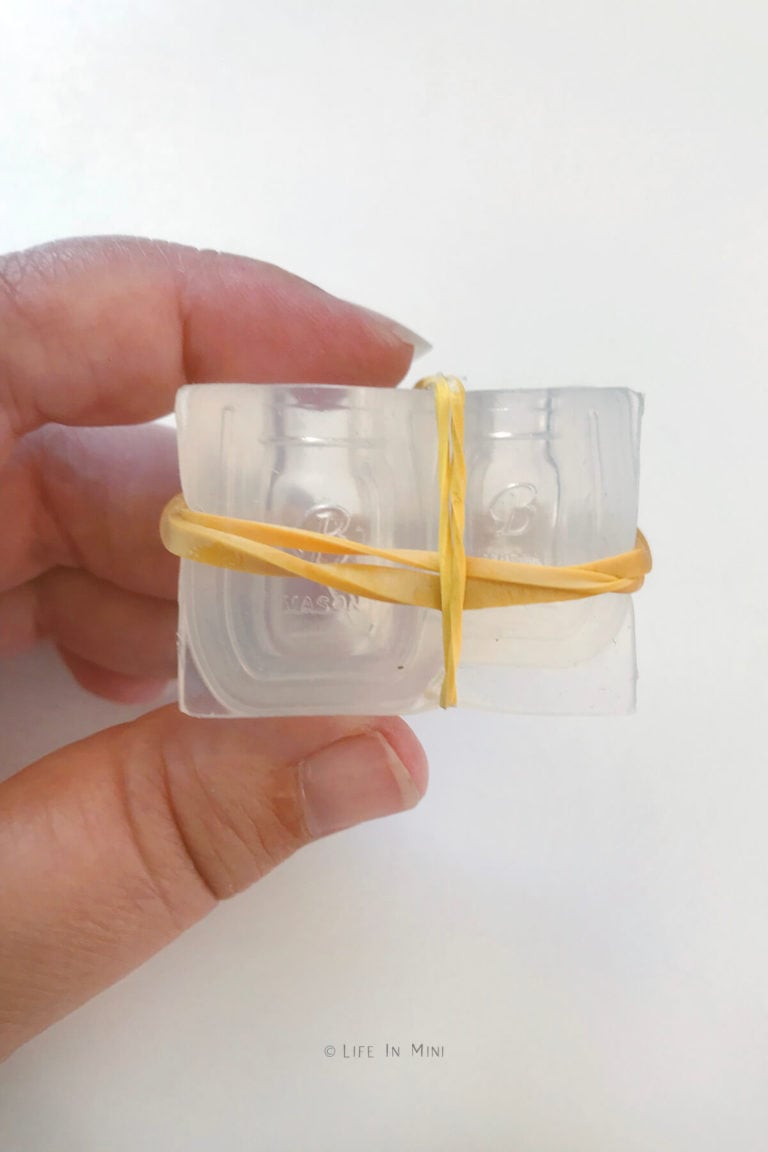
2. Wearing protective latex gloves, slowly add resin into your molds. Since there will be a silicone tube pushed into the resin to create the open jar, fill the mold about ⅔ full. If you have bubbles, you can pierce with a toothpick. Also a heat gun helps disperse the bubbles. You can also wait a few minutes and the bubbles will move up and pop themselves.
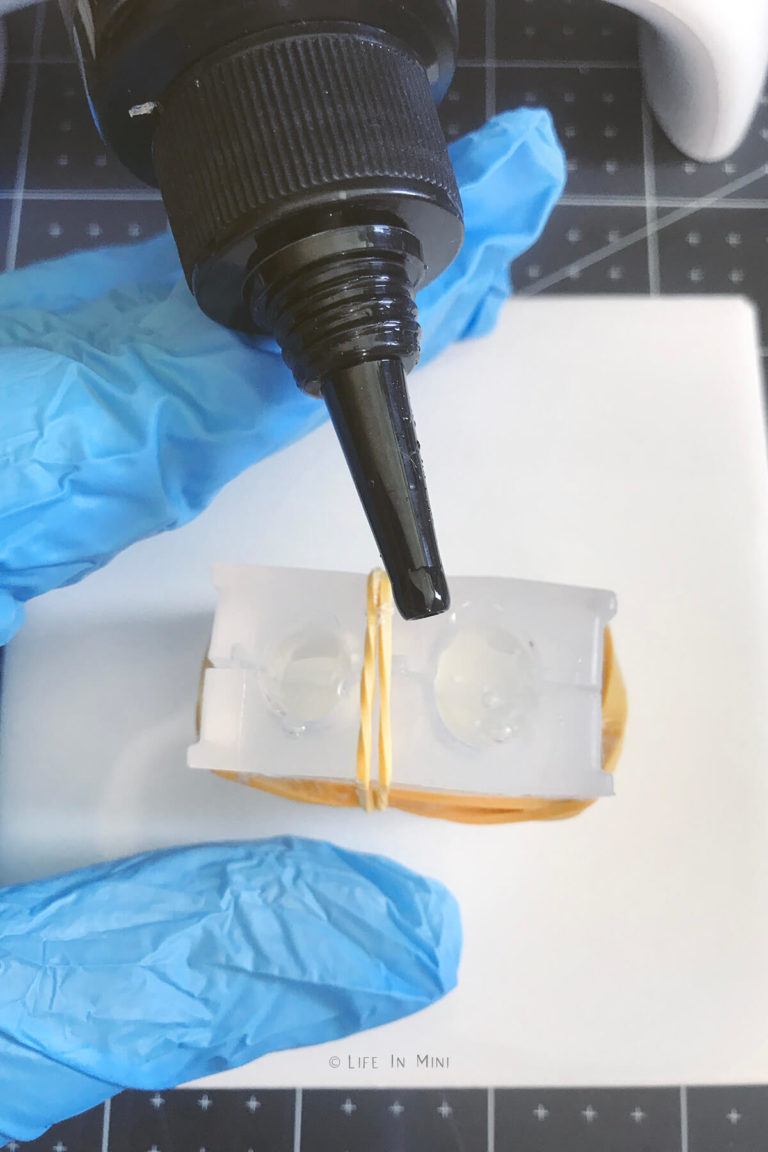
3. Press the inside of the mold into the resin, pushing down flat. It will overflow a little, and that is just fine. Since there is a little shrinkage when UV resin cures, it is better to have too much resin in the mold than too little. While holding the mold securing in one hand, pass the UV light over the piece and let it quick cure for one minute. Since this mold is clear, the UV light passes through.
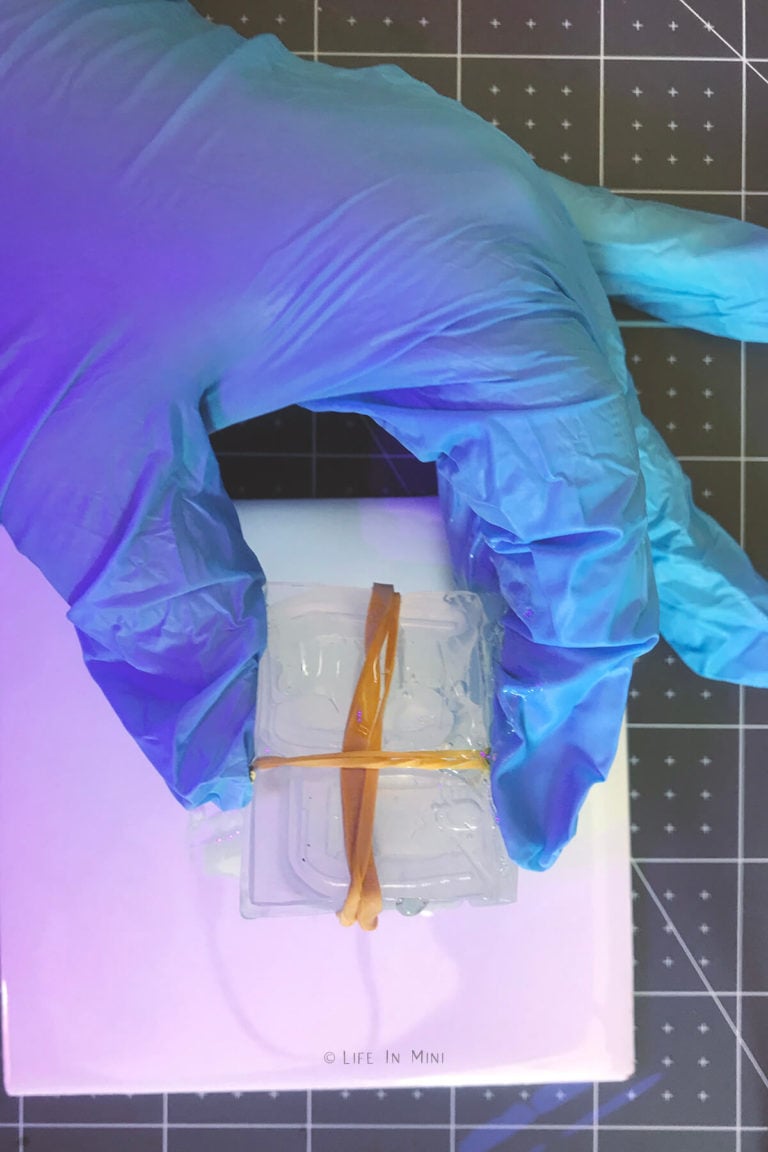
4. Place the piece under the UV light and let it completely cure for an additional 3 minutes, rotating the mold for each minute.
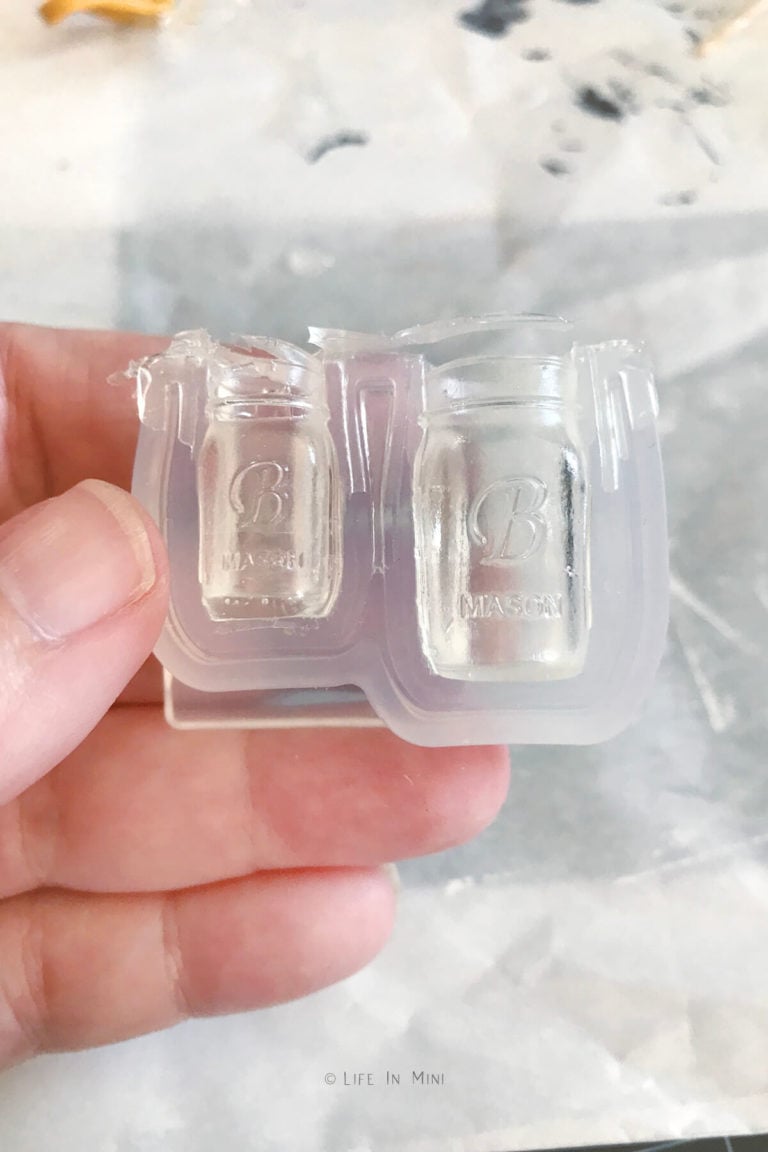
5. Gently remove the rubber bands and pull open the silicone mold to reveal your resin jars. Use your xacto blade to cut the excess pieces off your jars, especially where the two silicon molds joined. Sand the edges smooth.
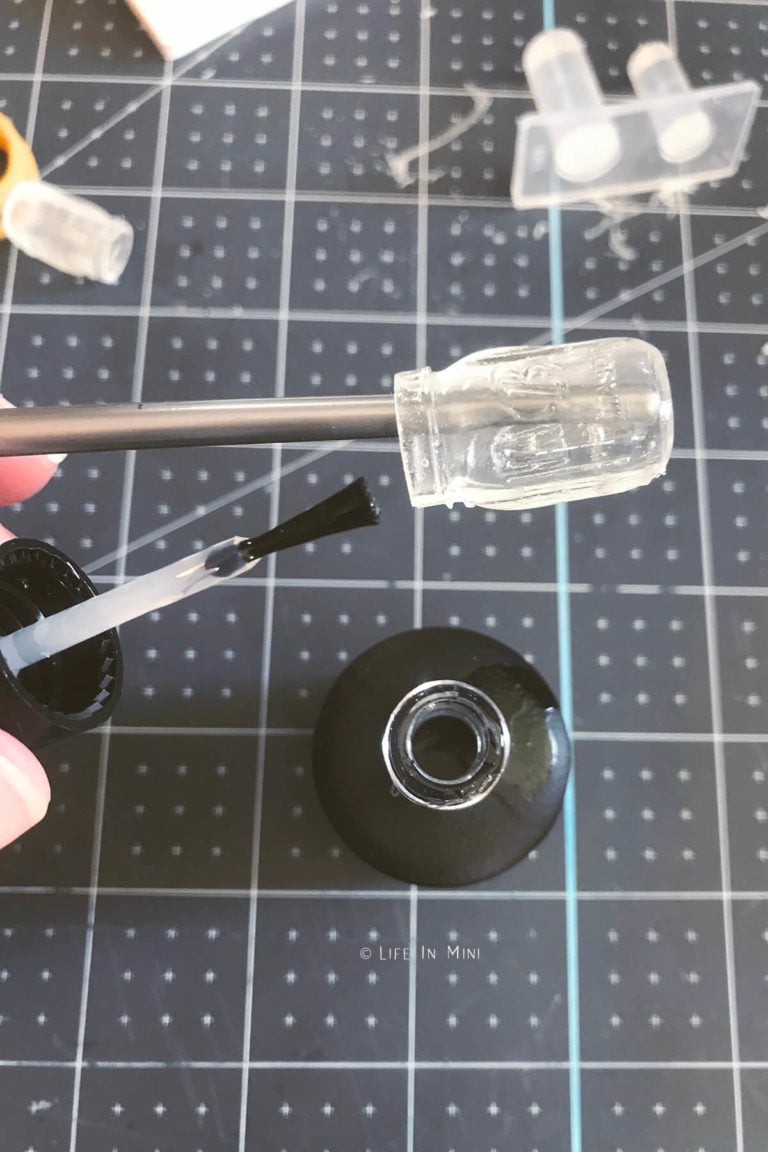
6. To make the jars shinier, add a thin coat of clear gloss nail polish – the uv gel kind. Place under the UV lamp for 1-2 minutes until hard and not tacky.
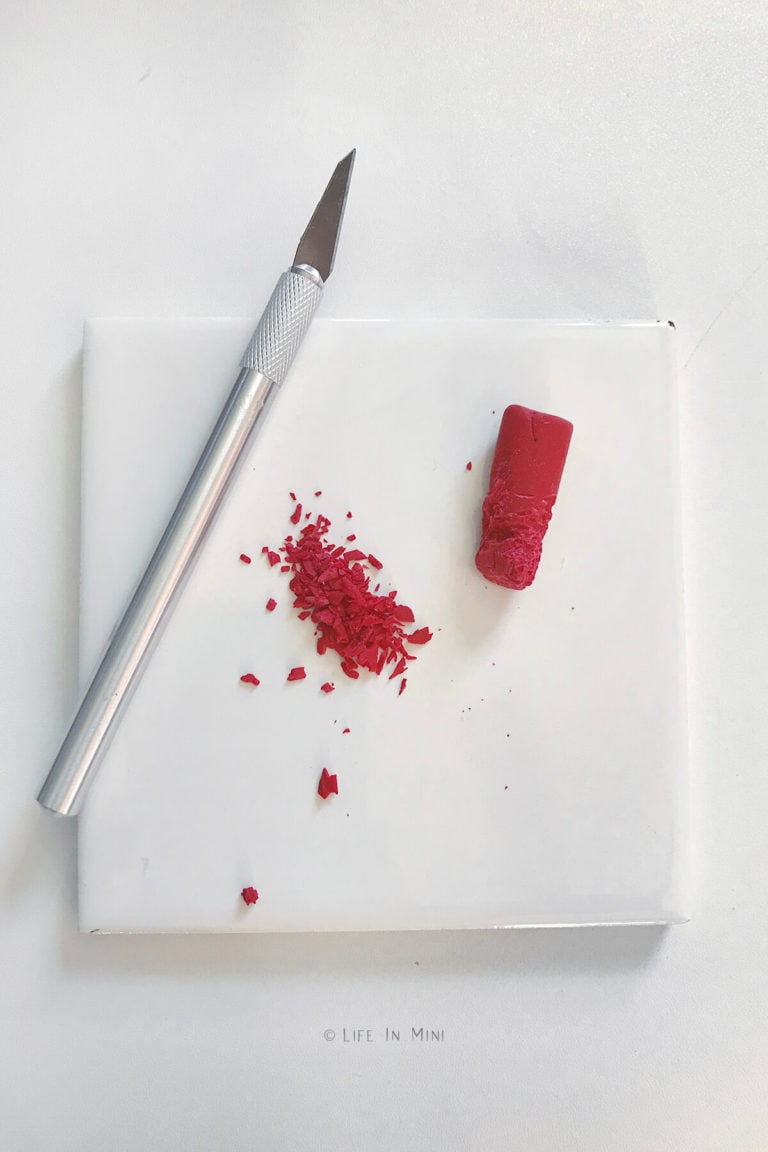
7. Bake a bit of red clay, per package directions. Once clay is baked, cut little bits of clay using your xacto blade. These will be the bits of fruit in your jam. You can also cut slices from a fruit cane, used for nail art.
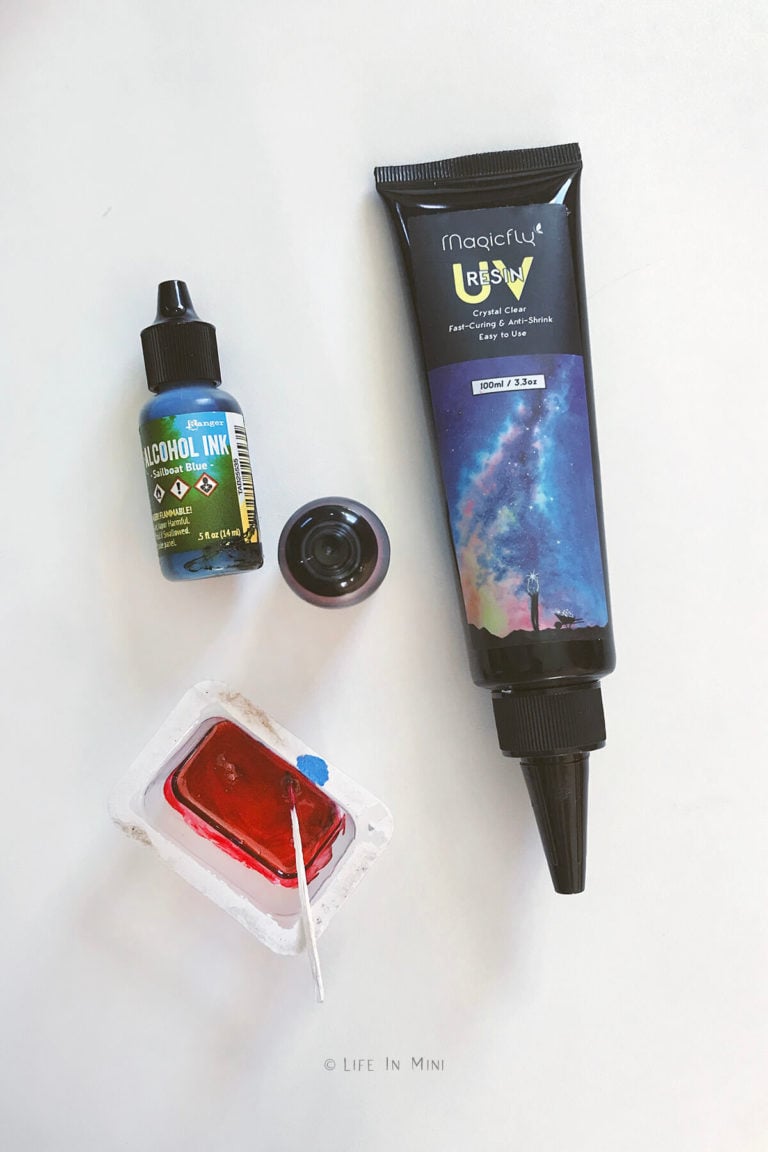
8. Pour some resin into your silicone cup or disposable plastic and add your colorant. I used red alcohol ink. Mine was watermelon red which was a bit bright for strawberry jam, which you can see in the final pictures. For darker red I added a touch of blue. Different inks offer different colors so mix resin to your personal liking.
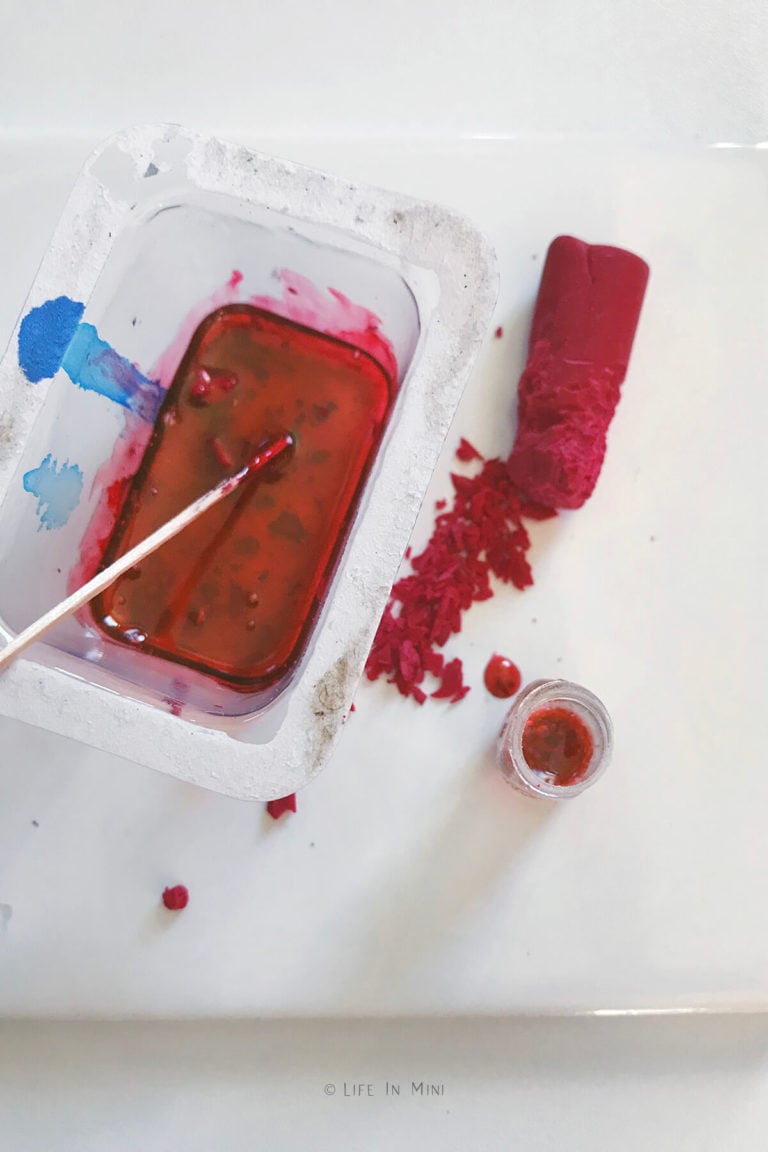
9. Stir in the bits of clay into your resin mix. Then using a toothpick, start adding the resin into your jar, little by little. It is best to add the resin and cure it in layers. UV resin shrinks while it cures, so by working in layers, the resin will cure properly and evenly.
10. Keep adding layers of resin and cure it for about one minute until the jar is filled. For the final cure, rotate the jar to insure it is complete and finished.
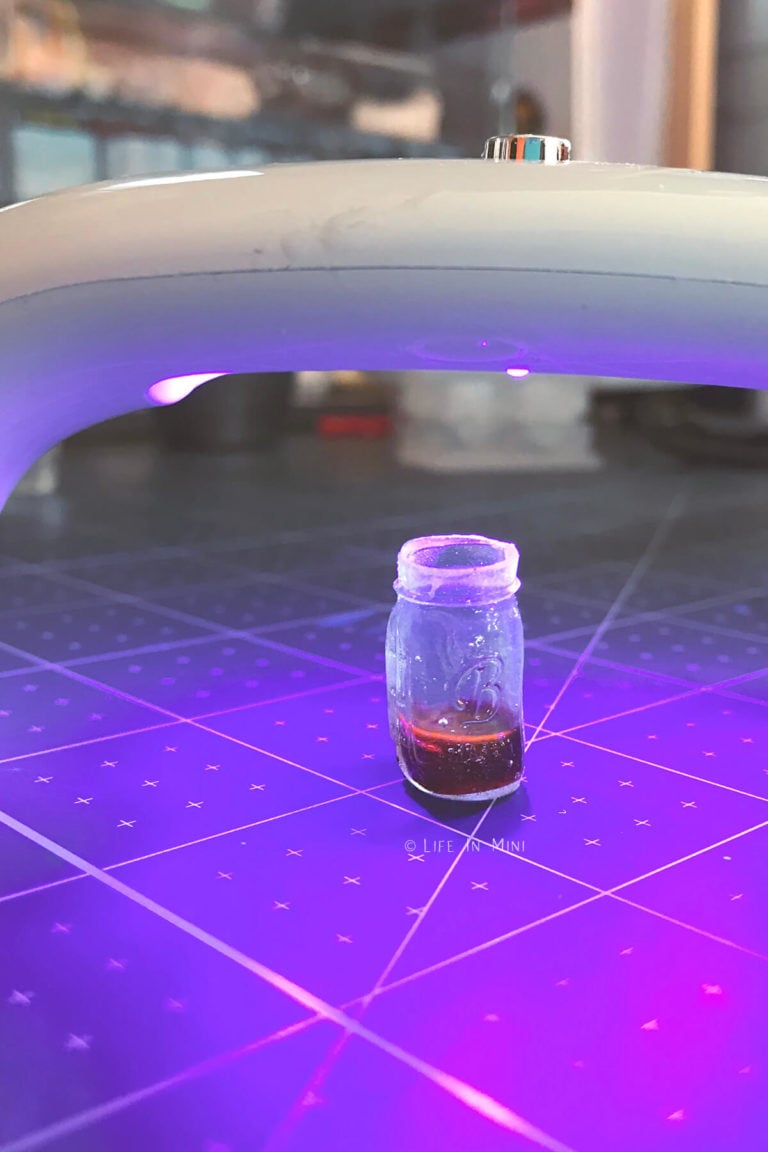
11. There are several ways you can cap off your jars. Some of my jars had not so nice looking tops. No big deal. I still used them. You can cut a bit of fabric or brown paper, place it over the jar and tie it with string or bakers twine. The cut the excess paper off.
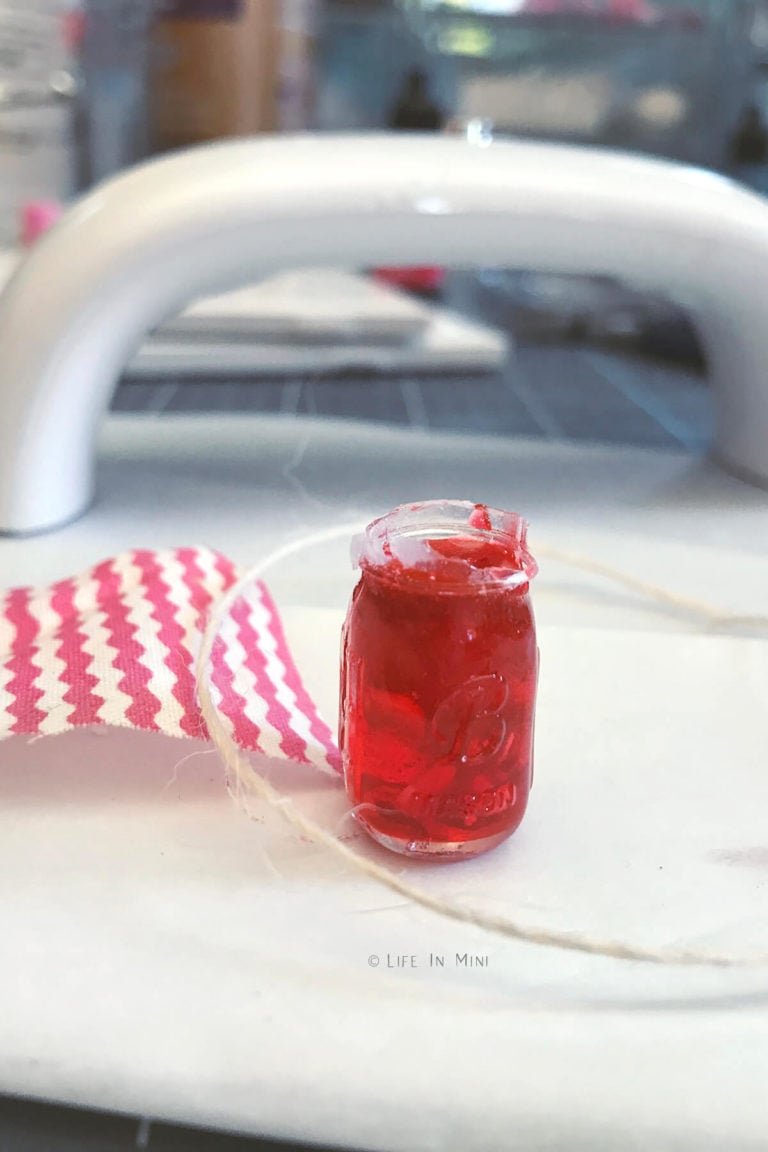
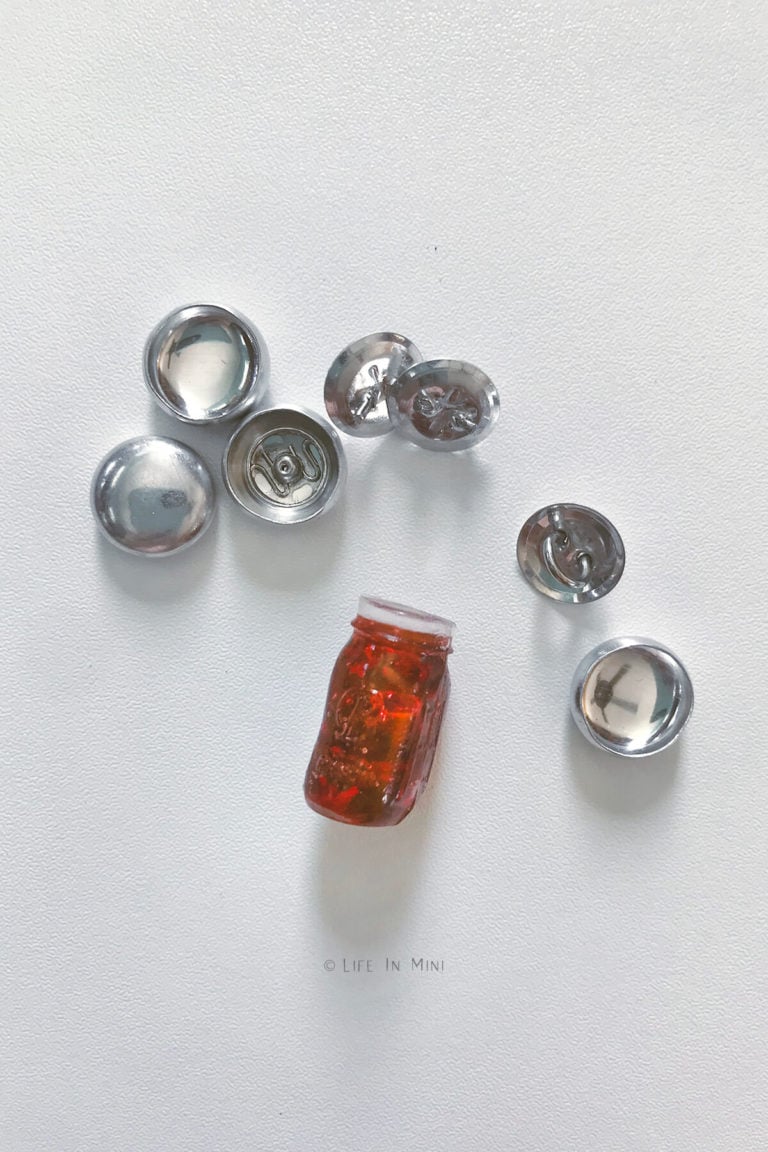
12. For a metal lid top, I used these metallic button covers I found… somewhere! They come in different sizes. I had ones that fit the smaller sized jar perfectly. I did not glue them to the jars as they fit snugly, but you can certainly glue them on.

Laura’s Top Pick:
Whether you are making a lot of resin minis or you are adding a layer of gloss with gel nail polish, a stand alone UV light let your resin project cure while you can work on something else.
Project tips and FAQs
The silicone molds I bought give you mason jars in two different sizes. Of course, you can still make your jams and jellies with UV resin and pour them into mini glass jars you already have. You can find them in craft stores or even 99¢ and dollar stores.
Just follow the same technique for mixing the colors and clay, pour them into the glass jars in layers and cure. I have a glass jar fetish, so I love the look of bottles and jars in all shapes and sizes.
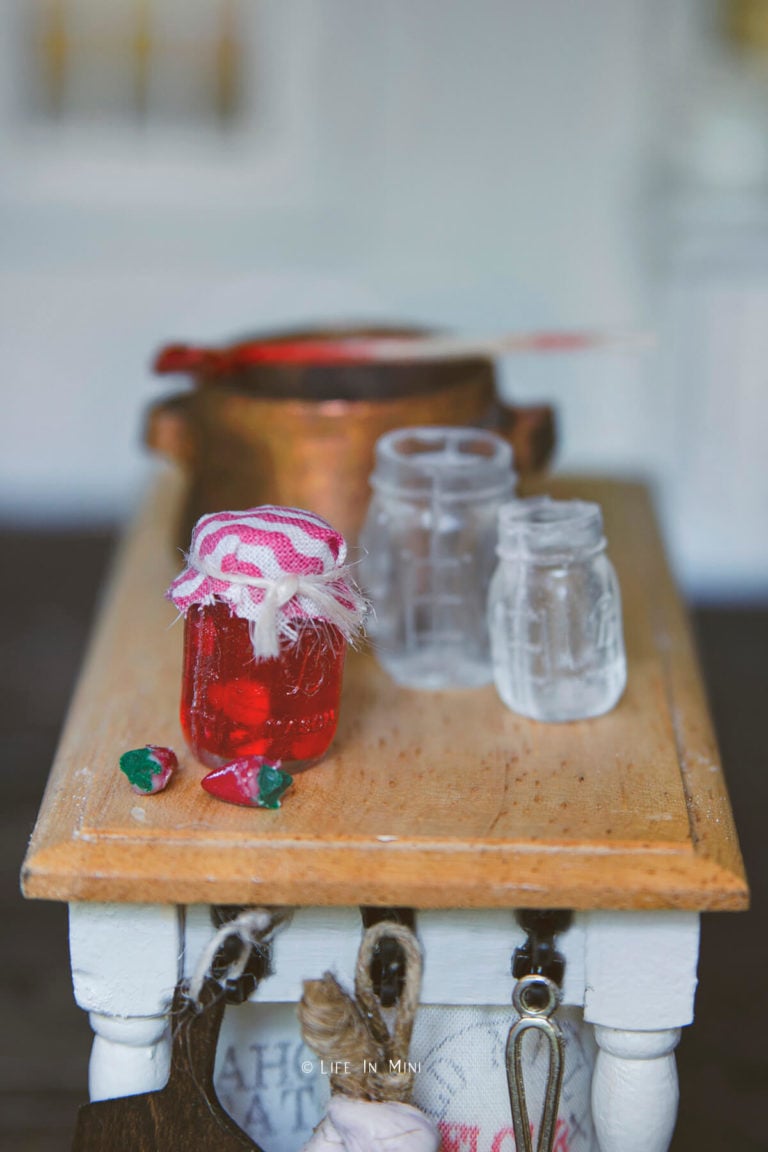
Some of the jars I left “uncapped” and messy so it could look like an open jar of jam. Place a spoon in it and it is ready to set in a table scene.
Several of my first attempts at these resin jars made some not-so-perfect samples. I kinda like their quirks and can still use them in different ways.
And if I got you in the mood for jam, here’s my recipe for strawberry rhubarb jam!
If you are enjoying my blog, why not sign up for my newsletter so you won’t miss out on the mini adventures!
Miniature Mason Jars Using UV Resin
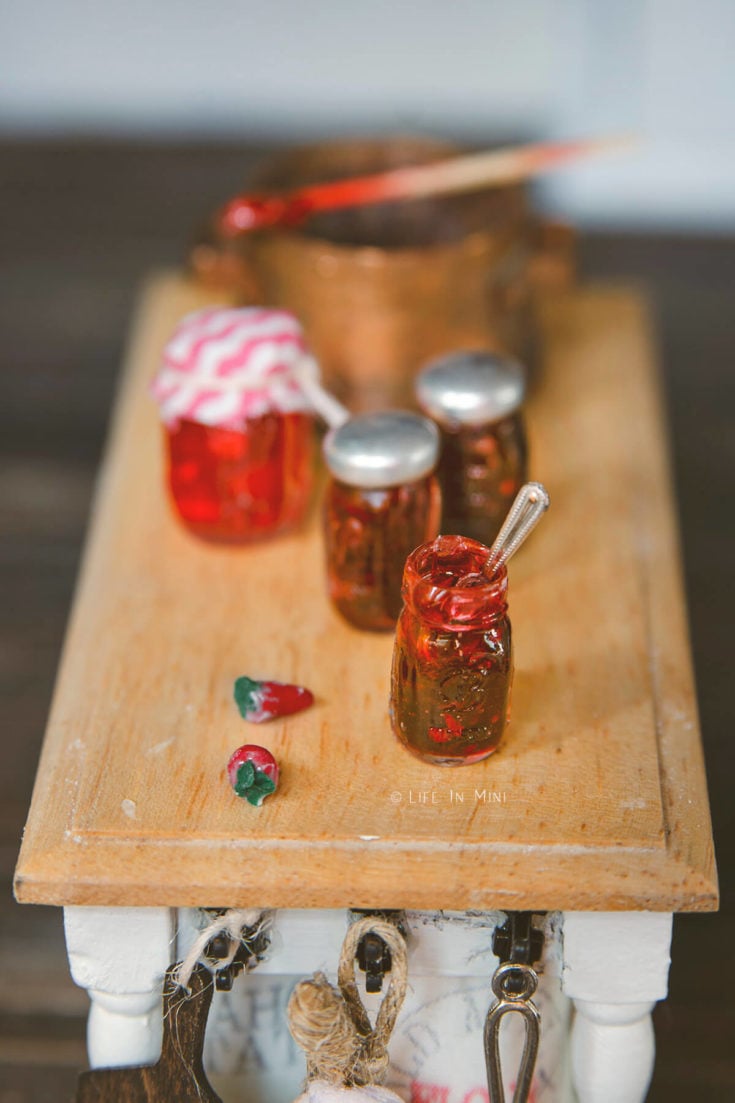
You can easily make your own miniature mason jars using UV resin and a silicone mold. This tutorial also shows you how to make mini jars of jam for your dollhouse kitchen.
Materials
- UV resin
- Colorant
- Red clay
- Clear gloss nail gel
Tools
- Latex gloves
- UV light
- Silicone mold
- Small tray and toothpick:
- Xacto
- Sand paper
- Resin safe work surface like glass, tile, silicone mat or parchment paper.
Instructions
- Secure your silicone mold with rubber bands. I used two, one for each direction. Do not cover the holes where you will need to pour in the resin.
- Wearing protective latex gloves, slowly add resin into your molds. Since there will be a silicone tube pushed into the resin to create the open jar, fill the mold about ⅔ full.
- If you have bubbles, you can pierce with a toothpick. Also a heat gun helps disperse the bubbles. You can also wait a few minutes and the bubbles will slowly move up and pop themselves.
- Press the inside of the mold into the resin, pushing down flat. It will overflow a little, and that is just fine.
- While holding the mold securing in one hand, pass the UV light over the piece and let it quick cure for one minute. Since this mold is clear, the UV light passes through.
- Place the piece under the UV light and let it completely cure for an additional 3 minutes, rotating the mold for each minute.
- Gently remove the rubber bands and pull open the silicone mold to reveal your resin jars. Use your xacto blade to cut the excess pieces off your jars, especially where the two silicon molds joined. Sand the edges smooth.
- To make the jars shinier, add a thin coat of clear gloss nail polish – the uv gel kind. Place under the UV lamp for 1-2 minutes until hard and not tacky.
- Bake a bit of red clay, per package directions. Once clay is baked, cut little bits of clay using your xacto blade. These will be the bits of fruit in your jam. You can also cut slices from a fruit cane, used for nail art.
- Pour some resin into your silicone cup or disposable plastic and add your colorant. Different inks offer different colors so mix resin to your personal liking.
- Stir in the bits of clay into your resin mix. Then using a toothpick, start adding the resin into your jar, little by little. It is best to add the resin and cure it in layers. UV resin shrinks while it cures, so by working in layers, the resin will cure properly and evenly.
- Keep adding layers of resin and cure it for about one minute until the jar is filled. For the final cure, rotate the jar to insure it is complete and finished.
Notes
There are several ways you can cap off your jars. Some of my jars had not so nice looking tops. No big deal. I still used them. You can cut a bit of fabric or brown paper, place it over the jar and tie it with string or bakers twine. The cut the excess paper off.
For a metal lid top, I used these metallic button covers I found… somewhere! They come in different sizes. I had ones that fit the smaller sized jar perfectly. I did not glue them to the jars as they fit snugly, but you can certainly glue them on.
PS If you try this craft, why not leave a star rating in the direction card right below and/or a review in the comment section further down the page? I always appreciate your feedback.
You can also follow me on Pinterest, Facebook or Instagram. Sign up for my eMail list, too!

Susan says
Great tutorial! I can’t wait to try! Already purchasing supplies. Links were very helpful. Thank you!! 💕💕💕
Laura says
Hi Susan,
Thank you! Can’t wait to see what you make. Yeah, I hate searching for products myself, so I try to share where I get my supplies.
Laura