


If your dollhouse Christmas trees isn’t making you feel jolly, learn my tips and tricks to glam it up and decorate it.
Now that Thanksgiving is over, Christmas season can officially begin! Or maybe your dollhouse celebrates Christmas 365-days of the year? Well, I am here to spread more holiday cheer in mini form, and as always, on the cheap.
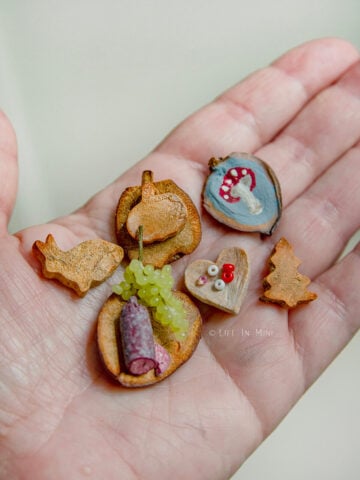
I have already shared my tips on making and finding dollhouse Christmas decorations. Today I am sharing all about the beloved Christmas tree.
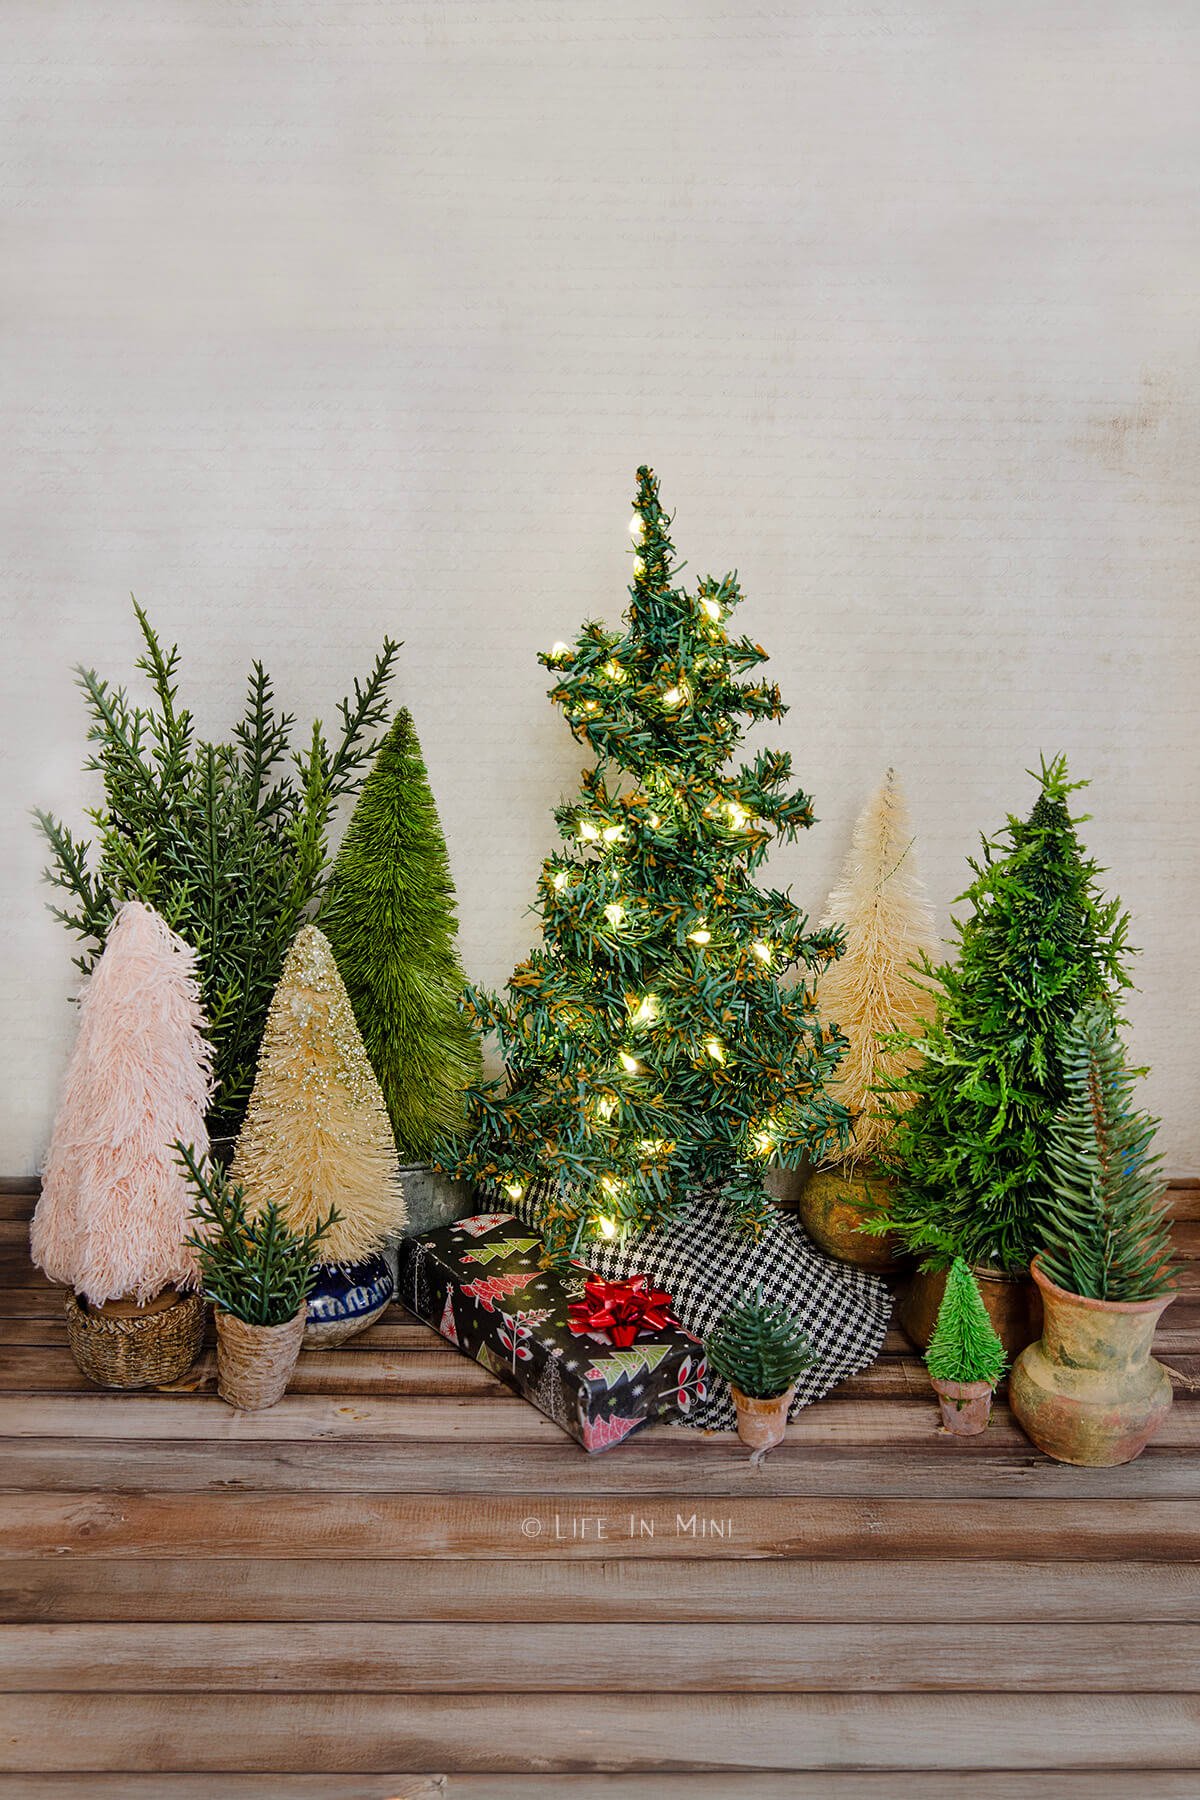
There are so many great options that don’t cost a fortune when it comes to a miniature Christmas tree, nor do you have to make one from scratch using wires, clay and loads of patience.
Your favorite craft stores have lots of small and mini sized table-top trees that can easily be used in a dollhouse. Also, be sure to check the Christmas village section where you can find some real cute tree options.
This post contains some affiliate links for your convenience (which means if you make a purchase after clicking a link I will earn a small commission but it won’t cost you a penny more)! Read my full disclosure policy.
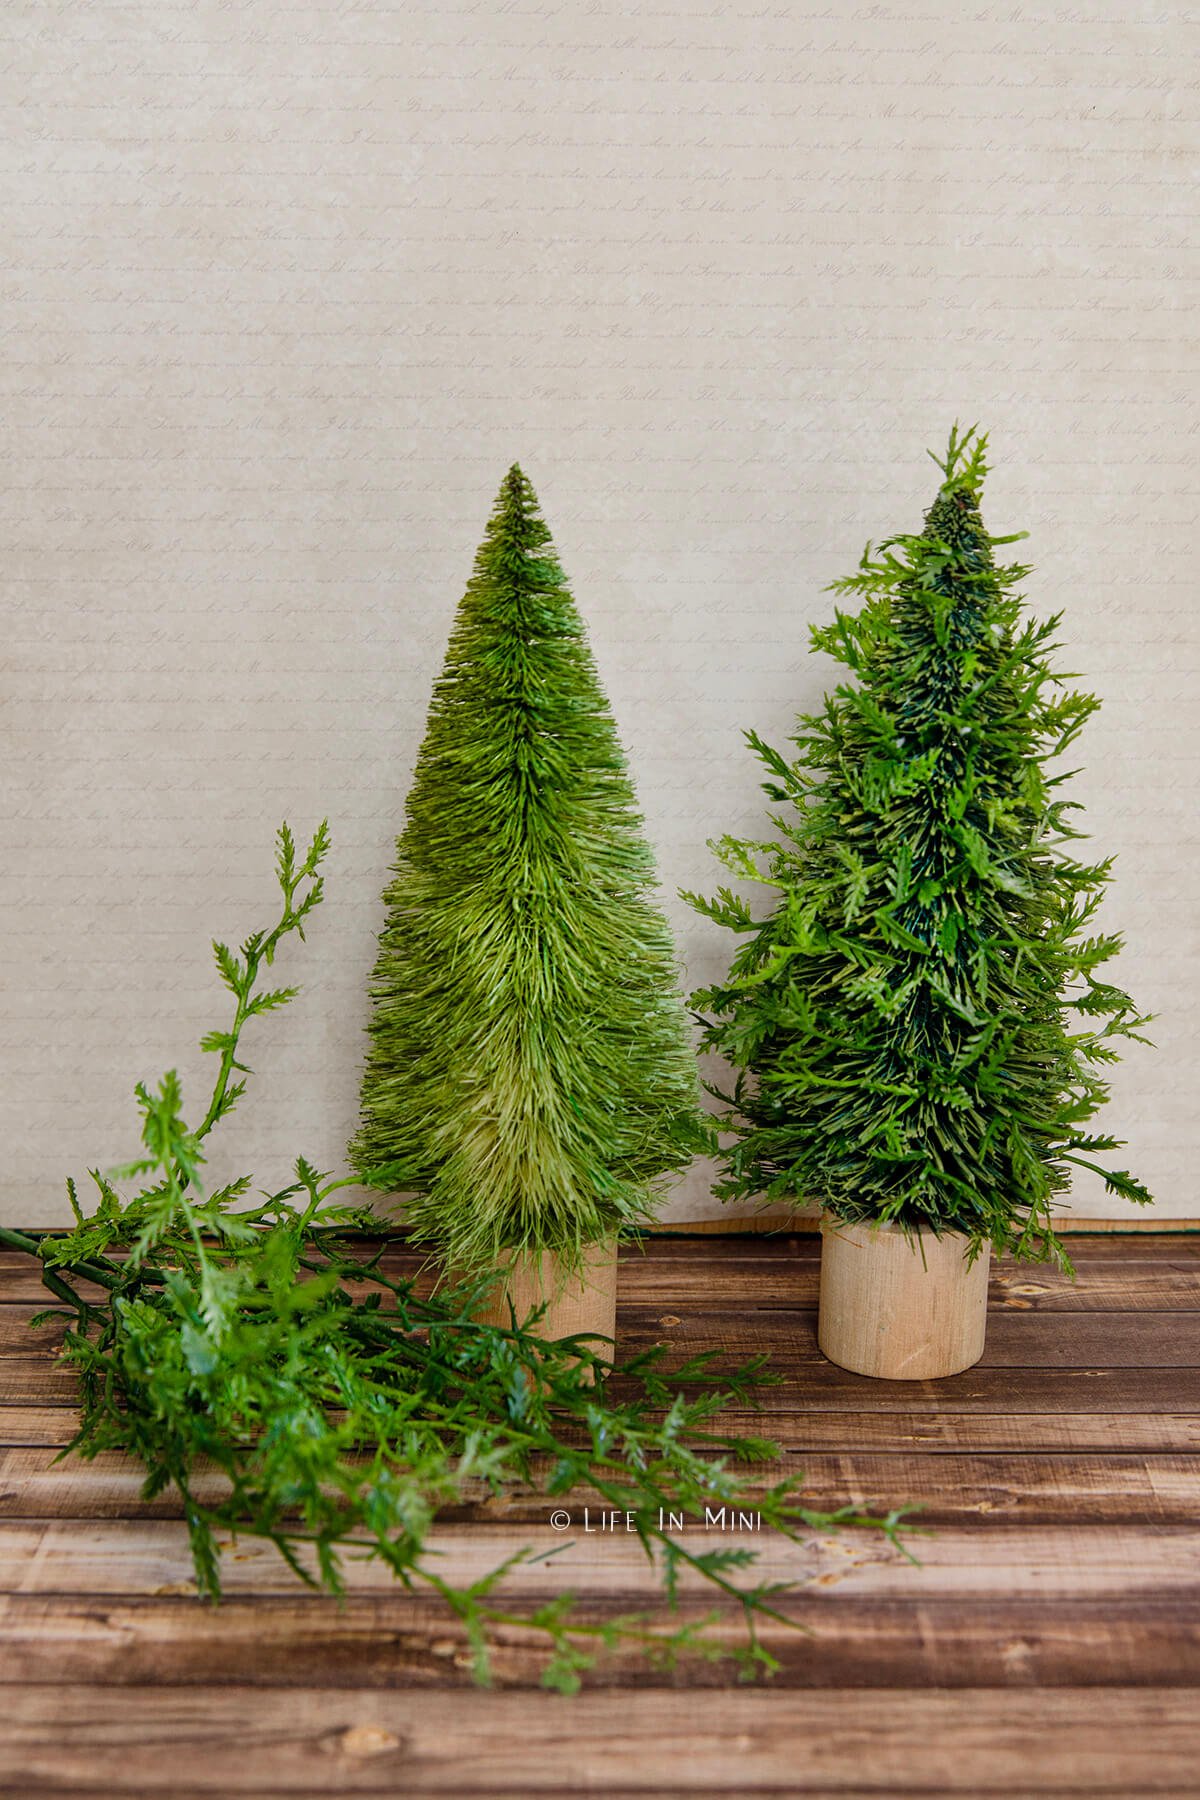
One favorite mini tree is the bottle brush tree. These babies come in a variety of sizes and colors. I love the simple look of a bottle brush tree and use them a lot during the holidays.
You can also jazz up the look of your 99¢ bottle brush trees by adding some mini bits of greenery to make them look like real mini trees.
I found this leaf pick at Hobby Lobby and use it often with my miniature plants because it has these itty bitty leaves. I cut off bits from it of various lengths, dip the ends in white glue and tuck them all around the bottle brush tree.
Another option is to use small fern picks like this one. You can also add some green flocking to the ends to give it some more realism.
This trick isn’t limited to bottle brush trees. You can do this with any basic tree you find and needs a little pick-me-up.
What do you think? Which version are you fond of?
Christmas tree lights

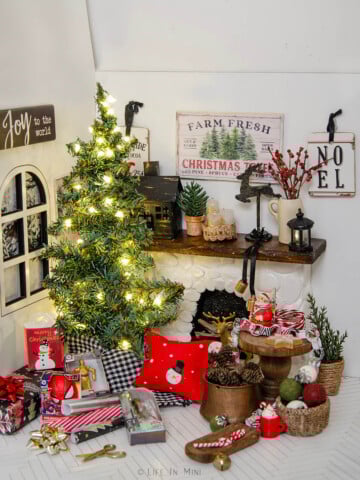
You don’t need fancy wiring to light up your miniature trees, either. Fairy lights are the best size for this job and the wiring hides easily in the tree and they are inexpensive – check out your 99¢ stores!
There are a few ways to hide the battery pack. The particular battery pack I used several years ago was big and to hide it, I made a box with scrapbook paper and slide the battery pack in it. Add a mini bow and it looks like a gift under the tree.
Other ways to hide battery packs, is to hide it in furniture or if it is small, under a tree skirt. Easy peasy.
Christmas tree bases

I found the inspiration for tree bases from reels and videos for full size Christmas trees. You can easily cut a circle from a fabric, add a slit and presto – a mini sized tree skirt is ready!
You can obviously use the wood base that your mini tree comes in, but here are some other fun options for tree bases:
- Napkin rings
- Ceramic pots
- Metal pots
- Drawer knobs
- Baskets
Napkin rings come in so many textures and colors, from metal to wicker. And they make the perfect tree collar.
You can use ceramic pots that are already made or make them yourself, with air dry clay or polymer clay. I have a collection of mini copper pots and was able to use one of them for my tree. You can also make a faux mini pot by using a plastic cap, binder clips for handles and metallic paint.
Okay, this next item might surprise you – the drawer knob. But again, I saw this on instagram for a bottle brush tree table decoration and LOVED the idea. Whether you use a simple brass knob or a fancy ornate one, remove the screws and hardware, flip it over and you have a cute and unique mini tree stand.
Look for funky knobs at antique stores, garage sales and Hobby Lobby.
And for baskets, you can use resin printed or fancy woven baskets. And of course, you can make your own mini basket!
Christmas tree decorations
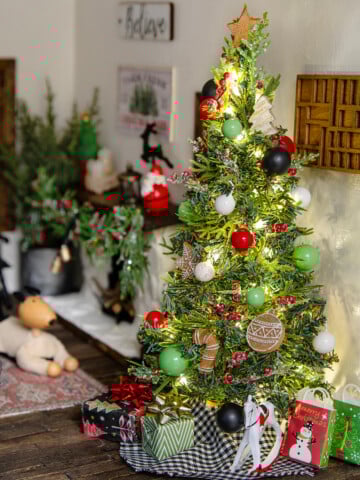
Now that you have your tree set up and lit, it is time for the fun to begin: let’s decorate! Personally, I prefer keeping my dollhouse Christmas trees simple and withOUT ornaments. But that is also because I’m not super patient and I change my mind all the time about what I want my tree to be decorated with.
There are lots of options here for decorating your tree. Here are some examples:
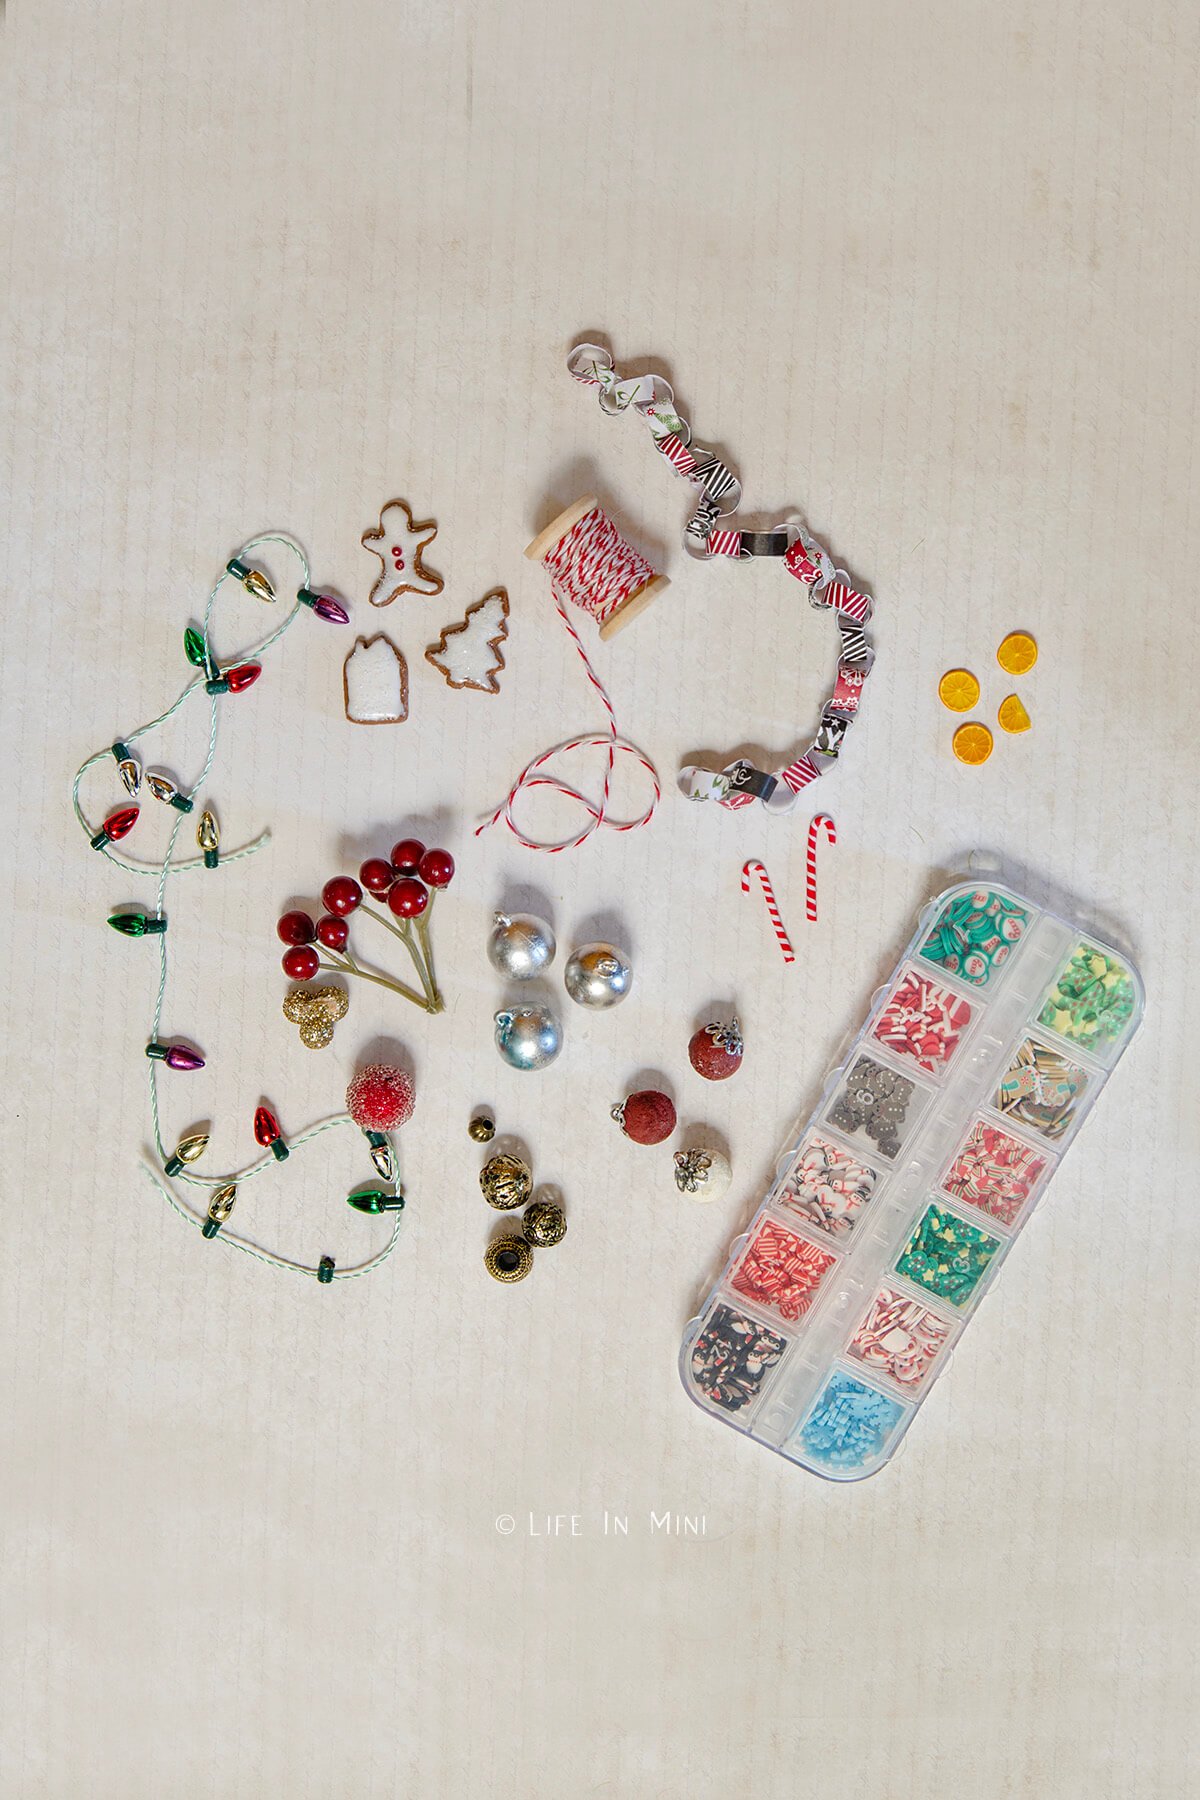
- Mini ornaments
- Jewelry beads
- Mini candy canes
- Resin nail charms
- Orange slices
- Mini bows
- Fake tree lights
- Colorful bakers twine
- Mini paper chain from scrapbook paper
- Homemade clay ornaments
- Bits broken off from full size Christmas decor
You can find mini sized ball ornaments at Hobby Lobby, Wal-Mart and Michaels. If you don’t like the colors they come in, you can give them a faux mercury glass finish or DIY chalk paint.
If you don’t have mini ornaments, you can make your own using mini balls (wood or plastic) or mini ball beads, a bead cap and an eye pin.
Roll out air dry clay or polymer clay to make mini ornaments by using mini Christmas cutters to make cookies or ornaments. You can also cut out scrapbook paper with fun mini hole punches (glue several pieces together to make them thicker) then finish with gloss ModPodge.
To hang your ornaments you can cut small pieces of floral wire or attach jewelry eye pins to your ornaments. If you want a more permanent option, glue them directly onto your tree with white glue.
More tree options

Let’s talk beyond the big family Christmas tree and focus on smaller trees for the table top or other greeneries for the dollhouse. I like to use broken off bits from my full size Christmas tree, stick it in a small pot and presto – an ultra mini tree.
You can also cut off pieces from greenery picks and use that, too. Mini bottle brush trees are super cute and you can find mini greeneries that hold name place cards (just remove the metal card holder).
So there you have it. Easy and inexpensive ways to deck the halls and trim that tree without breaking the bank.
Bottle brush tree tip
If your bottle brush trees are a bit squished or misshapen, there’s an easy fix to get it back to its holiday glory. Dip your tree in a bowl with warm water for 30-60 seconds and the bristles will rehydrate and relax. Fix them up and let them dry completely for about 30-60 minutes and you start decorating!
If you are enjoying my blog, why not sign up for my newsletter so you won’t miss out on the mini adventures!
Written by Laura Bashar
I’m a food blogger and cookbook author that loves miniatures and crafting. I started this blog to share my passion for minis, including tutorials and free printables.
Leave a Reply