With just a few household items you already have at home, it is very easy to make your own realistic miniature candles for your dollhouse.
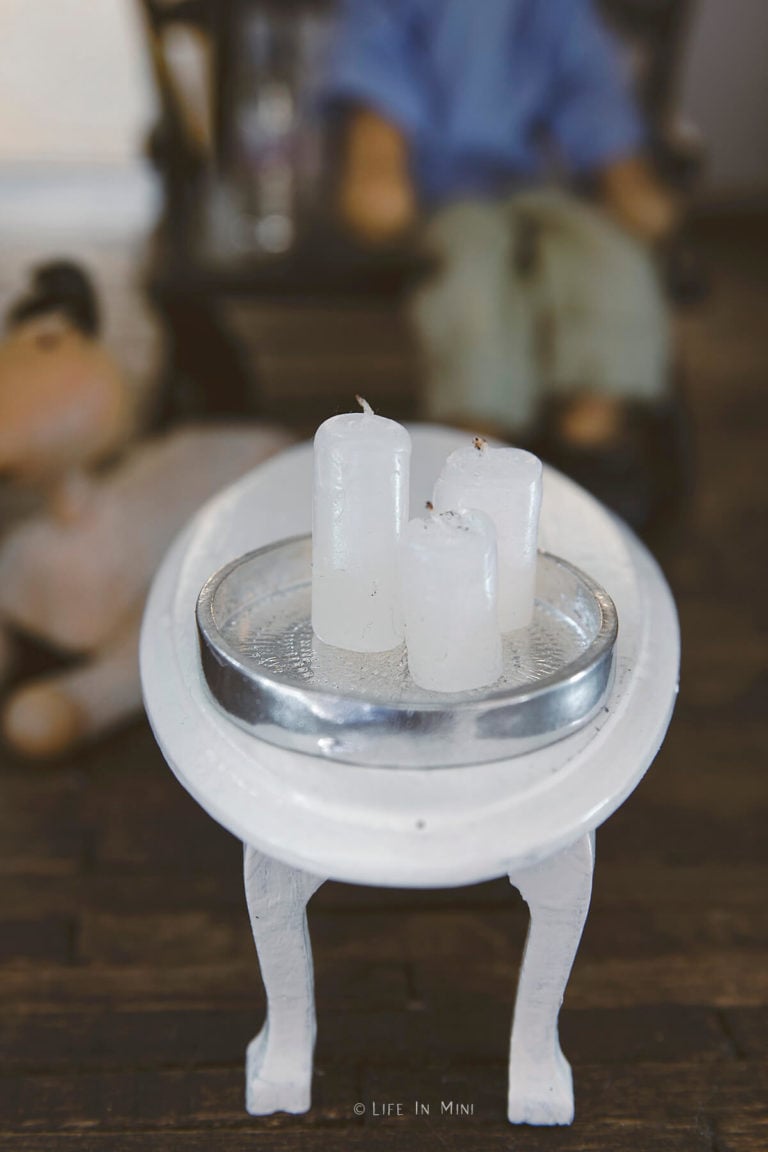
I keep switching modes as I work on this dollhouse. I still have big projects to start and finish, from flooring the upstairs and attic spaces to deciding if I am going to wire the house for electricity or not.
Since I only get to work on it during my “free” time, weeks can go by in between projects. I find that mixing in big mini making with some smaller fun endeavors makes the process less stressful and much more gratifying.
One great place to find miniature accessories without spending a bundle is in the jewelry and bead aisles of your favorite craft store. That’s where I found the silverish metal pendant that I thought would make a great tray.
Once I cut off the hoop attachment, I sanded it smooth and gave it a quick spray coat of silver paint. Voila! My tray was done and ready for accessorizing.
Different ways to make miniature candles
I wanted to put some pillar candles on my tray. There are several options to making mini candles for your dollhouse. If you are going for looks, you can form easy candles with polymer clay.
Clay works great for thinner candles, like the ones you use in candlesticks. You can also create faux candles using wax crayons.
But I figured a way to create realistic mini candles using, well, real candles. Chances are you have all the tools and supplies you need on hand to make this project. And it is super cheap!
Supplies needed
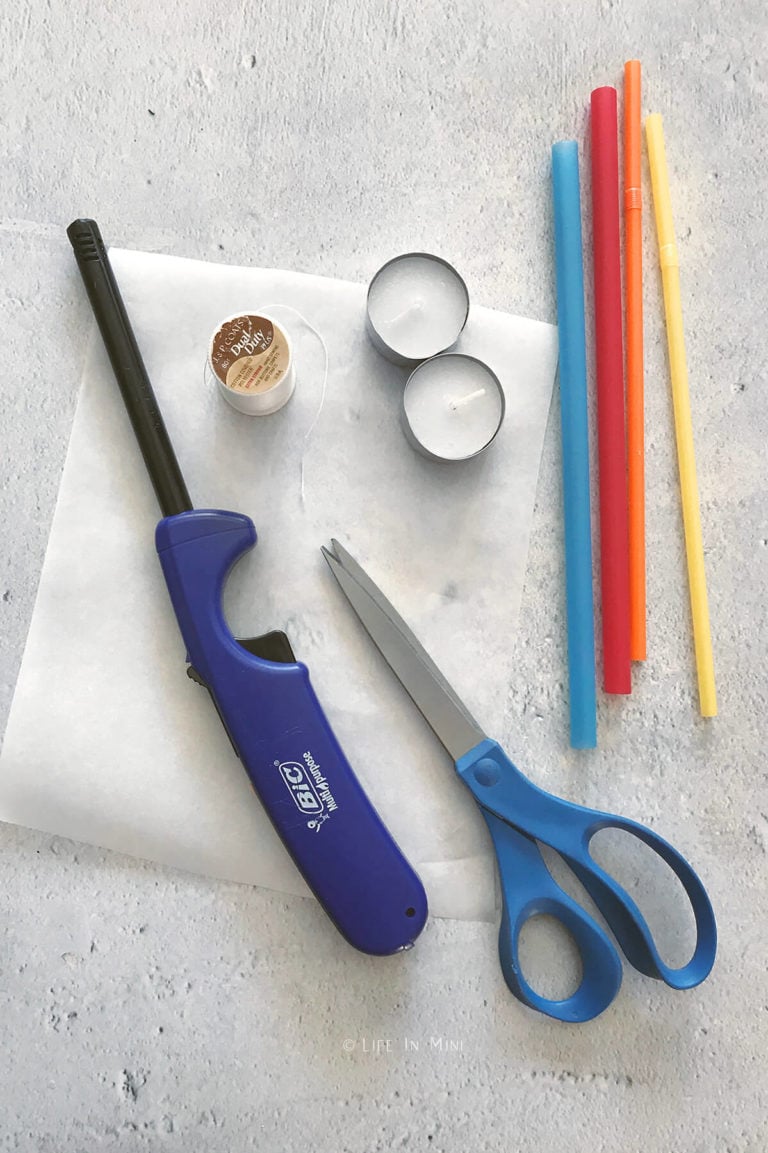
- Tea light: You can choose candles of any form and color to make these mini candles. I like to use the tea lights in the metal trays because I can form a little spout with the metal, making it easier to pour the wax into the straw molds.
- Thread: For the wicks, I used thick upholstery thread that was leftover from a sewing project. White thread is preferable but you could also use cream colored thread.
- Straw: I used plastic straws for my candle molds. Thicker smoothie straws make perfect miniature pillar candles.
- Parchment paper: This and some melted wax is used to help secure your straw molds in place. You can also use wax paper.
- Scissors: You can use scissors or an Xacto blade to cut the thread and straws.
- Lighter: You will need to light your candles to melt the wax so use a lighter or matches.
Step-by-step directions
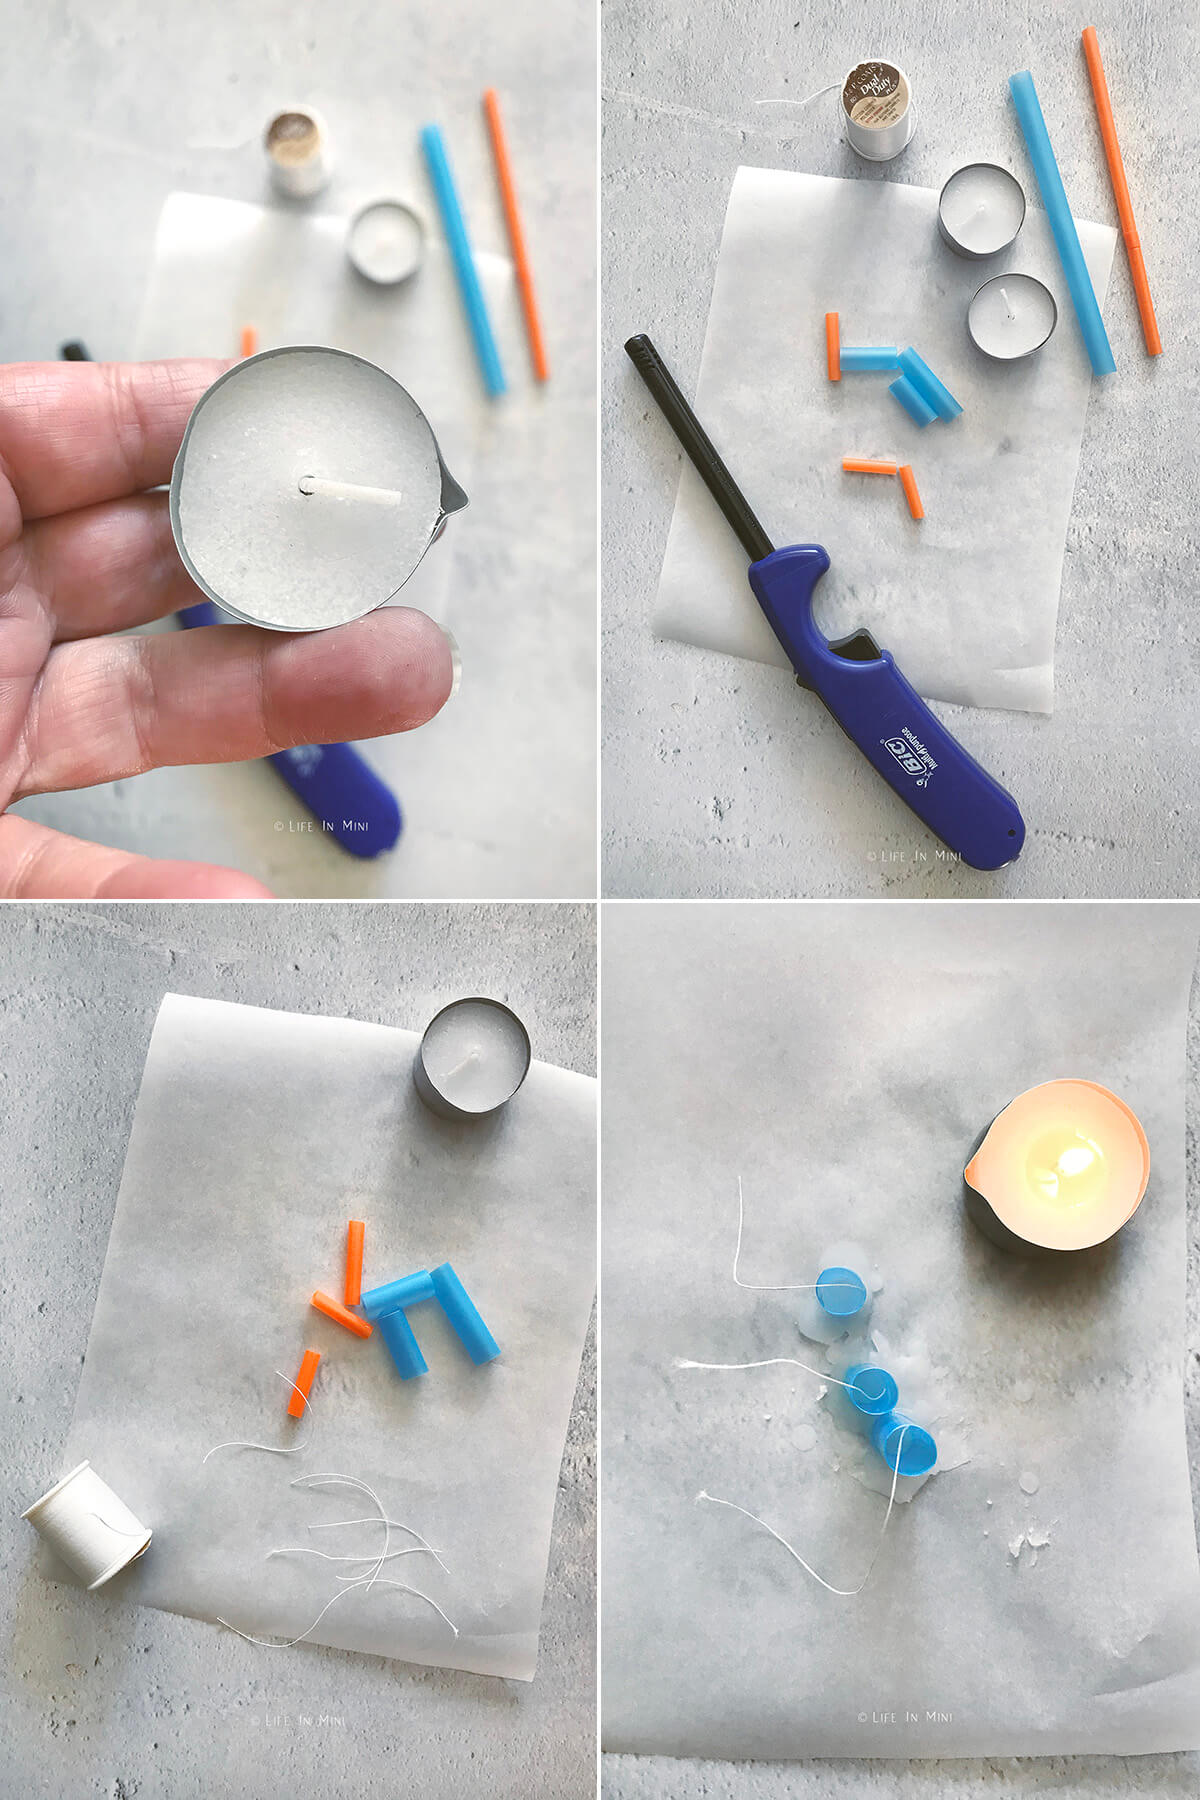
- Prep the tea light. Bend and form a spout from the metal bowl of the your tea light. Light the candle and let it burn until you have enough wax to pour and make candles. How much wax you need depends on how many candles you are making.
- Cut your forms. Cut your plastic straws to the height you want for your candles. Remember, you do not have to fill it up all the way.
- Cut the wicks. Cut the threads for wicks and place them inside the straws. Make them longer than the straw molds as you can cut them to the size you want after the candles are made.
- Secure the wicks. Pour some wax onto your parchment paper. You only need a thin layer approximately ⅛-inch thick. This wax is to help secure you straws. Place your straws in the wax, standing upright with the cut threads placed inside each straw.

- Add wax. Very carefully, pour wax into straw, adjusting the thread to keep it centered. Pour to the top of the straw or as tall as you want your candle to be.
- Let it cool. Let the wax cool completely. Once cooled, use a pencil to push the candles out of the straw, using the eraser end. If that doesn’t work easily, use scissors or an Xacto blade to cut the sides of the straws to remove the candles.
- Finish the candles. Trim the thread to desired wick length. I like to light the wick briefly to make the tip black. To give the candles a worn burnt look, run the lighter along the top of the candle to melt it a little and dribble some melted wax down the side.
Project tips and FAQs
I have made thinner candles using thinner straws. It just takes a little more prying to get the candles out. Use the end of a paintbrush to help push them out of the straw if cutting the straws is too difficult.
Now that you have your mini candles, follow my tutorial to make miniature candlesticks using earring backs and other scraps you probably have laying about.
If you are enjoying my blog, why not sign up for my newsletter so you won’t miss out on the mini adventures!
How to make miniature candles
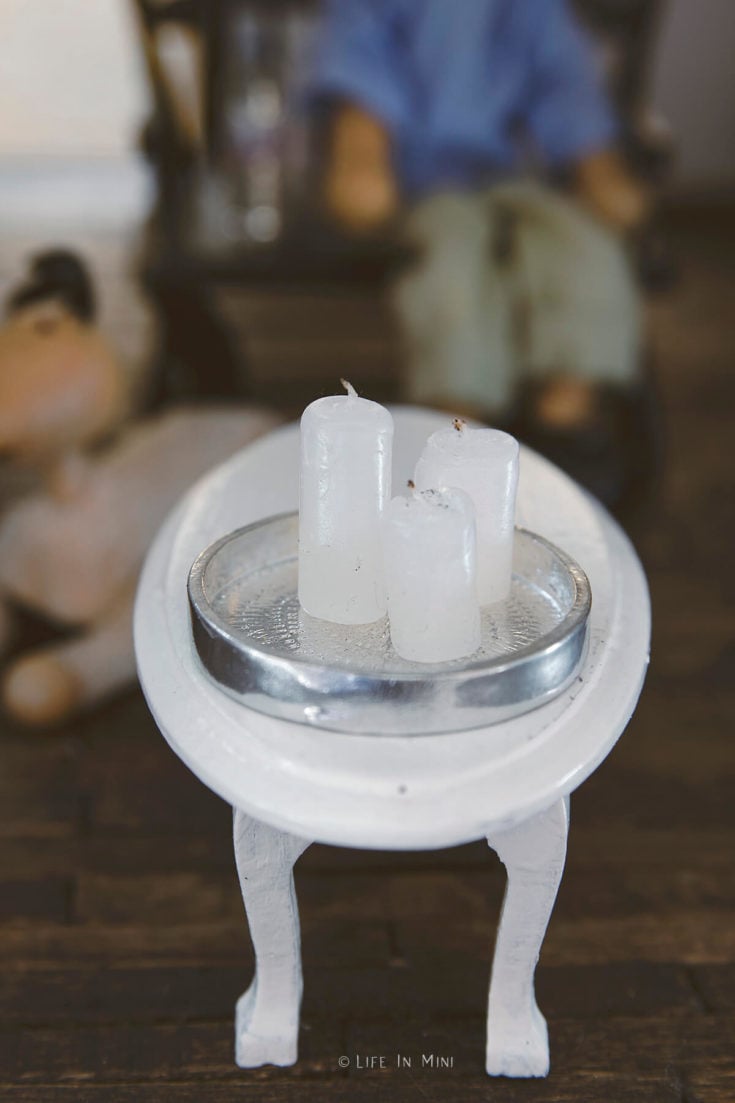
With just a few household items you already have at home, it is very easy to make your own realistic miniature candles for your dollhouse.
Materials
- Tea lights in metal trays, any color
- Thick white thread
- Plastic straws, any thickness
- Parchment paper
Tools
- Lighter
- Scissors
Instructions
- Bend and form a spout from the metal bowl of the your tea light. Light the candle and let it burn until you have enough wax to pour and make candles.
- Cut your plastic straws to the height you want for your candles. Remember, you do not have to fill it up all the way.
- Cut the threads for wicks and place them inside the straws. Make them longer than the straw molds as you can cut them to the size you want after the candles are made.
- Pour some wax onto your parchment paper. You only need a thin layer approximately ⅛-inch thick. This wax is to help secure you straws.
- Place your straws in the wax, standing upright with the cut threads placed inside each straw.
- Very carefully, pour wax into straw, adjusting the thread to keep it centered. Pour to the top of the straw or as tall as you want your candle to be.
- Let the wax cool completely.
- Once cooled, use a pencil to push the candles out of the straw, using the eraser end. If that doesn’t work easily, use scissors or an Xacto blade to cut the sides of the straws to remove the candles.
- Trim the thread to desired wick length. I like to light the wick briefly to make the tip black.
Notes
To give the candles a worn burnt look, run the lighter along the top of the candle to melt it a little and dribble some melted wax down the side.
PS If you try this craft, why not leave a star rating in the direction card right below and/or a review in the comment section further down the page? I always appreciate your feedback.
You can also follow me on Pinterest, Facebook or Instagram. Sign up for my eMail list, too!
Written by Laura Bashar
I’m a food blogger and cookbook author that loves miniatures and crafting. I started this blog to share my passion for minis, including tutorials and free printables.


Karen says
Thank you for this great idea. I’m new to this and found your method to be very “user-friendly” and they look so realistic!!
Laura says
Hi Karen-
Thank you for your sweet words. This can easily become an expensive hobby and I’m not a fine craftsman! I do my best to share easy tutorials anyone can follow.
Laura
Clara says
Hi Laura, I love your idea of this way of making candles. I have made a few today and the result was amazing. Thank you so much.
Laura says
Hi Clara-
I’m so glad you like the candles you made! They are so cute, am I right?!
Laura
Antares says
kris muchísimas gracias por tus tutoriales, acabo de descubrir tu página y es increíble lo que haces con poco dinero y los resultados tan excelentes!!!! ya tienes otra seguidora. No todo el mundo puede gastarse lo que desearía para sus casas, pero con tus ideas es maravilloso!
Kris says
The mini candle instructions were very easy to follow and my candles turned out great. Thanks for your know how.
Laura says
Hi Kris-
I’m so glad you love your mini candles. Thanks for commenting!
Laura