


This is a fun tutorial to make miniature Christmas ornaments for your dollhouse Christmas tree using some inexpensive berry floral picks.
So far my December has been spent focusing on my dollhouse more than making a dent in my Christmas shopping! It’s definitely harder to shop for my kids as adults than when they were little kids.
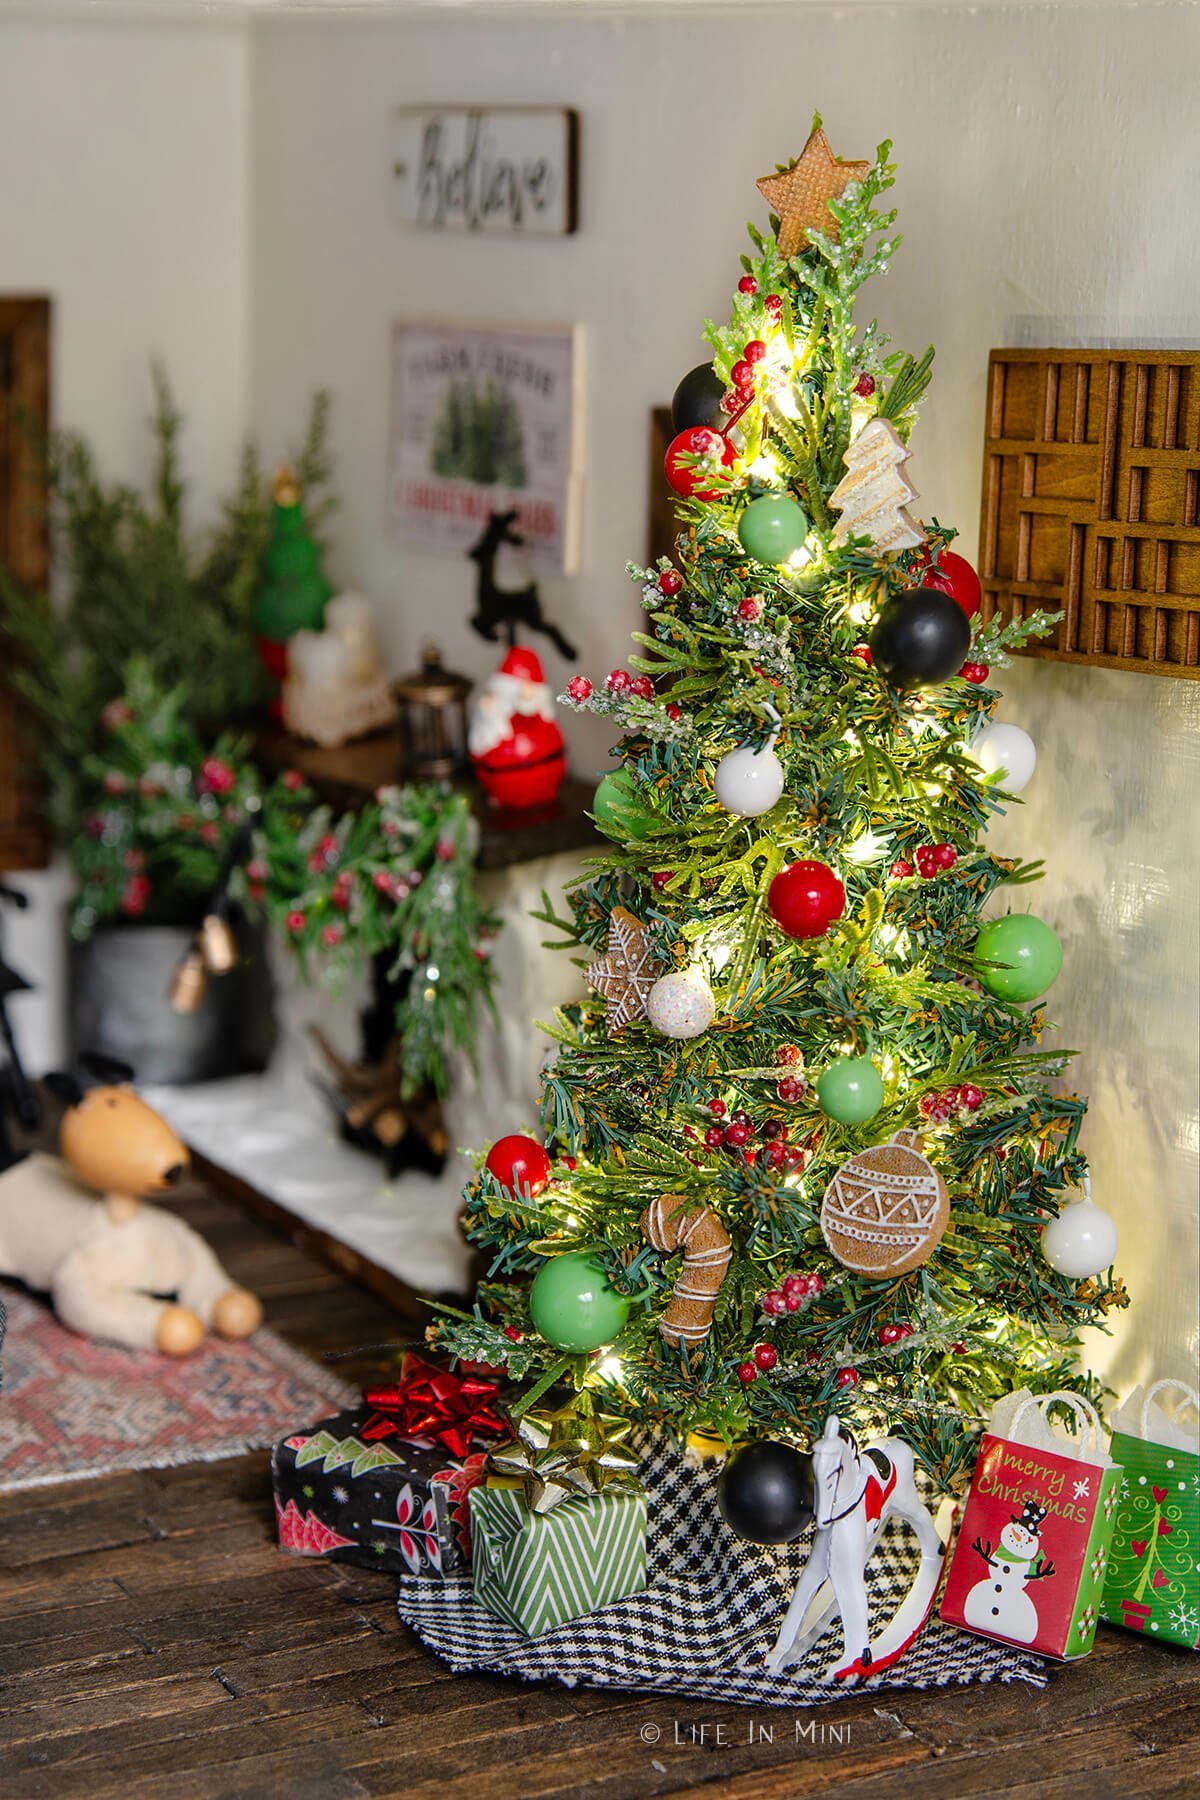
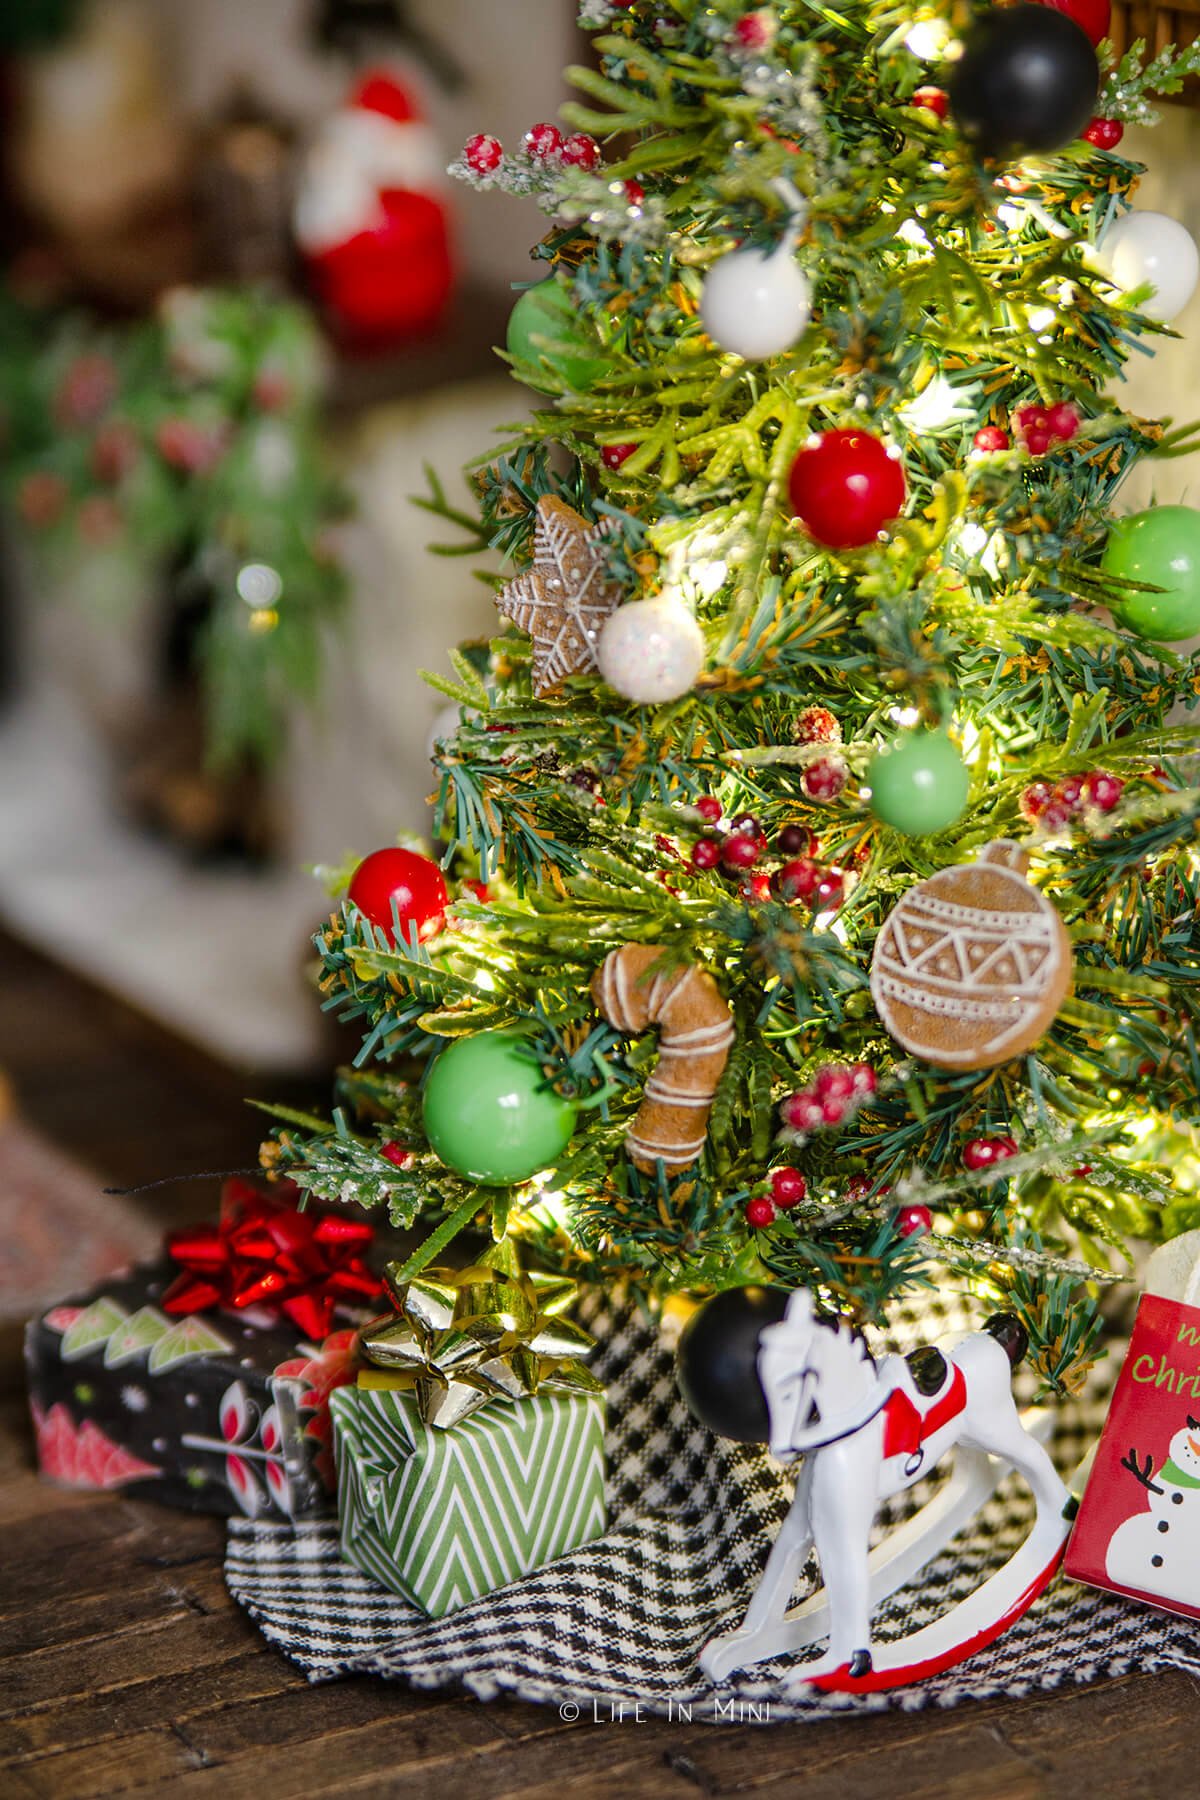
After posting several tutorials back to back, my work area (and dollhouse) was a bit of a mess, so I thought it was high time that I cleaned things up. As I was sorting and adding my dollhouse Christmas decorations, I thought that my boring Christmas tree needing a makeover.
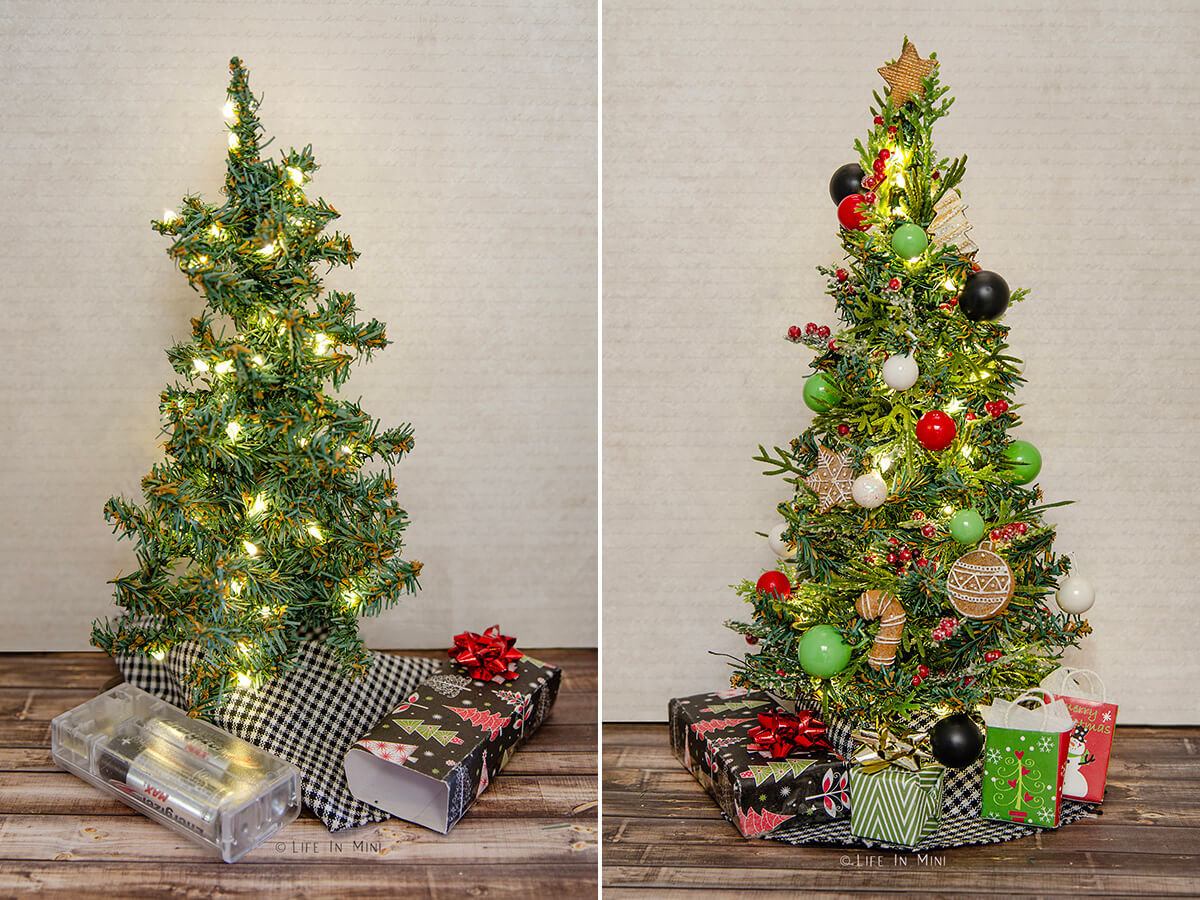
As I did in the bottle brush Christmas tree tutorial, I glued in bits of artificial greens into this wired tree to give it a more natural and lush feel. One pick that I snipped from had bits of faux berries and ice.
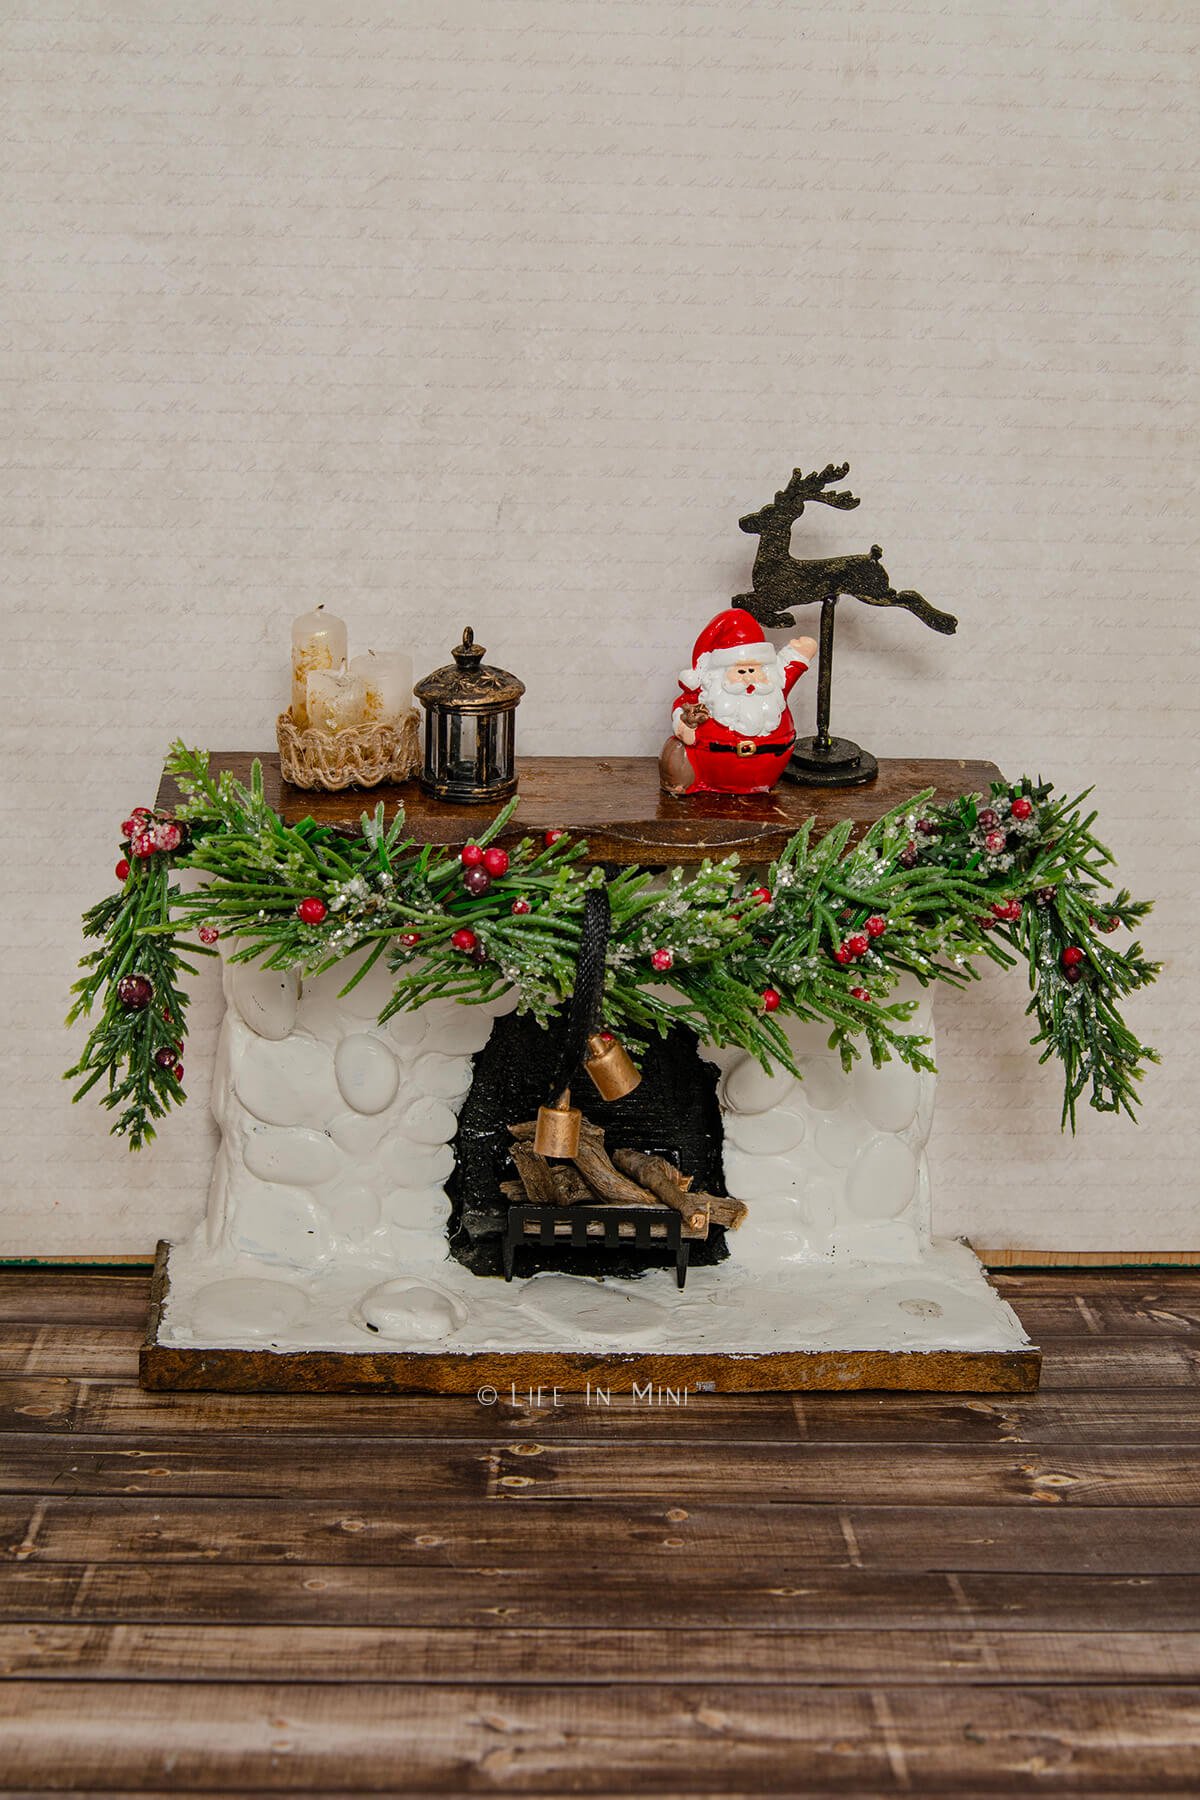
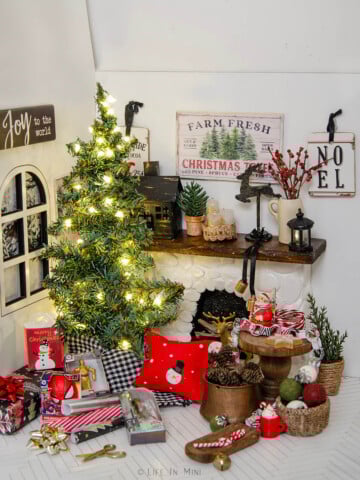
While the glue was drying on the tree, I also made a garland for the fireplace mantel using the same technique, but with a sprig of boring wired garland ties as the base. It turned out so lush and full!
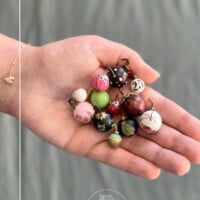
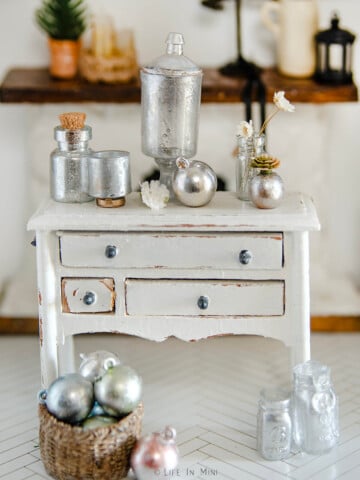
While shopping for more greenery picks I could use at Hobby Lobby, I noticed that these ball-berry picks would make perfect miniature ornaments.
OH. MY. GAWD!!! Why did I never see this before?!!
I quickly snagged several different sizes and colors that I liked to make mini ball ornaments. They are the perfect size for dollhouses and they already have a wire attached to them. Easy peasy!
This is one of those projects where you can make it as easy or as complicated as you want it to be. When I first decorated my tree, I was just doing it for fun, not a tutorial and I really liked having the simple colored balls.
But you could totally paint or glam them up with embellishments, which I share below.
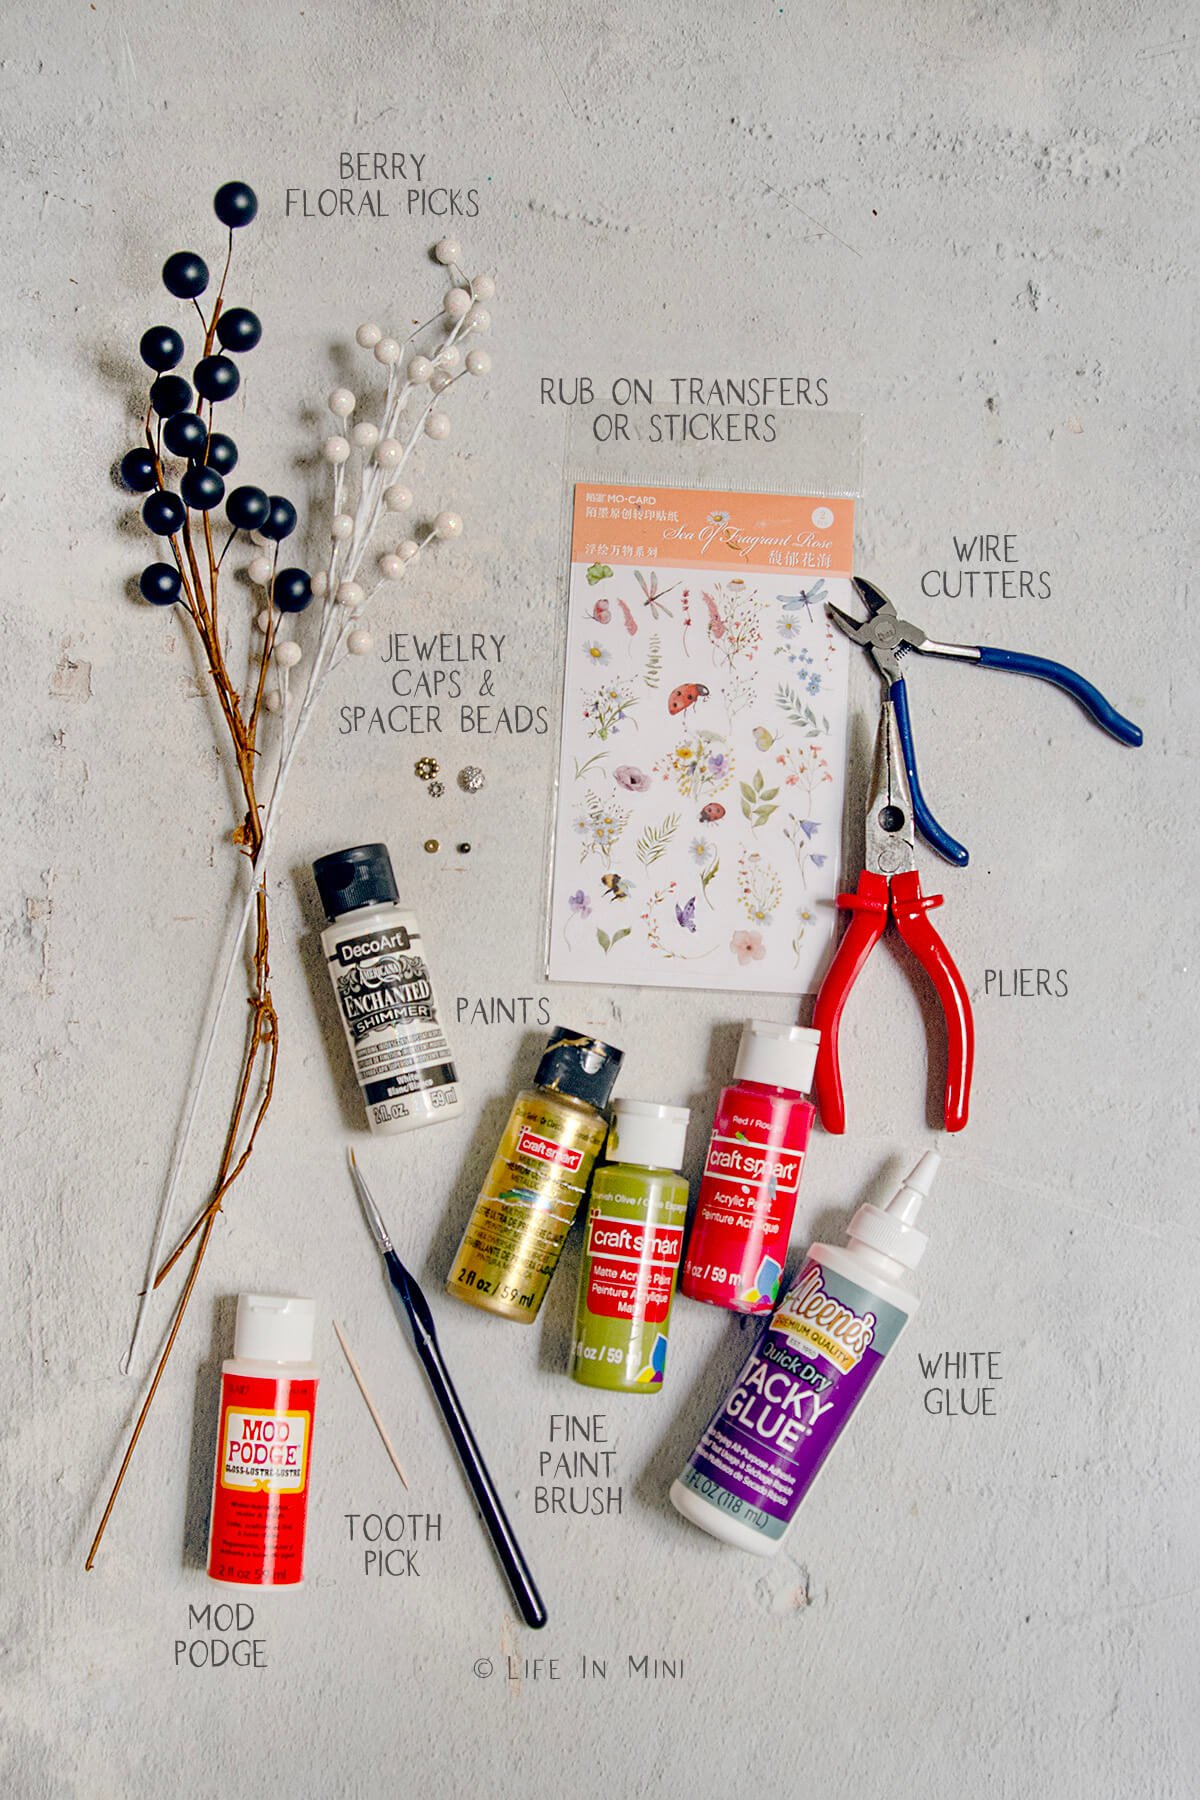
Supplies needed
This post contains some affiliate links for your convenience (which means if you make a purchase after clicking a link I will earn a small commission but it won’t cost you a penny more)! Read my full disclosure policy.
- Ball floral picks: You can choose colors you like or paint them any color. The smooth non-glitter varieties are easier to work with if you are going to modify them. Do make sure that each berry/ball is attached to a wire.
- Paint: If you are painting the balls, you can use any color paint you like, including metallic paints. If you are painting small designs (as I attempted with my itty bitty tree) you will need some small paint brushes.
- Embellishments: You can glue on mini gems, add stickers, nail art or even rub on transfers. If using rub-ons, do add a final coat of Mod Podge to protect them.
- Jewelry caps: To add bling and detail, you can add jewelry bead caps or spacer beads to mimic the ornament caps. You can also just paint it on with metallic paint.
- Glue: I used Aleene’s Tacky Glue but you can use any glue that dries clear.
- Wire cutters: Some scissors will cut the thin wires, but it will destroy them so use wire cutters.
- Pliers: I found that using pliers to bend the wire to form the hook works better than using your fingers – plus you don’t get poked or cut!
Step-by-step directions
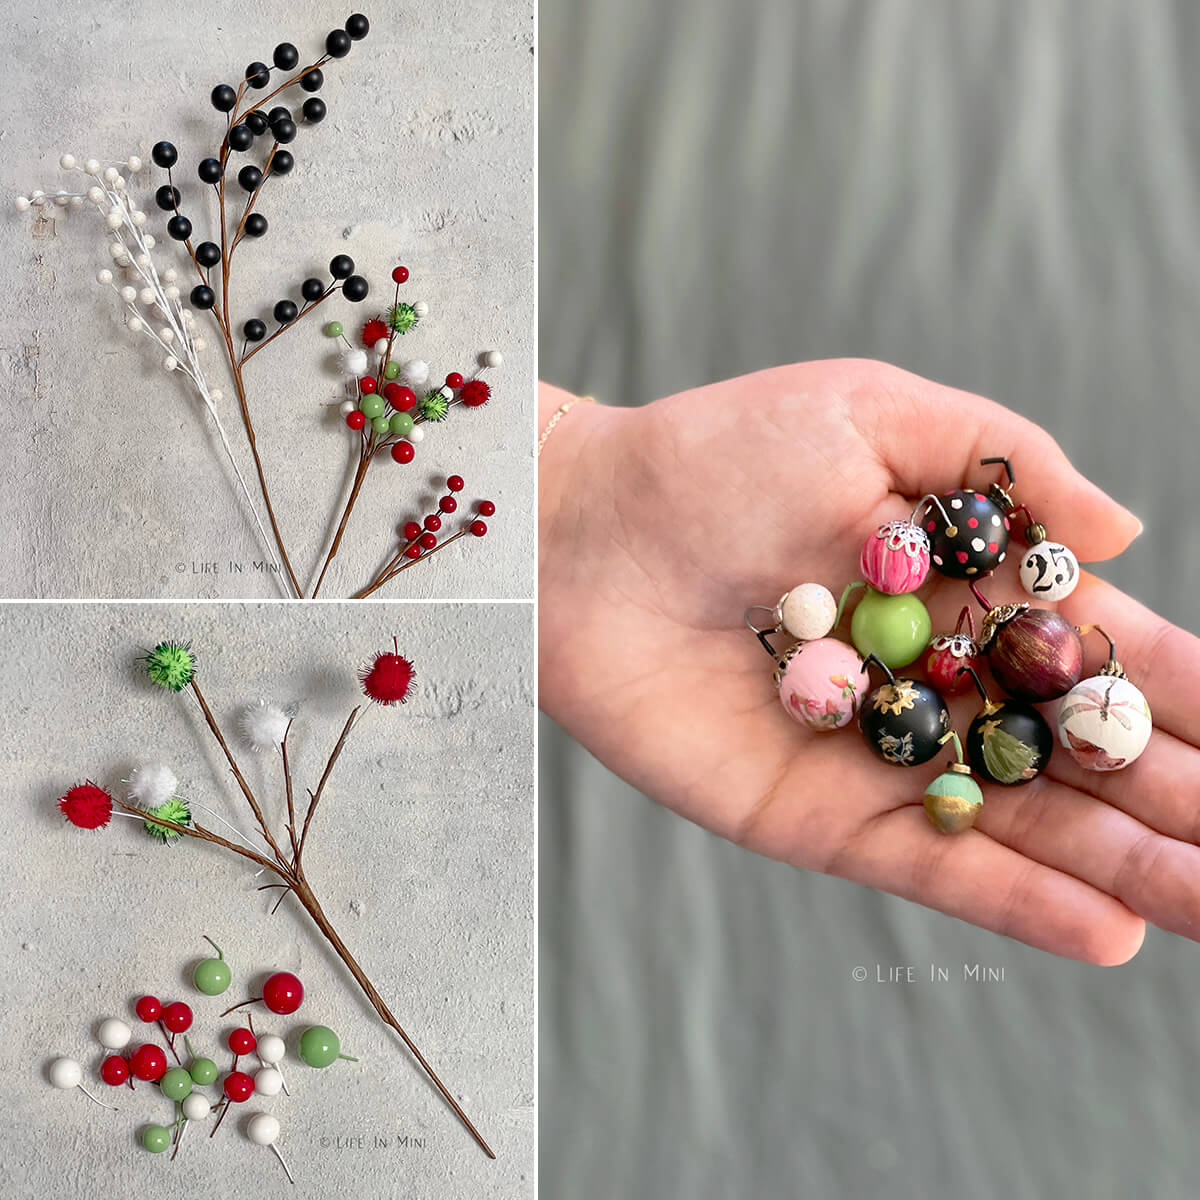
- Cut the pieces off. Each little ball is attached to wire, so you need to cut them off with just enough wire to make a hook. If decorating the balls, leave off a longer piece of wire so it is easier to handle.
- Decorate. Or not. Since I found colors I liked, I just left them as is. But you can easily paint the balls or embellish them with paint, stickers or rub on transfers.
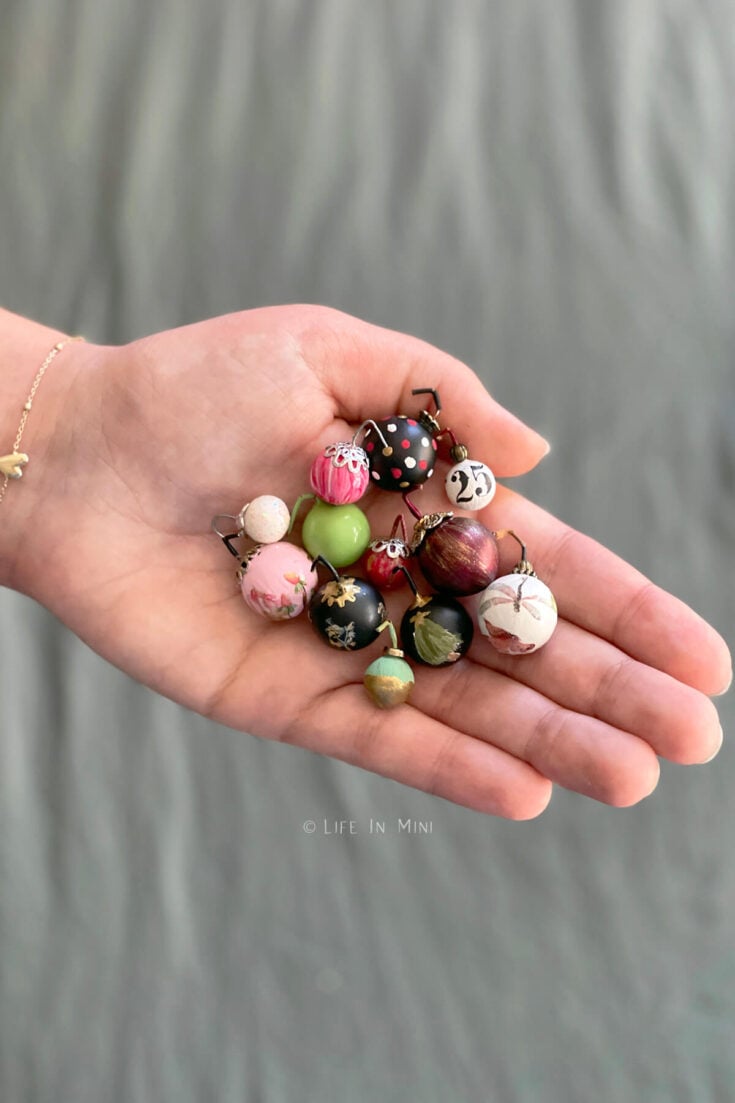
- Add hardware. Initially, I did not add anything to my little ornaments, but for funsies, I glued on jewelry caps and spacers and really love how nice they turned out.
- Make the hook. Cut off any excess wire and use pliers to bend the wire to form into a hook.
Expert tips and FAQs
I had way too much fun with these little ornaments and generally decorating for the dollhouse for the holidays. It was the perfect project to relax me at the end of the day.
My favorite ornaments were the ones using rub-on transfers. I wish I had some mini holiday rub ons, but I really love how the botanical and floral ones turned out. That little 25 ornament used rub ons, as well.
I dry brushed some gold on a few ornaments, added dots with a toothpick to another. Dipped the bottoms into paint, left them plain… I went through my bead boxes and found fun ornament cap options.
And if all you have is paint, use that! I need to practice painting teeny tiny things. Some of the picks came with pom-poms, and you could also use them as ornaments, if you want.
As always, just have fun with it! Most Christmas picks are now 50% off and be sure to comb the bins AFTER the holidays to stock up for next year! Some of these picks are full of little balls that you can decorate two dollhouse trees with just one pick.
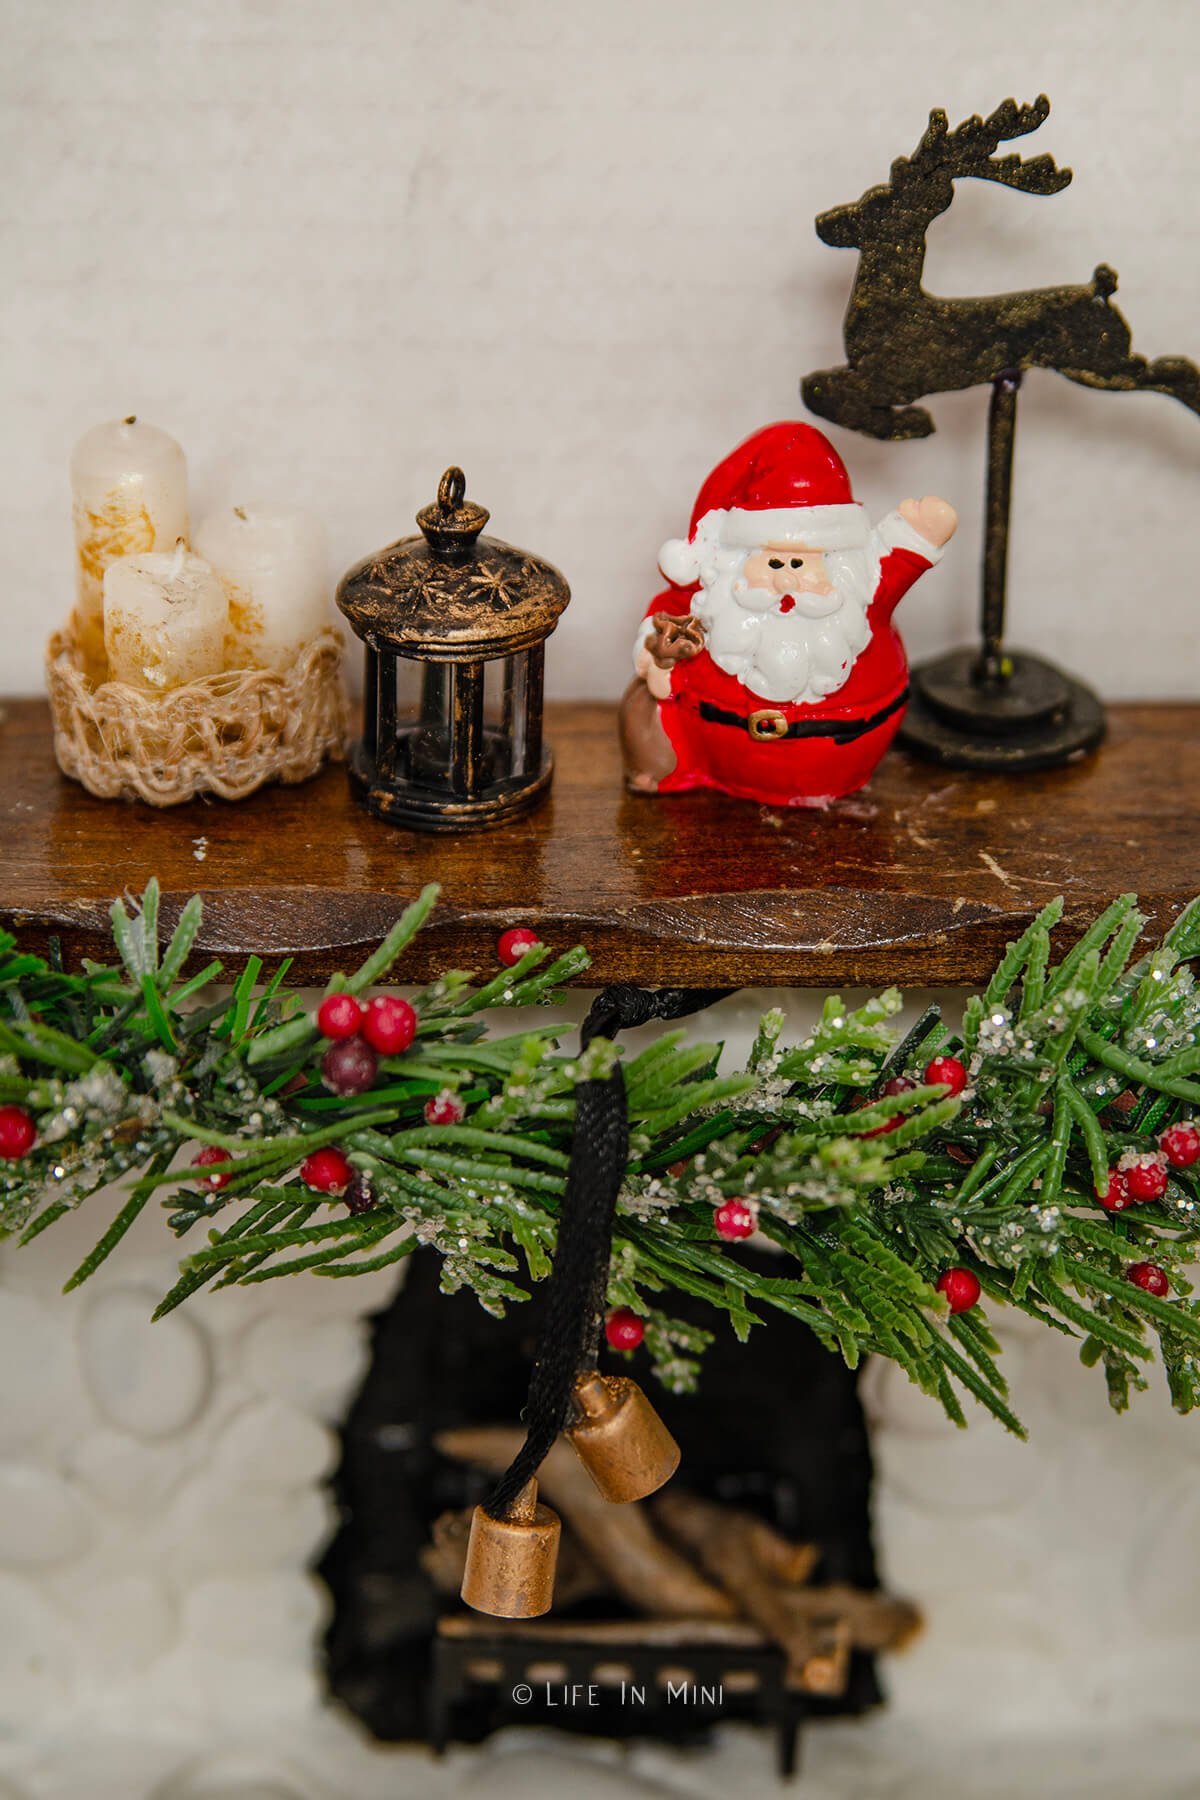
And if you were wondering, the little bells in the mantle garland was made from simple plastic candle holders that came with some birthday candles. Just snip off the part that goes into the cake, brush on a little antique gold rub and buff, glue on some ribbon and done!

If you are enjoying my blog, why not sign up for my newsletter so you won’t miss out on the mini adventures!
Mini ornaments from floral picks
This is a fun tutorial to make miniature Christmas ornaments for your dollhouse Christmas tree using some inexpensive berry floral picks.
Materials
- Ball floral picks
- Paint (if using)
- Embellishments like mini gems, stickers, nail art or rub on transfers.
- Mod Podge
- Jewelry caps and/or spacer beads
- Aleene’s Tacky Glue
Tools
- Wire cutters
- Pliers
Instructions
- Each little ball is attached to wire, so you need to cut them off with just enough wire to make a hook. If decorating the balls, leave off a longer piece of wire so it is easier to handle.
- If painting the balls, do this first. After paint dries, you can embellish them with stickers, mini gems or rub on transfers.
- If using rub on transfers, add a layer of Mod Podge to protect them.
- To mimic ornament caps, slide a jewelry cap and/or spacer bead thru the wire and glue it to the ornament. You can also just paint it on with metallic paint.
- Cut off any excess wire and use pliers to bend the wire to form into a hook.
Notes
You can make this project as simple or as complicated as you like. Leave the balls as is or glam them up. The smooth non-glitter varieties are easier to work with if you are going to paint or embellish them. Do make sure that each berry/ball is attached to a wire.
PS If you try this craft, why not leave a star rating in the direction card right below and/or a review in the comment section further down the page? I always appreciate your feedback.
You can also follow me on Pinterest, Facebook or Instagram. Sign up for my eMail list, too!
Written by Laura Bashar
I’m a food blogger and cookbook author that loves miniatures and crafting. I started this blog to share my passion for minis, including tutorials and free printables.
Judith says
Looks like a fun, easy little craft. I believe I will have to go get some picks. 🙂
Laura says
Hi Judith-
Ha ha! Can’t wait to see what you make!
Laura
Janet Jones says
You have so many cool ideas for miniatures, I love all of them. I’ll be looking forward your next one! 🤗🥰
Laura says
Hi Janet-
You are so sweet! Thank you! Honestly, I can’t seem to stop looking at things and thinking, “Can I make this into something for my dollhouse???!!”
Happy Holidays!
Laura