It is super easy to give your dollhouse roof the look of slate. You only need a little bit of paint of black and white paint and a paint brush.
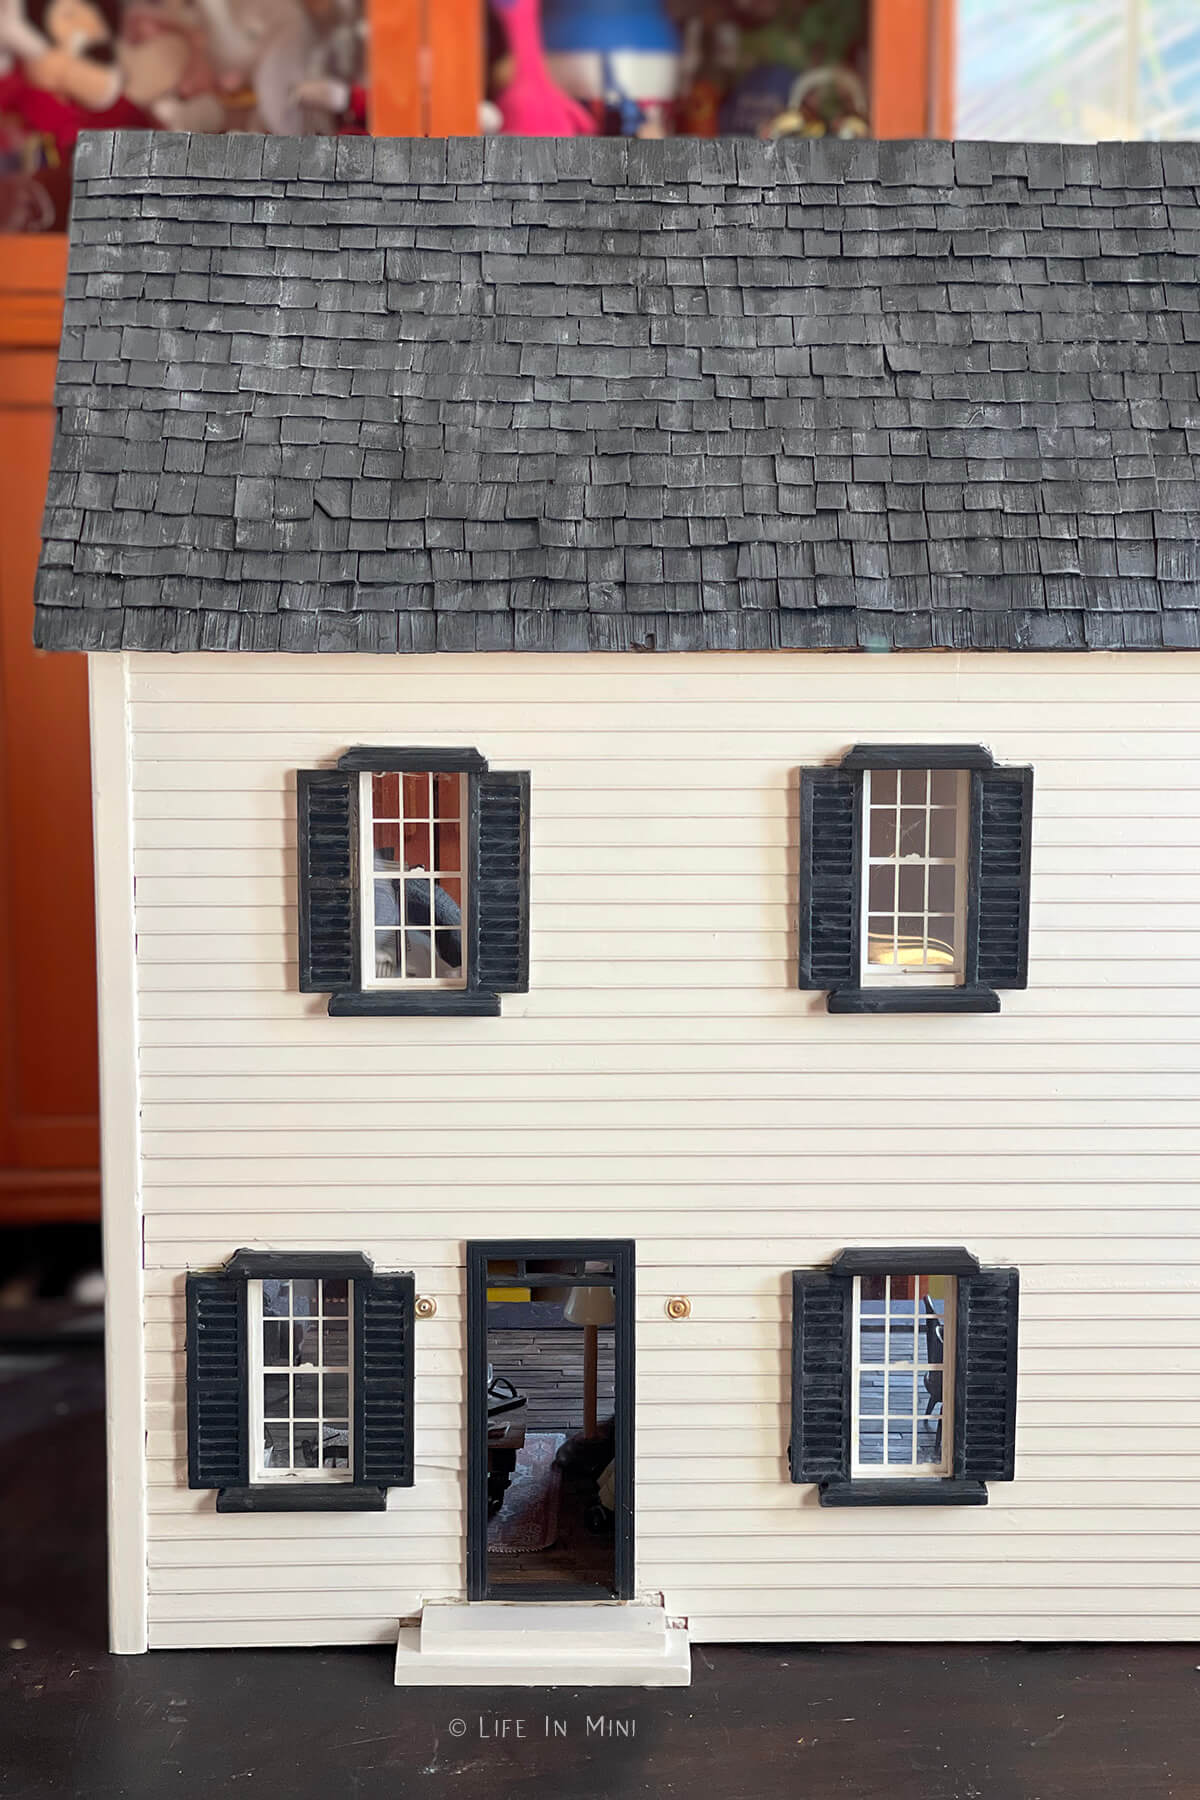
I was about 13-years old when I first got my dollhouse. My dad did the building and I was in charge of everything else. I managed to paint the outside of the house. I think it was cream with dark brown trim.
But gluing those individual wood shingles onto the roof and figuring out the copper tape wiring would be my undoing. Alas, the dollhouse never got finished.
Over the years, it sat in my parents’ house. It was eventually given to family friends who were going to finish the dollhouse for their little girl. That never happened.
Years later, these friends gave the dollhouse back to my parents where it sat until I had my little girl and was ready to finally finish it for her, some 30 years later.
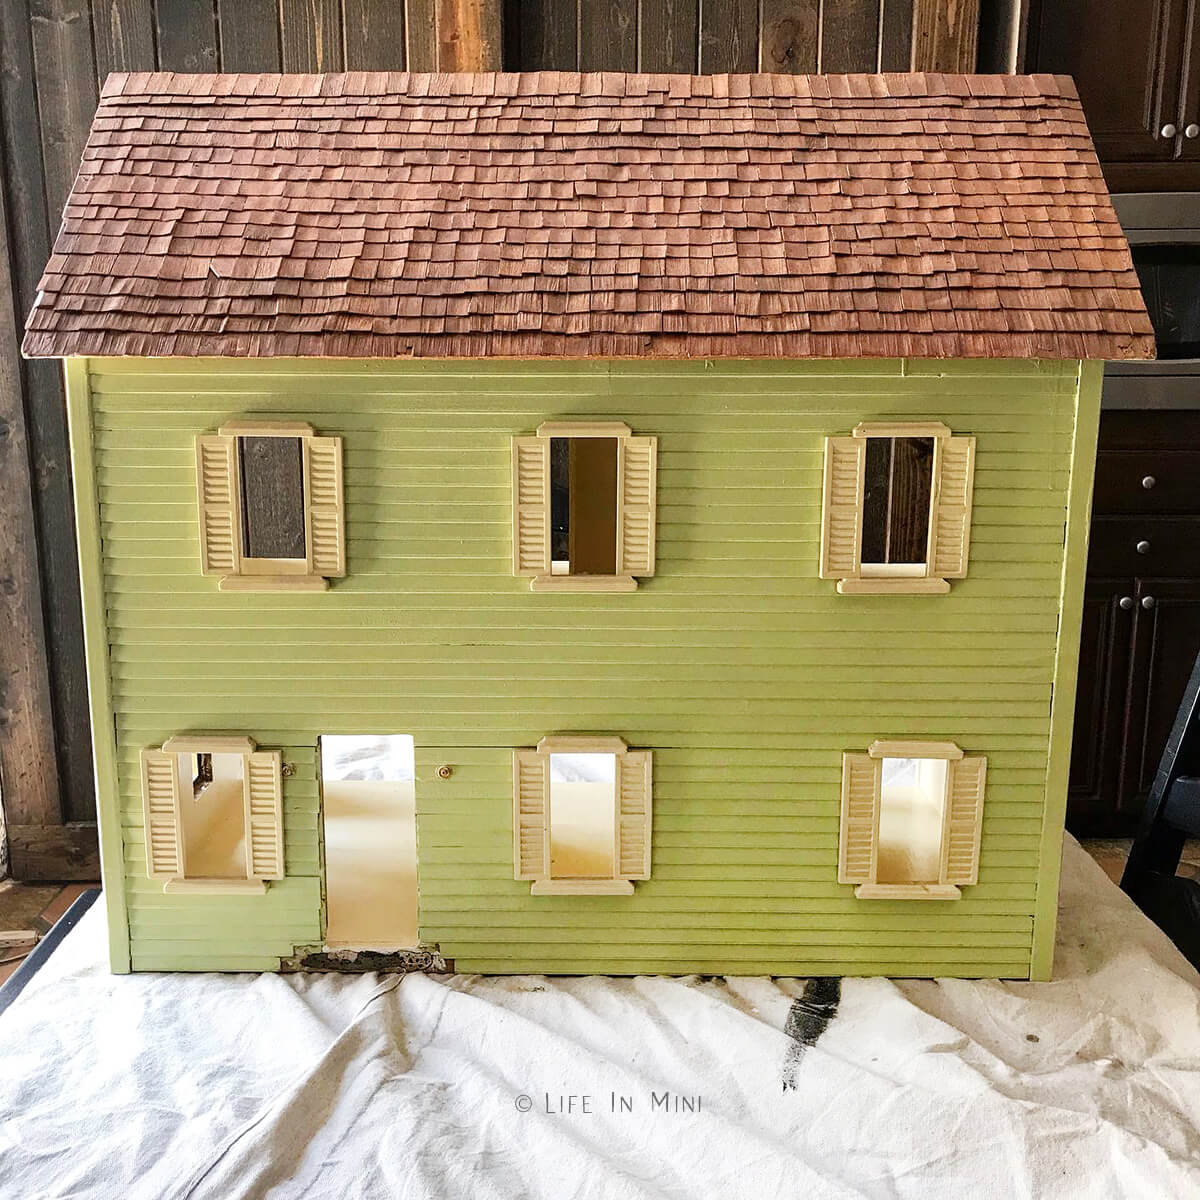
I painted the outside a light green and decided to keep things simple for my then 4-year old daughter. The interior was all painted cream. And I finally finished gluing all those ridiculously small wood shingles onto the roof.
That was over 10-years ago. My now teenage daughter and I gave the dollhouse a facelift and painted it cream with black trim. We added some beautiful dollhouse flooring using popsicle sticks to the entire house.
She suggested I paint the shingles black and I gladly did. Those wood shingles were looking mighty shabby without the paint.
After a year or so, the harsh black roof was annoying me. I wanted it to look more like slate. While perusing the ‘gram, I saw that my insta friend Donna had recently painted her dollhouse roof to mimic slate.
So I quickly got inspired and started painting.
Supplies you need
This post contains some affiliate links for your convenience (which means if you make a purchase after clicking a link I will earn a small commission but it won’t cost you a penny more)! Read my full disclosure policy.
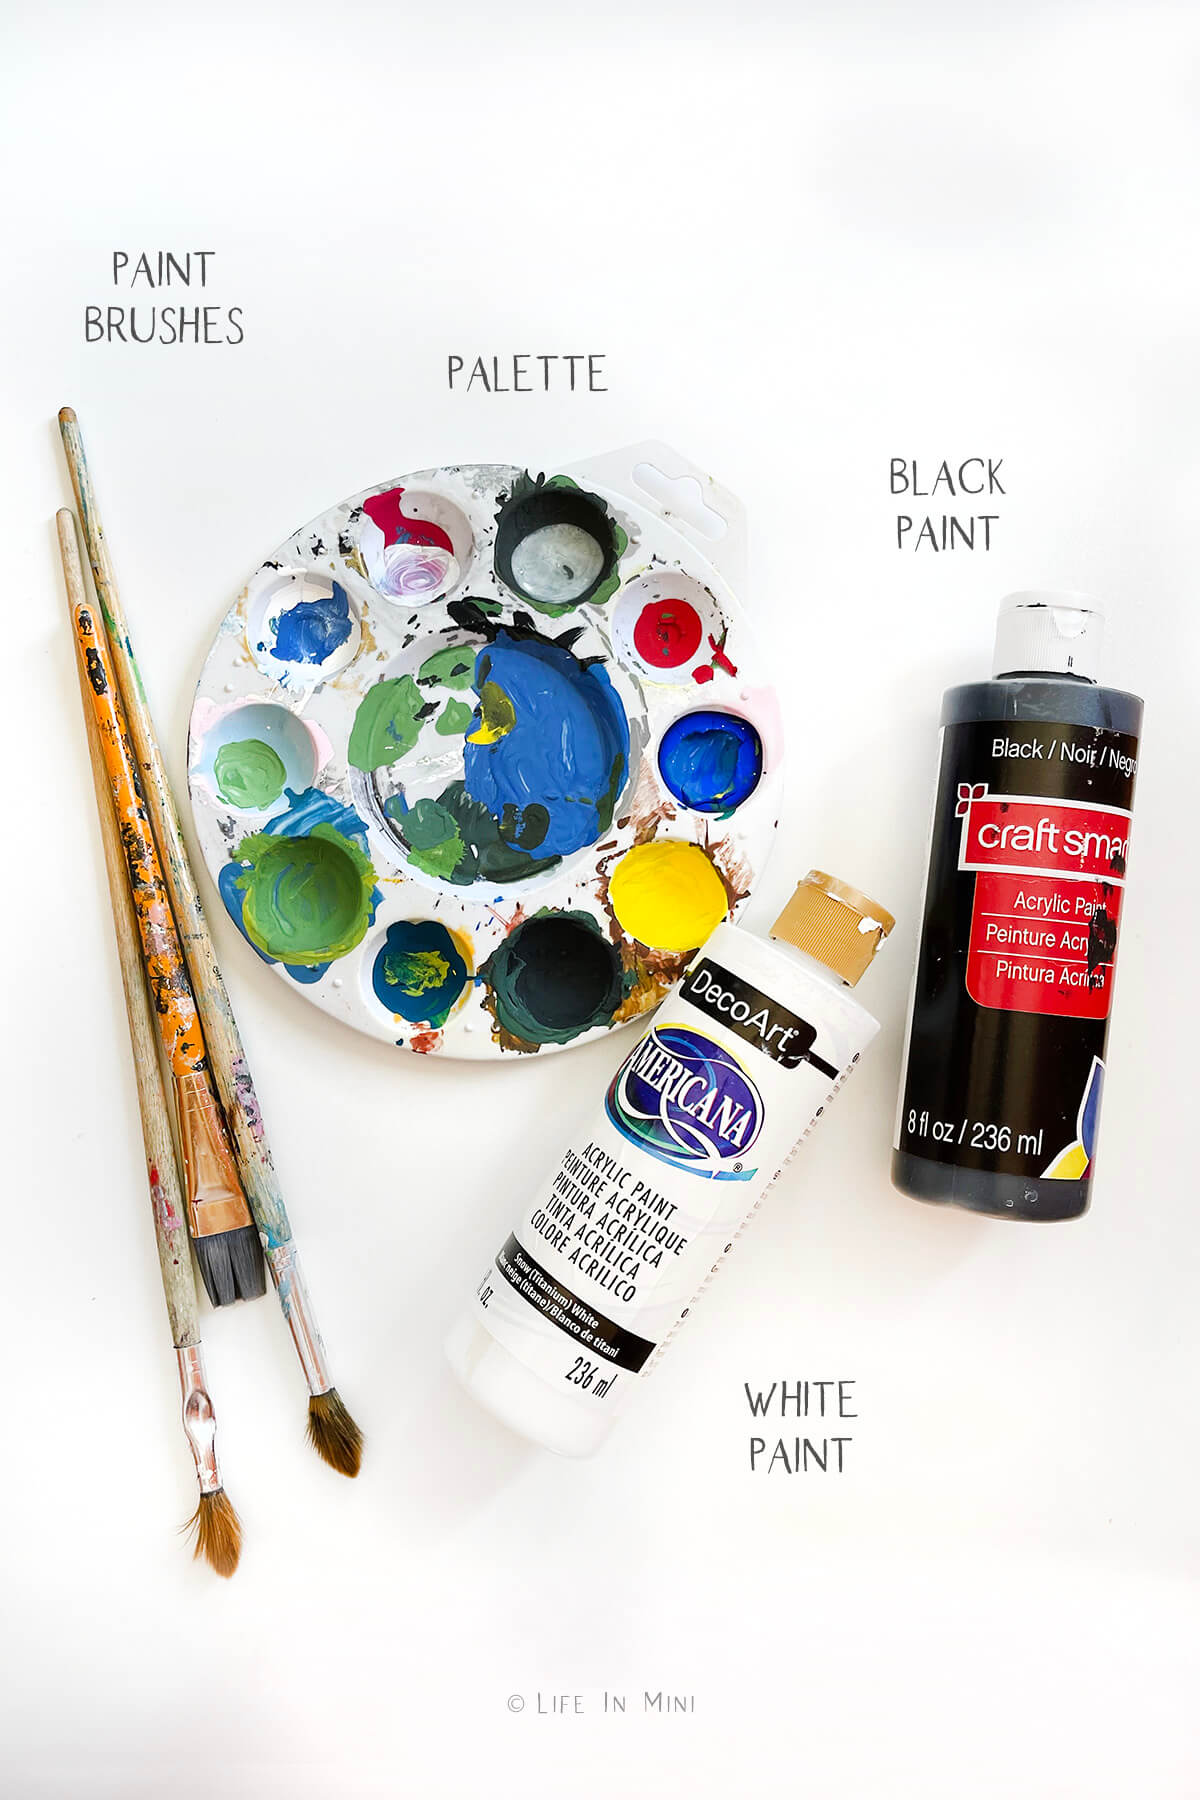
- Paint: I used acrylic paint that I already had on hand. For slate you will need black and white paint. You will also mix some of it together to make gray.
- Paint brushes: I chose a wide brush, but you can use any size of brushes you are comfortable with.
- Paint palette: Since you will be mixing paint to make the different grays, you can use a paint palette (you can find them cheap at the Dollar Tree) or use the leftover plastic packaging from jewelry supplies, dollhouse furniture or anything else you can use and discard like plastic or paper plates.
Step-by-step directions
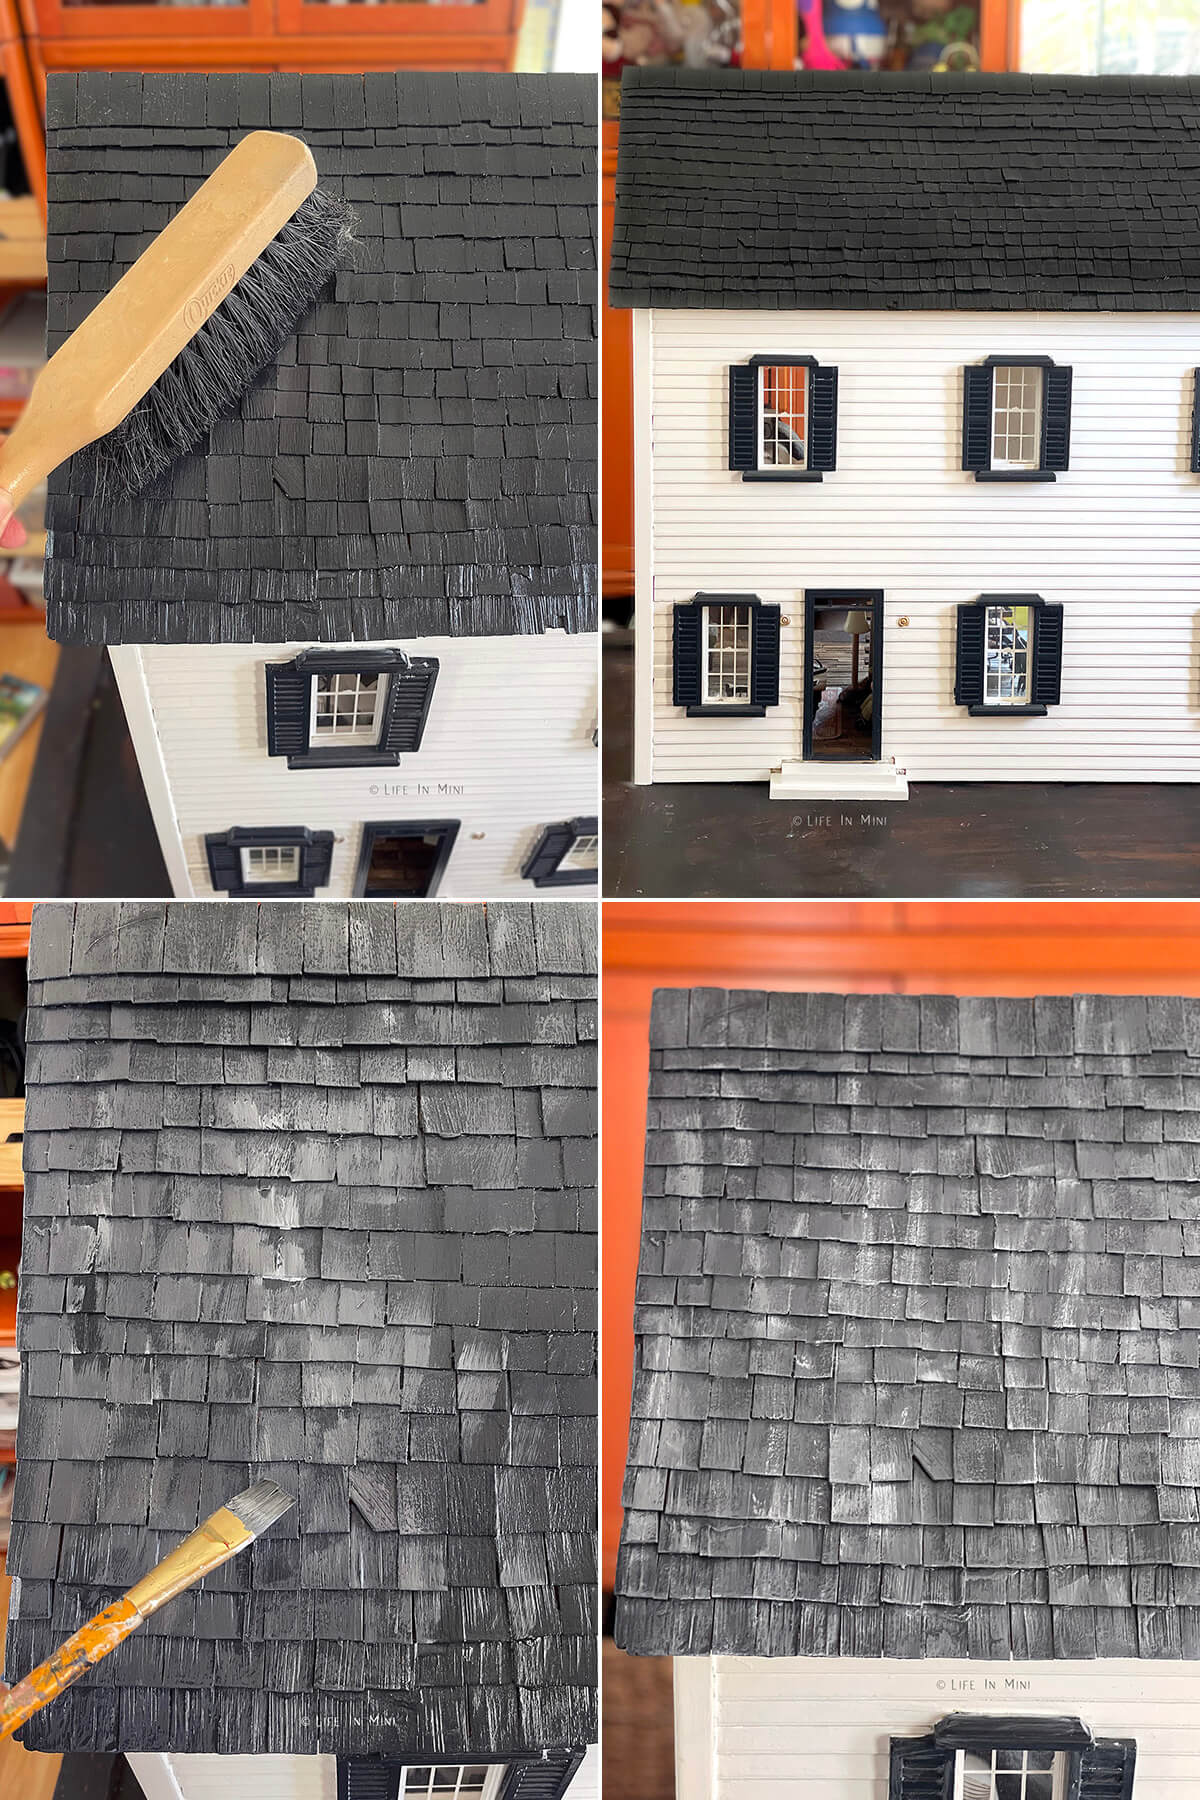
- Clean the roof. I first started cleaning the roof using wet wipes to get the dust off. I ended up getting bits of the white cloth all over the roof. So I grabbed my hand broom and swept off all the bits and pieces stuck to the roof.
- Paint it black. If you are starting with a natural wood roof, you will need to start with a black base coat. You can start with dark black or charcoal. Since I had painted my dollhouse roof black a couple years ago, I was set.
- Layer the grays. Once the black paint coat is dry, it is time to layer on the grays. It is okay to use a variety of grays. Dab the paint on the brush and then remove some of it. We are going to use a dry brush technique. You don’t want globs of gray, just wisps of it.
- Add more layers. As the paint dries, you can see where you need more or less gray, white and black. Again, you are applying the paint lightly by using light coats of grays and whites. Keep adding layers until you get the look you like. If you have too much white, dry brush some black over these spots.
Project tips and FAQs
I used wood shingles for my dollhouse roof as this was what was provided with the dollhouse kit. You can purchase wood dollhouse shingles at craft stores or online.
This can be pricy. You can cut your own wood dollhouse shingles using wide popsicle sticks or wood veneer. But you don’t have to use wood for the shingles.
You can also cut shingles from card stock or thin pieces of cardboard, like the kind you find at the back of notepads or from cereal boxes. If you are using card stock or cardboard, use light coats of paint.
You can easily create a slate-like roof for your dollhouse using paint. Using a dry brush technique, apply layers of black, grey and white paint to create a faux slate look.
For shingles, you can use precut pieces of wood to cover your dollhouse roof. Or you can cut up popsicle sticks or wood veneer to make shingles. You can also cut shingles using card stock or thin pieces of cardboard like cereal boxes.
If you are using wood shingles, you can either leave them as is or color them using a stain. For a plain natural look, add a polyurethane clear coat. You can also paint your shingles using acrylic paint.
How to paint your dollhouse shingles to look like slate tile
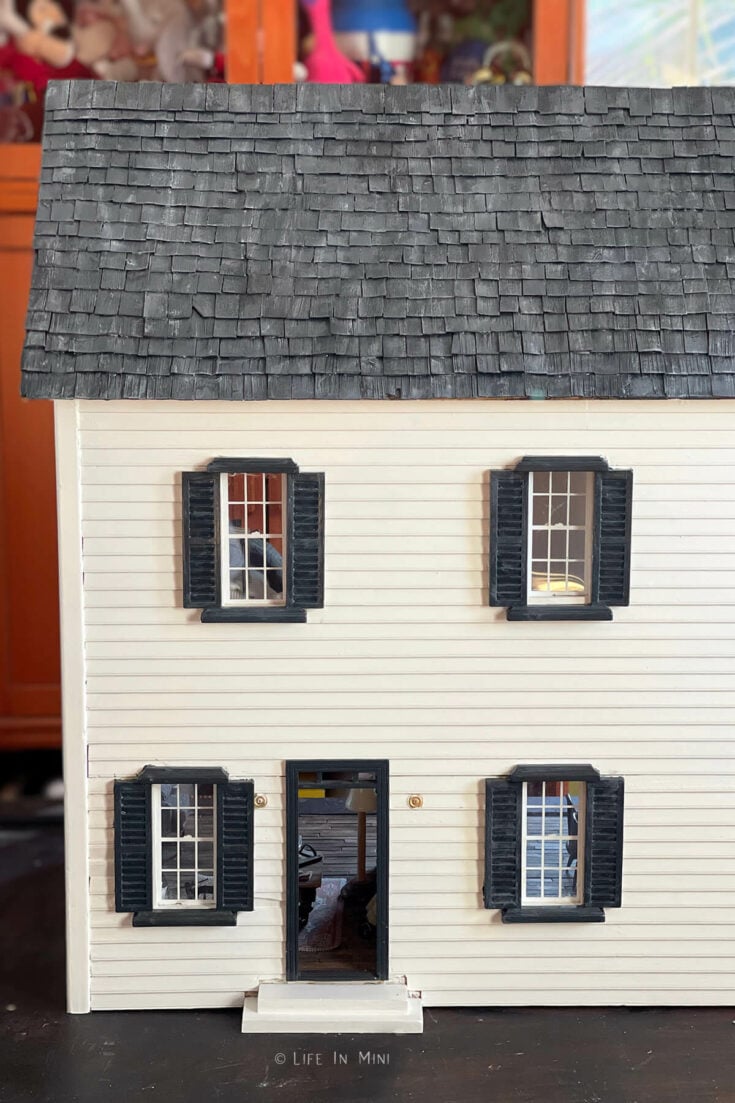
It is super easy to give your dollhouse roof the look of slate. You only need a little bit of paint of black and white paint and a paint brush.
Materials
- Black paint
- White paint
Tools
- Paint brushes
Instructions
- Clean the roof. I first started cleaning the roof using wet wipes to get the dust off. I ended up getting bits of the white cloth all over the roof. So I grabbed my hand broom and swept off all the bits and pieces stuck to the roof.
- If you are starting with a natural wood roof, you will need to start with a black base coat. You can start with dark black or charcoal. Since I had painted my dollhouse roof black a couple years ago, I was set.
- Once the black paint coat is dry, it is time to layer on the grays. It is okay to use a variety of grays. Dab the paint on the brush and then remove some of it. We are going to use a dry brush technique. You don’t want globs of gray, just wisps of it.
- As the paint dries, you can see where you need more or less gray, white and black. Again, you are applying the paint lightly by using light coats of grays and whites. Keep adding layers until you get the look you like. If you have too much white, dry brush some black over these spots.
Notes
You can use this technique whether you have shingles made of wood, card stock or cardboard. For non-wood shingles use thin coats of paint.
PS If you try this craft, why not leave a star rating in the direction card right below and/or a review in the comment section further down the page? I always appreciate your feedback.
You can also follow me on Pinterest, Facebook or Instagram. Sign up for my eMail list, too!
Written by Laura Bashar
I’m a food blogger and cookbook author that loves miniatures and crafting. I started this blog to share my passion for minis, including tutorials and free printables.


Teresa L Townsell says
Just the tutorial I was looking for! Thanks!
Laura says
Hi Teresa-
Thank you! I can’t wait to see what you create!
Laura
Susy do Brasil says
…..Parabéns….ótimos trabalhos.
amei 🙂
Laura says
Hi Susy-
Thank you!
Laura ❤️