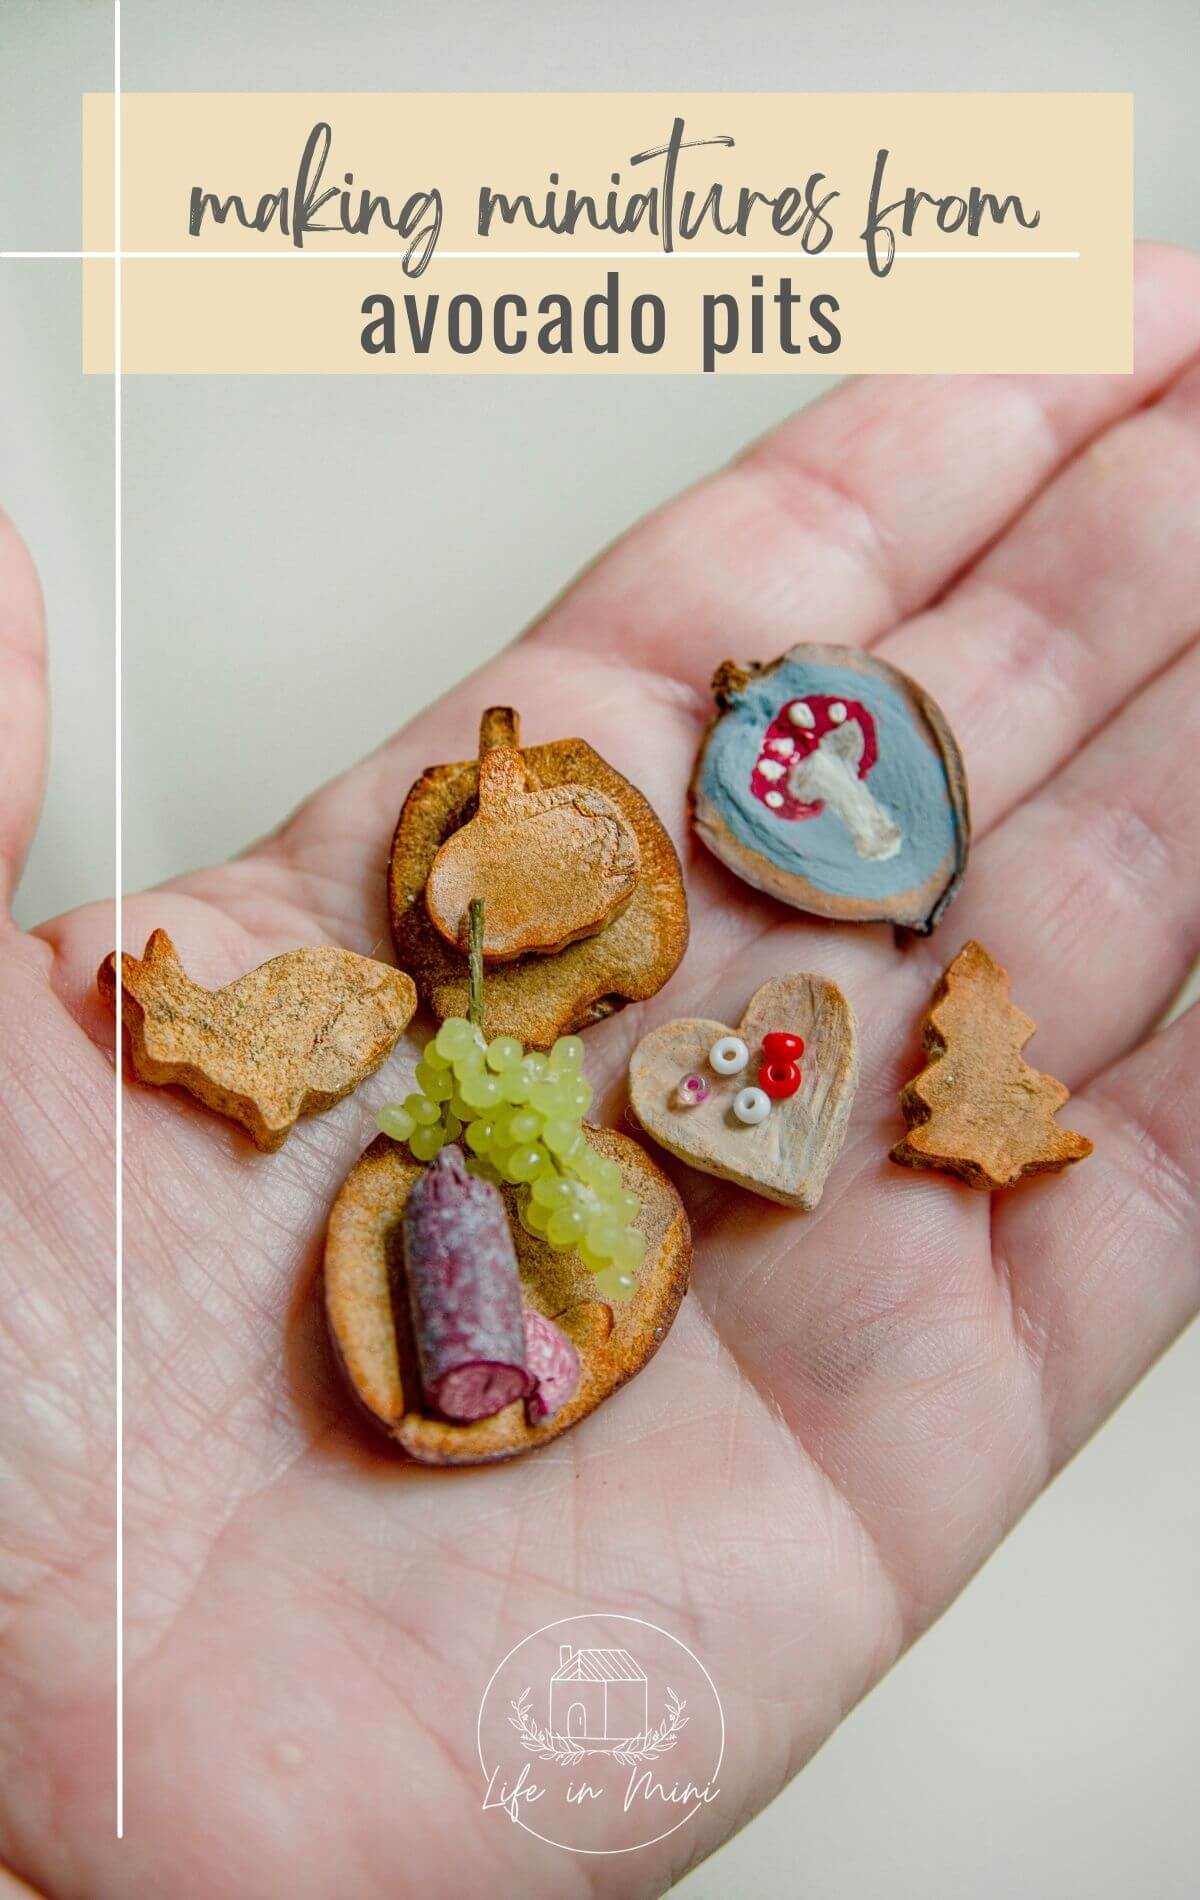
Did you know that you can carve avocado pits much more easily than wood, and that you can also make miniatures with them?! This is a truly inexpensive way to make dollhouse miniatures from something you would normally throw away.
I have a resin 3D printer that I still don’t know how to use. I really need to work on that, but I find it very intimidating. I have used my Cricut Maker for a few dollhouse projects, but I have to pull everything out, hook it up and relearn how to use it every time I want to make something.
So I find myself preferring making miniatures using simple tools and simple techniques. It also makes the projects easier on the budget, too!
My favorite dollhouse miniatures are the ones that are created basically from garbage – those small bits and baubles that normal people would throw away, but I find a use for in mini making.
Today’s project is definitely fits in the trash to treasure category because it uses an avocado pit. Now I don’t claim to be the first person to carve something from an avocado seed. There are slews of real wood carvers creating amazing pieces of art from this, well, piece of garbage.
Avocado pits are soft when freshly extracted from an avocado, making cutting and carving much easier. The pits dry to become like hardwood after a week or two.
I recently watched a reel showing how to make buttons for sweaters from, well, avocado pits. And that’s when I decided to make some minis with this beloved piece of garbage.

Jump to Tutorial
Supplies you need

This post contains some affiliate links for your convenience (which means if you make a purchase after clicking a link I will earn a small commission but it won’t cost you a penny more)! Read my full disclosure policy.
- Avocados: You want to use the pits from freshly avocados. This is when they are at their softest. The larger the pit, the better. I found that those small pits, like the size of an almond, do not dry well.
- Sharp knife: You want a very sharp knife. I prefer a big blade like a chef’s knife. If you never sharpened a knife, invest in a knife sharpener. They are relatively inexpensive and easy to use. You will also need a cutting board.
- Paper towel: Avocado seeds are slippery. I found that holding it with a paper towel while you cut it, keeps it from slipping out of your hands and cutting yourself. Yes, I’m speaking from experience. You could also use cut resistant gloves to hold the seed and keep you from hurting yourself.
- Wood carving tools: If you want to scoop out the center of your wood slices to make a shallow bowl, these small wood carving tools make it easy.
- Metal cutters: If you want to cut your pieces into shapes, you can use metal clay or cookie cutters. I’m not sure if plastic will be strong enough to push through the seed. Some seeds were thick or harder and I used a can of beans or rubber mallet to smack it through the seed.
- Sand paper: I liked the rough finish of the woods, but you can easily sand them smooth once dried.
- Paint: The dried wood is very porous. I found that a little wood stain gets soaked in quickly, leaving little to wipe off. Experiment with it yourself. You can also use a paint wash to “stain” your wood or actually paint the pieces themselves.
- Wood wax: You can finish the final wood pieces with a some clear or tinted furniture wax. You can also use oils like Danish oil or tung oil to finish your pieces. But honestly, use what you have on hand unless you are planning on making a bunch of these.
Step-by-step directions
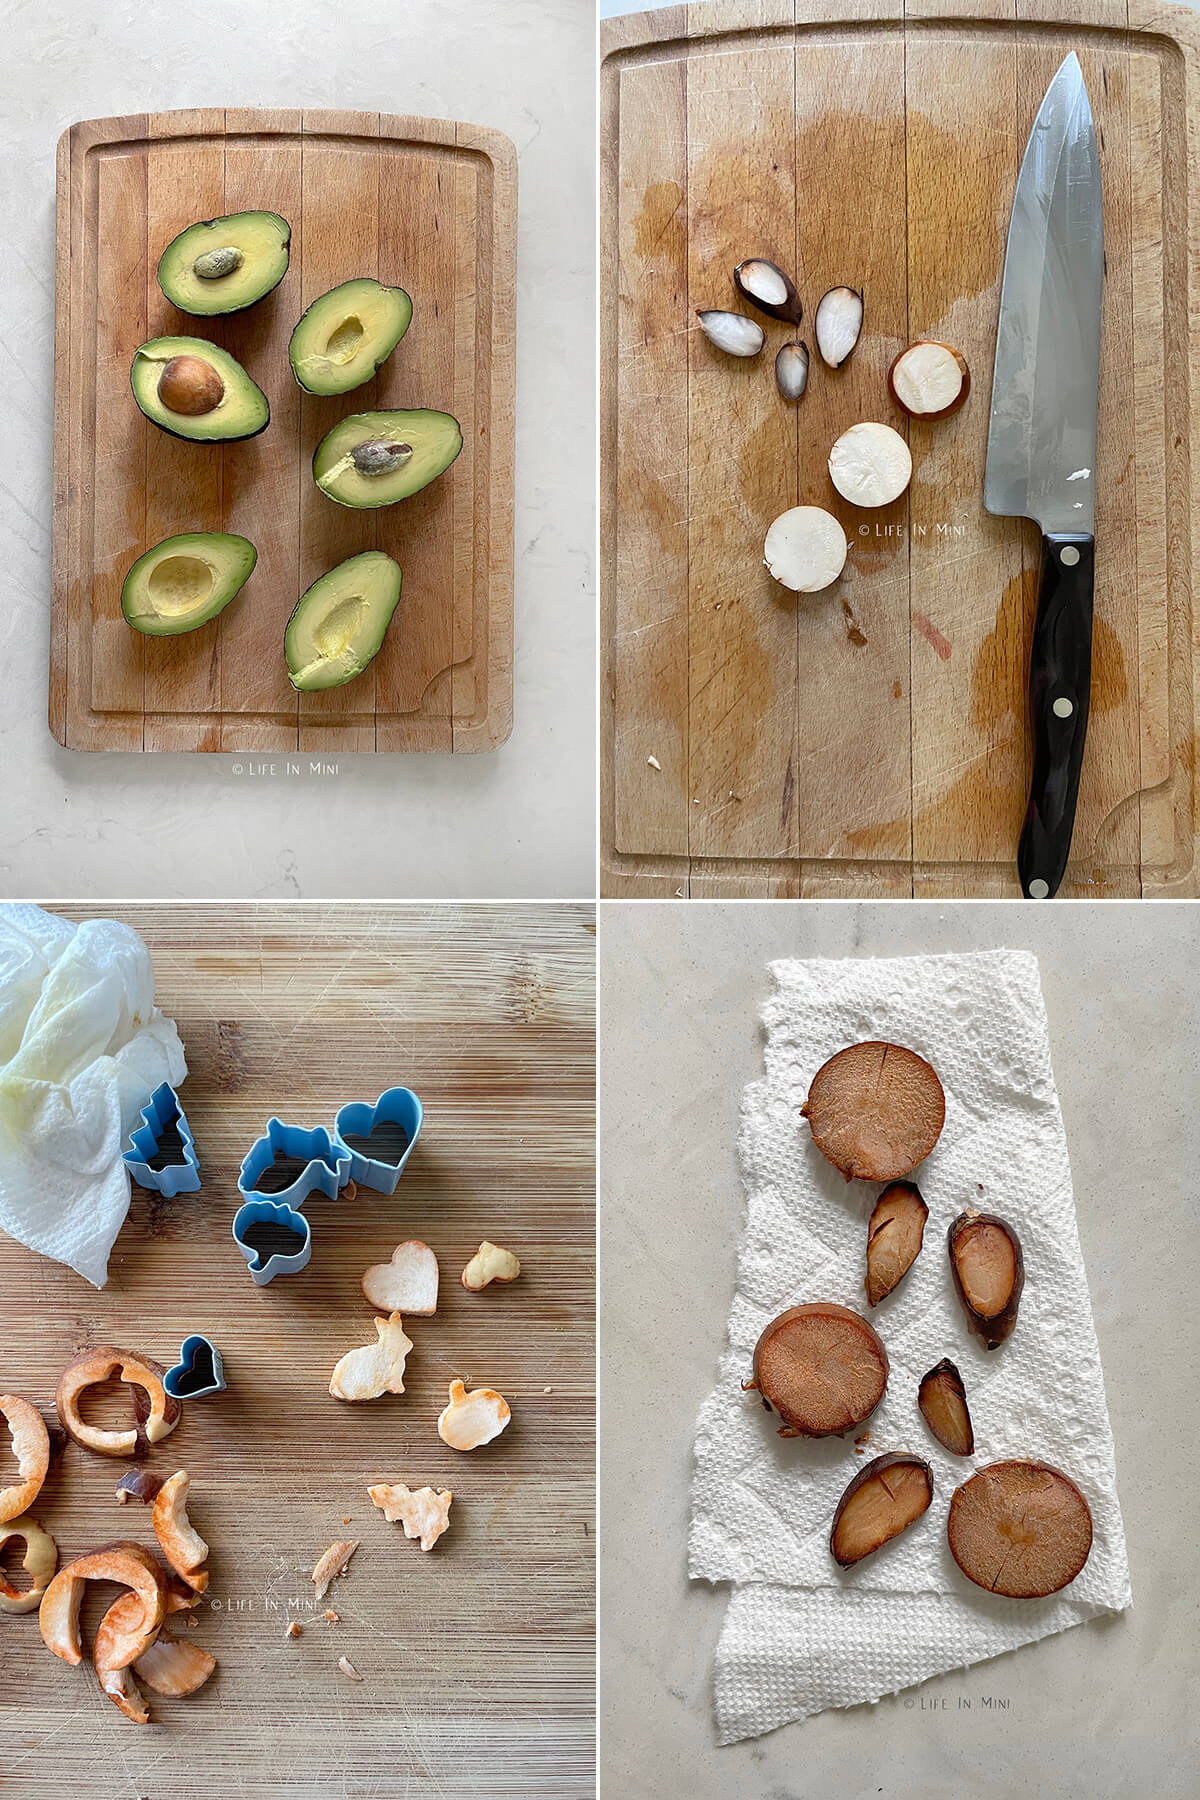
- Remove the pit. Cut the avocado in half lengthwise then twist the two halves to separate. Cut the avocado flash with the pit in half again, then peel off the seed.
- Clean the pit. Wash the avocado pit clean of any flesh or residue and dry it.
- Cut your slices. Hold the pit with a paper towel in one hand to keep it from sliding out of your hand. Using your other hand, Carefully cut the pit into even slices about ⅛-inch thin.
- Cut into shapes. If you want to, use a pairing knife or your metal cutters to cut your avocado slices into desired shape.
- Dry the slices. Let the pieces dry for at least a week. If you cut your slices too thin, they will warp when they dry, so place a heavy object over them so they dry flat. As the slices dry, they do shrink about 25% from its original size. The skin on the outside of the seed will loosen as the seed dries and can easily be removed.
- Sand and finish. If you choose to, sand your pieces smooth. I did not sand my pieces to give it a rustic look. To finish your minis, you can paint or wax them.
Project tips and FAQs
I must have cut up 4 or 5 different avocado pits in the past month. Some slices were cut too thin and dried up wobbly. Other slices would crack in half as they dried up.
The best time to cut and shape the “wood” is when the avocado pit is soft. If you want to make a hole in it after it is dried, you can use your rotary tool, just be careful. I managed to break a few this way.
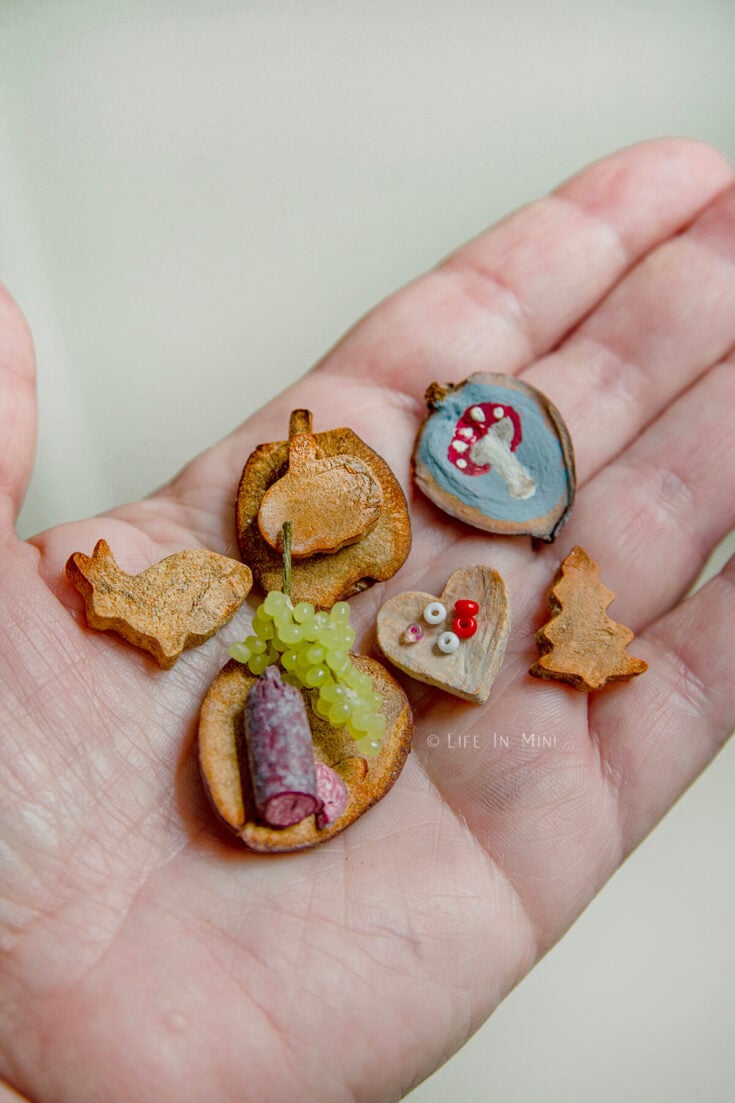
The avocado seed pieces resemble wood when it is dry. Those that have a reddish orange color were cut about 5 days ago, so they aren’t completely dried yet. I didn’t paint or stain the pieces pictured here as I wanted you to see how they look au natural. I did rub the dry pieces with a little clear furniture wax.
Another blogger uses equal parts olive oil and vinegar as a natural wood polish, so I will have to try that, myself.
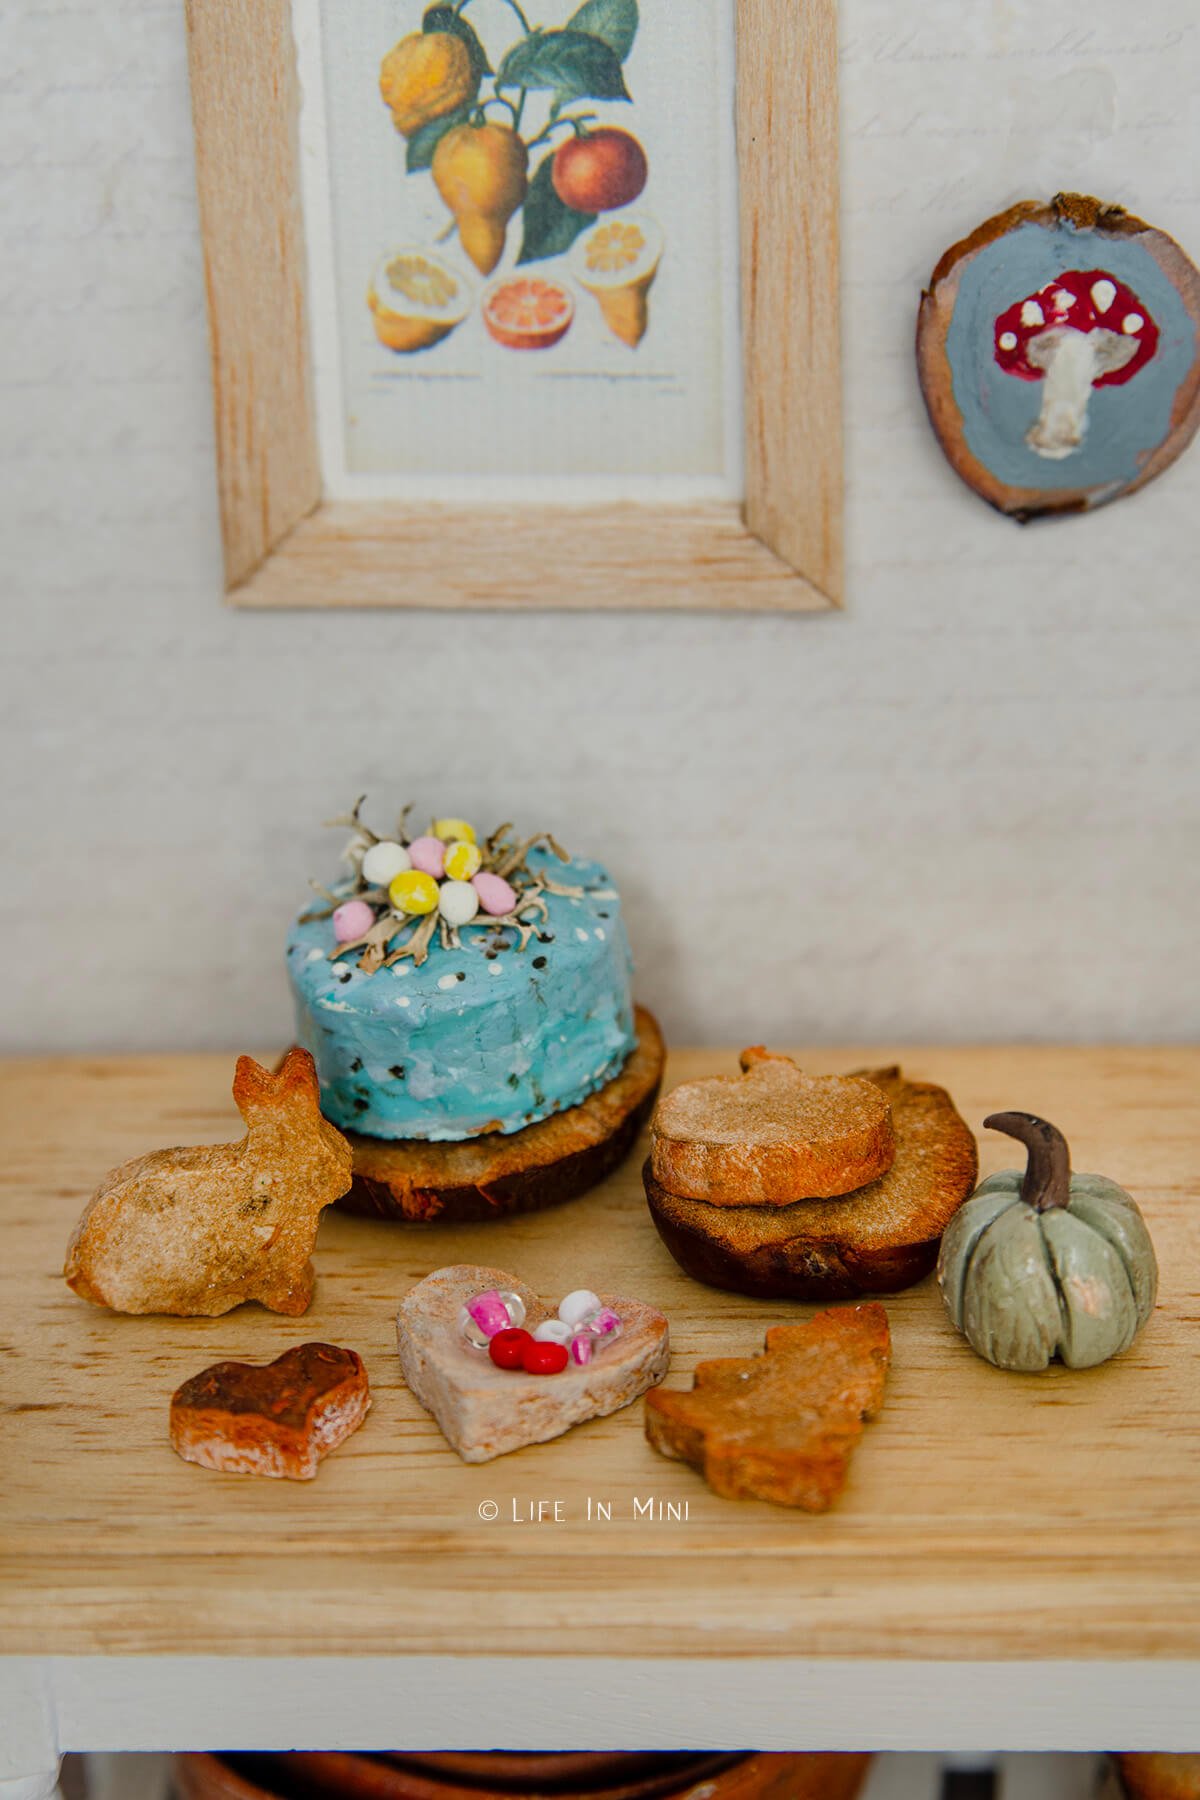
For the heart piece, I thought it would make a cute shallow bowl so I used my wood carving tool to scoop out the center a little bit. I did this when it was hard and dry, being careful not to do too much as they do get a little brittle and break easily.
You can also carve from a whole avocado pit, if you have some carving talents. Again, the pit is soft when freshly peeled and it dries like hardwood.
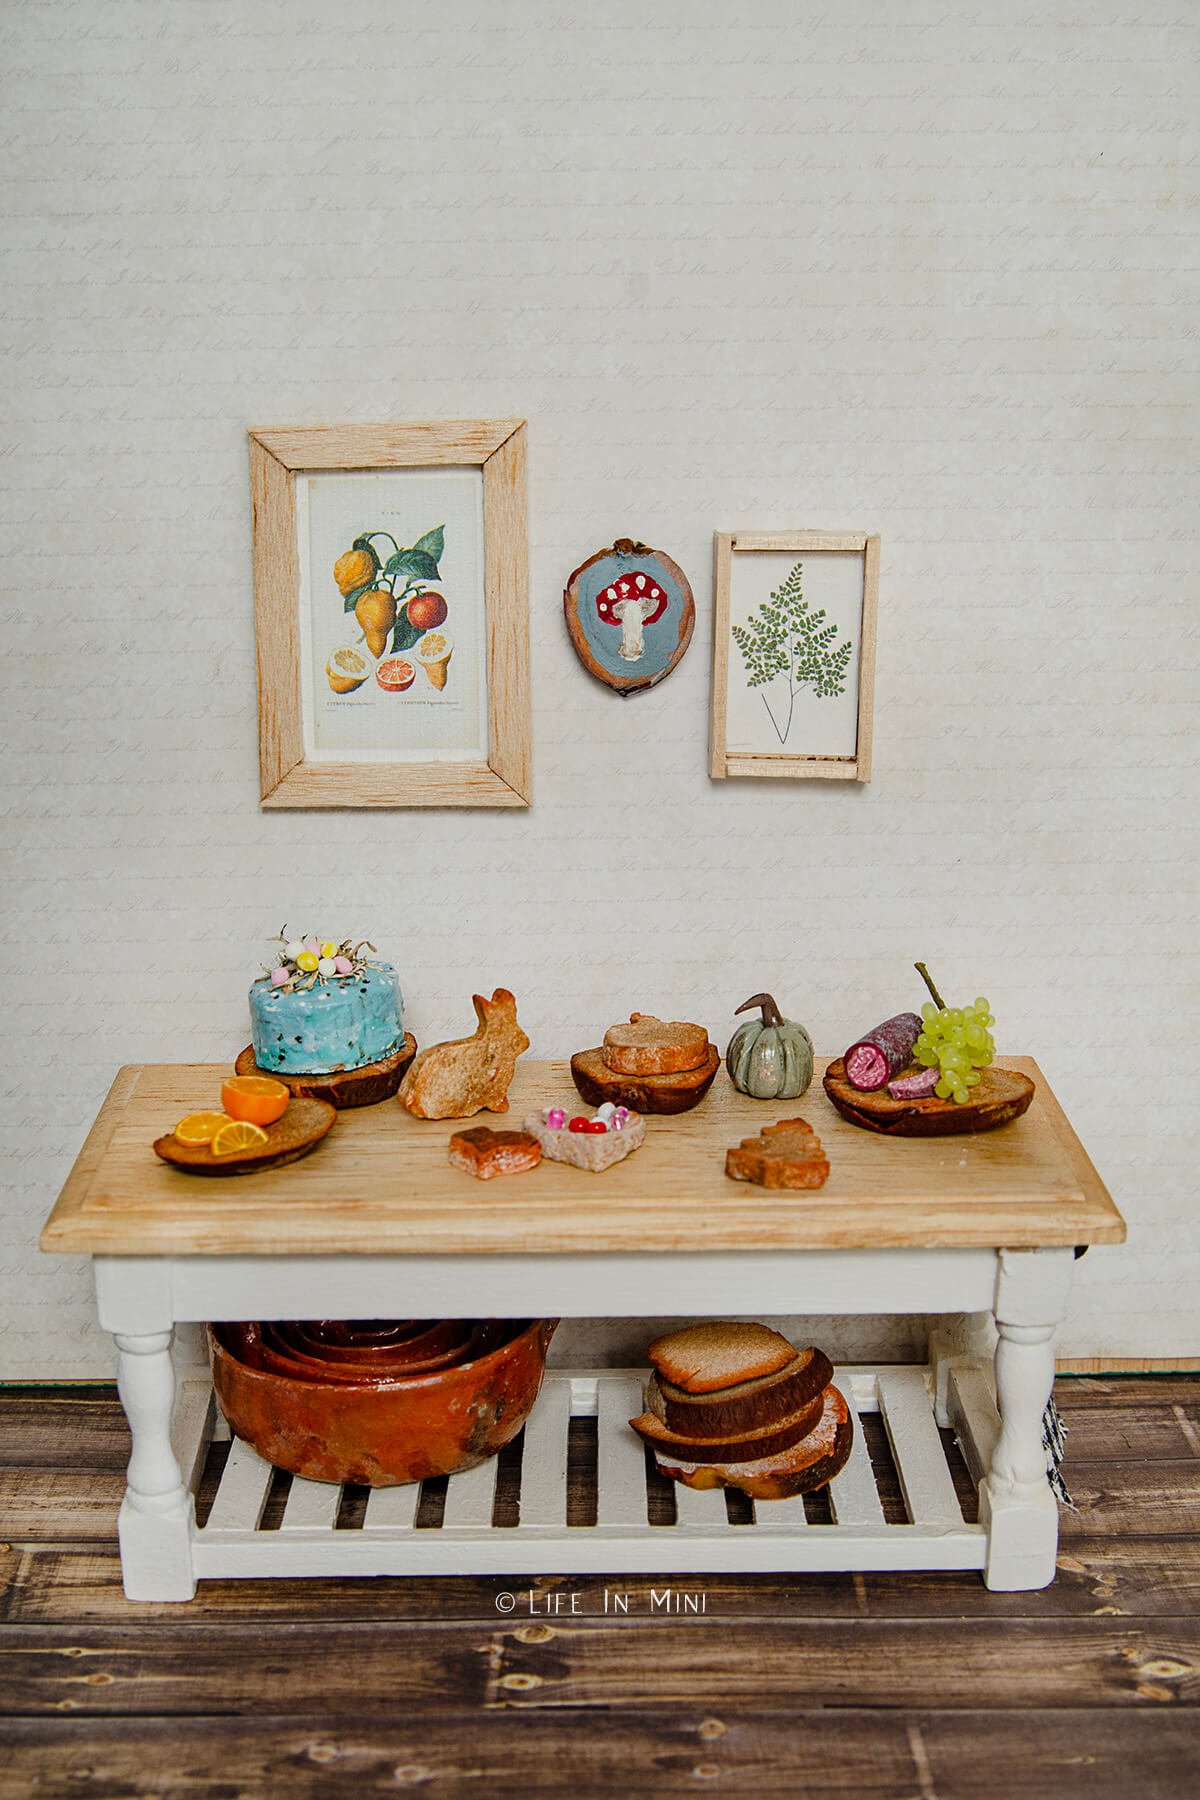
There are a lot of fun crafts people make with avocado pits, like jewelry and buttons. So have fun with it! I painted my first miniature artwork (here was my mushroom art inspiration) on one of the dried avocado wood slices and it quickly became one of my favorite pieces.
If you are enjoying my blog, why not sign up for my newsletter so you won’t miss out on the mini adventures!
Miniatures from Avocado Pits
Did you know that you can carve avocado pits much more easily than wood, and that you can also make miniatures with them?! This is a truly inexpensive way to make dollhouse miniatures from something you would normally throw away.
Materials
- Avocado pits
- Wood wax
- Paints
Tools
- Paper towel
- Sharp knife
- Sandpaper
Instructions
- Cut the avocado in half lengthwise then twist the two halves to separate. Cut the avocado flash with the pit in half again, then peel off the seed.
- Wash the avocado pit clean of any flesh or residue and dry it.
- Hold the pit with a paper towel in one hand to keep it from sliding out of your hand. Using your other hand, carefully cut the pit into even slices about ⅛-inch thick (3-5mm).
- If you want to, use a pairing knife or your metal cutters to cut your avocado slices into desired shape.
- Let the pieces dry for at least a week. If you cut your slices too thin, they will warp when they dry, so place a heavy object over them so they dry flat.
- Sand your pieces smooth. Then you can paint or wax your final minis.
Notes
As the slices dry, they do shrink about 25% from its original size. The skin on the outside of the seed will loosen as the seed dries and can easily be removed.
PS If you try this craft, why not leave a star rating in the direction card right below and/or a review in the comment section further down the page? I always appreciate your feedback.
You can also follow me on Pinterest, Facebook or Instagram. Sign up for my eMail list, too!
Written by Laura Bashar
I’m a food blogger and cookbook author that loves miniatures and crafting. I started this blog to share my passion for minis, including tutorials and free printables.

Rhissanna says
This is genius!
Laura says
I’m so glad you like this idea! Can’t wait to see what you carve up!
Laura
Michele says
Love this idea, I taught woodcarving for years. So I have one more recommendation for anyone interested in carving. Please get a Kevlar or a cut resistant glove. I know they are not very comfortable but they do help and will protect your hand from damage and needing stitches. Only use when carving with a knife, not with power tools.
Laura says
Hi Michele-
Yes, great idea! I need to get me a pair of these gloves.
Laura